依赖注入
依赖注入中的构造器注入:在上一节的IOC创建对象的方式中记录。
依赖注入的本质是Set注入!
- 依赖:bean对象的创建依赖于容器
- 注入:bean对象中的所有属性由容器来注入。
环境搭建:
1、编写实体类Address:
public class Address {
    private String address;
    @Override
    public String toString() {
        return "Address{" +
                "address='" + address + '\'' +
                '}';
    }
    public String getAddress() {
        return address;
    }
    public void setAddress(String address) {
        this.address = address;
    }
}
编写实体类Student,记得添加属性的set和get方法,此处忽略:
2、编写beans.xml外键测试
3、编写测试代码:
public class MyTest {
    public static void main(String[] args) {
        //创建对象时输入CPX
        ApplicationContext context = new ClassPathXmlApplicationContext("beans.xml");
        Student student = (Student) context.getBean("student");
        System.out.println(student.getName());
    }
}

Set方式注入(重点)
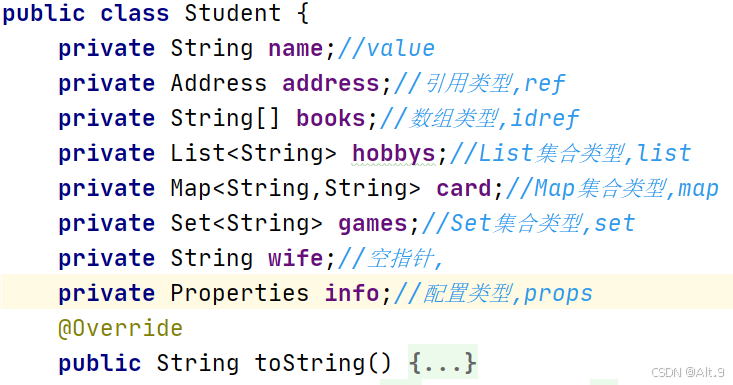
实现Student实体类中各中属性的实例化。实现注入时,主要是map与properties不同。
以下主要包含了引用类型、数组类型、List类型、Map类型、Set类型、空指针、配置类型的注入方式
<bean id="address" class="com.serenity.pojo.Address">
<property name="address" value="北京"/>
</bean>
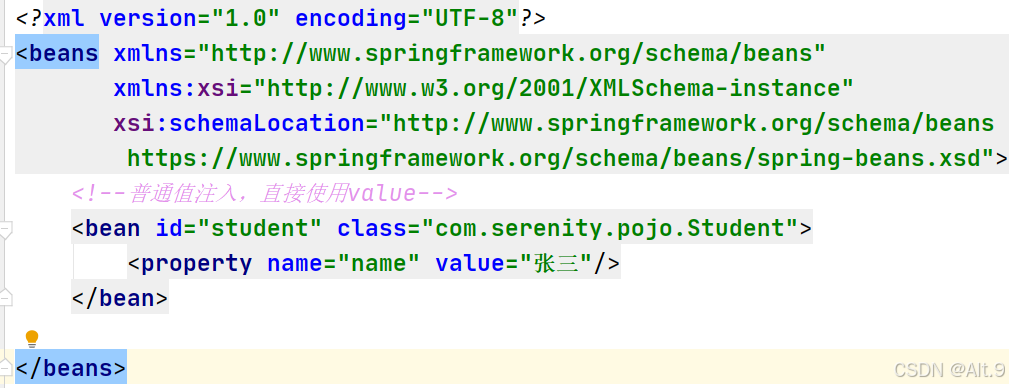
<bean id="student" class="com.serenity.pojo.Student">
<!--普通值注入,直接使用value-->
<property name="name" value="张三"/>
<!--bean注入,使用ref-->
<property name="address" ref="address"/>
<!--数组注入,array-->
<property name="books">
<array>
<value>红楼梦</value>
<value>西游记</value>
<value>水浒传</value>
<value>三国演义</value>
</array>
</property>
<!--List注入-->
<property name="hobbys">
<list>
<value>听音乐</value>
<value>玩游戏</value>
<value>追剧</value>
</list>
</property>
<!--map注入-->
<property name="card">
<map>
<entry key="身份证" value="12345679813456"/>
<entry key="银行卡" value="45613798461356"/>
</map>
</property>
<!--set注入-->
<property name="games">
<set>
<value>开心消消乐</value>
<value>植物大战僵尸</value>
<value>英雄联盟</value>
</set>
</property>
<!--空值注入-->
<property name="wife">
<null></null>
</property>
<!--Properties注入-->
<property name="info">
<props>
<prop key="driver">20200345</prop>
<prop key="username">王五</prop>
<prop key="sex">男</prop>
<prop key="password">123456</prop>
</props>
</property>
</bean>
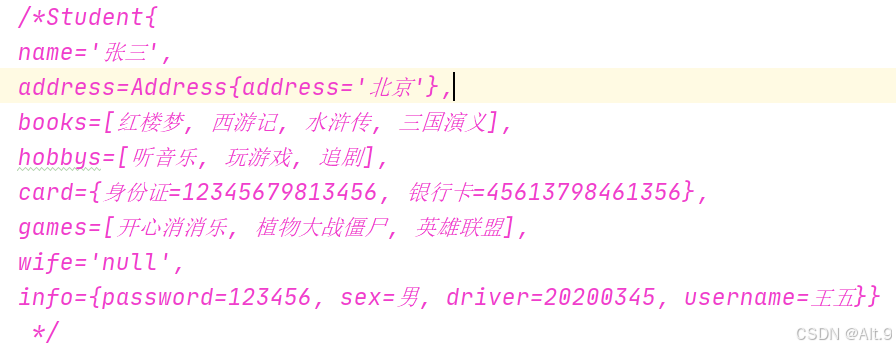
测试:

测试结果:

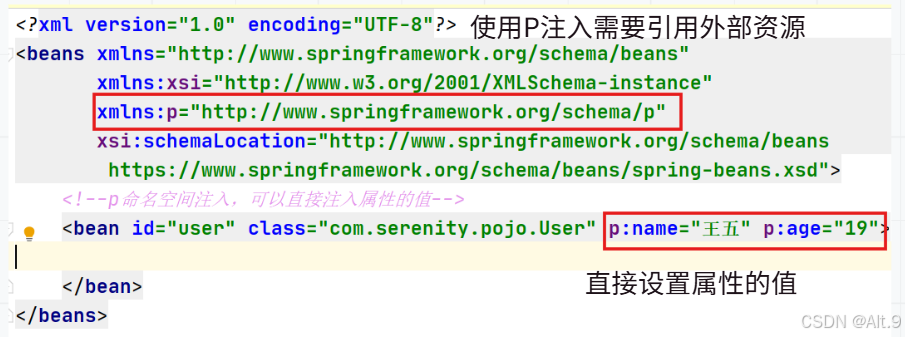
P命名空间注入
可以直接注入属性的值:property
1、创建实例User类
public class User {
    private String name;
    private int age;
    @Override
   public User() {
    }
   public User(String name,int age) {
        this.name = name;
        this.age = age;
    }
    public String toString() {
        return "User{" +
                "name='" + name + '\'' +
                ", age=" + age +
                '}';
    }
    public String getName() {
        return name;
    }
    public void setName(String name) {
        this.name = name;
    }
    public int getAge() {
        return age;
    }
    public void setAge(int age) {
        this.age = age;
    }
}
2、编写Userbeans.xml文件
3、编写测试


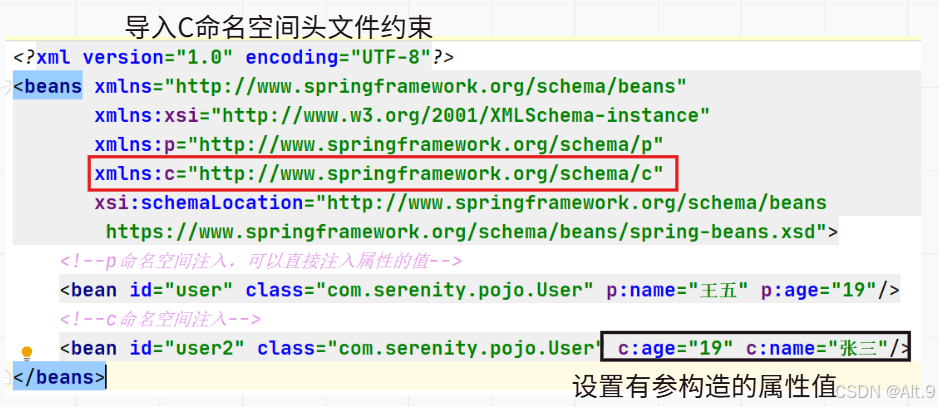
C命名空间注入
通过构造器注入:constructs-args(使用该方法注入时,需要保证类中的有参构造方法存在)
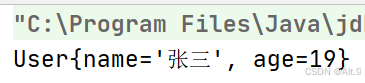
测试:
注意点:P命名空间和C命名空间不能直接使用,需要导入xml约束
xmlns:p="http://www.springframework.org/schema/p"
xmlns:c="http://www.springframework.org/schema/c"
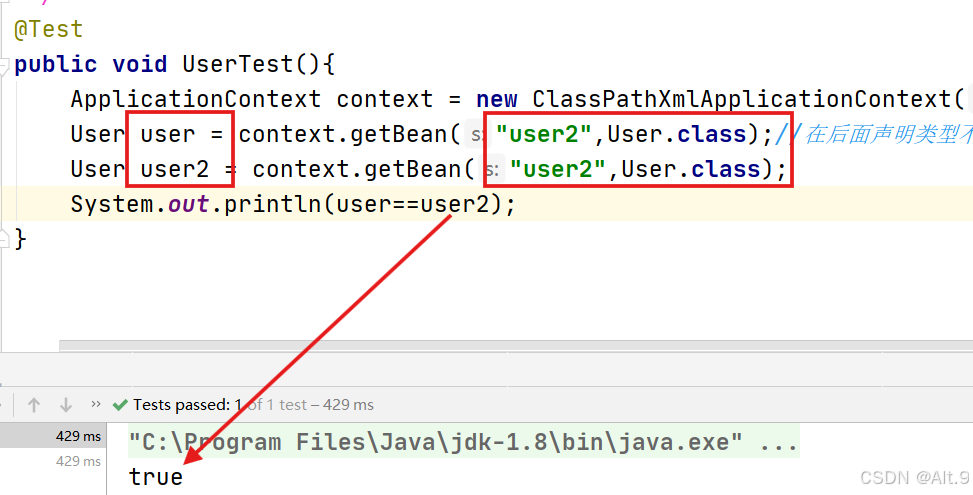
Bean作用域
singleton(单例模式):这是默认的作用域,对于在Spring IoC容器中定义的每个Bean,容器将创建一个单一的实例。无论请求多少次,都会返回同一个Bean实例。
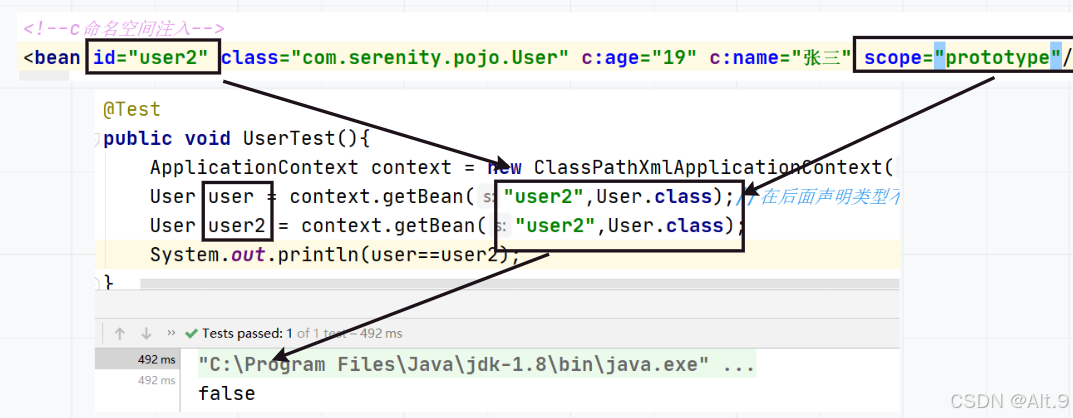
prototype(原型模式):每次请求都会创建一个新的Bean实例,这意味着如果多次调用getBean()方法,每次都会得到一个新的对象。
request:每次HTTP请求都会创建一个新的Bean,适用于Web应用程序中的Spring WebApplicationContext环境。
session:在同一个HTTP Session中,相同的Bean将被复用,不同的Session会有不同的Bean实例。
application:在整个ServletContext生命周期内,只创建一个Bean实例,适用于Web应用程序中的Spring WebApplicationContext环境。
可在bean中的scope属性设置模式

单例模式测试:
原型模式测试:
Bean的自动装配
- 自动装配是Spring满足Bean依赖的一种方式。
- Spring会在上下文中自动寻找,并自动给bean装配属性。
在Spring中有三种装配方式
1、在xml中显示配置
2、在Java中显示配置
3、隐式的自动装配(重要)
搭建环境:一个人有两个宠物。
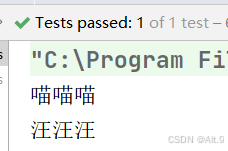
public class Dog {
    public void shout(){
        System.out.println("汪汪汪");
    }
}
public class Cat {
public void shout(){
System.out.println("喵喵喵");
}
}
public class People {
    private Cat cat;
    private Dog dog;
    private String name;}
编写beans.xml文件
 <bean id="cat" class="com.serenity.pojo.Cat"/>
    <bean id="dag" class="com.serenity.pojo.Dog"/>
    <bean id="people" class="com.serenity.pojo.People">
        <property name="name" value="张三"/>
        <property name="dog" ref="dag"/>
        <property name="cat" ref="cat"/>
测试:
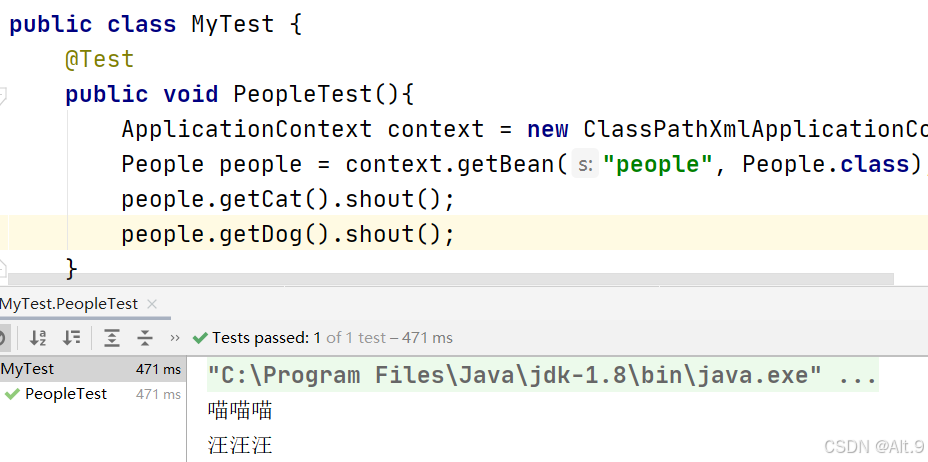
 @Test
    public void PeopleTest(){
        ApplicationContext context = new ClassPathXmlApplicationContext("beans.xml");
        People people = context.getBean("people", People.class);
        people.getCat().shout();
        people.getDog().shout();
    }
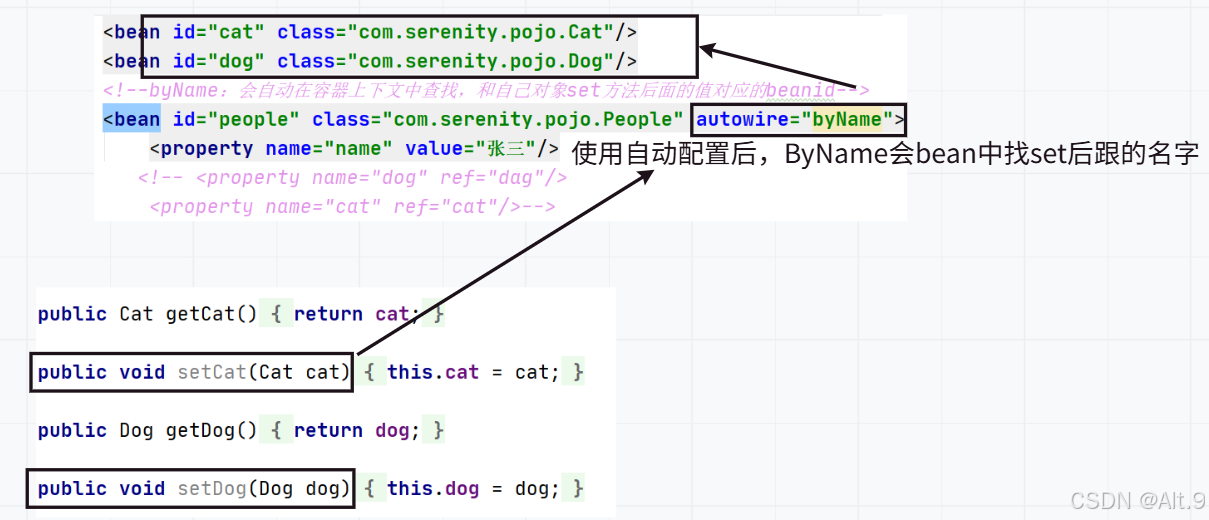
自动配置:在bean中的suthwire属性可以设置自动配置。自动配置可以省略
使用ByName
需要保证所有beanid唯一,并且这个bean需要和自动注入的属性的set方法的值唯一。
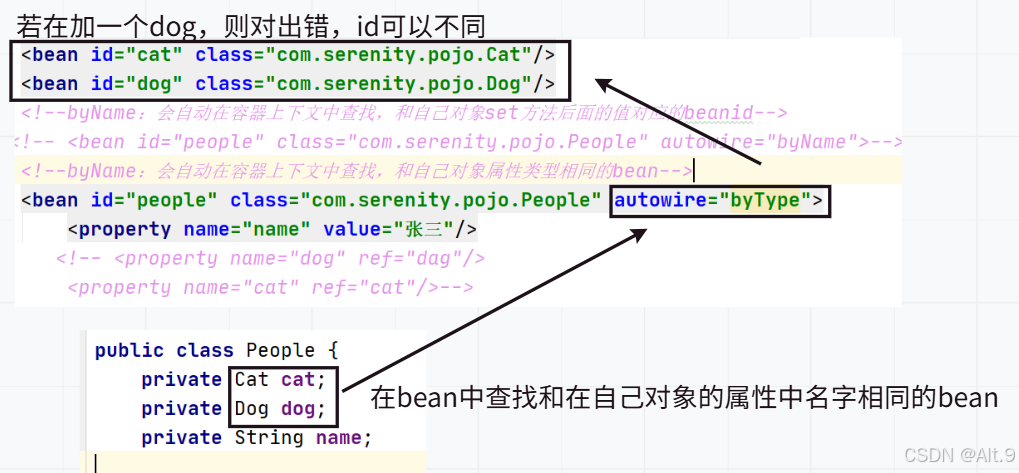
使用ByType
需要保证所有bean的class唯一,并且这个bean需要和自动注入的属性的类型一致。
使用注解实现自动装配
使用注解:
1、导入约束(context约束)
xmlns:context="http://www.springframework.org/schema/context"
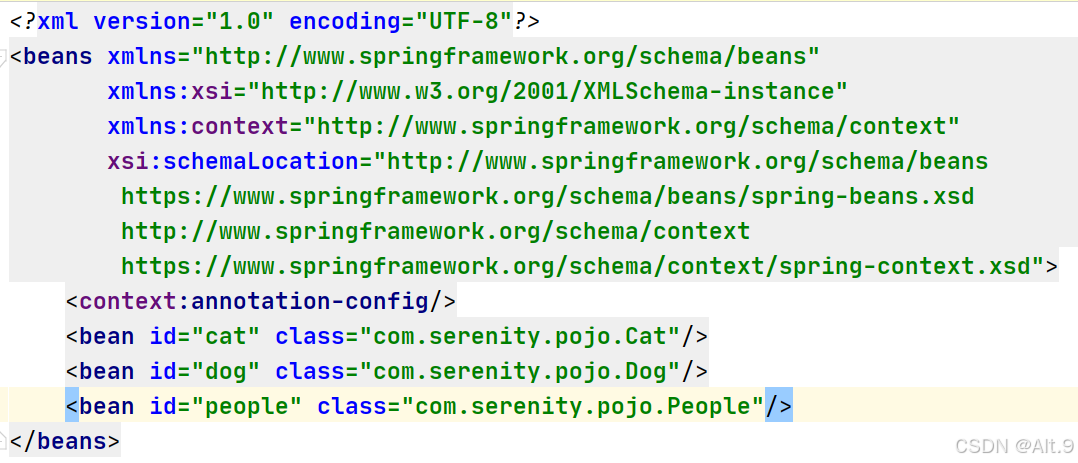
2、配置注解的支持:
<context:annotation-config>
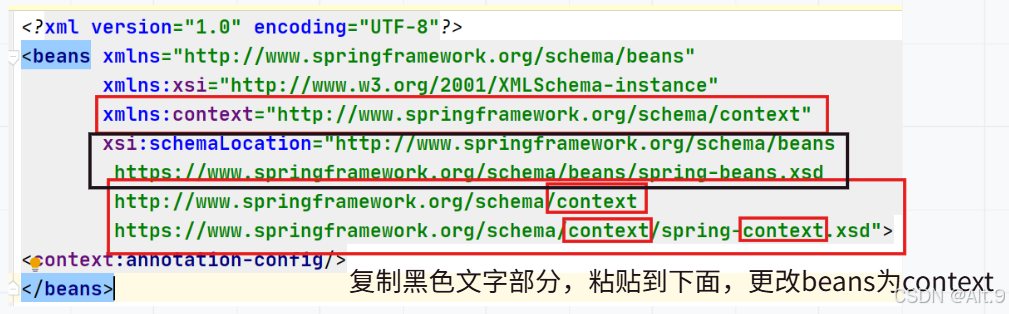
<?xml version="1.0" encoding="UTF-8"?>
<beans xmlns="http://www.springframework.org/schema/beans"
xmlns:xsi="http://www.w3.org/2001/XMLSchema-instance"
xmlns:context="http://www.springframework.org/schema/context"
xsi:schemaLocation="http://www.springframework.org/schema/beans
https://www.springframework.org/schema/beans/spring-beans.xsd
http://www.springframework.org/schema/context
https://www.springframework.org/schema/context/spring-context.xsd">
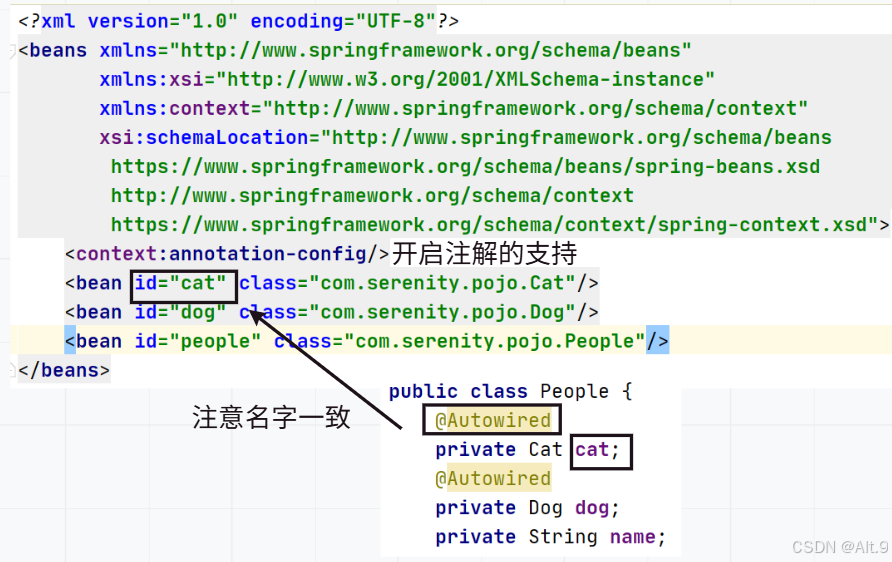
<context:annotation-config/>
</beans>修改Bean的自动配置的实例(一个人有两只宠物):
@Autowired
- 直接在属性上使用(在属性上使用时可以不写set方法,只要 get方法)
- 也可在set方法上使用
- 该注解使用前提时自动装配的属性在IOC(Spring)容器中存在,且符合名字。
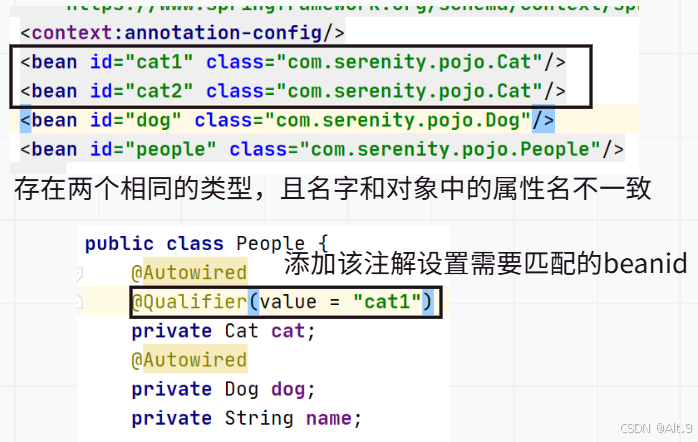
- 在存在多个相同的bean时,可添加@Qualifier注解指定唯一的bean对象注入。
- 先根据ByType,在根据ByName实现查找
扩展:
- @Nullable 字段标记了这个注解,说明这个字段可以为null
测试结果为:
与注解@Qualifier配合使用
@Resource注解
- 先会根据beanid查找,名字不符合时,在查找类型ByType
- 也可在该注解中加name属性指定唯一的bean对象注入

@Resource和@Autowired两者的区别
- 都是用来自动装配的,都可以放在属性字段上
- @Autowired通过ByType的方式实现,而且必须要求这个对象存在【常用】
- @Resource默认通过ByName的方式实现,如果找不到名字,则通过ByType实现
- 执行顺序不同