关键技术栈:SpringBoot + uniapp + MQTT + micropython + docker
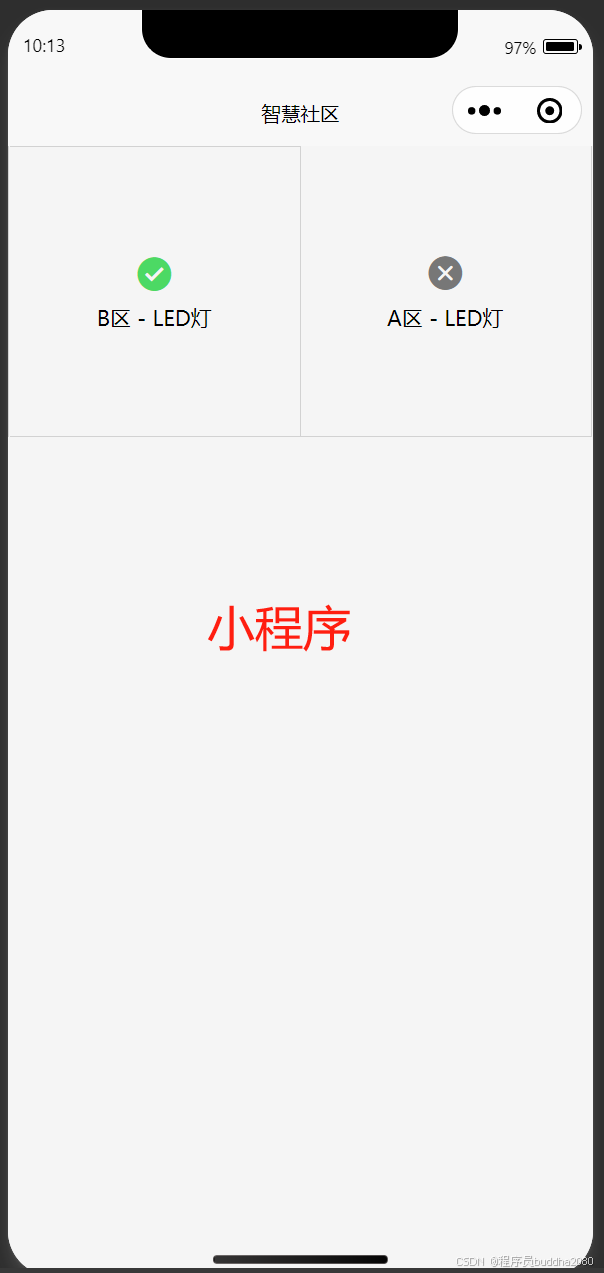
最终实现效果:小程序控制ESP32的LED设备亮灭,呈现效果如下:

整体流程:
①、小程序端发送控制信息给SpringBoot后端;
②、后端把控制信息存储更新到数据库同时把控制信息发布到MQTT;
③、订阅了MQTT服务的ESP32,根据收到的订阅信息更新对应端口状态(这里就是控制LED灯亮灭)
实现步骤:
1、Docker方式安装MQTT服务端(Mosquitto),MQTT作为发布订阅消息队列。
## 服务器或虚拟机安装好了docker软件

# 拉取Mosquitto镜像
sudo docker pull eclipse-mosquitto:latest

# 创建本地存储目录
mkdir -p ~/mosquitto/config ~/mosquitto/data ~/mosquitto/log

# 创建配置文件
cat << EOF > ~/mosquitto/config/mosquitto.conf
persistence true
persistence_location /mosquitto/data
log_dest file /mosquitto/log/mosquitto.log

# 允许匿名连接(生产环境应配置密码)
allow_anonymous true

# 监听端口
listener 1883 0.0.0.0
EOF

# 运行容器
sudo docker run -d \
  --name mosquitto \
  -p 1883:1883 \
  -p 9001:9001 \
  -v ~/mosquitto/config:/mosquitto/config \
  -v ~/mosquitto/data:/mosquitto/data \
  -v ~/mosquitto/log:/mosquitto/log \
  eclipse-mosquitto
2、小程序呈现控制开关并请求后端服务。
// /utils/config.js
const env = process.env.NODE_ENV

const config = {
  development: {
    baseUrl: 'http://localhost:8080/api'
  },
  production: {
    baseUrl: 'http://localhost:8080/api'
  }
}

export default config[env] || config.production
// /utils/http.js
import config from './config'
const BASE_URL = config.baseUrl

const http = (options) => {
  // 显示加载中
  if (options.loading !== false) {
    uni.showLoading({
      title: '加载中...',
      mask: true
    })
  }

  // 返回 Promise 对象
  return new Promise((resolve, reject) => {
    // 处理请求头
    let header = {
      'Content-Type': 'application/json',
      ...options.header
    }

    // 携带 token
    const token = uni.getStorageSync('token')
    if (token) {
      header.Authorization = `Bearer ${token}`
    }

    uni.request({
      url: BASE_URL + options.url,
      method: options.method || 'GET',
      data: options.data || {},
      header: header,
      timeout: 10000, // 10秒超时
      success: (res) => {
        // 响应成功处理
        if (res.statusCode === 200) {
          // 这里根据你的后端数据结构调整
          if (res.data.code === 200) {
            resolve(res.data.data)
          } else {
            // 业务错误处理
            _showError(res.data.code, res.data.message)
            reject(res.data)
          }
        } else {
          // HTTP 状态码错误处理
          _showError(res.statusCode, res.errMsg)
          reject(res)
        }
      },
      fail: (err) => {
        // 网络错误处理
        _showError(500, '网络连接失败,请检查网络')
        reject(err)
      },
      complete: () => {
        // 关闭加载
        uni.hideLoading()
      }
    })
  })
}

// 错误处理函数
function _showError(code, message) {
  const errorMap = {
    400: '请求错误',
    401: '未授权,请重新登录',
    403: '拒绝访问',
    404: '请求资源不存在',
    500: '服务器错误',
    502: '网关错误',
    503: '服务不可用'
  }

  const errorMessage = errorMap[code] || message || '未知错误'

  uni.showToast({
    title: errorMessage,
    icon: 'none',
    duration: 2000
  })

  // 处理 token 过期
  if (code === 401) {
    // 清除本地 token 并跳转到登录页
    uni.removeStorageSync('token')
    uni.navigateTo({
      url: '/pages/login/login'
    })
  }
}

// 封装常用方法
const get = (url, data, options = {}) => {
  return http({
    url,
    data,
    method: 'GET',
    ...options
  })
}

const post = (url, data, options = {}) => {
  return http({
    url,
    data,
    method: 'POST',
    ...options
  })
}

const del = (url, data, options = {}) => {
  return http({
    url,
    data,
    method: 'DELETE',
    ...options
  })
}

const put = (url, data, options = {}) => {
  return http({
    url,
    data,
    method: 'PUT',
    ...options
  })
}

export default {
  get,
  post,
  del,
  put,
  request: http
}
// /utils/api.js
import http from './http'

export default {
	// 示例接口
	login: (data) => http.post('/user/login', data),
	getUserInfo: () => http.get('/user/info', {
		loading: true
	}), // 带加载提示
	getList: (params) => http.get('/data/list', params),

	// 获取全部设备列表
	getDeviceListAll: () => http.get('/iot/device/listAll', {
		loading: true
	}),
	// 更新设备管理
	updateDevices: (data) => http.put('/iot/device', data)
}
// main.js

// #ifndef VUE3
import Vue from 'vue'
import App from './App'
import api from './utils/api'

// 挂载到 Vue 原型
Vue.prototype.$api = api

Vue.config.productionTip = false

App.mpType = 'app'

const app = new Vue({
    ...App
})
app.$mount()
// #endif

// #ifdef VUE3
import { createSSRApp } from 'vue'
import App from './App.vue'
export function createApp() {
  const app = createSSRApp(App)
  return {
    app
  }
}
// #endif
<!-- page/index/index.vue -->

<template>
	<view class="container">
		<view class="warp">
			<!-- 宫格 -->
			<uni-grid :column="2" :highlight="true" @change="change" :disabled="loading">
				<uni-grid-item v-for="item in getDeviceList" :index="item.id" :key="item.id">
					<view class="grid-item-box">
						<!-- 添加加载动画 -->
						<uni-icons v-if="loading" type="spinner-cycle" color="#999" :size="30" />
						<uni-icons v-else :type="item.powerStatus === '1' ? 'checkbox-filled' : 'clear'" :size="30"
							:color="item.powerStatus === '1' ? '#4cd964' : '#777'" />
						<text class="text">{{ item.location }} - {{ item.deviceName }}</text>
					</view>
				</uni-grid-item>
			</uni-grid>
		</view>

	</view>
</template>

<script>
	export default {
		data() {
			return {
				// 设备列表
				getDeviceList: [],
				loading: false
			}
		},
		// 推荐方案:组合使用生命周期
		onLoad() {
			// 初始化页面时执行(推荐)
			this.getDeviceListAll()
		},
		onShow() {
			// 页面显示时执行(适用于需要实时刷新的场景)
			// this.refreshData()
		},
		methods: {
			async change(e) {
				try {
					this.loading = true
					const deviceId = e.detail.index
					const targetDevice = this.getDeviceList.find(item =>
						String(item.id) === String(deviceId)
					);
					// 未找到设备的错误处理
					if (!targetDevice) {
						uni.showToast({
							title: '设备不存在',
							icon: 'none'
						});
						return;
					}

					// 状态切换逻辑
					const newStatus = targetDevice.powerStatus === '1' ? '0' : '1';

					// 乐观更新:先更新本地数据
					this.updateLocalDeviceStatus(deviceId, newStatus)

					// 发送更新请求
					await this.$api.updateDevices({
						id: deviceId,
						powerStatus: newStatus
					})

					uni.showToast({
						title: '状态更新成功',
						icon: 'success'
					})
				} catch (error) {
					// 回滚本地数据
					this.getDeviceListAll()
					uni.showToast({
						title: '更新失败,已恢复状态',
						icon: 'none'
					})
				} finally {
					this.loading = false
				}
			},
			// 本地数据更新方法
			updateLocalDeviceStatus(deviceId, newStatus) {
				this.getDeviceList = this.getDeviceList.map(item => {
					if (item.id == deviceId) {
						return {
							...item,
							powerStatus: newStatus
						}
					}
					return item
				})
			},

			// 获取设备管理列表
			async getDeviceListAll() {
				try {
					const data = await this.$api.getDeviceListAll()

					this.getDeviceList = data.map(item => ({
						...item,
						powerStatus: String(item.powerStatus)
					}))
				} catch (err) {
					console.error('请求失败:', err)
				}
			}
		}
	}
</script>

<style lang="scss">
	.container {
		.warp {
			.text {
				font-size: 14px;
				margin-top: 5px;
			}

			.grid-item-box {
				flex: 1;
				position: relative;
				/* #ifndef APP-NVUE */
				display: flex;
				/* #endif */
				flex-direction: column;
				align-items: center;
				justify-content: center;
				padding: 15px 0;

				transition: opacity 0.3s;

				/* 加载状态样式 */
				&[loading] {
					opacity: 0.7;
					pointer-events: none;
				}
			}
		}
	}
</style>
2、SpringBoot后端作为MQTT的一个客户端,处理小程序端发过来的控制信息。
<!-- pom.xml文件引入 -->

<!-- MQTT -->
<dependency>
    <groupId>org.eclipse.paho</groupId>
    <artifactId>org.eclipse.paho.client.mqttv3</artifactId>
    <version>1.2.5</version>
</dependency>
# application.yml配置信息

mqtt:
  broker: tcp://8.134.119.114:1883  # MQTT代理地址
  clientId: subq7iH8KZeXYKFn
  username: admin
  password: public
  qos: 1
// MqttConfig.java配置类

package com.ruoyi.iot.mqtt;

import org.eclipse.paho.client.mqttv3.MqttClient;
import org.eclipse.paho.client.mqttv3.MqttConnectOptions;
import org.springframework.beans.factory.annotation.Value;
import org.springframework.context.annotation.Bean;
import org.springframework.context.annotation.Configuration;

@Configuration
public class MqttConfig {

    @Value("${mqtt.broker}")
    private String broker;

    @Value("${mqtt.clientId}")
    private String clientId;

    @Value("${mqtt.username}")
    private String username;

    @Value("${mqtt.password}")
    private String password;

    @Bean
    public MqttClient mqttClient() throws Exception {
        MqttConnectOptions options = new MqttConnectOptions();
        options.setUserName(username);
        options.setPassword(password.toCharArray());
        options.setAutomaticReconnect(true);
        options.setCleanSession(true);

        MqttClient client = new MqttClient(broker, clientId);
        client.connect(options);
        return client;
    }
}
// DeviceApiController.java接口类

package com.ruoyi.api;

import com.ruoyi.common.annotation.Anonymous;
import com.ruoyi.common.core.controller.BaseController;
import com.ruoyi.common.core.domain.AjaxResult;
import com.ruoyi.iot.domain.IotDevices;
import com.ruoyi.iot.service.IIotDevicesService;
import org.eclipse.paho.client.mqttv3.MqttClient;
import org.eclipse.paho.client.mqttv3.MqttMessage;
import org.springframework.beans.factory.annotation.Autowired;
import org.springframework.web.bind.annotation.*;

import java.util.List;

/**
 * 小程序设备接口
 */
@Anonymous
@RestController
@RequestMapping("/api/iot/device")
public class DeviceApiController extends BaseController {

    @Autowired
    private IIotDevicesService devicesService;

    @Autowired
    private MqttClient mqttClient;

    // 其他略

    /**
     * 修改设备管理
     */
    @PutMapping
    public AjaxResult edit(@RequestBody IotDevices iotDevices) {
        int result = devicesService.updateIotDevices(iotDevices);
        if (result > 0) {
            sendMqttCommand(iotDevices);
            return AjaxResult.success("更新成功");
        }
        return AjaxResult.error("更新失败");
        // return toAjax(devicesService.updateIotDevices(iotDevices));
    }

    private void sendMqttCommand(IotDevices device) {
        try {
            String topic = "/device/" + device.getId() + "/power";
            String payload = "{\"status\":" + device.getPowerStatus() + "}";

            MqttMessage message = new MqttMessage(payload.getBytes());
            message.setQos(1);
            message.setRetained(true);

            mqttClient.publish(topic, message);
        } catch (Exception e) {
            logger.error("MQTT消息发送失败: " + e.getMessage());
        }
    }
}
3、ESP32订阅MQTT,根据订阅信息,更新端口状态
# main.py文件

import time
import network
import ujson
from machine import Pin
from umqtt.simple import MQTTClient

# ----------------- 配置参数 -----------------
# Wi-Fi 配置
WIFI_SSID = "weixin:quweiexist"
WIFI_PASSWORD = "woaizhonghua"

# MQTT 配置
MQTT_BROKER = "8.134.119.114"  # 服务器IP
MQTT_PORT = 1883
MQTT_USERNAME = "admin"
MQTT_PASSWORD = "public"
MQTT_CLIENT_ID = "l8sYnfRyWz3KMXi9"
MQTT_TOPIC = "/device/1/power"  # 订阅通配符主题(监听所有设备)

# LED 初始化(GPIO25)
led = Pin(16, Pin.OUT)
led.off()  # 初始状态关闭


# ----------------- Wi-Fi 连接 -----------------
def connect_wifi():
    sta_if = network.WLAN(network.STA_IF)
    if not sta_if.isconnected():
        print("正在连接Wi-Fi...")
        sta_if.active(True)
        sta_if.connect(WIFI_SSID, WIFI_PASSWORD)
        while not sta_if.isconnected():
            time.sleep(0.5)
    print("Wi-Fi 连接成功!")
    print("IP 地址:", sta_if.ifconfig()[0])


# ----------------- MQTT 回调函数 -----------------
def mqtt_callback(topic, msg):
    print("收到消息:", topic.decode(), msg.decode())
    try:
        # 解析JSON消息
        data = ujson.loads(msg)
        status = data.get("status")
        if status == 1:
            led.on()
            print("LED已开启")
        elif status == 0:
            led.off()
            print("LED已关闭")
        else:
            print("无效的状态值")
    except Exception as e:
        print("消息解析失败:", e)


# ----------------- 主程序 -----------------
def main():
    # 连接 Wi-Fi
    connect_wifi()

    # 连接 MQTT
    client = MQTTClient(
        client_id=MQTT_CLIENT_ID,
        server=MQTT_BROKER,
        port=MQTT_PORT,
        user=MQTT_USERNAME,
        password=MQTT_PASSWORD
    )
    client.set_callback(mqtt_callback)

    try:
        client.connect()
        client.subscribe(MQTT_TOPIC)
        print("已连接到 MQTT Broker,等待控制指令...")

        # 持续监听
        while True:
            client.wait_msg()
    except Exception as e:
        print("MQTT 连接失败:", e)
    finally:
        client.disconnect()


if __name__ == "__main__":
    main()
注意事项:
1、采用路由容易不在一个网段,特别是路由有2.4和5G混用的。
2、MQTT服务端可以采用云服务器部署。