数据结构初级部分的学习我们已经学完了,接下来就进入C++初阶部分的学习,因为数据结构的高阶部分要用到C++才能够更好的理解并书写,所以我们要先学习C++,初阶部分学完就能继续学习我们对数据结构了。好了,直接进入今天的主题吧。
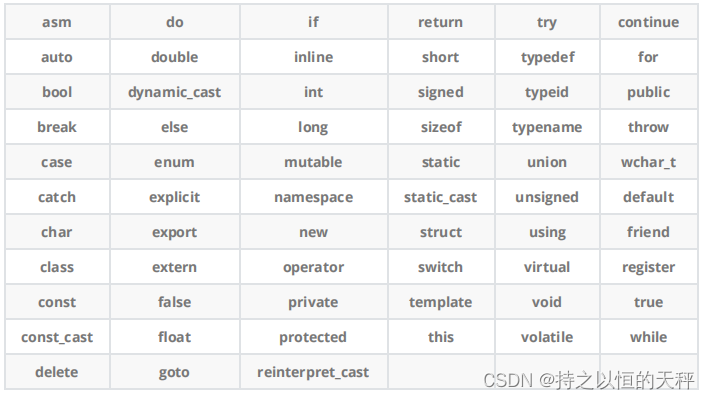
1.C++关键字
2.命名空间
#include <stdio.h>
#include <stdlib.h>
int rand = 10;
// C语言没办法解决类似这样的命名冲突问题,所以C++提出了namespace来解决
int main()
{
 printf("%d\n", rand);
return 0;
}
// 编译后后报错:error C2365: “rand”: 重定义;以前的定义是“函数”
2.1 命名空间的定义
// 大家下去以后自己练习用自己名字缩写即可,如张三:zs
// 1. 正常的命名空间定义
namespace hjw
{
	// 命名空间中可以定义变量/函数/类型
	int rand = 10;
	int Add(int left, int right)
	{
		return left + right;
	}
	struct Node
	{
		struct Node* next;
		int val;
	};
}

//2. 命名空间可以嵌套
// test.cpp
namespace N1
{
	int a;
	int b;
	int Add(int left, int right)
	{
		return left + right;
	}
	namespace N2
	{
		int c;
		int d;
		int Sub(int left, int right)
		{
			return left - right;
		}
	}
}

//3. 同一个工程中允许存在多个相同名称的命名空间,编译器最后会合成同一个命名空间中
namespace N1
{
	int Mul(int left, int right)
	{
		return left * right;
	}
}2.2 命名空间的使用
我们先来看一段代码
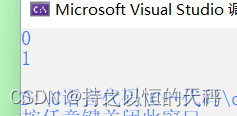
int a = 2;
void f1()
{
	int a = 0;
	printf("%d\n", a);
	printf("%d\n", ::a);
}

void f2()
{
	int a = 1;
}
int main()
{
	printf("%d\n", a);
	f1();
	f2();
	return 0;
}
大家都知道main函数里面的a会先在main函数里面找,如果没有,就在外部去找。f1函数中第一个printf也是一样,但第二个printf加了一个“::”(域作用限定符),就直接在外部寻找了,不用先去找局部变量了。
namespace hjw
{
	// 命名空间中可以定义变量/函数/类型
	int a = 0;
	int b = 1;
	int Add(int left, int right)
	{
		return left + right;
	}
	struct Node
	{
		struct Node* next;
		int val;
	};
}
int main()
{
	// 编译报错:error C2065: “a”: 未声明的标识符
	printf("%d\n", a);
	return 0;
}int main()
{
printf("%d\n", hjw::a);
return 0;
}2.使用using将命名空间中某个成员引入
using hjw::b;
int main()
{
	printf("%d\n", hjw::a);
	printf("%d\n", b);
	return 0;
}
3.使用using namespace 命名空间名称引入
using namespace hjw;
int main()
{
	printf("%d\n", hjw::a);
	printf("%d\n", b);
	return 0;
}
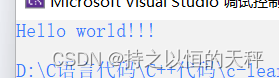
3. C++输入、输出
#include<iostream>
// std是C++标准库的命名空间名,C++将标准库的定义实现都放到这个命名空间中
using namespace std;
int main()
{
cout<<"Hello world!!!"<<endl;
return 0;
}
说明:
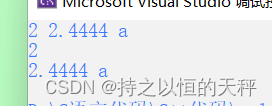
#include <iostream>
using namespace std;
int main()
{
	int a;
	double b;
	char c;

	// 可以自动识别变量的类型
	cin >> a;
	cin >> b >> c;

	cout << a << endl;//endl是自动换行
	cout << b << " " << c << endl;
	return 0;
}
4.缺省参数
4.1 缺省参数的概念
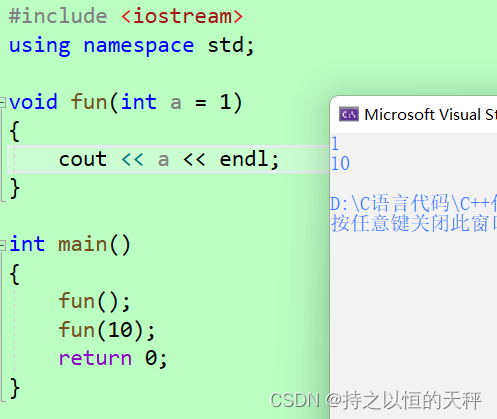
4.2 缺省参数的分类
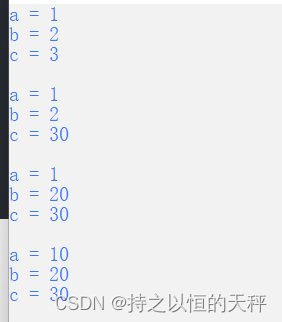
- 全缺省参数
void Func(int a = 10, int b = 20, int c = 30)
{
	cout << "a = " << a << endl;
	cout << "b = " << b << endl;
	cout << "c = " << c << endl;
}

int main()
{
	Func(1, 2, 3);
	Func(1, 2);
	Func(1);
	Func();
	return 0;
}
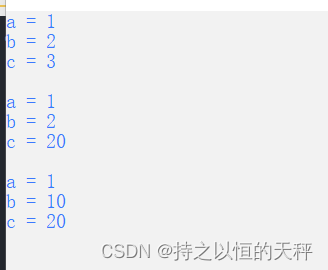
- 半缺省参数
void Func(int a, int b = 10, int c = 20)
{
	cout << "a = " << a << endl;
	cout << "b = " << b << endl;
	cout << "c = " << c << endl;
	printf("\n");
}

int main()
{
	Func(1, 2, 3);
	Func(1, 2);
	Func(1);
	return 0;
}
注意:
 //a.h
  void Func(int a = 10);

  // a.cpp
  void Func(int a = 20)
 {}

  // 注意:如果生命与定义位置同时出现,恰巧两个位置提供的值不同,那编译器就无法确定到底该
用那个缺省值。
5.函数重载
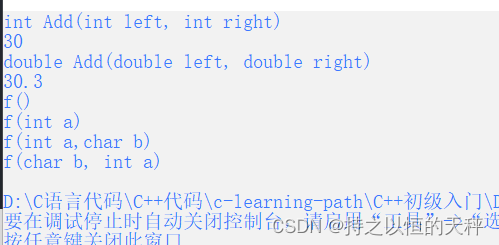
5.1 函数重载概念
// 1、参数类型不同
int Add(int left, int right)
{
	cout << "int Add(int left, int right)" << endl;
	return left + right;
}
double Add(double left, double right)
{
	cout << "double Add(double left, double right)" << endl;
	return left + right;
}
// 2、参数个数不同
void f()
{
	cout << "f()" << endl;
}

void f(int a)
{
	cout << "f(int a)" << endl;
}

// 3、参数类型顺序不同
void f(int a, char b)
{
	cout << "f(int a,char b)" << endl;
}
void f(char b, int a)
{
	cout << "f(char b, int a)" << endl;
}
int main()
{
	int a = Add(10, 20);
	cout << a << endl;
	double b = Add(10.1, 20.2);
	cout << b << endl;

    f();
	f(10);

	f(10, 'a');
	f('a', 10);

	return 0;
}
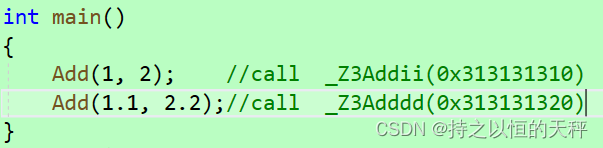
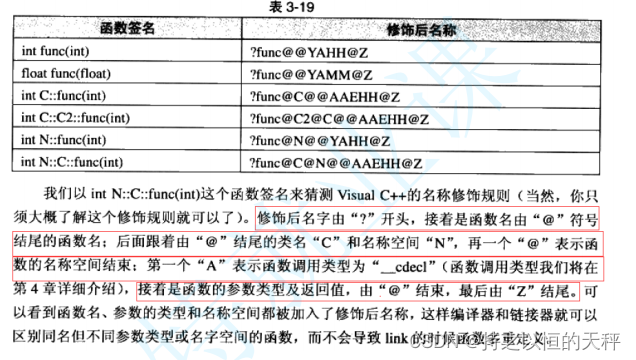
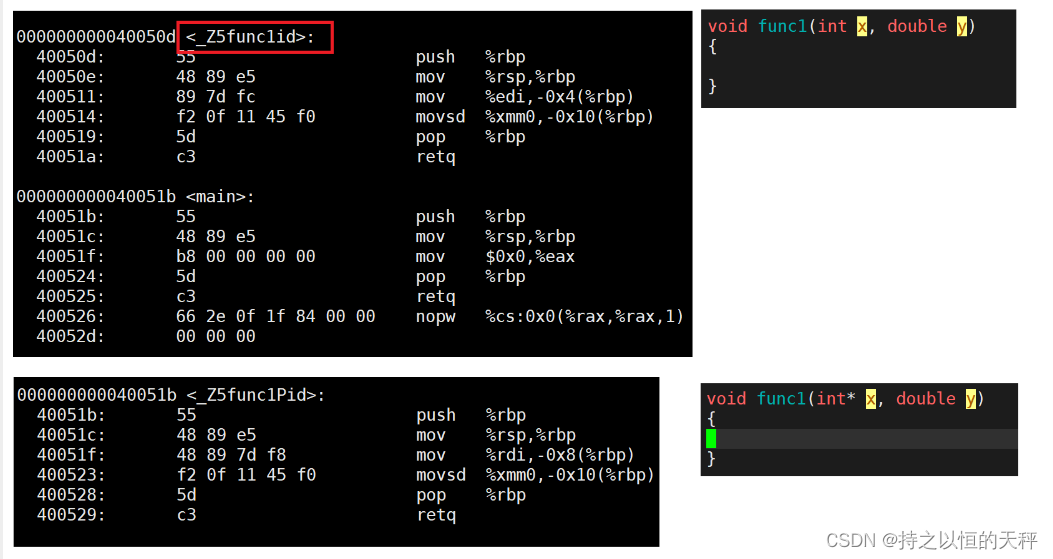
5.2 C++支持函数重载的原理--名字修饰(name Mangling)
6.引用
6.1 引用概念
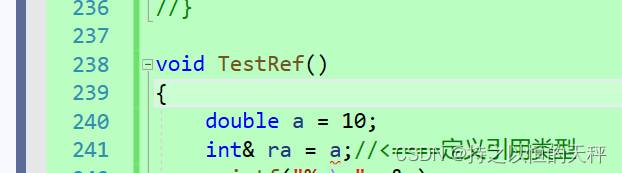
void TestRef()
{
	int a = 10;
	int& ra = a;//<====定义引用类型
	int j = a;

	cout << &a << endl;
	cout << &ra << endl;
	cout << &j << endl;
}
我们在学习C语言的时候,应该都见过这种问题,交换2个数用下面的方法是不可行的
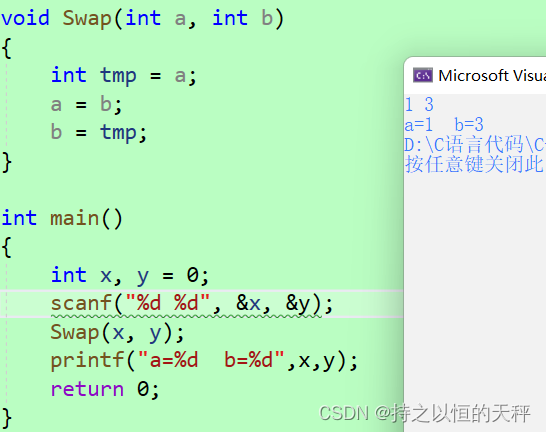
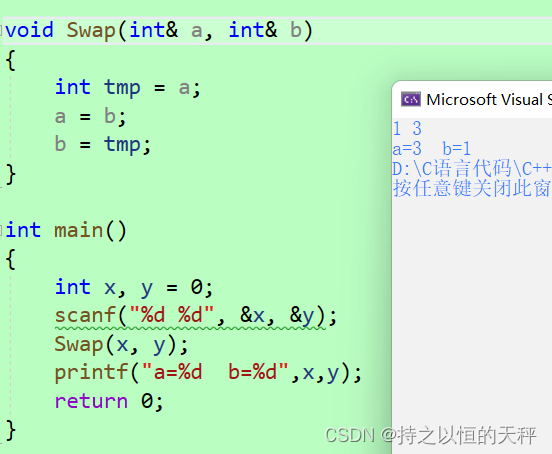
要想交换2个数,就必须要用到指针,学了引用之后,也可以用引用来解决问题。相当于x的别名是a,y的别名是b,交换2个数的别名也相当于交换了数。

6.2 引用特性
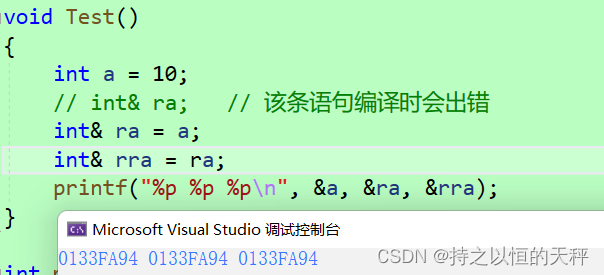
void Test()
{
	int a = 10;
	// int& ra;   // 该条语句编译时会出错
	int& ra = a;
	int& rra = a;
	printf("%p %p %p\n", &a, &ra, &rra);
}
当然也可以给别名取别名
6.3 常引用
void TestConstRef()
{
	const int a = 10;
	//int& ra = a;   // 该语句编译时会出错,a为常量

	const int& ra = a;
	//int& b = 10; // 该语句编译时会出错,b为常量

	const int& b = 10;
	double d = 12.34;

	//int& rd = d; // 该语句编译时会出错,类型不同
	const int& rd = d;
}
6.4 使用场景
1.做参数:具体例子就是上面的交换2个数。
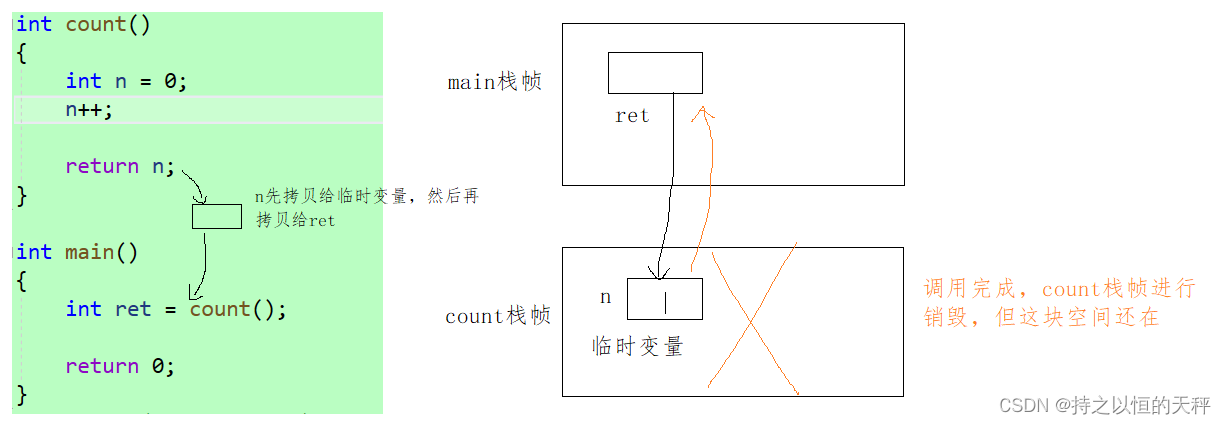
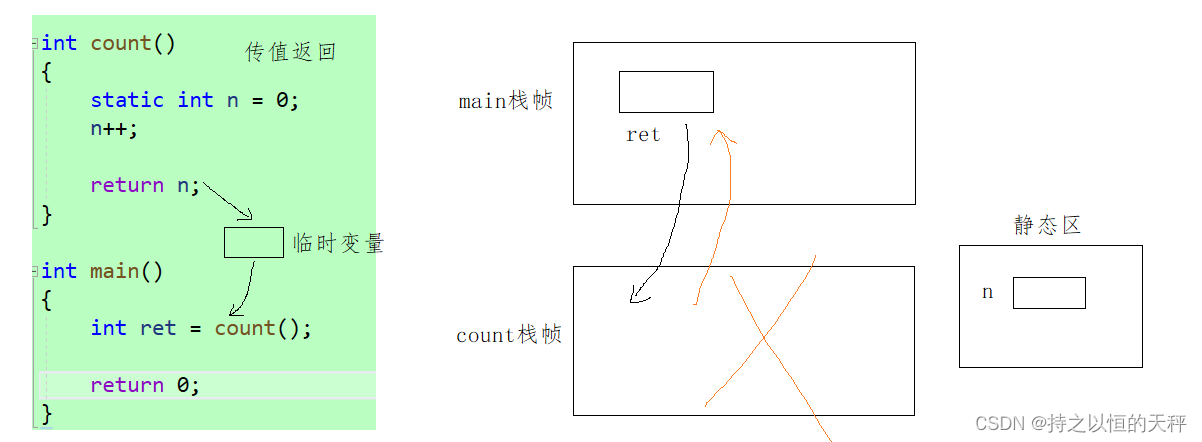
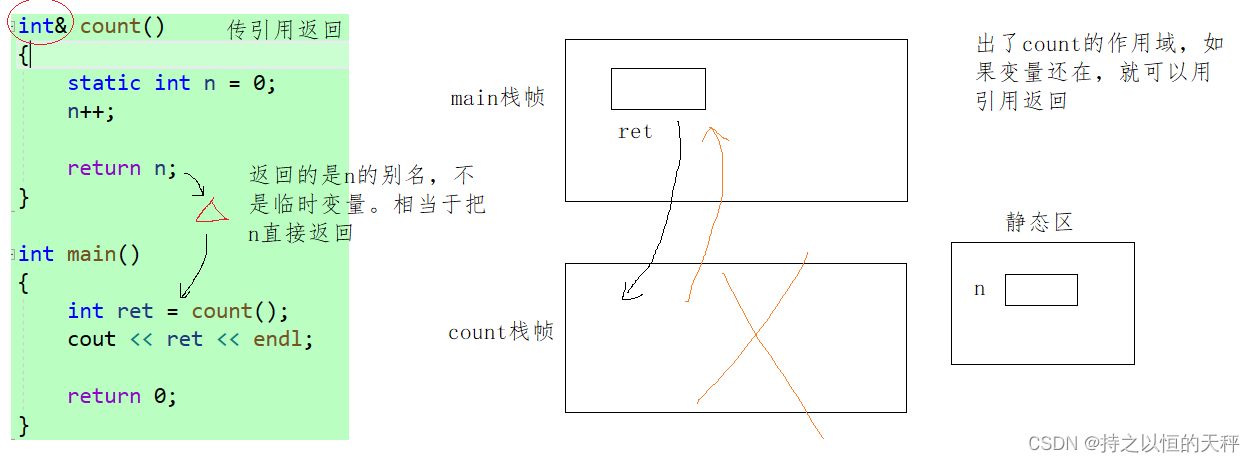
2.做返回值
int& Count()
{
   static int n = 0;
   n++;
   // ...
   return n;
}
我们先来分析一下这段代码
看了上面几张图片,我们来分析一下下面代码的结果是什么吧(代码本身有错,主要是学习传引用返回)
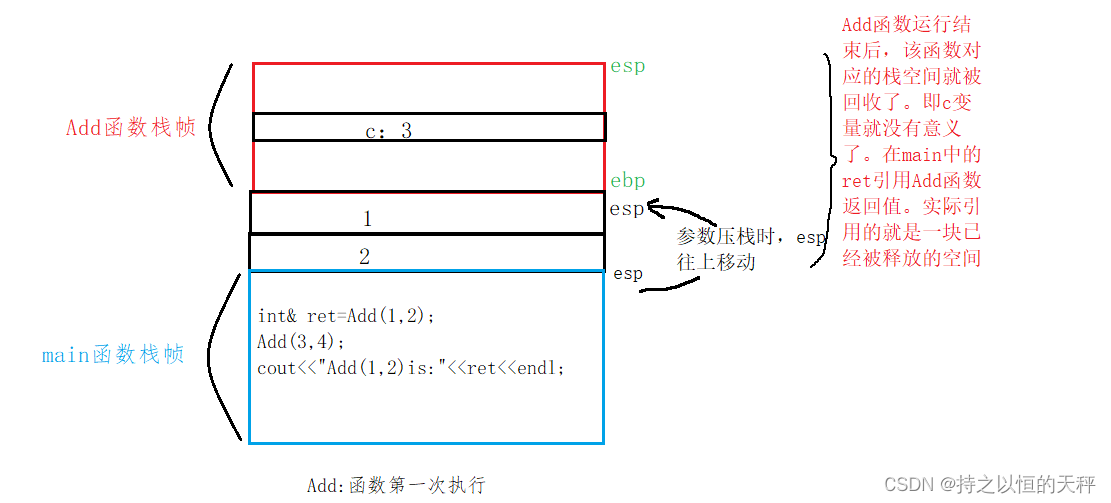
int& Add(int a, int b)
{
int c = a + b;
return c;
}
int main()
{
int& ret = Add(1, 2);
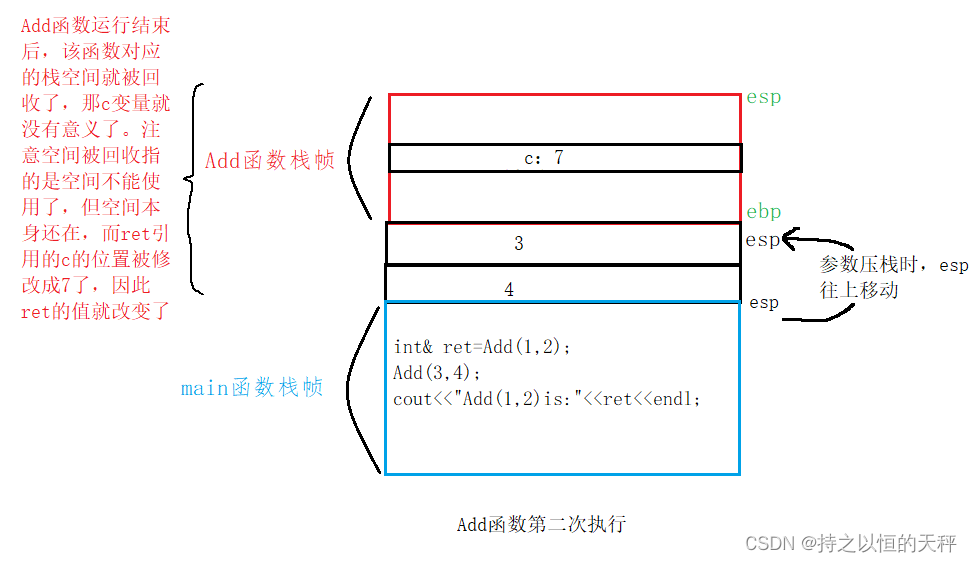
Add(3, 4);
cout << "Add(1, 2) is :"<< ret <<endl;
cout << "Add(1, 2) is :" << ret << endl;
return 0;
} 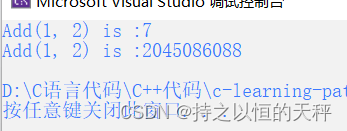
为什么呢?具体原因如下

6.5 引用和指针的区别
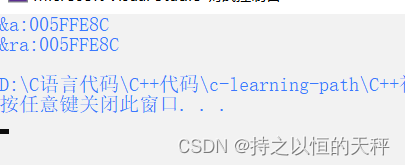
int main()
{
	int a = 1;
	int& ra = a;

	cout << "&a:" << &a << endl;
	cout << "&ra:" << &ra << endl;
	return 0;
}
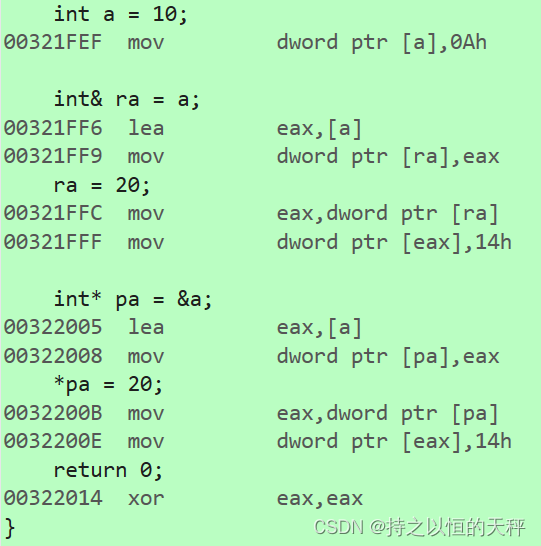
int main()
{
	int a = 10;

	int& ra = a;
	ra = 20;

	int* pa = &a;
	*pa = 20;
	return 0;
}
7.auto关键字(C++11)
7.1 类型别名思考
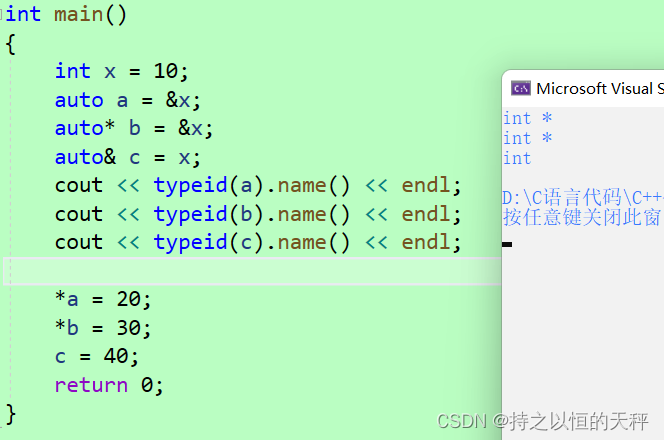
int main()
{
	int a = 0;
	//int b = a;
	auto b = a;
	auto c = &a;
	cout << typeid(b).name() << endl;
	cout << typeid(c).name() << endl;

	return 0;
}
auto主要的用处如下
#include<map>
#include<iostream>
int main()
{
    std::map<std::string, std::string> m{ { "apple", "苹果" }, { "orange",
		"橙子" },{"pear","梨"} };
	std::map<std::string, std::string>::iterator it = m.begin();
    auto it = m.begin();

	return 0;
}
#include<map>
typedef std::map<std::string, std::string> Map;
int main()
{
	// auto 实际价值 简化代码,类型很长时,可以考虑自动推导
	Map m{ { "apple", "苹果" }, { "orange","橙子" },{"pear","梨"} };
	Map::iterator it = m.begin();

	return 0;
}typedef char* pstring;
int main()
{
const pstring p1; // 编译成功还是失败?
const pstring* p2; // 编译成功还是失败?
return 0;
}答案是第一个编译错误,第二个编译成功。
可能有小伙伴们认为第一个是const char* p1,但其实是char* const p1。const修饰的是p1,const变量必须要初始化,并且只有一次初始化的机会。
7.2 auto简介
int TestAuto()
{
return 10;
}
int main()
{
int a = 10;
auto b = a;
auto c = 'a';
auto d = TestAuto();
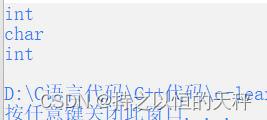
cout << typeid(b).name() << endl;
cout << typeid(c).name() << endl;
cout << typeid(d).name() << endl;
//auto e; 无法通过编译,使用auto定义变量时必须对其进行初始化
return 0;
}
注意:
7.3 auto的使用规则
void TestAuto()
{
    auto a = 1, b = 2;
    auto c = 3, d = 4.0;  // 该行代码会编译失败,因为c和d的初始化表达式类型不同
}
8.4 auto不能推导的场景
1.auto不能作为函数的参数
// 此处代码编译失败,auto不能作为形参类型,因为编译器无法对a的实际类型进行推导
void TestAuto(auto a)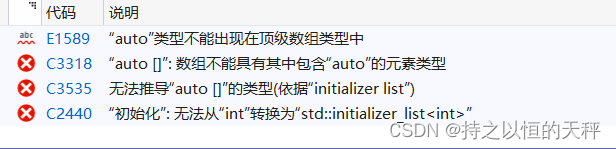
{}2.auto不能直接用来声明数组
void TestAuto()
{
    int a[] = {1,2,3};
    auto b[] = {4,5,6};
}
8.范围for循环
8.1 范围for循环的用法
int array[] = { 1, 2, 3, 4, 5,6,6,4 };
for (int i = 0; i < sizeof(array) / sizeof(int); ++i)
{
	cout << array[i] << " ";
}
cout << endl;int main()
{
//TestFor();
//自动依次取数组中数据赋值给e对象,自动判断结束
int array[] = { 1, 2, 3, 4, 5 };
for (auto& e : array)
{
e *= 2;
cout << e << " ";
}
cout << endl;
for (auto x : array)
{
cout << x << " ";
}
cout << endl;
return 0;
}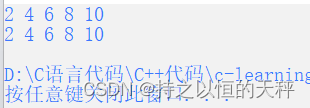
第二段代码的结果可能有小伙伴们不知道是怎么回事,原因是使用引用会把数组里的每个元素都改成了别名e,*2之后数组的数据也改变了。不加引用的话,第二段代码的输出结果还是原本的数据
8.2 范围for循环的使用条件
9.指针空值nullptr(C++11)
9.1 C++98中的指针空值
void TestPtr()
{
int* p1 = NULL;
int* p2 = 0;
// ……
}#ifndef NULL
#ifdef __cplusplus
#define NULL 0
#else
#define NULL ((void *)0)
#endif
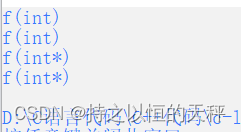
#endifvoid f(int)
{
cout<<"f(int)"<<endl;
}
void f(int*)
{
cout<<"f(int*)"<<endl;
}
int main()
{
f(0);
f(NULL);
f(nullptr);
f((int*)NULL);
return 0;
}
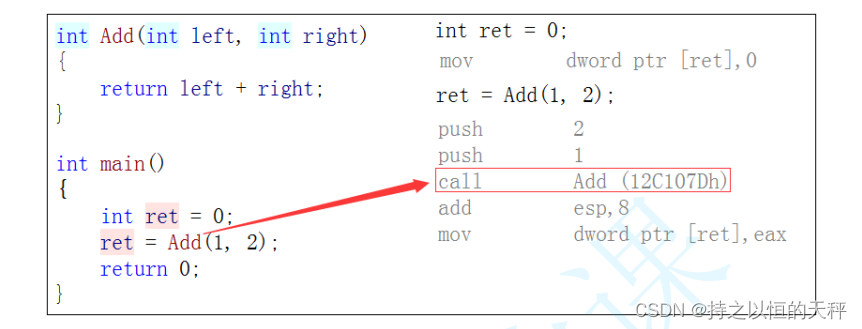
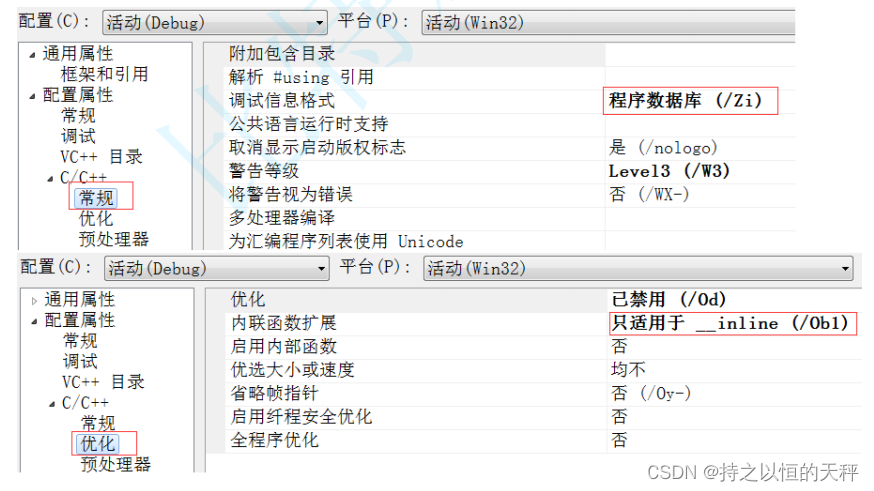
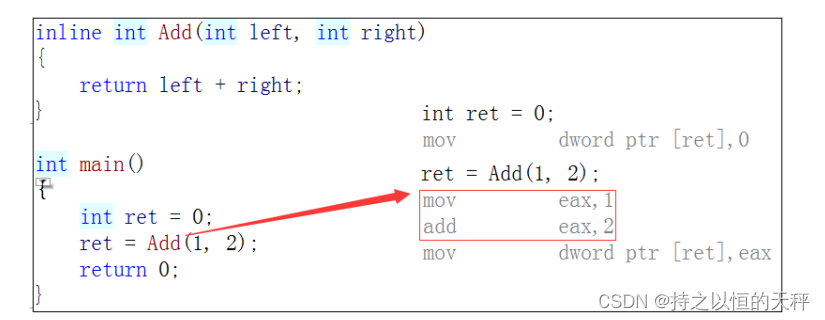
10.内联函数
在讲内联函数之前,我们先看一下宏的优缺点。因为宏函数与内联函数相似。下面是宏函数的写法
//错误写法
//#define ADD(x,y) (x+y);
//#define ADD(x,y) (x+y)
//#define ADD(x,y) x+y

//正确写法
#define ADD(x,y) ((x)+(y))
inline int Add(int x, int y)
{
	return x + y;
}

int main()
{
	ADD(1, 2);
	printf("%d\n", ADD(1, 2));
	printf("%d\n", ADD(1, 2)*3);  //对ADD函数不加括号的话,结果为7,因为编译器会把1给x,y是2*3  ADD(x,y) x+y							  //加括号结果是9  ADD(x,y) (x+y)

	return 0;
}10.1 概念