1.IoC本质
IoC(Inversion of Control,控制反转) 是Spring框架的灵魂,它颠覆了传统编程中“谁用谁造”的逻辑。简单来说,IoC就是把对象创建和管理的控制权从程序员手中“反转”给一个外部容器,让代码更灵活、更松散。
在生活中,IoC的影子无处不在。比如你去电影院看电影,传统方式是你自己带投影仪、幕布、音响,忙得焦头烂额;而现在,你买张票,影院把一切准备好,你只管享受。IoC就像这个“影院”,它接管了资源的准备工作,你只负责使用。
在编程中,传统方式是你手动new对象、管理依赖;而IoC下,容器替你完成这些,控制权反转,程序员从“主动干活”变成“被动接收”。
2.类Bean的存储
2.1存储的方式
在之前的⼊⻔案例中,要把某个对象交给IOC容器管理,需要在类上添加⼀个注解:@Component,而Spring框架为了更好的服务web应⽤程序, 提供了更丰富的注解(五大类注解)。
类注解用于标记一个类,表示它将被IoC容器管理,成为一个“Bean”(Spring中受管理的对象)。常见的类注解包括:
@Controller:用于Web层,表示这是一个控制器类,负责处理用户请求。@Service:用于业务逻辑层,表示这是一个服务类,封装核心业务逻辑。@Repository:用于数据访问层,表示这是一个数据操作类,通常与数据库交互。@Configuration:用于配置类,通常定义Bean或配置Spring的运行环境。@Component:通用的基础注解,适用于任何需要被容器管理的类,是其他类注解的“父类”。
这些注解本质上告诉Spring:“嘿,这个类交给你管吧!”容器会根据注解自动创建实例并管理其生命周期。
除了类注解,Spring还提供了方法注解"@Bean",通常用在@Configuration标记的配置类中。它允许你在方法中自定义Bean的创建逻辑。
这里,@Bean告诉Spring:“这个方法会返回一个Bean,帮我管理它。”容器会调用这些方法,创建并组装对象。
2.2 获取Bean
举例:
在Controller类上添加@Controller:该类放入IoC容器中,成为Bean
@Controller
public class UserController {
    public void doUserController(){
        System.out.println("douserController...");
    }
}
从容器中获取Bean:
@SpringBootApplication
public class Test1Application {
    public static void main(String[] args) {

        // 获取上下文
        ApplicationContext context = SpringApplication.run(Test1Application.class, args);
        //获取UserControler的Bean
        UserController userController = context.getBean(UserController.class);
        userController.doUserController();//使用UserController的Bean方法
    }

}
ApplicationContext 翻译过来就是: Spring 上下文
因为对象都交给 Spring 管理了,所以获取对象要从 Spring 中获取,那么就得先得到 Spring 的上下文
关于上下⽂的概念:
上学时, 阅读理解经常会这样问: 根据上下⽂, 说⼀下你对XX的理解
在计算机领域, 上下⽂这个概念, 咱们最早是在学习线程时了解到过, ⽐如我们应⽤进⾏线程切换的时候,切换前都会把线程的状态信息暂时储存起来,这⾥的上下⽂就包括了当前线程的信息,等下次该线程⼜得到CPU时间的时候, 从上下⽂中拿到线程上次运⾏的信息这个上下⽂, 就是指当前的运⾏环境, 也可以看作是⼀个容器, 容器⾥存了很多内容, 这些内容是当前运⾏的环境
ApplicationContext 也提供了其他获取bean的⽅式, ApplicationContext 获取bean对象的功能, 是⽗类BeanFactory提供的功能.
public interface BeanFactory {
	//以上省略...

	// 1. 根据bean名称获取bean
	Object getBean(String var1) throws BeansException;
	// 2. 根据bean名称和类型获取bean
	<T> T getBean(String var1, Class<T> var2) throws BeansException;
	// 3. 按bean名称和构造函数参数动态创建bean,只适⽤于具有原型(prototype)作⽤域的bean
	Object getBean(String var1, Object... var2) throws BeansException;
	// 4. 根据类型获取bean
	<T> T getBean(Class<T> var1) throws BeansException;
	// 5. 按bean类型和构造函数参数动态创建bean, 只适⽤于具有原型(prototype)作⽤域的bean
	<T> T getBean(Class<T> var1, Object... var2) throws BeansException; 15

	//以下省略...
 }
常⽤的是上述1,2,4种, 这三种⽅式,获取到的bean是⼀样的
其中1,2种都涉及到根据名称来获取对象. bean的名称是什么呢?
Spring中,bean是Spring框架在运⾏时管理的对象, Spring会给管理的对象起⼀个名字.
⽐如学校管理学⽣, 会给每个学⽣分配⼀个学号, 根据学号, 就可以找到对应的学⽣.Spring也是如此, 给每个对象起⼀个名字, 根据Bean的名称(BeanId)就可以获取到对应的对象.
Bean 命名约定,我们看下官方文档的说明:
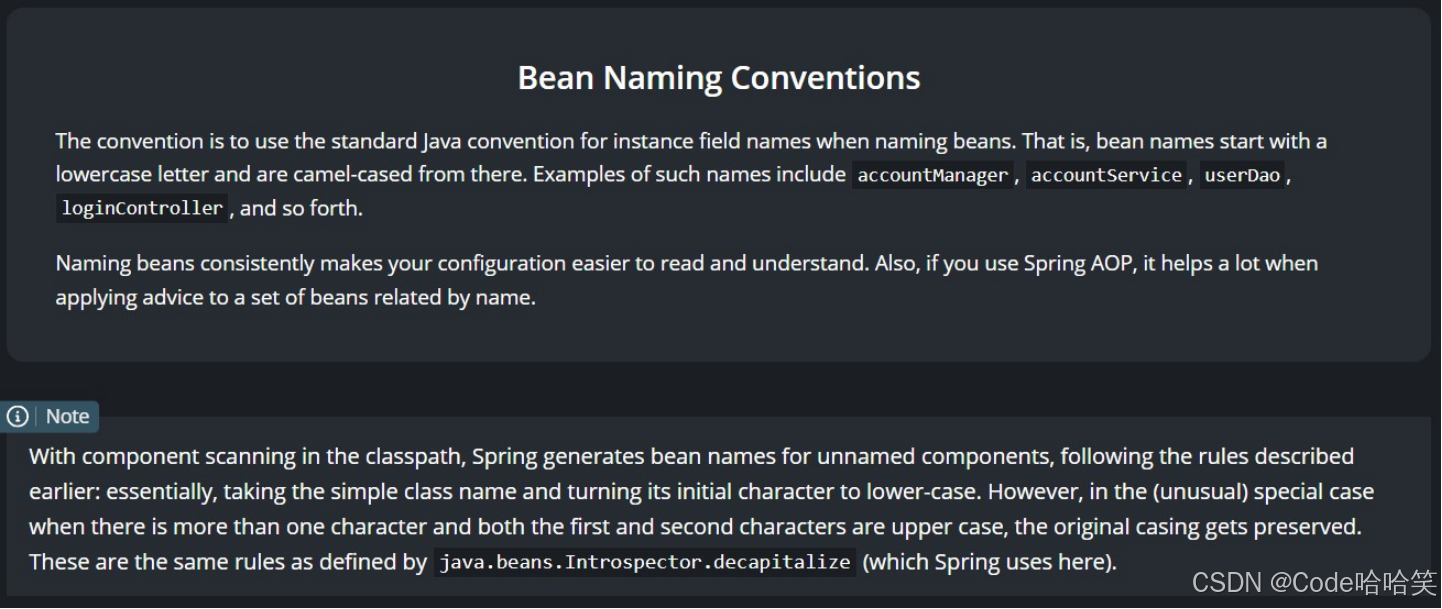
程序开发⼈员不需要为bean指定名称(BeanId), 如果没有显式的提供名称(BeanId),Spring容器将为该 bean⽣成唯⼀的名称.
命名约定使⽤Java标准约定作为实例字段名. 也就是说,bean名称以⼩写字⺟开头,然后使⽤驼峰式⼤⼩写.
⽐如:
类名: UserController, Bean的名称为: userController
类名: AccountManager, Bean的名称为: accountManager类名: AccountService, Bean的名称为: accountService
也有⼀些特殊情况, 当有多个字符并且第⼀个和第⼆个字符都是⼤写时, 将保留原始的⼤⼩写. 这些规则与java.beans.Introspector.decapitalize (Spring在这⾥使⽤的)定义的规则相同.
⽐如:
类名: UController, Bean的名称为: UController类名: AManager, Bean的名称为: AManager
根据命名规则来获取Bean:
@SpringBootApplication
public class Test1Application {

    public static void main(String[] args) {

        // 获取上下文
        ApplicationContext context = SpringApplication.run(Test1Application.class, args);

        //从Spring上下⽂中获取对象
        //根据bean类型, 从Spring上下⽂中获取对象
        UserController userController1 = context.getBean(UserController.class);
        //根据bean名称, 从Spring上下⽂中获取对象
        UserController userController2 = (UserController) context.getBean("userController");
        //根据bean类型+名称, 从Spring上下⽂中获取对象
        UserController userController3 = context.getBean("userController",UserController.class);

		//执行Bean的方法
        userController1.doUserController();
        userController2.doUserController();
        userController3.doUserController();

    }

}
运行结果:
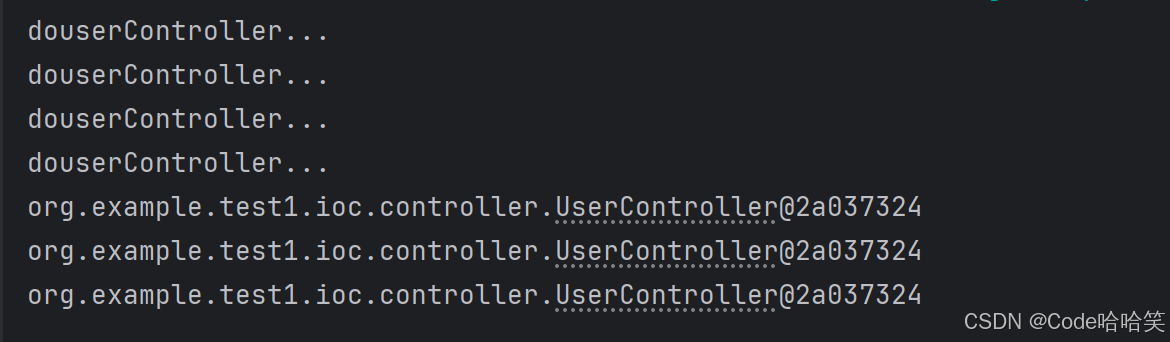
从上可以得知,打印的地址是相同的,不同方式获取到的Bean是相同的。
地址⼀样, 说明对象是⼀个
获取bean对象, 是⽗类BeanFactory提供的功能
ApplicationContext VS BeanFactory(常见面试题):
- 继承关系和功能方面来说:Spring 容器有两个顶级的接⼝:BeanFactory 和ApplicationContext。其中 BeanFactory 提供了基础的访问容器的能⼒,⽽ ApplicationContext 属于 BeanFactory 的⼦类,它除了继承了 BeanFactory 的所有功能之外,它还拥有独特的特性,还添加了对国际化⽀持、资源访问⽀持、以及事件传播等⽅⾯的⽀持.
- 从性能方面来说:ApplicationContext 是⼀次性加载并初始化所有的 Bean 对象,⽽ BeanFactory 是需要那个才去加载那个,因此更加轻量. (空间换时间)
2.3 类注解–举例
2.3.1 @Controller注解
在Controller类上添加@Controller:该类放入IoC容器中,成为Bean
@Controller
public class UserController {
    public void doUserController(){
        System.out.println("douserController...");
    }
}
如何观察这个对象已经存在Spring容器当中了呢? 接下来从Spring容器中获取对象
@SpringBootApplication
public class Test1Application {
    public static void main(String[] args) {

        // 获取上下文
        ApplicationContext context = SpringApplication.run(Test1Application.class, args);
        //获取UserControler的Bean
        UserController userController = context.getBean(UserController.class);
        userController.doUserController();//使用UserController的Bean方法
    }

}
结果:

把@Controller注释,再次运行:
//@Controller
public class UserController {
    public void doUserController(){
        System.out.println("douserController...");
    }
}
运行时发生报错:

2.3.2 @service注解
使用 @Service 存储 bean 的代码如下所示:
@Service
public class UserService {
    public void doUserService(){
        System.out.println("doUserService...");
    }
}
从容器中获取Bean:
@SpringBootApplication
public class Test1Application {
    public static void main(String[] args) {

        // 获取上下文
        ApplicationContext context = SpringApplication.run(Test1Application.class, args);

        //获取UserServce
        UserService userService = (UserService)context.getBean("userService");
        userService.doUserService();

}
运行后的结果:

如果把@Service注解,运行时会报错
2.3.3 @Repository
使用 @Repository 存储 bean 的代码如下所示:
@Repository
public class UserRepository {
    public void daoUserRepository(){
        System.out.println("doUserRepository...");
    }
}
从容器中获取Bean:
@SpringBootApplication
public class Test1Application {
    public static void main(String[] args) {

        // 获取上下文
        ApplicationContext context = SpringApplication.run(Test1Application.class, args);

        //获取UserRepository
        UserRepository userRepository = (UserRepository)context.getBean("userRepository");
        userRepository.daoUserRepository();

    }

}
运行结果:

把@Repository注解,运行发生报错
2.3.4 @Component
使用 @Component 存储 bean 的代码如下所示:
@Component
public class UserComponent {
    public void doUserComponent(){
        System.out.println("doUserComponent...");
    }
}
从容器中获取Bean:
@SpringBootApplication
public class Test1Application {
    public static void main(String[] args) {

        // 获取上下文
        ApplicationContext context = SpringApplication.run(Test1Application.class, args);

        //获取UserComponent
        UserComponent userComponent = (UserComponent)context.getBean("userComponent");
        userComponent.doUserComponent();
    }
}
运行结果:

2.3.5 @Configuration
使用 @Configuration存储 bean 的代码如下所示:
@Configuration
public class UserConfiguration {
    public void doUserConfiguration(){
        System.out.println("doUserConfiguration...");
    }
}
从容器中获取Bean:
@SpringBootApplication
public class Test1Application {
    public static void main(String[] args) {

        // 获取上下文
        ApplicationContext context = SpringApplication.run(Test1Application.class, args);

        //获取UserConfiguration
        UserConfiguration userConfiguration = (UserConfiguration)context.getBean("userConfiguration");
        userConfiguration.doUserConfiguration();
    }
}
运行结果:

把@Configuration注解,运行时会发生报错
3.为什么有多个类注解?
这与应用分层相关联,后端会有很多功能的类,为了让让程序员看到类注解之后,就能直接了解当前类的⽤途,就设置了很多个类注解。另外,类注解也会限制类功能。
•@Controller:控制层, 接收请求, 对请求进⾏处理, 并进⾏响应.
•@Servie:业务逻辑层, 处理具体的业务逻辑.
•@Repository:数据访问层,也称为持久层. 负责数据访问操作
•@Configuration:配置层. 处理项⽬中的⼀些配置信息.
• @Component:通用的基础注解,适用于任何需要被容器管理的类,是其他类注解的“父类”。
这和每个省/市都有⾃⼰的⻋牌号是⼀样的.
⻋牌号都是唯⼀的, 标识⼀个⻋辆的. 但是为什么还需要设置不同的⻋牌开头呢.
⽐如陕西的⻋牌号就是:陕X:XXXXXX,北京的⻋牌号:京X:XXXXXX,甚⾄⼀个省不同的县区也是不同的,⽐如西安就是,陕A:XXXXX,咸阳:陕B:XXXXXX,宝鸡,陕C:XXXXXX,⼀样.
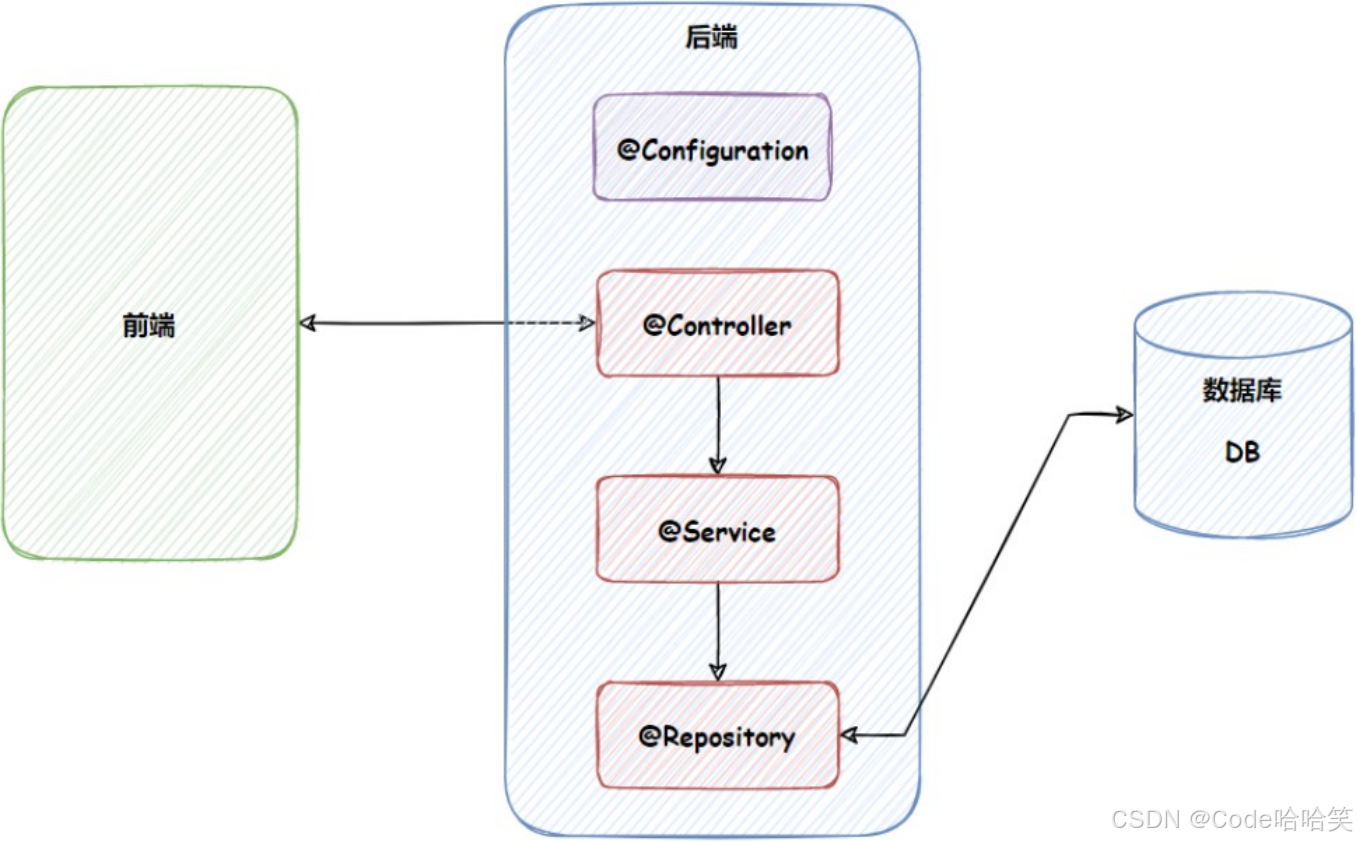
这样做的好处除了可以节约号码之外,更重要的作⽤是可以直观的标识⼀辆⻋的归属地.程序的应⽤分层,调⽤流程如下:
查看@Controller、@Service、Configuration、@Repository 注解的源码:
@Controller:
@Target(ElementType.TYPE)
@Retention(RetentionPolicy.RUNTIME)
@Documented
@Component
public @interface Controller {

	@AliasFor(annotation = Component.class)
	String value() default "";

}
@Service:
@Target(ElementType.TYPE)
@Retention(RetentionPolicy.RUNTIME)
@Documented
@Component
public @interface Service {

	@AliasFor(annotation = Component.class)
	String value() default "";

}
Configuration:
@Target(ElementType.TYPE)
@Retention(RetentionPolicy.RUNTIME)
@Documented
@Component
public @interface Repository {

	@AliasFor(annotation = Component.class)
	String value() default "";

}
@Repository :
@Target(ElementType.TYPE)
@Retention(RetentionPolicy.RUNTIME)
@Documented
@Component
public @interface Configuration {

	@AliasFor(annotation = Component.class)
	String value() default "";

	boolean proxyBeanMethods() default true;

}
进行对比:
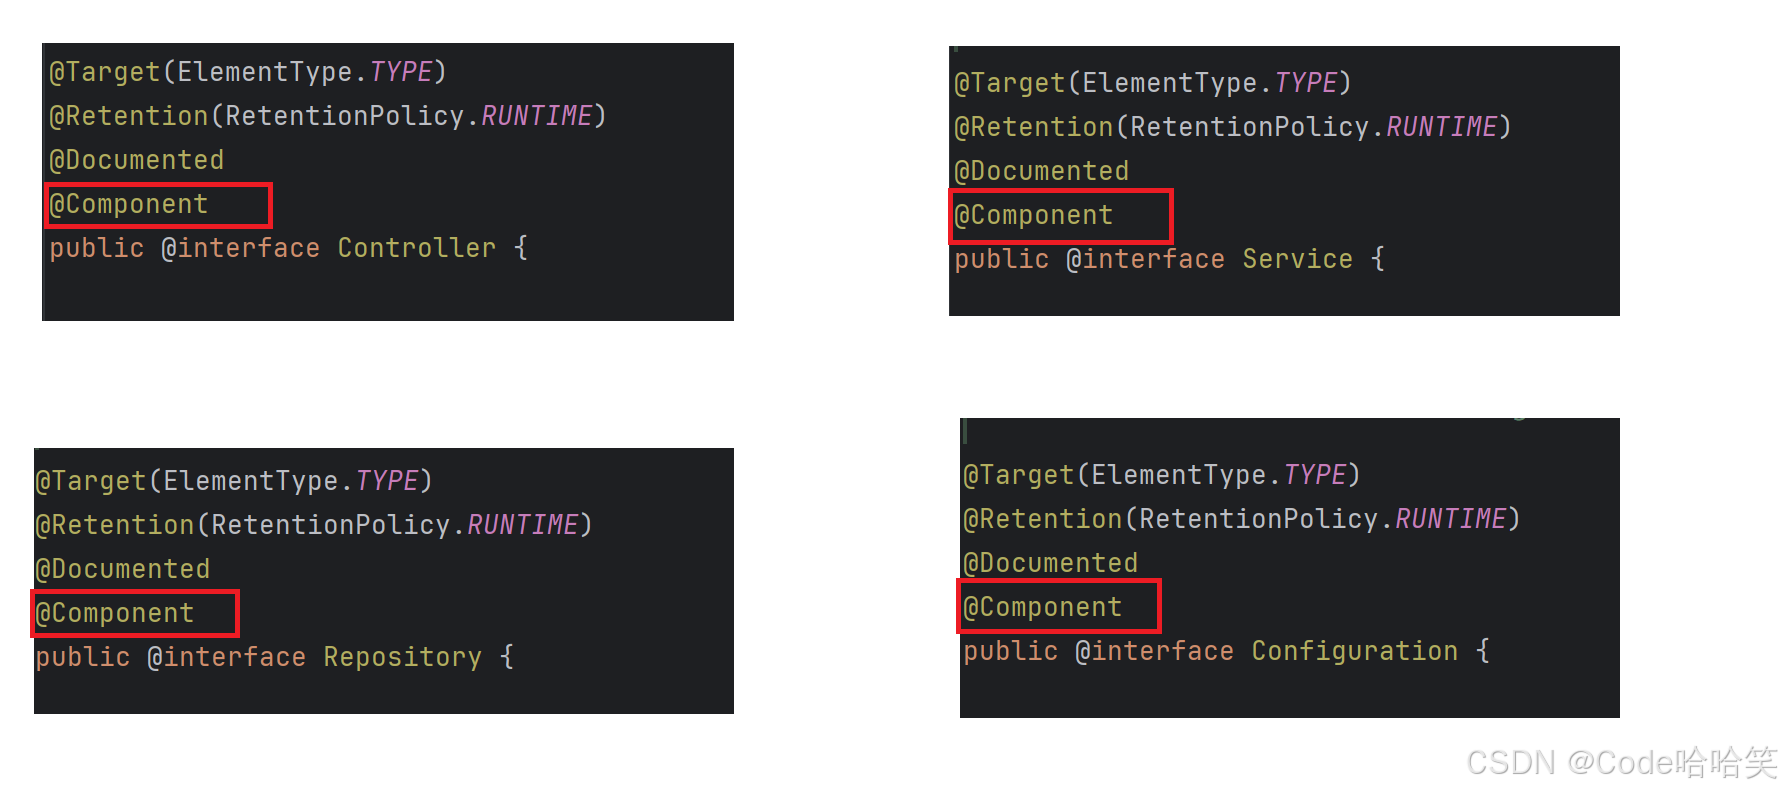
其实这些注解⾥⾯都有⼀个注解@Component,说明它们本⾝就是属于@Component的"⼦类".
@Component是⼀个元注解,也就是说可以注解其他类注解,如@Controller、@Service、Configuration、@Repository 等. 这些注解被称为@Component的衍⽣注解。
@Controller、@Service和 @Repository ⽤于更具体的⽤例(分别在控制层, 业务逻辑层, 持久化层), 在开发过程中,如果你要在业务逻辑层使⽤ @Component 或@Service,显然@Service是更好的选择
比如杯⼦有喝⽔杯, 刷⽛杯等, 但是我们更倾向于在⽇常喝⽔时使⽤⽔杯, 洗漱时使⽤刷⽛杯.
如果把与前端交互的Controller层的@Controller的注解换成@Service会怎么样呢?
示例:
@Controller
@RequestMapping("basic")
public class BasicController {

    @RequestMapping("/test")
    @ResponseBody
    public String test(){
        return "@Service";
    }

}
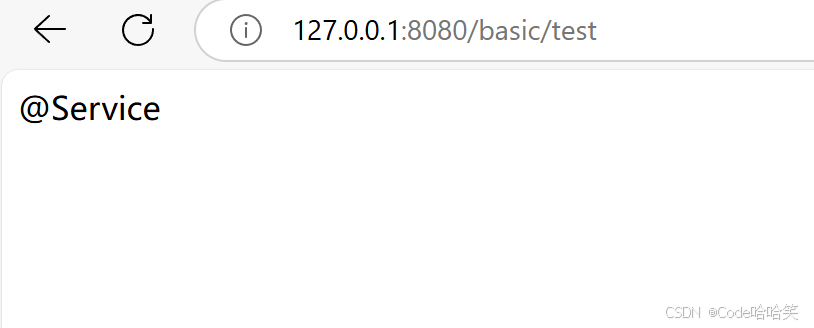
使用@Controller注解,运行后的结果:
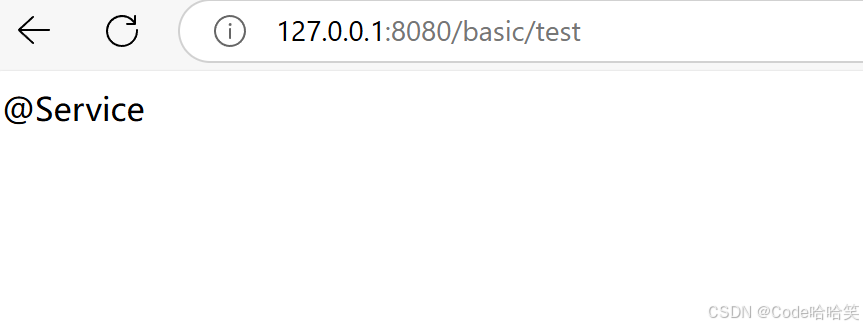
错误示例:
//@Controller
@Service
@RequestMapping("basic")
public class BasicController {

    @RequestMapping("/test")
    @ResponseBody
    public String test(){
        return "@Service";
    }
}
使用@Service注解,运行后的结果:
不推荐这样做
尽管这种方式“能用”,但在实际开发中不建议将 @Service 用于控制器层,主要有以下原因:
- 职责混乱:@Service 的语义是为业务逻辑层设计,处理 HTTP请求是 @Controller 的职责。用 @Service 替代 @Controller 会让代码意图不清晰,违背分层架构原则。
- 潜在风险: 如果项目中禁用了某些默认扫描或调整了 Spring MVC 的配置(如自定义 RequestMappingHandlerMapping),这种“意外支持”可能失效,导致请求无法处理。
- 可读性与维护性: 其他开发者看到 @Service 上的 @RequestMapping,会感到困惑,增加理解和维护成本。
正确的做法是使用 @Controller 或 @RestController(后者是 @Controller 和 @ResponseBody 的组合)