基于win 10 打造K8S应用开发环境(wsl & kind)
一、wsl子系统安装
1.1 确认windows系统版本
cmd/powershell

或者win + r 运行winver
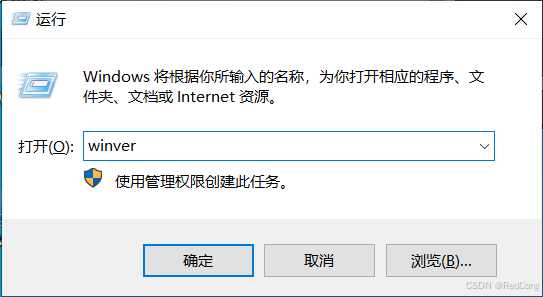
操作系统要>= 19044

1.2 开启wsl功能
控制面板 -> 程序 -> 启用或关闭Windows功能
开启适用于Linux的windows子系统 & 虚拟机平台
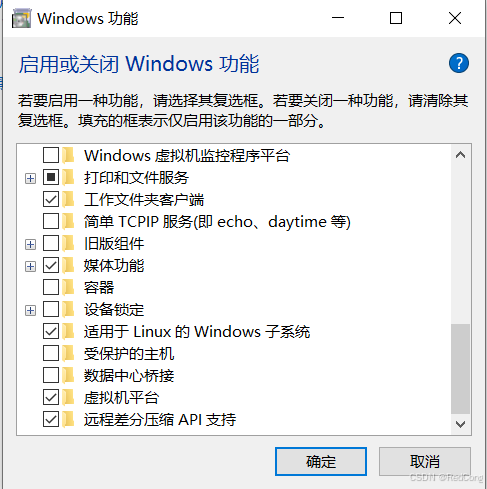
确认完成后,电脑会重启。
1.3 wsl配置
wsl
适用于 Linux 的 Windows 子系统没有已安装的分发版。
可以通过访问 Microsoft Store 来安装分发版:
https://aka.ms/wslstore

#更改新分发的默认安装版本为2
wsl --set-default-version 2
#WSL 2 内核更新
wsl --update

#获得有效分发列表
wsl --list --online

#安装Ubuntu
wsl --install -d Ubuntu
启动ubuntu
C:\WINDOWS\system32>wsl
Provisioning the new WSL instance Ubuntu
This might take a while...
Create a default Unix user account: test
New password:
Retype new password:
passwd: password updated successfully
To run a command as administrator (user "root"), use "sudo <command>".
See "man sudo_root" for details.

Welcome to Ubuntu 24.04.2 LTS (GNU/Linux 5.15.167.4-microsoft-standard-WSL2 x86_64)

 * Documentation:  https://help.ubuntu.com
 * Management:     https://landscape.canonical.com
 * Support:        https://ubuntu.com/pro

 System information as of Fri Apr 11 10:27:41 CST 2025

  System load:  0.57                Processes:             34
  Usage of /:   0.1% of 1006.85GB   Users logged in:       0
  Memory usage: 3%                  IPv4 address for eth0: 192.168.137.113
  Swap usage:   0%


This message is shown once a day. To disable it please create the
/home/test/.hushlogin file.
1.4 解决在WSL上虚拟机无法连通外网问题
在 WSL(Windows Subsystem for Linux)上使用 NAT(网络地址转换)模式时,虚拟机无法连通外网是一个常见问题
检查DNS:
DNS 配置问题会导致无法连接外网。可以尝试以下步骤:
1.备份并删除自动生成的文件:
sudo cp /etc/wsl.conf /etc/wsl.conf.bk
sudo cp /etc/resolv.conf /etc/resolv.conf.bk
sudo rm /etc/resolv.conf || true
sudo rm /etc/wsl.conf || true
2.重新创建配置文件:
sudo bash -c 'cat <<EOF > /etc/wsl.conf
[network]
generateResolvConf = false
EOF'
3.重新创建 DNS 配置:
sudo bash -c 'cat <<EOF > /etc/resolv.conf
nameserver 8.8.8.8
nameserver 8.8.4.4
EOF'
1.5 wsl命令解释
获取帮助文档
wsl --help
版权所有(c) Microsoft Corporation。保留所有权利。

用法: wsl.exe [Argument] [Options...] [CommandLine]

运行 Linux 二进制文件的参数:

    如果未提供命令行,wsl.exe 将启动默认 shell。

    --exec, -e <CommandLine>
        在不使用默认 Linux Shell 的情况下执行指定的命令。

    --
        按原样传递其余命令行。

选项:
    --cd <Directory>
        将指定目录设置为当前工作目录。
        如果使用了 ~,则将使用 Linux 用户的主页路径。如果路径
        以 / 字符开头,将被解释为绝对 Linux 路径。
        否则,该值一定是绝对 Windows 路径。

    --distribution, -d <Distro>
        运行指定分发。

    --user, -u <UserName>
        以指定用户身份运行。

管理适用于 Linux 的 Windows 子系统的参数:

    --help
        显示用法信息。

    --install [选项]
        安装额外的适用于 Linux 的 Windows 子系统分发。
         要获得有效分发列表,请使用“wsl --list --online”。

        选项:
            --distribution, -d [参数]
                按名称下载并安装分发。

                参数:
                    有效分发名称(不区分大小写)。

                示例:
                    wsl --install -d Ubuntu
                    wsl --install --distribution Debian

    --set-default-version <Version>
        更改新分发的默认安装版本。

    --shutdown
         立即终止所有运行的分发及 WSL 2
        轻型实用工具虚拟机。

    --status
        显示适用于 Linux 的 Windows 子系统的状态。

    --update [Options]
        如果未指定任何选项,则将 WSL 2 内核更新
        为最新版本。

        选项:
            --rollback
                恢复为 WSL 2 内核的先前版本。

            --inbox
                仅更新收件箱 WSL 2 内核。不要从 Microsoft Store 下载 WSL。

            --web-download
                从 Internet 而不是 Microsoft Store 下载最新版本的 WSL。

用于管理适用于 Linux 的 Windows 子系统中的分发的参数:

    --export <Distro> <FileName>
        将分发导出到 tar 文件。
        对于标准输出,文件名可以是 -。

    --import <Distro> <InstallLocation> <FileName> [Options]
        将指定的 tar 文件作为新分发导入。
        对于标准输入,文件名可以是 -。

        选项:
            --version <Version>
                指定要用于新分发的版本。

    --list, -l [Options]
        列出分发。

        选项:
            --all
                列出所有分发,包括
                当前正在安装或卸载的分发。

            --running
                仅列出当前正在运行的分发。

            --quiet, -q
                仅显示分发名称。

            --verbose, -v
                显示所有分发的详细信息。

            --online, -o
                显示使用“wsl --install”进行安装的可用分发列表。

    --set-default, -s <分发>
        将分发设置为默认值。

    --set-version <分发> <版本>
        更改指定分发的版本。

    --terminate, -t <分发>
        终止指定的分发。

    --unregister <分发>
        注销分发并删除根文件系统。
更改新分发的默认安装版本为2
wsl --set-default-version 2
WSL 2 内核更新
wsl --update
获得有效分发列表
wsl --list --online
安装额外的适用于 Linux 的 Windows 子系统分发Ubuntu
wsl --install -d Ubuntu
运行指定分发。
wsl -d Ubuntu
运行默认的分发
wsl
列出分发并显示版本
wsl -l -v
将Ubuntu分发设置为默认值
wsl --set-default Ubuntu
终止指定的分发。将Runing变成Stopped
wsl --terminate Ubuntu
注销分发并删除根文件系统。
wsl --unregister Ubuntu
显示适用于 Linux 的 Windows 子系统的状态。
wsl --status
默认分发: Ubuntu
默认版本: 2
以指定用户身份运行
wsl --user root
root@DESKTOP-KCURLDV:/mnt/c/Users/Administrator#
二、安装Docker Desktop
2.1 下载docker Desktop
https://desktop.docker.com/win/main/amd64/Docker%20Desktop%20Installer.exe?utm_source=docker&utm_medium=webreferral&utm_campaign=dd-smartbutton&utm_location=module&_gl=1*5ht9ce*_gcl_au*MjQwMDkyNDQ0LjE3NDQxMTQzMzg.*_ga*MTM1ODM2MjU5NS4xNzQ0MTE0MzEx*_ga_XJWPQMJYHQ*MTc0NDExNDMxMS4xLjEuMTc0NDExNjM4OC41MC4wLjA.
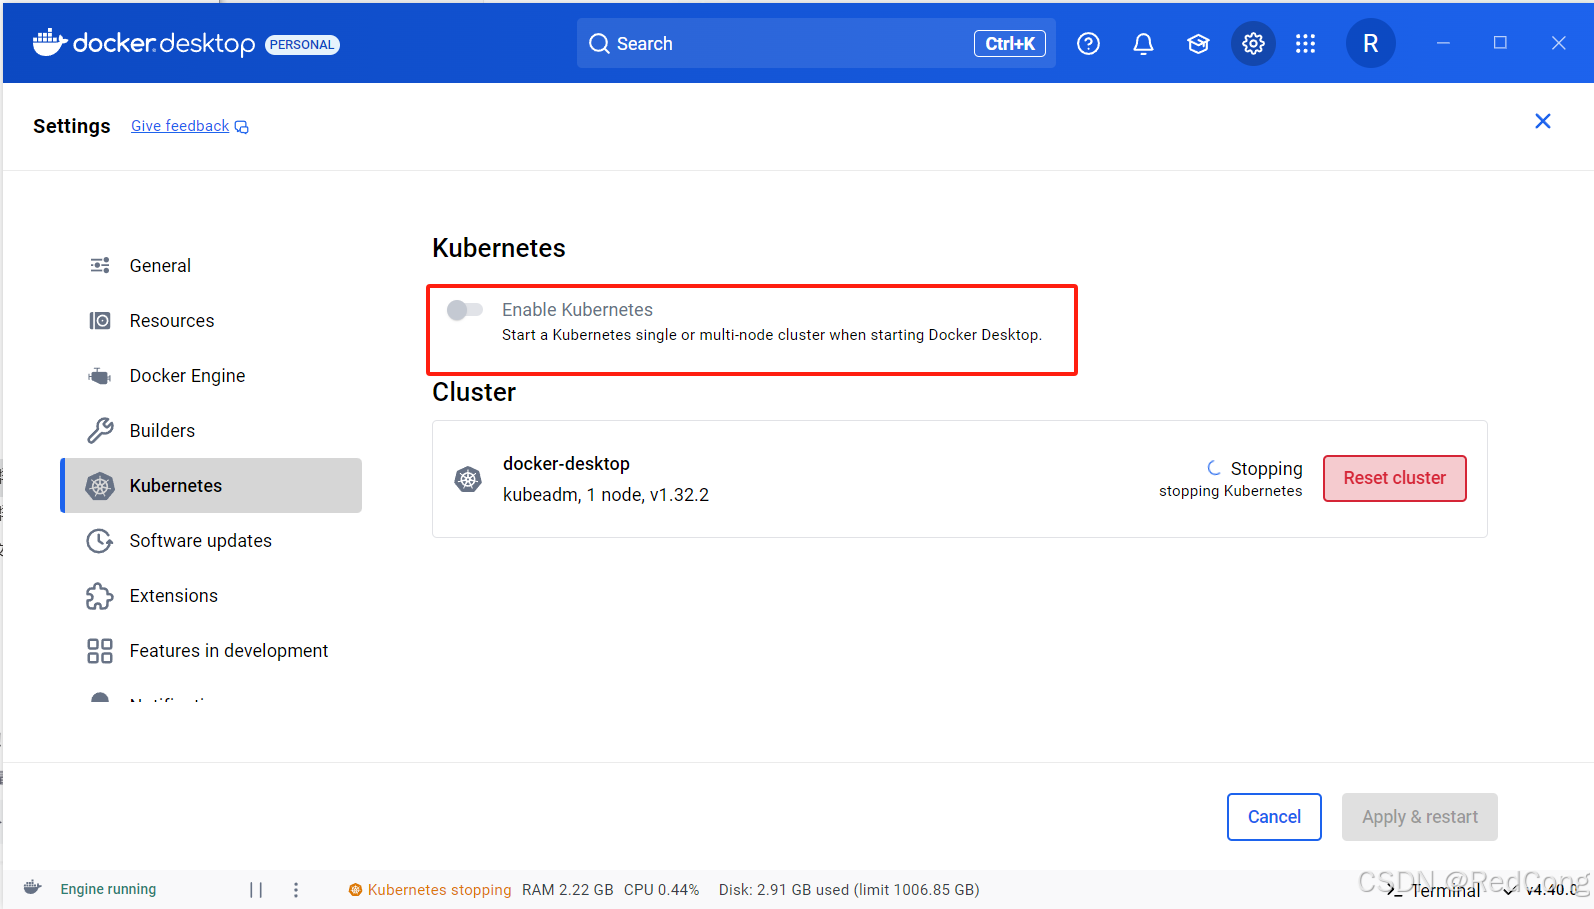
2.2 安装以及设置
一步步安装就行。
docker配置如下图所示


三、Golang安装
功能:可以安装多个golang版本,可以切换golang版本
root@DESKTOP-KCURLDV:~# bash < <(curl -s -S -L https://raw.githubusercontent.com/moovweb/gvm/master/binscripts/gvm-installer)
Cloning from https://github.com/moovweb/gvm.git to /root/.gvm
No existing Go versions detected
ERROR: Missing requirements.
Installed GVM v1.0.22

Please restart your terminal session or to get started right away run
 `source /root/.gvm/scripts/gvm`

# source /root/.gvm/scripts/gvm
ERROR: Missing requirements.
如果不执行source /root/.gvm/scripts/gvm需要退出Ubuntu终端,再登入即可有gvm命令
# gvm version

Could not find bison

  linux: apt-get install bison

Could not find gcc

  linux: apt-get install gcc

Could not find make

  linux: apt-get install make

ERROR: Missing requirements.

# apt-get update
# apt-get install bison gcc make
# gvm version
Go Version Manager v1.0.22 installed at /root/.gvm

# gvm
Usage: gvm [command]

Description:
  GVM is the Go Version Manager

Commands:
  version    - print the gvm version number
  get        - gets the latest code (for debugging)
  use        - select a go version to use (--default to set permanently)
  diff       - view changes to Go root
  help       - display this usage text
  implode    - completely remove gvm
  install    - install go versions
  uninstall  - uninstall go versions
  cross      - install go cross compilers
  linkthis   - link this directory into GOPATH
  list       - list installed go versions
  listall    - list available versions
  alias      - manage go version aliases
  pkgset     - manage go packages sets
  pkgenv     - edit the environment for a package set
  applymod   - apply the go version in go.mod
# gvm listall

gvm gos (available)

   go1
   go1.0.1
   go1.0.2
   go1.0.3
   go1.1
   ....


# gvm install go1.19 -B
Installing go1.19 from binary source
# gvm install go1.20.3 -B
Installing go1.20.3 from binary source

# gvm use go1.19
Now using version go1.19

# gvm list
gvm gos (installed)

=> go1.19
   go1.20.3
# gvm use go1.20.3
# gvm list

gvm gos (installed)

   go1.19
=> go1.20.3
四、kubectl安装
启动Docker 并指定wsl为Ubuntu后,会在Ubuntu安装docker和kubectl命令。
如果没有kubectl命令可以手动安装
curl -LO "https://dl.k8s.io/release/$(curl -L -s https://dl.k8s.io/release/stable.txt)/bin/linux/amd64/kubectl"
chmod +x kubectl
sudo mv kubectl /usr/local/bin
Kind 只负责创建集群(会配置好 kubeconfig)
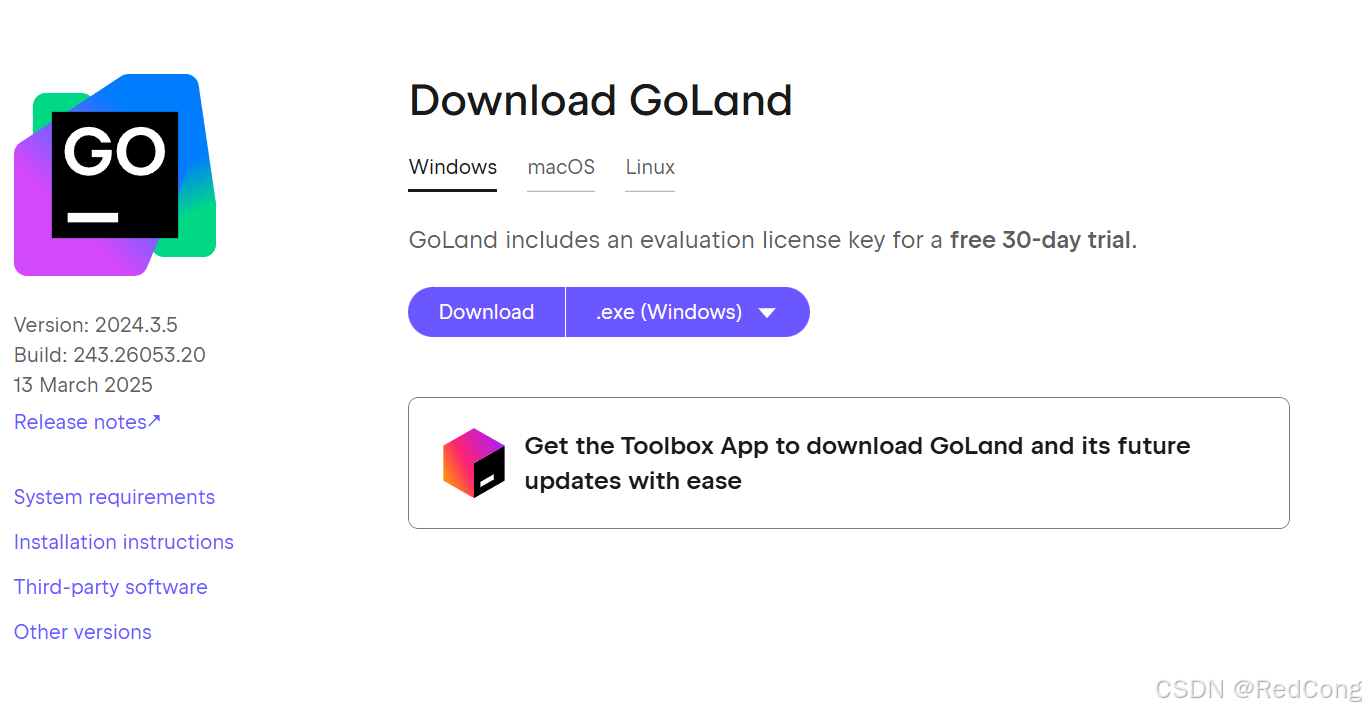
五、Golang安装下载
5.1 下载安装地址(傻瓜式)
https://www.jetbrains.com/go/download/#section=windows
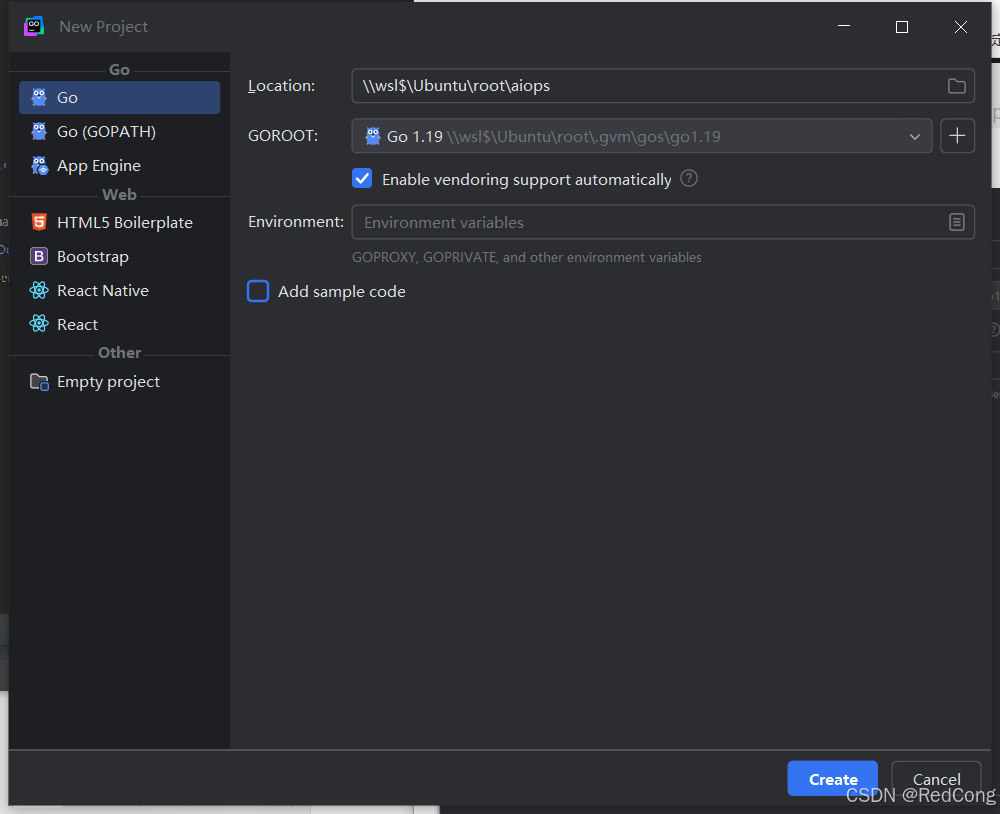
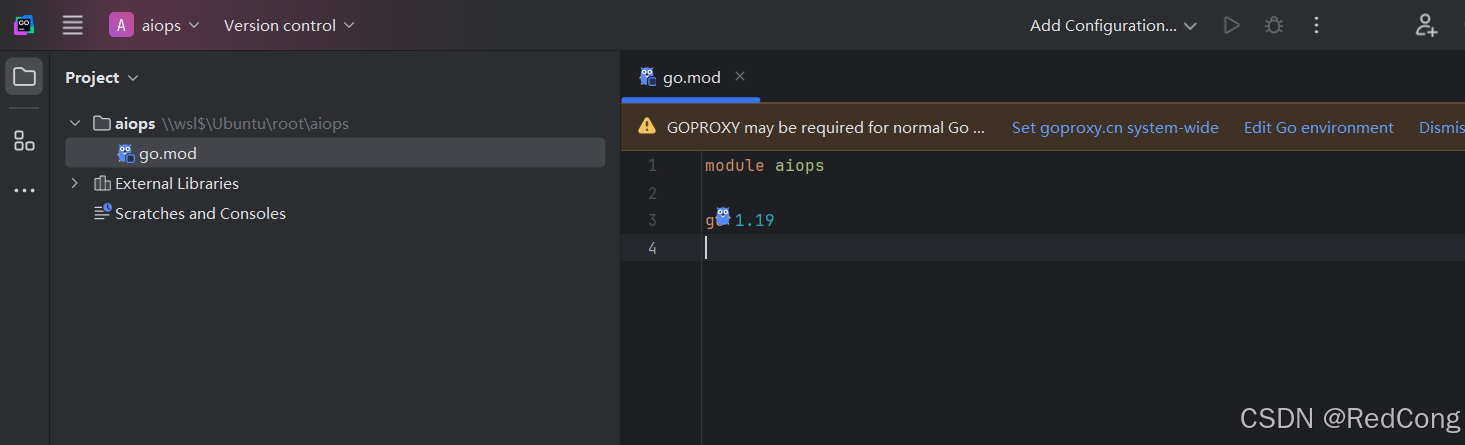
5.2 创建Project
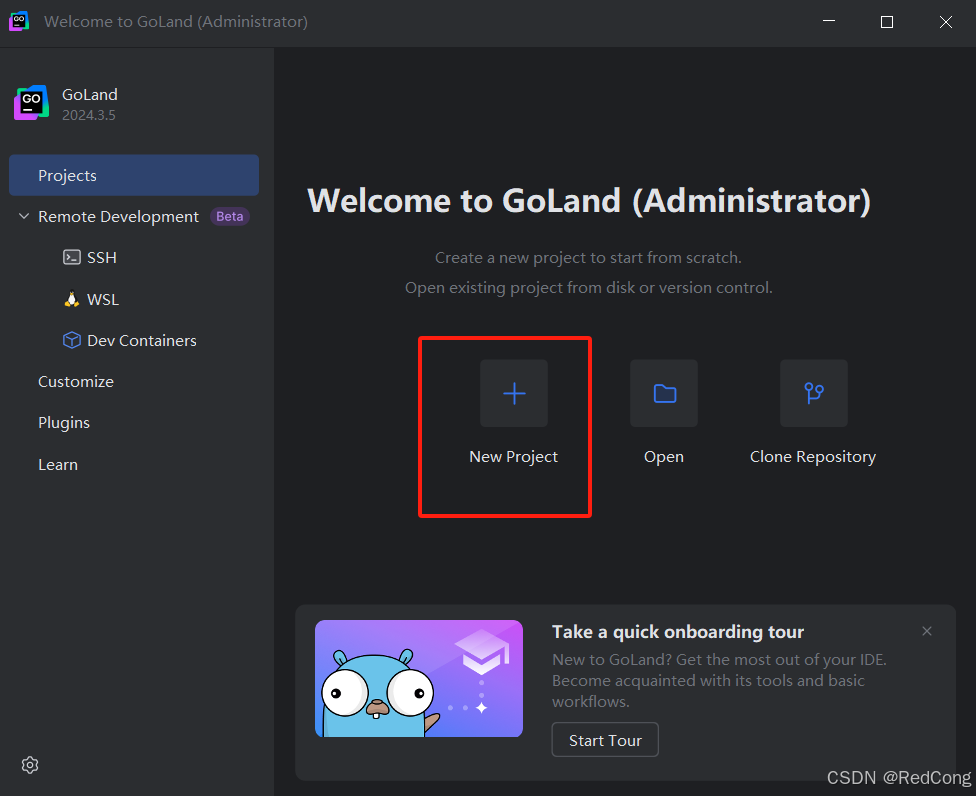
location:     \\wsl$\Ubuntu\root\aiops
GOROOT:       \\wsl$\Ubuntu\root\.gvm\gos\go1.19
5.3 无法访问\wsl$\Ubuntu\root\解决
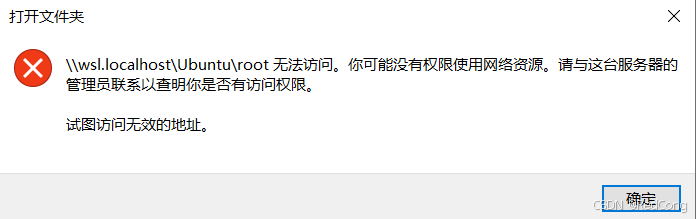
原因分析:
因此,我查找了WSL官方文档(WSL 的文件权限 | Microsoft Learn),发现其给出如下解释

即Windows访问Linux的文件的权限是由WSL分发版(如Ubuntu)的默认用户决定的,安装WSL分发版时会创建一个用户,一般会使用该用户登录,因此我们需要修改默认用户。
解决方案:
C:\Users\Administrator>ubuntu config --default-user root

C:\Users\Administrator>wsl -l -v
  NAME              STATE           VERSION
* Ubuntu            Running         2
  docker-desktop    Running         2

C:\Users\Administrator>wsl
test@DESKTOP-KCURLDV:/mnt/c/Users/Administrator$ cat /etc/wsl.conf
[boot]
systemd=true

[user]
default=test
test@DESKTOP-KCURLDV:/mnt/c/Users/Administrator$ vi /etc/wsl.conf
test@DESKTOP-KCURLDV:/mnt/c/Users/Administrator$ sudo vi /etc/wsl.conf
[boot]
systemd=true

[user]
#default=test
test@DESKTOP-KCURLDV:/mnt/c/Users/Administrator$
在终端使用如下命令将默认用户变更为root(注意:ubuntu处需要根据你安装的Linux版本改变,可用如下命令查看你的Linux发行版名称),然后使用wsl命令打开Linux终端,正常来说就会以root用户登录,同时也可以直接在Windows的资源管理器中以root身份访问Linux文件。
拥有root权限可能会对虚拟机的安全造成威胁,例如从Windows入侵Linux文件系统。因此建议在执行完相关文件上传任务后,将默认用户改为普通用户(也可以改变需要访问的文件或文件夹的权限,例如sudo chmod 777 XXX,但会相对麻烦)。
C:\Users\Administrator>wsl -l -v
  NAME              STATE           VERSION
* Ubuntu            Running         2
  docker-desktop    Running         2


如果执行以上命令后仍未变更默认用户,则可能是在Linux中使用了配置文件,使用如下命令查看并注释掉相关配置即可。(有时可能需要重启wsl)
```bash
C:\Users\Administrator>wsl --terminate Ubuntu
操作成功完成。

C:\Users\Administrator>wsl
root@DESKTOP-KCURLDV:/mnt/c/Users/Administrator#
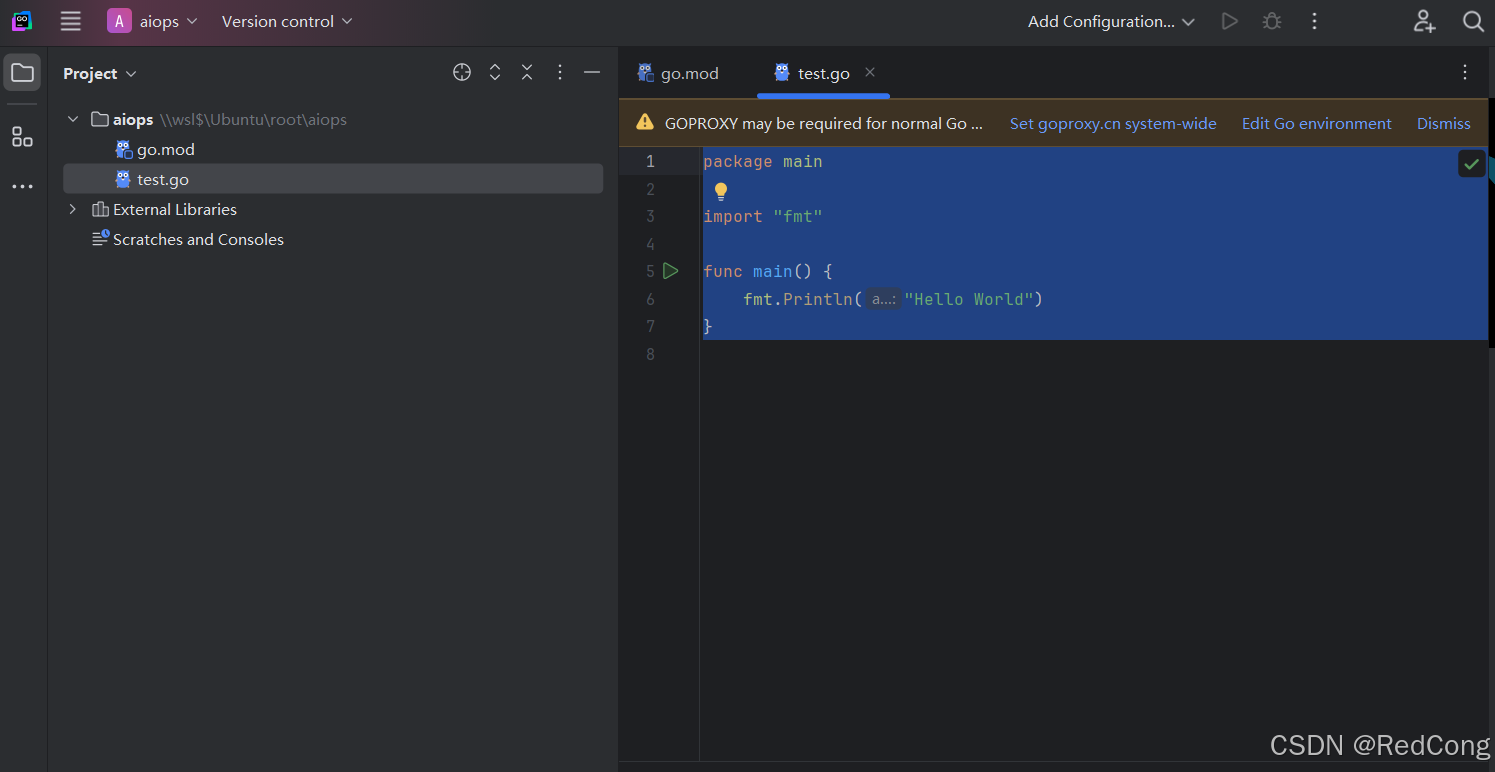
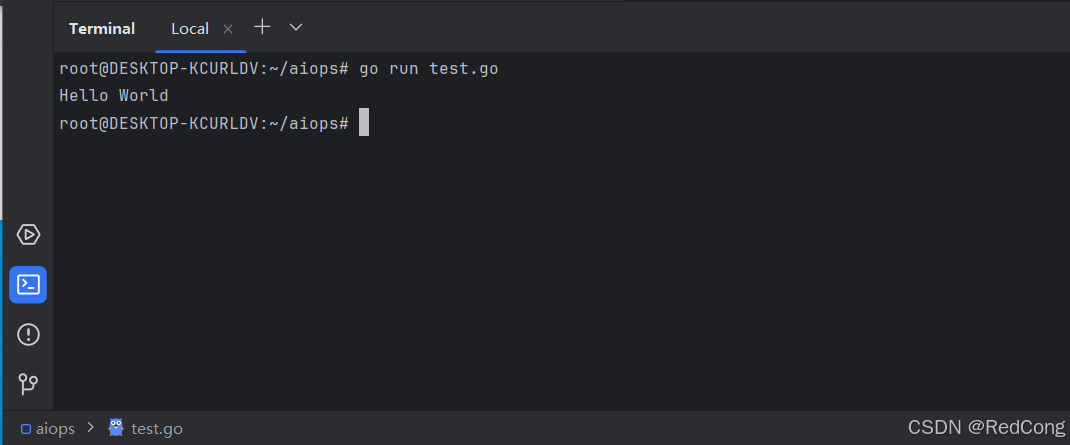
5.4 编写test.go并运行
package main

import "fmt"

func main() {
	fmt.Println("Hello World")
}
如果出现报错
package test is not in GOROOT
解决:GO111MODULE修改为on
命令为go env -w GO111MODULE=on
root@DESKTOP-KCURLDV:~/aiops# go env
GO111MODULE="on" # 修改为on
GOARCH="amd64"
GOBIN=""
GOCACHE="/root/.cache/go-build"
GOENV="/root/.config/go/env"
GOEXE=""
GOEXPERIMENT=""
GOFLAGS=""
GOHOSTARCH="amd64"
GOHOSTOS="linux"
GOINSECURE=""
GOMODCACHE="/root/go/pkg/mod"
GONOPROXY=""
GONOSUMDB=""
GOOS="linux"
GOPATH="/root/go"
GOPRIVATE=""
GOPROXY="https://proxy.golang.org,direct"
GOROOT="/root/.gvm/gos/go1.19"
GOSUMDB="sum.golang.org"
GOTMPDIR=""
GOTOOLDIR="/root/.gvm/gos/go1.19/pkg/tool/linux_amd64"
GOVCS=""
GOVERSION="go1.19"
GCCGO="gccgo"
GOAMD64="v1"
AR="ar"
CC="gcc"
CXX="g++"
CGO_ENABLED="1"
GOMOD="/root/aiops/go.mod"
GOWORK=""
CGO_CFLAGS="-g -O2"
CGO_CPPFLAGS=""
CGO_CXXFLAGS="-g -O2"
CGO_FFLAGS="-g -O2"
CGO_LDFLAGS="-g -O2"
PKG_CONFIG="pkg-config"
GOGCCFLAGS="-fPIC -m64 -pthread -Wl,--no-gc-sections -fmessage-length=0 -fdebug-prefix-map=/tmp/go-build3377041513=/tmp/go-build -gno-record-gcc-switches"
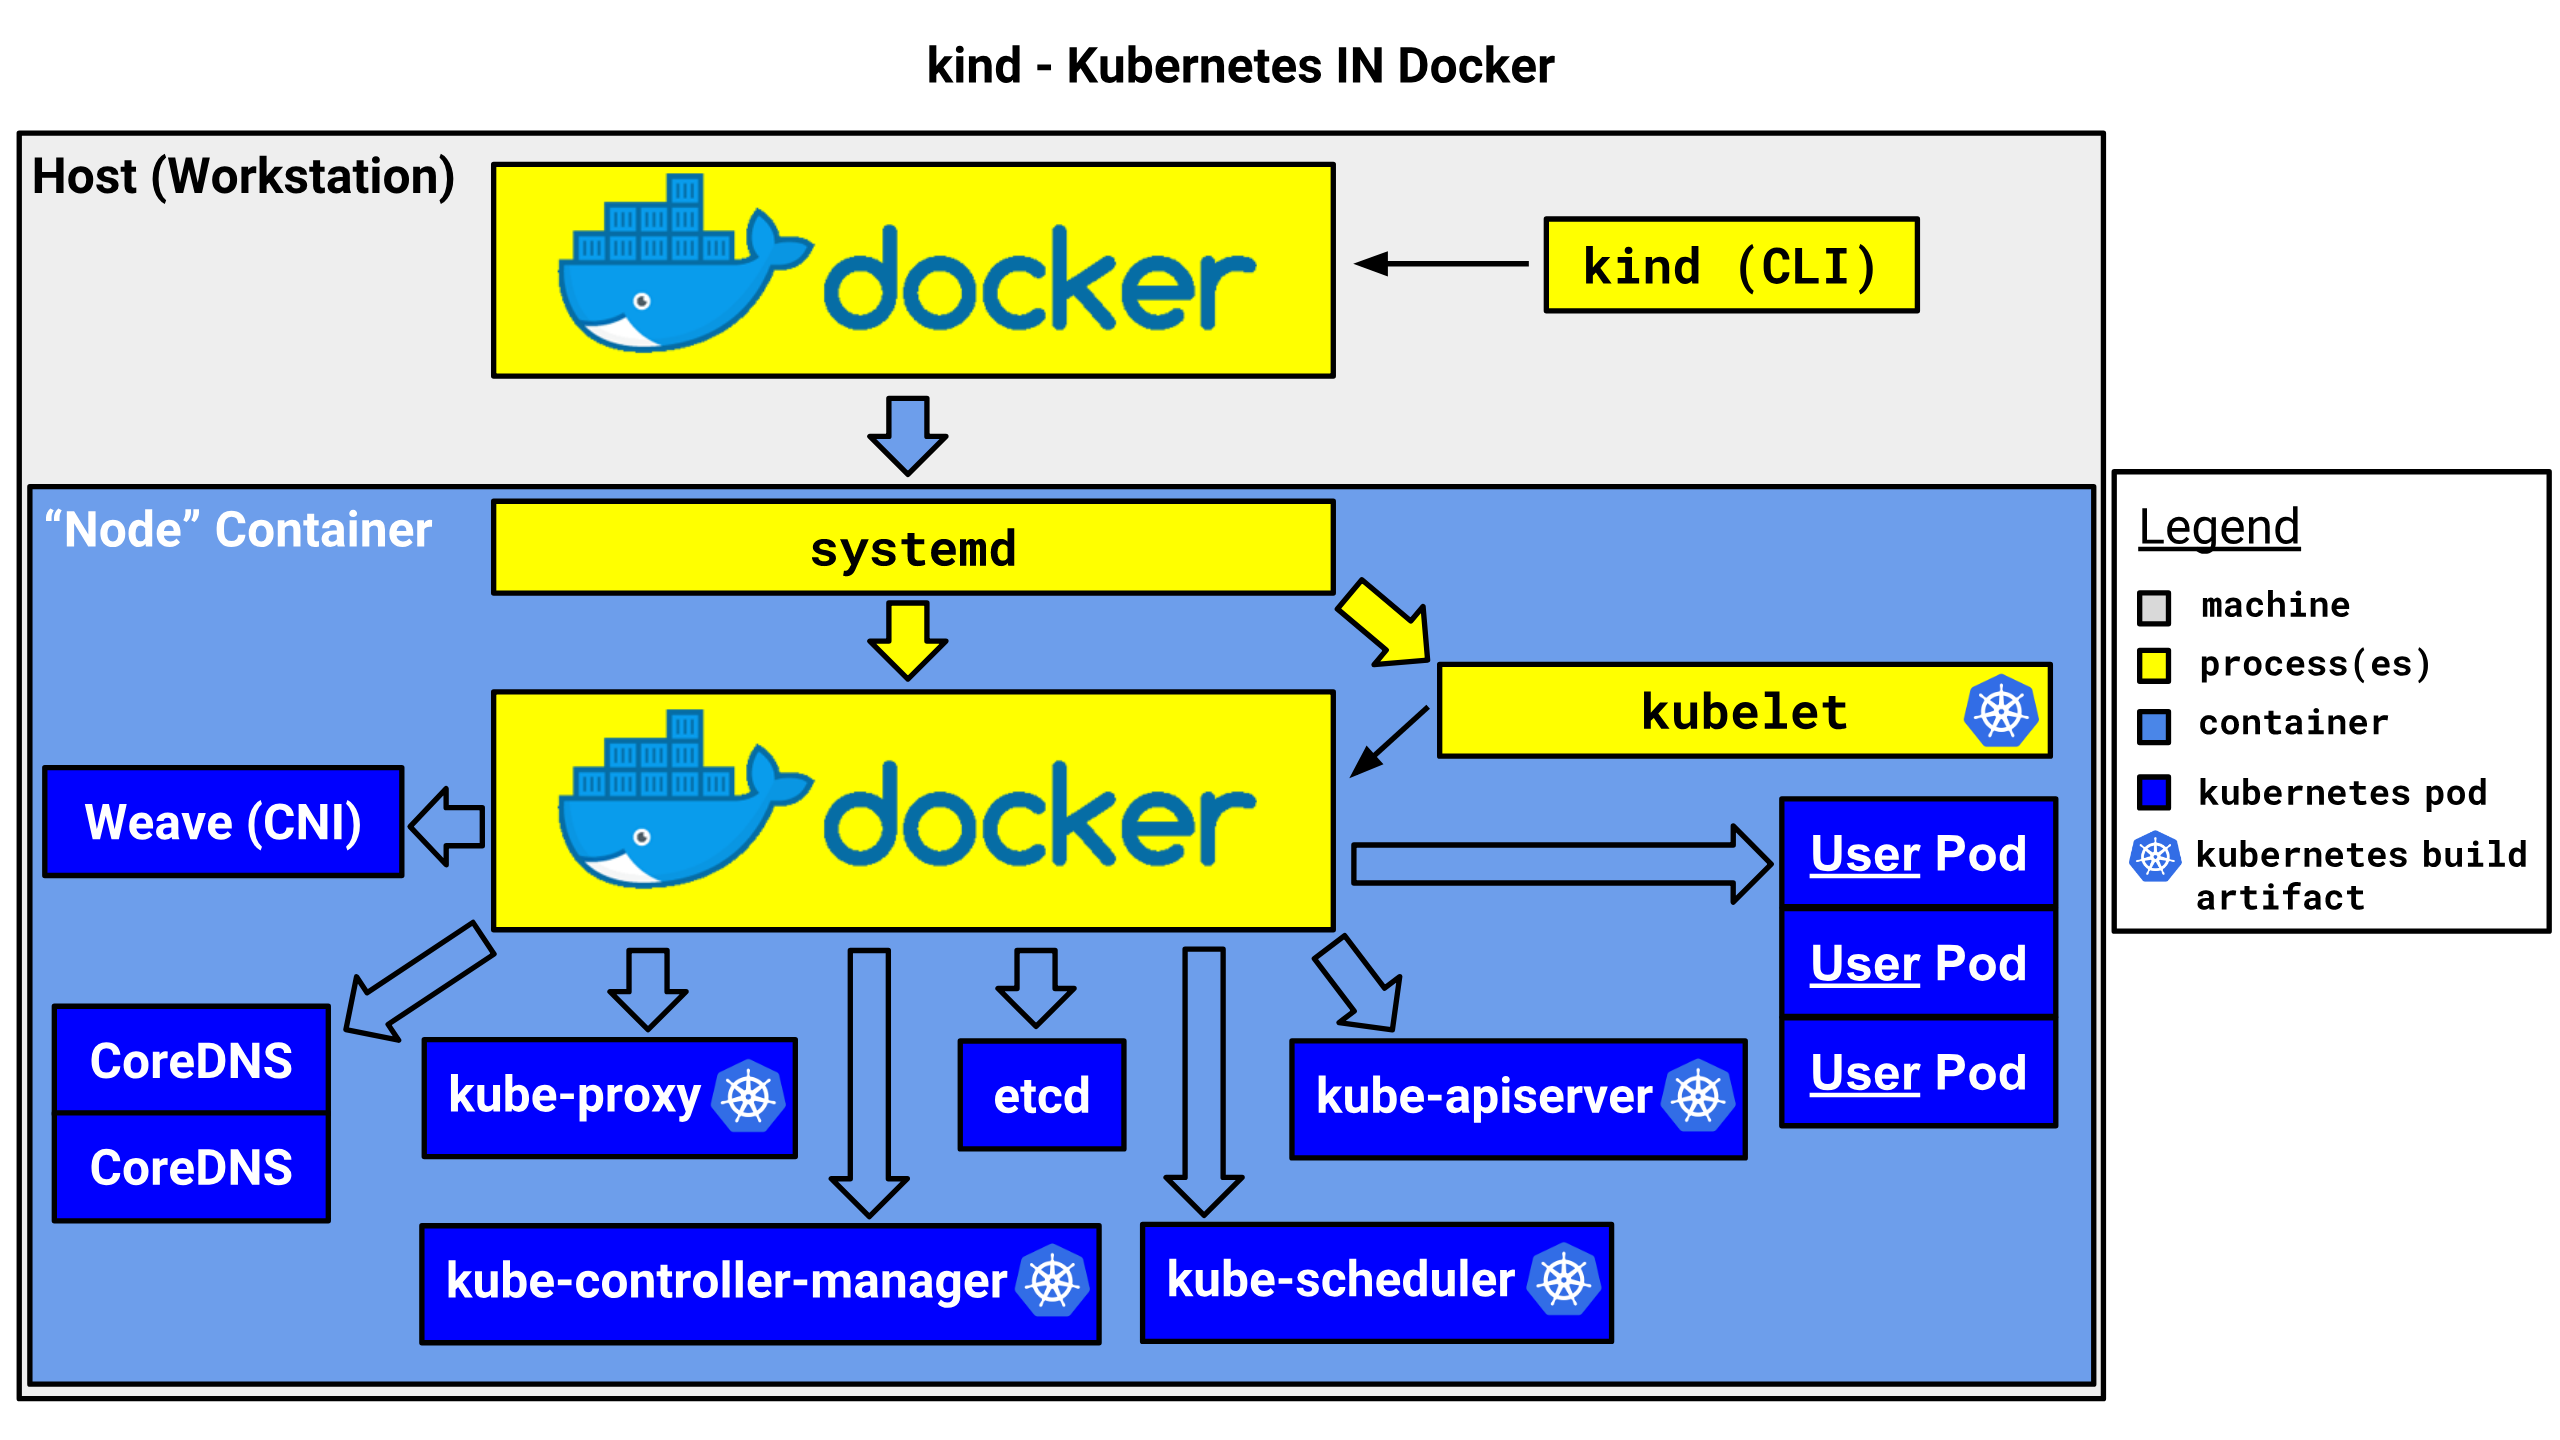
六、kind安装
Kind是Kubernetes In Docker的缩写,顾名思义,看起来是把k8s放到docker的意思。
kind创建k8s集群的基本原理就是:提前准备好k8s节点的镜像,通过docker启动容器,来模拟k8s的节点,从而组成完整的k8s集群。
需要注意,kind创建的集群仅可用于开发、学习、测试等
不能用于生产环境。
创建、启动k8s集群非常快速,资源消耗较低。
支持创建多节点的k8s集群,包括高可用模式。
kind 支持Linux,macos and windows
它是CNCF认证的k8s集群安装方式之一。
 安装kind:
#通过设置 gvm use 命令的 --default 参数来指定默认的 Go 版本,这样每次新建终端时就不需要手动指定了
# gvm use go1.19 --default
Now using version go1.19

# go install sigs.k8s.io/kind@latest
go: downloading sigs.k8s.io/kind v0.27.0
go: downloading github.com/spf13/pflag v1.0.5
go: downloading github.com/spf13/cobra v1.8.0
go: downloading al.essio.dev/pkg/shellescape v1.5.1
go: downloading github.com/pkg/errors v0.9.1
go: downloading gopkg.in/yaml.v3 v3.0.1
go: downloading github.com/pelletier/go-toml v1.9.5
go: downloading github.com/mattn/go-isatty v0.0.20
go: downloading sigs.k8s.io/yaml v1.4.0
go: downloading github.com/BurntSushi/toml v1.4.0
go: downloading github.com/evanphx/json-patch/v5 v5.6.0
go: downloading github.com/google/safetext v0.0.0-20220905092116-b49f7bc46da2
go: downloading golang.org/x/sys v0.6.0
# kind version
kind v0.27.0 go1.19 linux/amd64

# kind -h
kind creates and manages local Kubernetes clusters using Docker container 'nodes'

Usage:
  kind [command]

Available Commands:
  build       Build one of [node-image]
  completion  Output shell completion code for the specified shell (bash, zsh or fish)
  create      Creates one of [cluster]
  delete      Deletes one of [cluster]
  export      Exports one of [kubeconfig, logs]
  get         Gets one of [clusters, nodes, kubeconfig]
  help        Help about any command
  load        Loads images into nodes
  version     Prints the kind CLI version

Flags:
  -h, --help              help for kind
  -q, --quiet             silence all stderr output
  -v, --verbosity int32   info log verbosity, higher value produces more output
      --version           version for kind

Use "kind [command] --help" for more information about a command.
注意docker版本和kind版本的兼容问题,如果部署失败可能是k8s版本过低
七、使用kind实现单节点k8s集群部署
kind部署的k8s与docker中的k8s无关.
# kind create cluster --name k8s-1 --image kindest/node:v1.25.16

Creating cluster "k8s-1" ...
 ✓ Ensuring node image (kindest/node:v1.25.16) 🖼
 ✓ Preparing nodes 📦
 ✓ Writing configuration 📜
 ✓ Starting control-plane 🕹️
 ✓ Installing CNI 🔌
 ✓ Installing StorageClass 💾
Set kubectl context to "k8s-1-kind"
You can now use your cluster with:

kubectl cluster-info --context kind-kind

Not sure what to do next? 😅  Check out https://kind.sigs.k8s.io/docs/user/quick-start/

# kubectl cluster-info --context kind-kind
Kubernetes control plane is running at https://127.0.0.1:38317
CoreDNS is running at https://127.0.0.1:38317/api/v1/namespaces/kube-system/services/kube-dns:dns/proxy

To further debug and diagnose cluster problems, use 'kubectl cluster-info dump'.

# kind get clusters
kind

# kubectl get node
NAME                 STATUS   ROLES           AGE     VERSION
kind-control-plane   Ready    control-plane   5m37s   v1.25.16

# kubectl get po -n kube-system
NAME                                         READY   STATUS    RESTARTS        AGE
coredns-565d847f94-6kvst                     1/1     Running   0               6m
coredns-565d847f94-d7nt8                     1/1     Running   0               6m
etcd-kind-control-plane                      1/1     Running   0               6m12s
kindnet-cxk26                                1/1     Running   0               6m
kube-apiserver-kind-control-plane            1/1     Running   0               6m15s
kube-controller-manager-kind-control-plane   1/1     Running   1 (5m16s ago)   6m15s
kube-proxy-h8g6p                             1/1     Running   0               6m
kube-scheduler-kind-control-plane            1/1     Running   1 (5m18s ago)   6m12s

# kind delete clusters kind
Deleted nodes: ["kind-control-plane"]
Deleted clusters: ["kind"]
八、使用kind实现多节点k8s集群部署
# cat <<EOF > kind.yaml
kind: Cluster
apiVersion: kind.x-k8s.io/v1alpha4
nodes:
- role: control-plane
- role: worker
- role: worker
EOF

# kind create cluster --image kindest/node:v1.25.16 --name kind --config kind.yaml
Creating cluster "kind" ...
 ✓ Ensuring node image (kindest/node:v1.25.16) 🖼
 ✓ Preparing nodes 📦 📦 📦
 ✓ Writing configuration 📜
 ✓ Starting control-plane 🕹️
 ✓ Installing CNI 🔌
 ✓ Installing StorageClass 💾
 ✓ Joining worker nodes 🚜
Set kubectl context to "kind-kind"
You can now use your cluster with:

kubectl cluster-info --context kind-kind

Not sure what to do next? 😅  Check out https://kind.sigs.k8s.io/docs/user/quick-start/

# kubectl get node
NAME                 STATUS   ROLES           AGE    VERSION
kind-control-plane   Ready    control-plane   2m1s   v1.25.16
kind-worker          Ready    <none>          86s    v1.25.16
kind-worker2         Ready    <none>          85s    v1.25.16


# cat <<EOF > kind1.yaml
kind: Cluster
apiVersion: kind.x-k8s.io/v1alpha4
nodes:
- role: control-plane
- role: worker
- role: worker
networking:
  disableDefaultCNI: true
  kubeProxyMode: "ipvs"
EOF

# kind create cluster --image kindest/node:v1.25.16 --name kind1 --config kind1.yaml
Creating cluster "kind1" ...
 ✓ Ensuring node image (kindest/node:v1.25.16) 🖼
 ✓ Preparing nodes 📦 📦 📦
 ✓ Writing configuration 📜
 ✓ Starting control-plane 🕹️
 ✓ Installing StorageClass 💾
 ✓ Joining worker nodes 🚜
Set kubectl context to "kind-kind1"
You can now use your cluster with:

kubectl cluster-info --context kind-kind1

Not sure what to do next? 😅  Check out https://kind.sigs.k8s.io/docs/user/quick-start/

#kubectl config current-context
kind-kind1
#kubectl config use-context kind-kind

# kind delete clusters kind1
Deleted nodes: ["kind1-control-plane" "kind1-worker2" "kind1-worker"]
Deleted clusters: ["kind1"]

# kind delete clusters kind
Deleted nodes: ["kind-control-plane" "kind-worker2" "kind-worker"]
Deleted clusters: ["kind"]
也可以创建多套K8S集群
使用–name 指定集群名称
使用kubectl config use-context 集群上下文名称即可切换集群。
# cat <<EOF > kind2.yaml
# a cluster with 3 control-plane nodes and 3 workers
kind: Cluster
apiVersion: kind.x-k8s.io/v1alpha4
nodes:
- role: control-plane
- role: control-plane
- role: control-plane
- role: worker
- role: worker
- role: worker
EOF

#kind create cluster --image kindest/node:v1.25.16 --name kind2 --config kind2.yaml
Creating cluster "kind2" ...
 ✓ Ensuring node image (kindest/node:v1.25.16) 🖼
 ✓ Preparing nodes 📦 📦 📦 📦 📦 📦
 ✓ Configuring the external load balancer ⚖️
 ✓ Writing configuration 📜
 ✓ Starting control-plane 🕹️
 ✓ Installing CNI 🔌
 ✓ Installing StorageClass 💾
 ✓ Joining more control-plane nodes 🎮
 ✓ Joining worker nodes 🚜
Set kubectl context to "kind-kind2"
You can now use your cluster with:

#kubectl cluster-info --context kind-kind2

Not sure what to do next? 😅  Check out https://kind.sigs.k8s.io/docs/user/quick-start/
root@DESKTOP-KCURLDV:~# kubectl cluster-info --context kind-kind2

Kubernetes control plane is running at https://127.0.0.1:41983
CoreDNS is running at https://127.0.0.1:41983/api/v1/namespaces/kube-system/services/kube-dns:dns/proxy

To further debug and diagnose cluster problems, use 'kubectl cluster-info dump'.

# kubectl get nodes
NAME                   STATUS   ROLES           AGE     VERSION
kind2-control-plane    Ready    control-plane   4m27s   v1.25.16
kind2-control-plane2   Ready    control-plane   3m53s   v1.25.16
kind2-control-plane3   Ready    control-plane   2m17s   v1.25.16
kind2-worker           Ready    <none>          83s     v1.25.16
kind2-worker2          Ready    <none>          83s     v1.25.16
kind2-worker3          Ready    <none>          83s     v1.25.16
九、通过goland开发 部署描述文件,并部署到k8s集群

编写yaml
apiVersion: apps/v1
kind: Deployment
metadata:
  name: nginx
spec:
  selector:
    matchLabels:
      app: nginx
  template:
    metadata:
      labels:
        app: nginx
    spec:
      containers:
        - name: nginx
          image: nginx:latest
          imagePullPolicy: IfNotPresent
      restartPolicy: Always
# kubectl apply -f aiops/nginx.yaml
deployment.apps/nginx configured
# kubectl get po
NAME                    READY   STATUS    RESTARTS   AGE
nginx-d5f959df4-kcqq4   1/1     Running   0          4m12s