前言:
通过实践而发现真理,又通过实践而证实真理和发展真理。从感性认识而能动地发展到理性认识,又从理性认识而能动地指导革命实践,改造主观世界和客观世界。实践、认识、再实践、再认识,这种形式,循环往复以至无穷,而实践和认识之每一循环的内容,都比较地进到了高一级的程度。
前置操作:添加依赖
//JWT框架 java8版本
<dependency>
    <groupId>io.jsonwebtoken</groupId>
    <artifactId>jjwt</artifactId>
    <version>0.9.1</version>
</dependency>
//JWT框架 java8以上的版本使用下面这个
<dependency>
    <groupId>io.jsonwebtoken</groupId>
    <artifactId>jjwt</artifactId>
     <version>0.12.3</version>
</dependency>


//redis驱动
<dependency>
    <groupId>org.springframework.boot</groupId>
    <artifactId>spring-boot-starter-data-redis-reactive</artifactId>
</dependency>
//Security框架,在完成Redis,jwt前,为了更好完成代码功能,先不添加Security框架
<dependency>
    <groupId>org.springframework.security</groupId>
    <artifactId>spring-security-core</artifactId>
</dependency>
<dependency>
    <groupId>org.springframework.security</groupId>
    <artifactId>spring-security-web</artifactId>
</dependency>
<dependency>
    <groupId>org.springframework.security</groupId>
    <artifactId>spring-security-config</artifactId>
</dependency>
注释的格式打错了,复制完后请删掉
上面的3个框架,都是为了这一套流程更好更容易的实现
JWT:创建JWT
Redis:存储JWT
Security:判断JWT
运行,报错
org.springframework.data.redis.RedisConnectionFailureException: Unable to connect to Redis
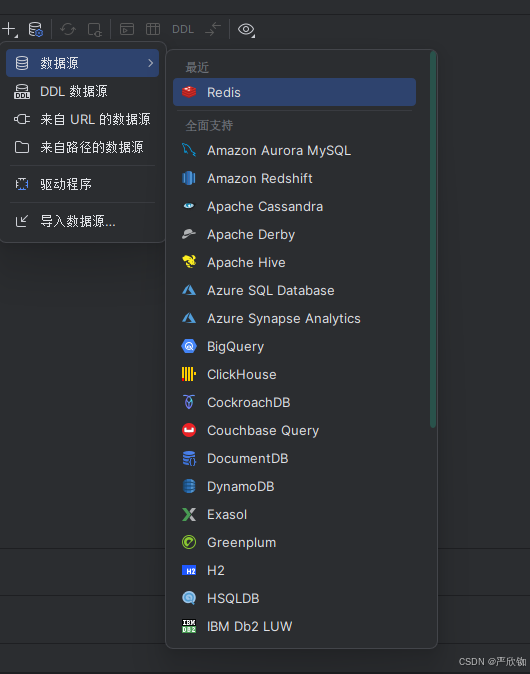
良性报错,我们像注册mysql一样,注册redis即可
配置完后,就可以解决bug了
Redis配置:
spring:
#mysql配置
  datasource:
    driver-class-name: com.mysql.cj.jdbc.Driver
    url: jdbc:mysql://localhost:3306/my_project?serverTimezone=Asia/Shanghai&characterEncoding=utf8&useSSL=false&zeroDateTimeBehavior=convertToNull
    username: root
    password: 123456
#redis配置
  data:
    redis:
      database: 0
      host: 127.0.0.1
      port: 6379
      #  password: xxxxx 如果有密码添加
database:为redis数据名称
mybsql的可以用英文,redis的只有数字,可以根据idea右边的数据添加
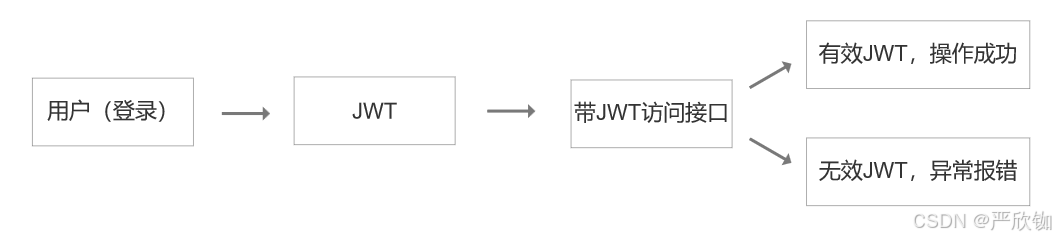
正片:
先从JWT开始,JWT从生成一个JWT开始
最简单的JWT生成
        //文章来源 https://developer.aliyun.com/article/1613854

        String compact = Jwts.builder()
                .subject("严欣铷") //用户标签
                .expiration(new Date(System.currentTimeMillis() + 7200 * 1000)) //设置过期时间
                .signWith(Jwts.SIG.HS512.key().build()) //设置加密算法
                .compact();
        System.out.println(compact);
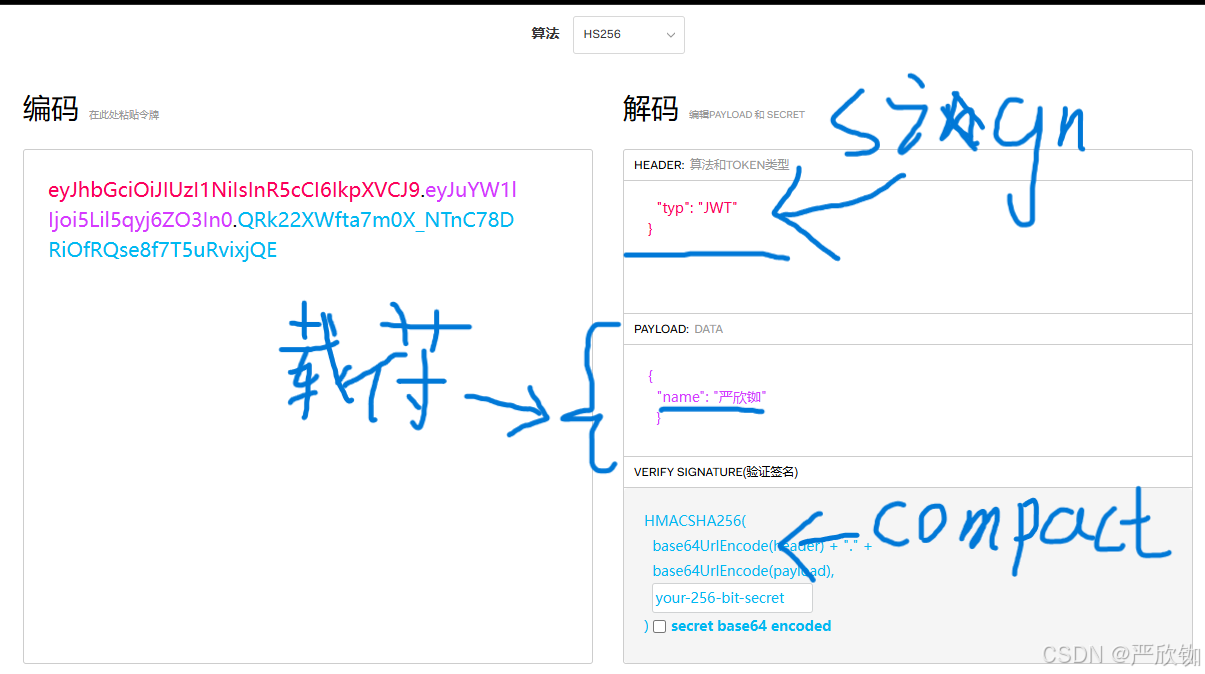
JWT分为三部分
再结合一个来看
① 标准载荷:
JwtBuilder为JWT规范中定义的标准载荷提供了方便的构建器方法。
● issuer: sets the iss(Issuer) Claim jwt签发者
● subject: sets the sub(Subject) Claim jwt针对的用户
● audience: sets the aud(Audience) Claim 校验jwt的一方
● expiration: sets the exp(Expiration Time) Claim jwt过期时间
● notBefore: sets the nbf(Not Before) Claim 定义在某个时间前该jwt是不可用的
● issuedAt: sets the iat(Issued At) Claim 签发时间
● id: sets the jti(JWT ID) Claim jwt的唯一身份标识,作一次性token,防重放攻击。
② 自定义载荷:
● claime(key,value)
● claime(Map对象)

现在需要将jwt传入到redis中
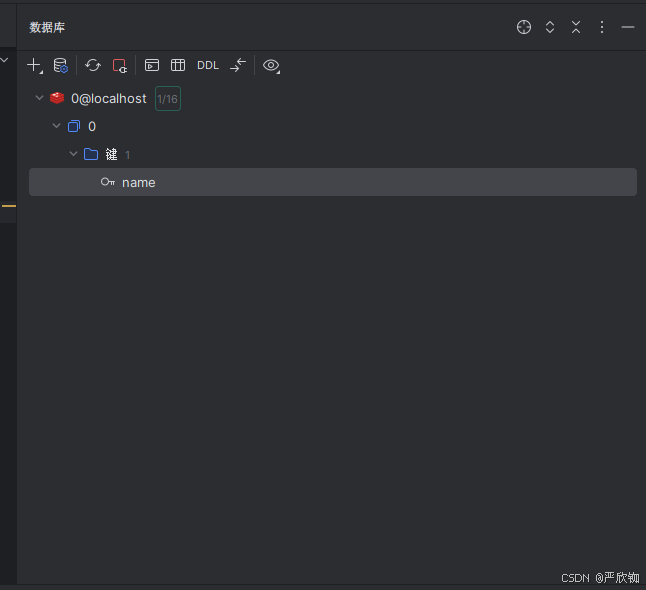
在写入redis前,先简单的写一串内容进去
@SpringBootTest
class SecurityApplicationTests {

    @Autowired
    StringRedisTemplate template;  //添加这句代码,自动装载,即可解决文章三处代码报错

    @Test
    void contextLoads() {
//        String compact = Jwts.builder()
//                .signWith(Jwts.SIG.HS512.key().build())
//                .subject("严欣铷")
//                .expiration(new Date(System.currentTimeMillis() + 7200 * 1000))
//                .compact();
//        System.out.println(compact);

        template.opsForValue().set("name","yanxinru");
        System.out.println(template.opsForValue().get("name"));
    }

}
这三条代码即可添加数据
现在有了JWT和Redis,我们试着将JWT传入Redis中
@SpringBootTest
class SecurityApplicationTests {

    @Autowired
    StringRedisTemplate template;  //添加这句代码,自动装载,即可解决文章三处代码报错

    @Test
    void contextLoads() {
        String compact = Jwts.builder()
                .signWith(Jwts.SIG.HS512.key().build())
                .subject("严欣铷")
                .expiration(new Date(System.currentTimeMillis() + 7200 * 1000))
                .compact();
        System.out.println(compact);

        template.opsForValue().set("key",compact); //调用compact
    }

}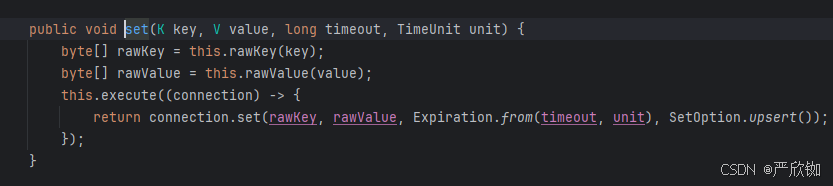
根据这个源码,我们可以设置一个timeout,让它自动删除
@SpringBootTest
class SecurityApplicationTests {

    @Autowired
    StringRedisTemplate template;  //添加这句代码,自动装载,即可解决文章三处代码报错

    @Test
    void contextLoads() {
        String compact = Jwts.builder()
                .signWith(Jwts.SIG.HS512.key().build())
                .subject("严欣铷")
                .expiration(new Date(System.currentTimeMillis() + 6000))
                .compact();
        System.out.println(compact);
        long date = 6000; //6秒过期,6秒后自动删除
        template.opsForValue().set("yanxinru",compact,date, TimeUnit.MILLISECONDS);
        template.opsForValue().set("chentiantian",compact,date, TimeUnit.MILLISECONDS);
    }

}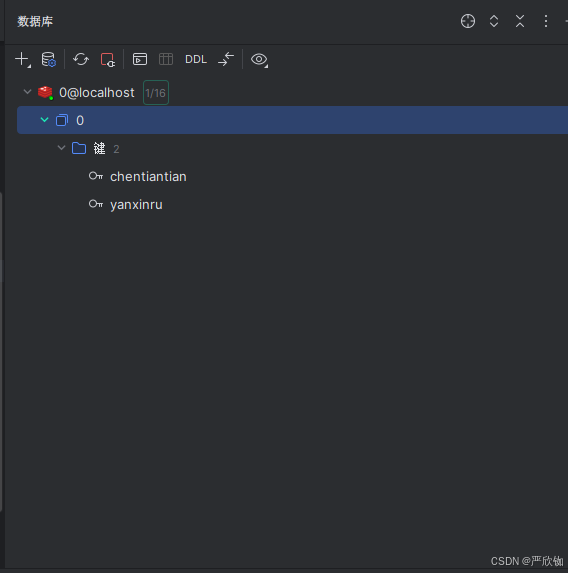
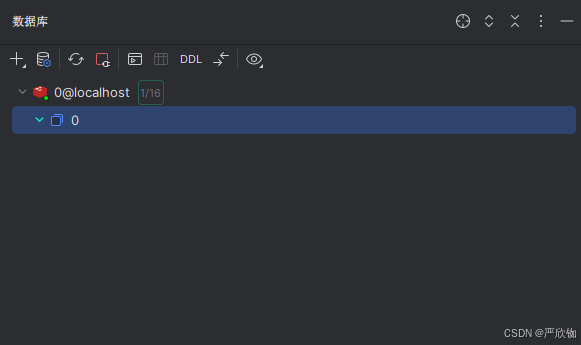
等六秒后,它会自动删除
我们可以将用户的ID,账号,作用唯一标识,将时间放长
该添加Security了
添加一个配置
/**
 * Security配置类
 */
@Configuration(proxyBeanMethods = false)
@EnableWebSecurity
@EnableMethodSecurity(securedEnabled = true)
public class SecurityConfig {

}
为了方便测试
  security:
    user:
      name: yanxinru
      password: 123456
      roles:
        User
做完后,我们对JWT进行修改
@SpringBootTest
class SecurityApplicationTests {

    @Autowired
    StringRedisTemplate template;  //添加这句代码,自动装载,即可解决文章三处代码报错

    @Test
    void contextLoads() {
        String compact = Jwts.builder()
                .signWith(Jwts.SIG.HS512.key().build())
                .subject("严欣铷")
                .expiration(new Date(System.currentTimeMillis() + 6000))
                .compact();

        long date = 600000; // 60秒过期
        if (set(compact,date)){
            System.out.println("导入成功");
        }
        else {
            System.out.println("导入失败");
        }

    }
    Boolean set(String token, long date){
        try{
            template.opsForValue().set("yanxinru",token,date,TimeUnit.MILLISECONDS);
            return true;
        }catch (Exception e){
            return false;
        }
    }
}
接下来,将内容添加至登录接口中
先做一个简单的登录接口
@RestController
@RequestMapping("/web/user")
public class userWebController {
@Resource
userMapper userMapper;
@Autowired
JWTUnit unit;//工具类都可以这么写
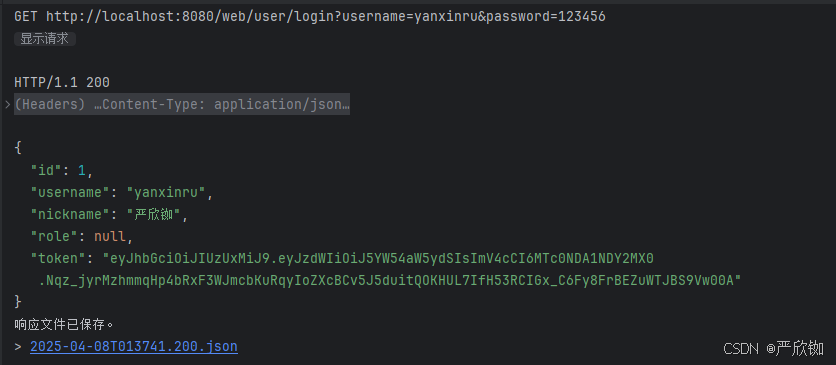
@GetMapping("/login")
public userToken login(String username, String password){
userTokenEntity userTokenEntity = userMapper.userToken(username, password);
userToken userToken = new userToken();
userToken.setId(userTokenEntity.getId());
userToken.setNickname(userTokenEntity.getNickname());
userToken.setUsername(userTokenEntity.getUsername());
userToken.setRole(userTokenEntity.getRole());
String token = unit.getToken(userTokenEntity.getUsername());
userToken.setToken(token);
return userToken;
}
@GetMapping("/id")
public userTokenEntity id(int id){
return userMapper.userTokenById(id);
}
}
@Component
public class JWTUnit {

    @Autowired
    StringRedisTemplate template;

    public String getToken(String username){
        String token = Jwts.builder()
                .signWith(Jwts.SIG.HS512.key().build())
                .subject(username)
                .expiration(new Date(System.currentTimeMillis() + 7200 * 1000))
                .compact();
        long date = System.currentTimeMillis() + 7200 * 1000;
        if (set(username,token,date)){
            System.out.println("成功导入");
            return token;
        }
        else {
            System.out.println("导入失败");
            return  token;
        }

    }

    //将key和token添加至redis中
    Boolean set(String username,String token, long date){
        try{
            template.opsForValue().set(username,token,date, TimeUnit.MILLISECONDS);
            return true;
        }catch (Exception e){
            return false;
        }
    }
}
我们完成了生成WJT
添加至redis中
要对token解析了,那要从redis里读取
先读取
userTokenEntity userTokenEntity = user.userTokenById(1);
jwtUnit.getToken(userTokenEntity.getUsername());
jwtUnit.getToken("asd");
jwtUnit.getToken("asdasd");
jwtUnit.getToken("asdasdxzca");
template.opsForValue().get(userTokenEntity.getUsername());
System.out.println(template.opsForValue().get(userTokenEntity.getUsername()));
System.out.println(template.opsForValue().get("asd"));//读取参数为表名
System.out.println(template.opsForValue().get("asdasd"));//读取参数为表名
System.out.println(template.opsForValue().get("asdasdxzca"));//读取参数为表名
