目录
一. Keepalived的工作原理
两台机器通过keepalived,虚拟一个IP,也就是VIP(Virtual IP)。这两台机器一个是Master一个是Backup。VIP开始为Master所有,Backup为空闲状态,同时在两台keepalived之间通信相当于有一条心跳线。Master 节点负责处理所有流量,并通过心跳线定期发送 VRRP Advertisement 报文,宣告自己的状态;如果 Backup 节点在指定时间内未收到 Master 的报文,会认为 Master 失效,并选举新的 Master。
如何选出Master:
优先级大的为Master,如果优先级一样谁先启动谁是Master
二. 实现单独的心跳网卡
默认配置中用于检测心跳的网卡往往“身兼多职”
现在我想添加一个独立的网卡检测心跳
#Ubuntu和Ubuntu1添加仅主机网卡
#在Ubuntu上
vim /etc/netplan/00-installer-config.yaml
#添加
ens37:
dhcp4: no
addresses:
- 192.168.10.105/24
netplan apply
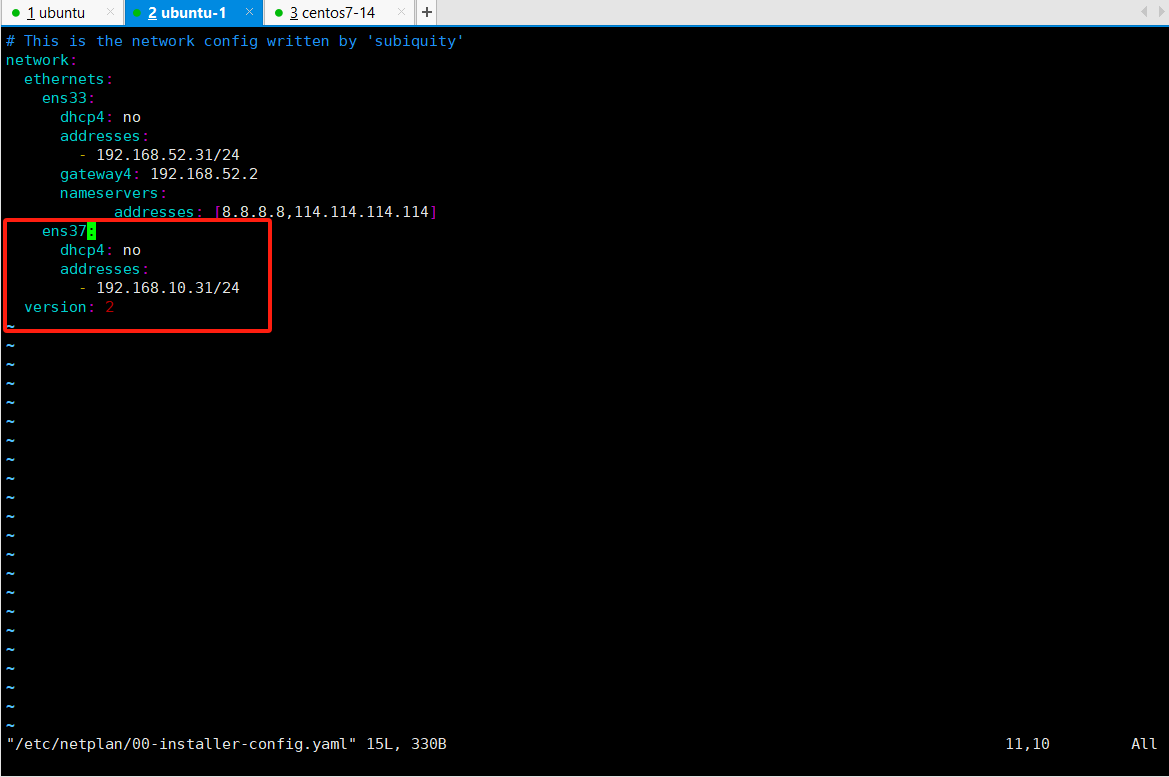
#在Ubuntu1上
ens37:
dhcp4: no
addresses:
- 192.168.10.31/24
netplan apply
测试机centos7-13也需要添加网卡 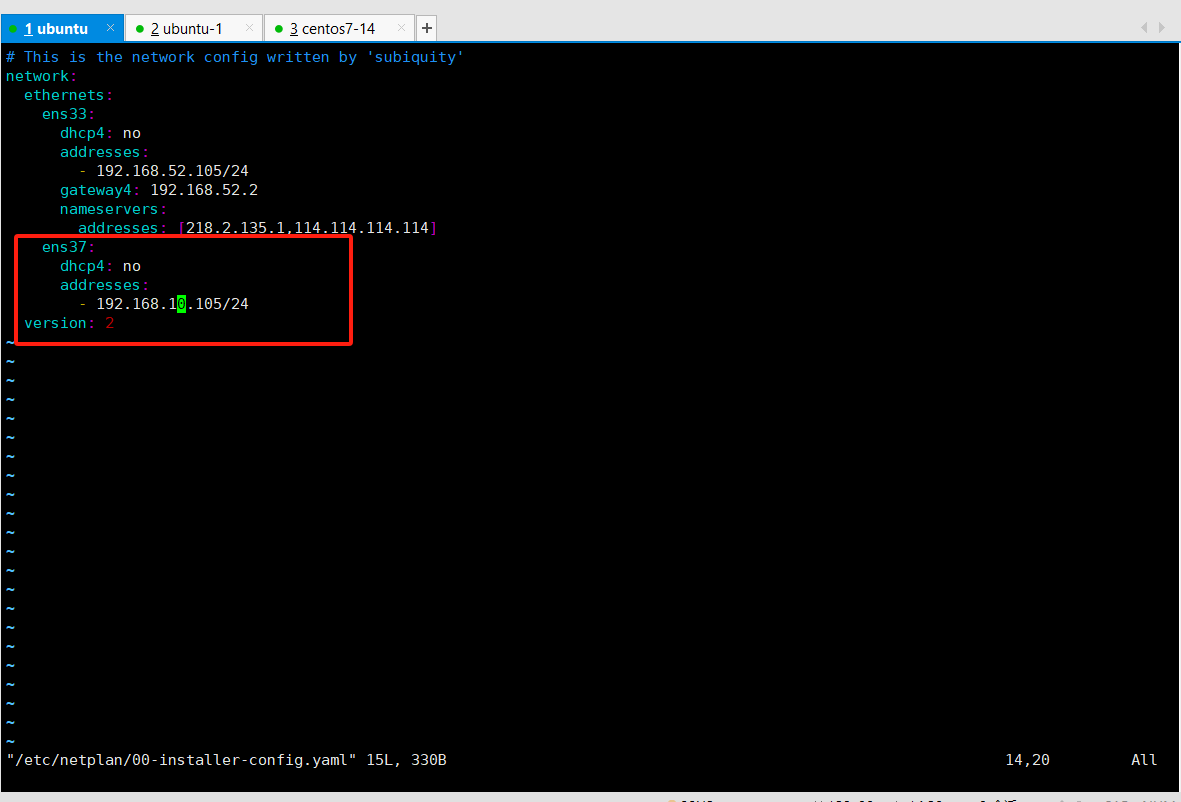
#在Ubuntu上
vim /etc/keepalived/keepalived.conf
global_defs {
router_id LVS01
vrrp_mcast_group4 224.0.0.19
}
vrrp_instance VI_1 {
interface ens37 #ens37为检测心跳的网卡
virtual_router_id 50
nopreempt
priority 100
advert_int 1
virtual_ipaddress {
192.168.52.188 dev ens33 label ens33:1 #将192.168.52.188绑定到ens33网卡上
}
}
systemctl restart keepalived
#在Ubuntu1上
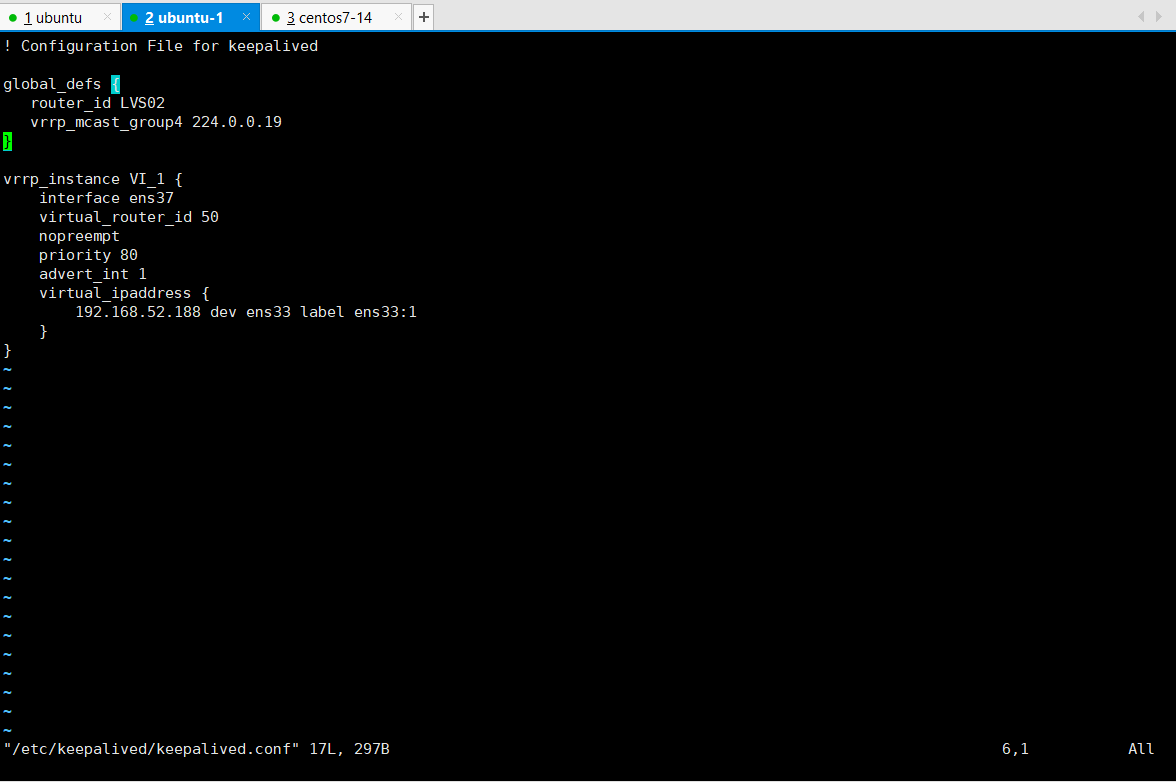
vim /etc/keepalived/keepalived.conf
global_defs {
router_id LVS02
vrrp_mcast_group4 224.0.0.19
}
vrrp_instance VI_1 {
interface ens37
virtual_router_id 50
nopreempt
priority 80
advert_int 1
virtual_ipaddress {
192.168.52.188 dev ens33 label ens33:1
}
}
systemctl restart keepalived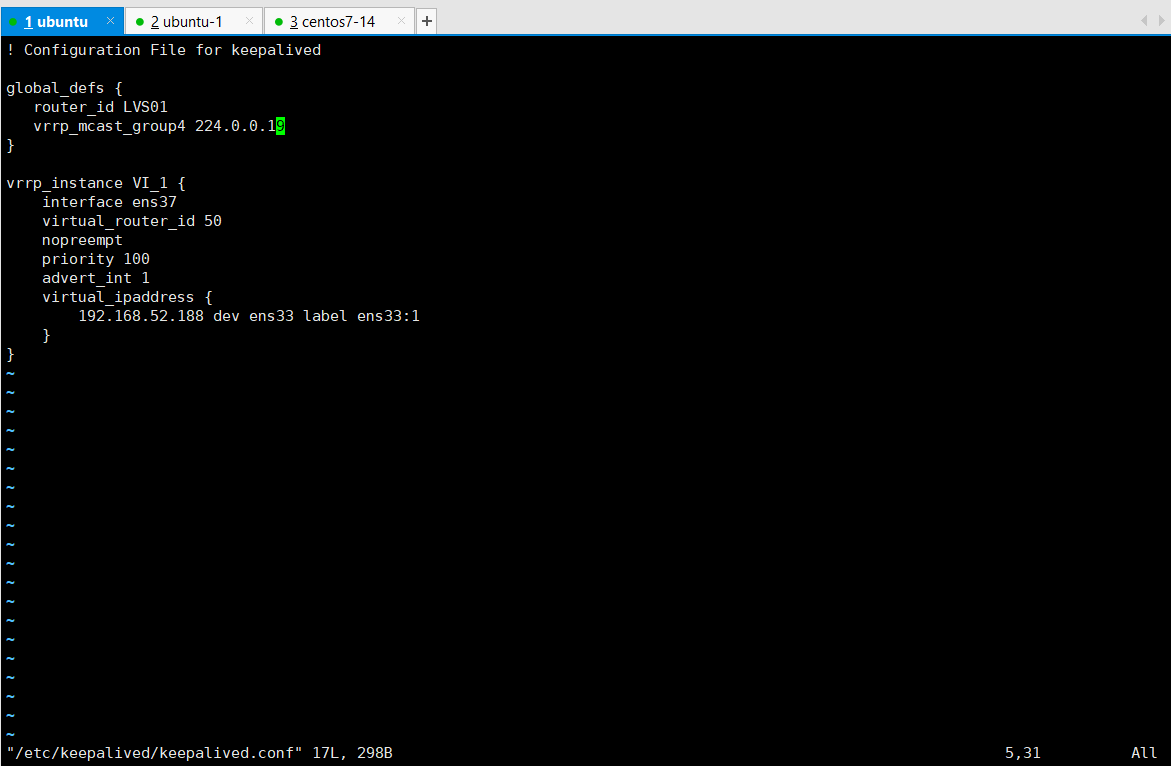
#在测试机centos7-14上
cd /etc/sysconfig/network-scripts

cp ifcfg-ens33 ifcfg-ens36

vim ifcfg-ens36

NAME=ens36
DEVICE=ens36
IPADDR=192.168.10.104
GATEWAY=192.168.10.2


systemctl restart network

需手动连接一下

reboot 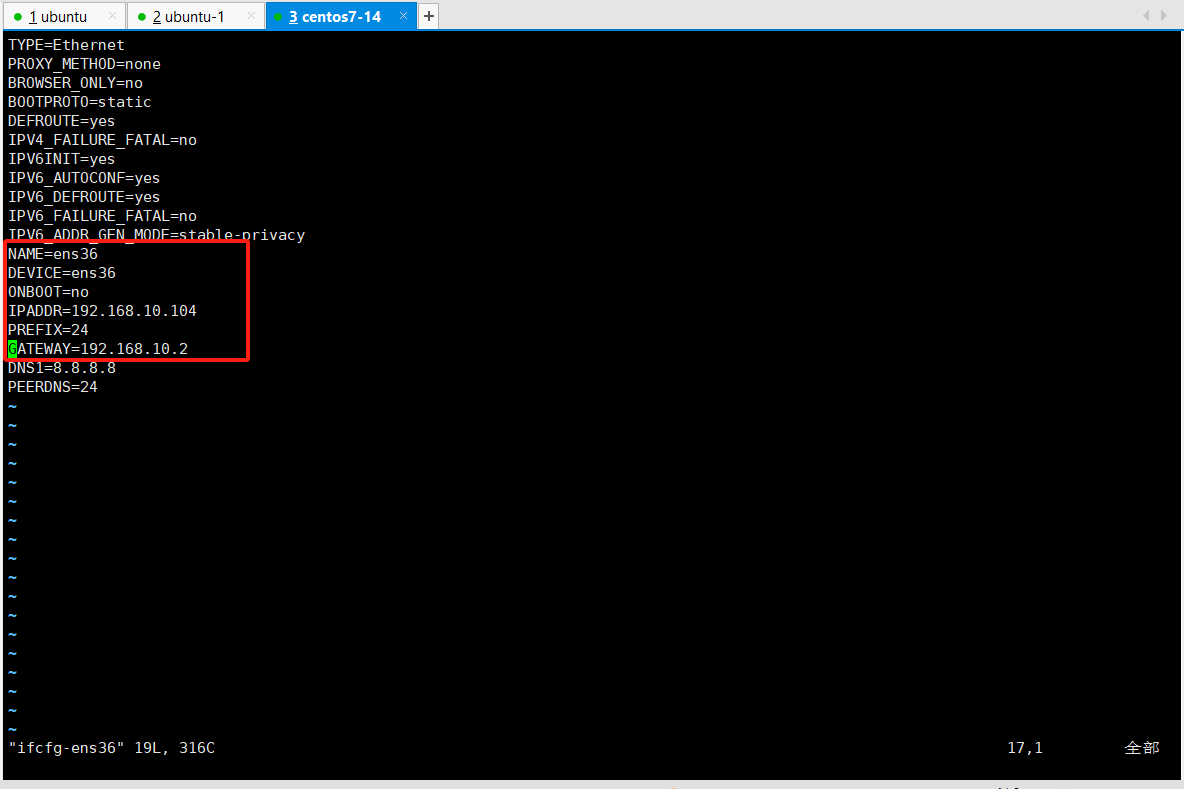
tcpdump -i ens36 host 224.0.0.19 -nnn
#捕获ens36网卡上所有与VRRP相关的组播流量,验证心跳线通信是否正常 
三. keepalive一些优化
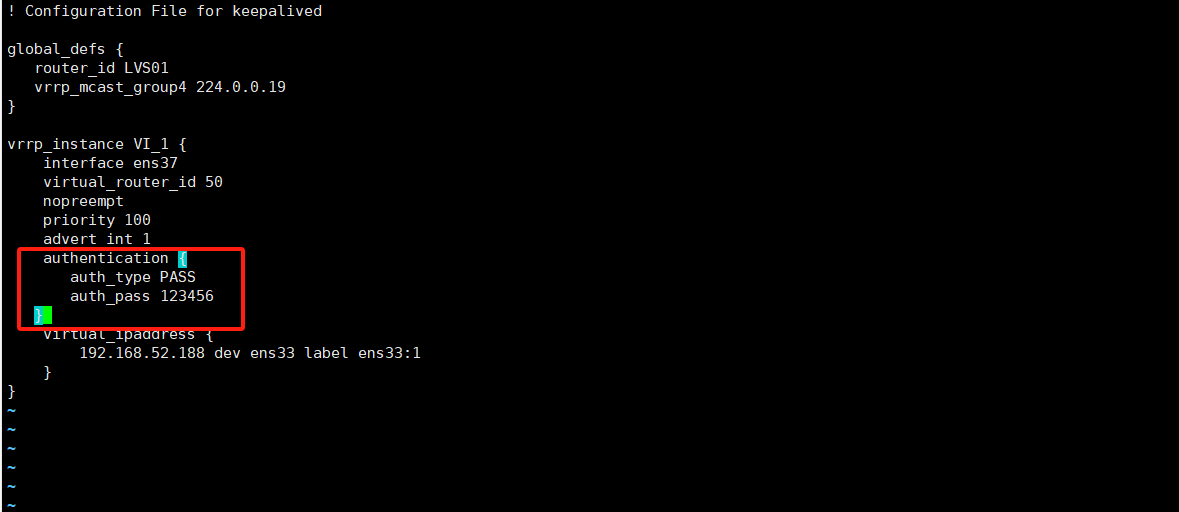
3.1 主从之间加密验证
在 VRRP(Virtual Router Redundancy Protocol)中,主从节点之间的通信默认是明文传输的,存在一定的安全风险。为了增强安全性,可以通过加密验证来保护主从节点之间的通信。
不过作用不大,仅做了解;因为密码是明文传输可以使用抓包工具查看
vim /etc/keepalived/keepalived.conf
#主从都添加

authentication {
       auth_type PASS
       auth_pass 123456
   }

systemctl restart keepalived.service
3.2 修改心跳线发送时间
主备都要改
advert_int 时间秒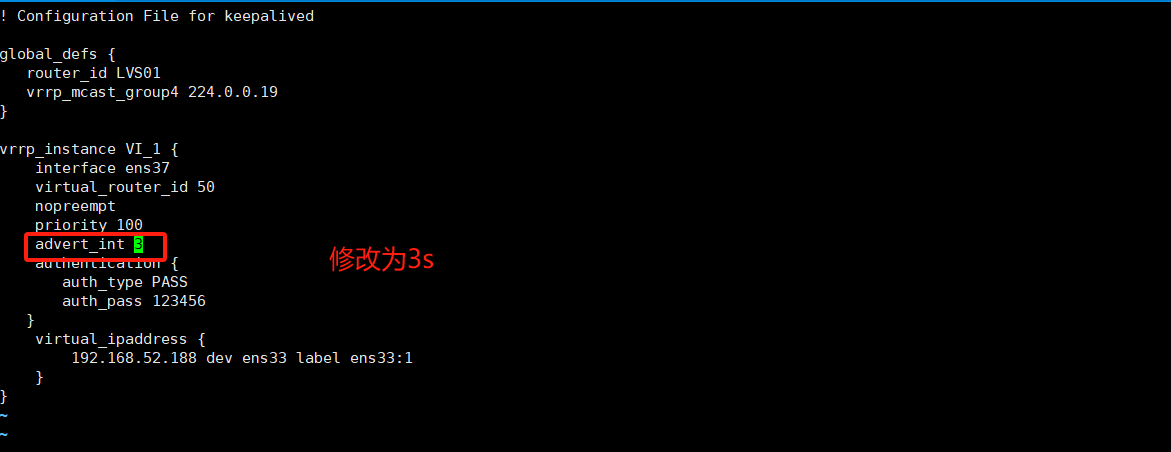
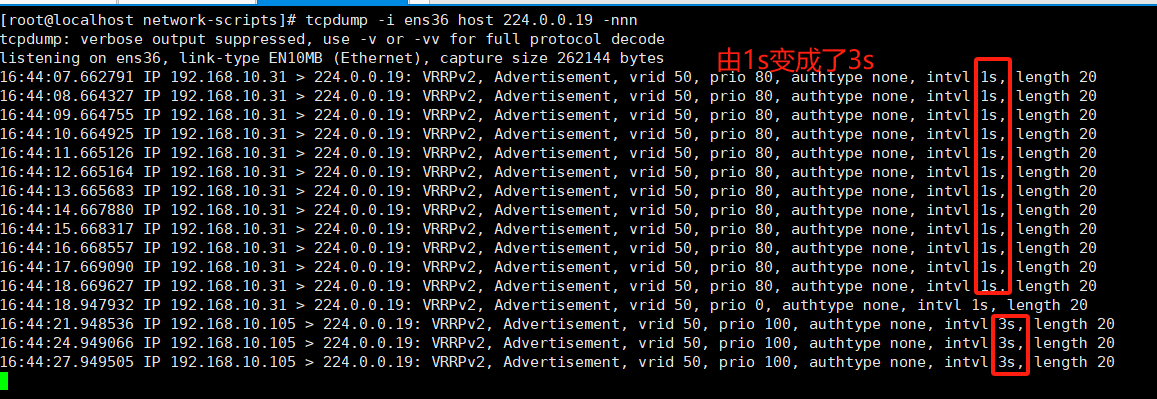
在centos7-14上抓包
tcpdump -i ens36 host 224.0.0.19 -nnn
四. 添加独立日志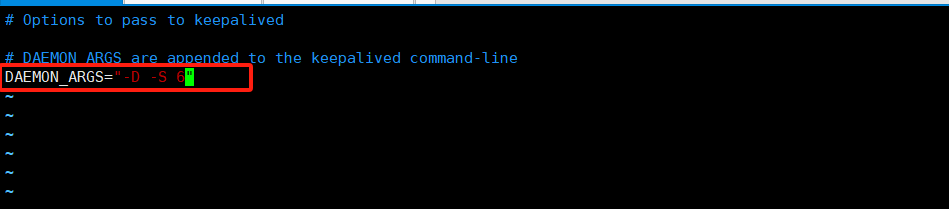

vim /etc/rsyslog.d/50-default.conf
#添加

local6.*     /var/log/keepalived.log

systemctl daemon-reload

cat /var/log/keepalived.log
#查看日志文件 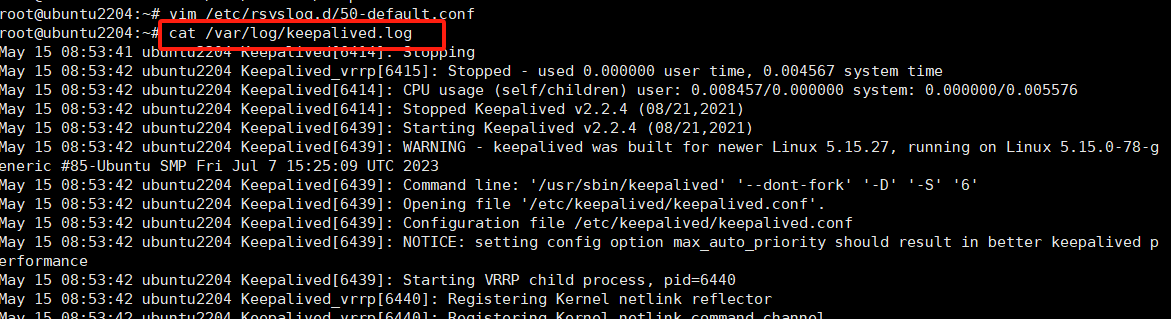
五. 抢占模式,非抢占模式,延迟抢占模式
抢占模式:主节点恢复后立即抢占 VIP
非抢占模式:主节点恢复后不抢占 VIP
延迟抢占模式:主节点恢复后等待一段时间再抢占 VIP
语法
preempt             #抢占式
nopreempt           #非抢占式
preempt_delay       #指定抢占延迟时间为#s,默认延迟300s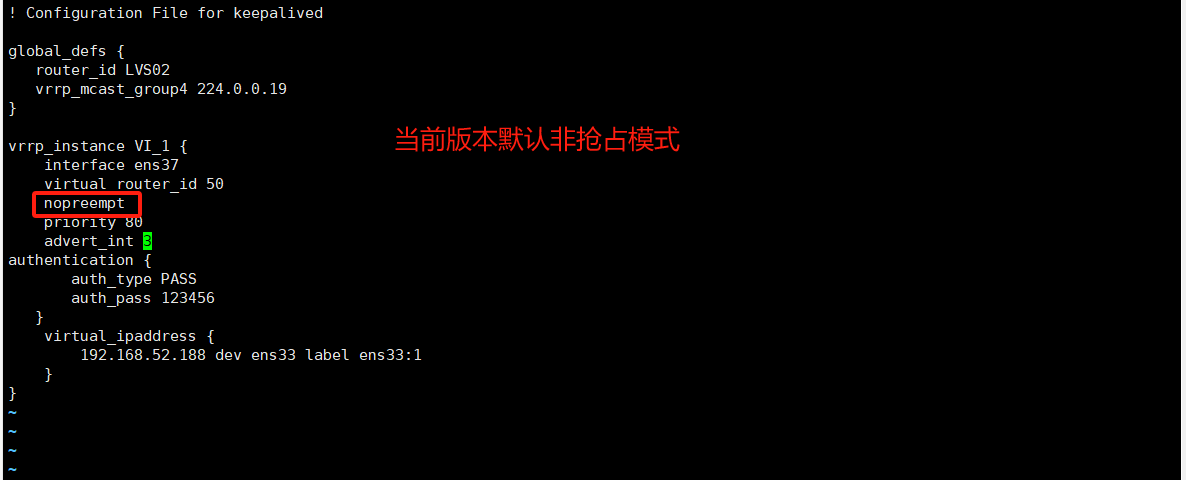
注意:抢占行为依赖于节点的优先级。确保主节点的优先级高于从节点。
比如:如果配置了非抢占模式(nopreempt),即使节点 A 的优先级更高,它也不会抢占主节点角色。
六. 单播地址和多播地址
VRRP 默认使用多播地址 224.0.0.18 进行通信,端口号为 112。多播地址允许主从节点在同一个网络中自动发现彼此。
可以使用 tcpdump 抓包工具检查多播通信是否正常:
tcpdump -i eth0 host 224.0.0.181. 单播地址(Unicast Address)
定义:单播地址用于标识网络中的一个特定设备(主机或接口),数据包从源地址发送到目标地址,且仅有一个发送者和一个接收者。
在Ubuntu上
vim /etc/keepalived/keepalived.conf


unicast_src_ip 192.168.10.105
    unicast_peer {
    192.168.10.31
    }

systemctl restart keepalived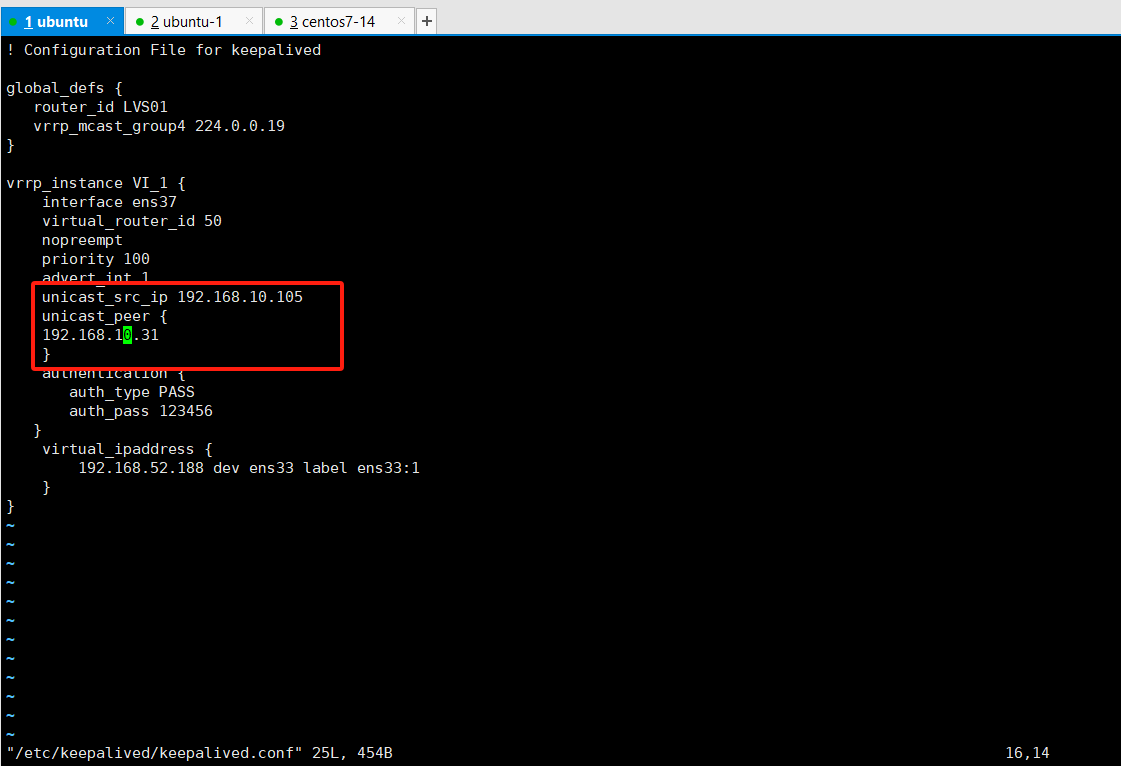
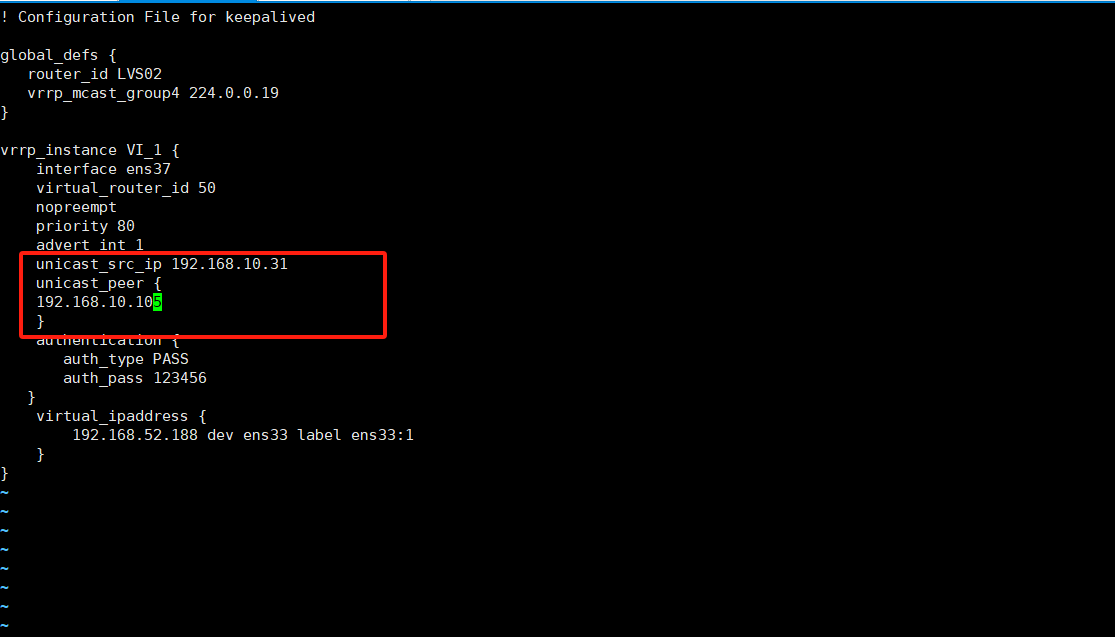
在Ubuntu1上

vim /etc/keepalived/keepalived.conf

unicast_src_ip 192.168.10.31
    unicast_peer {
    192.168.10.105
    }

systemctl restart keepalived
在测试机centos7-14上
#抓包
tcpdump -i ens36 host 192.168.10.31 -nnn

七. LVS和keepalived
以下操作是在二的配置基础上进行
#Ubuntu
vim /etc/keepalived/keepalived.conf

global_defs {
   router_id LVS02
   vrrp_mcast_group4 244.0.0.19
}

vrrp_instance VI_1 {
    interface ens37
    virtual_router_id 50
    preempt_delay 30
    priority 80
    advert_int 1
    unicast_src_ip 192.168.10.31
    unicast_peer {
    192.168.10.105
    }
    authentication {
    auth_type PASS
    auth_pass 123456
}

    virtual_ipaddress {
        192.168.52.188/24 dev ens33 label ens33:1
    }
}

virtual_server 192.168.52.188 80  {
    delay_loop 6
    lb_algo rr
    lb_kind DR
    persistence_timeout 0
    protocol TCP

    real_server 192.168.52.103 80 {
        weight 1
        HTTP_GET {
            url {
              path /
              status_code  200
            }
            connect_timeout 3
            retry 3
            delay_before_retry 3
        }

    }
    real_server 192.168.52.104 80 {
        weight 1
        HTTP_GET {
            url {
              path /
              status_code  200
            }
            connect_timeout 3
            retry 3
            delay_before_retry 3
        }
    }

}


#Ubuntu1
vim /etc/keepalived/keepalived.conf

global_defs {
   router_id LVS02
   vrrp_mcast_group4 244.0.0.19
}

vrrp_instance VI_1 {
    interface ens37
    virtual_router_id 50
    preempt_delay 30
    priority 80
    advert_int 1
    unicast_src_ip 192.168.10.31
    unicast_peer {
    192.168.10.105
    }
    authentication {
    auth_type PASS
    auth_pass 123456
}

    virtual_ipaddress {
        192.168.52.188/24 dev ens33 label ens33:1
    }
}

virtual_server 192.168.52.188 80  {
    delay_loop 6
    lb_algo rr
    lb_kind DR
    persistence_timeout 0
    protocol TCP

    real_server 192.168.52.103 80 {
        weight 1
        HTTP_GET {
            url {
              path /
              status_code  200
            }
            connect_timeout 3
            retry 3
            delay_before_retry 3
        }
    }
     real_server 192.168.52.104 80 {
        weight 1
        HTTP_GET {
            url {
              path /
              status_code  200
            }
            connect_timeout 3
            retry 3
            delay_before_retry 3
        }
    }

}
#centos7-13
yum install httpd -y
cd /var/www/html
echo 7-1 > index.html
systemctl start httpd
#centos7-14
yum install httpd -y
cd /var/www/html
echo 7-2 > index.html
systemctl start httpdUbuntu中
systemctl restart keepalived
ipvsadm -Ln
centos7-13和centos7-14

ifconfig lo:0 192.168.52.188 netmask 255.255.255.255

vim /etc/sysctl.conf


net.ipv4.conf.all.arp_ignore = 1
net.ipv4.conf.all.arp_announce = 2
net.ipv4.conf.default.arp_ignore = 1
net.ipv4.conf.default.arp_announce = 2
net.ipv4.conf.lo.arp_ignore = 1
net.ipv4.conf.lo.arp_announce = 2

sysctl -p

route add -host 192.168.52.188 dev lo:0
centos7-11
vim /etc/sysctl.conf
net.ipv4.conf.all.send_redirects = 0
net.ipv4.conf.default.send_redirects = 0
net.ipv4.conf.ens33.send_redirects = 0
sysctl -pubuntu和Ubuntu1
vim /etc/sysctl.conf
net.ipv4.conf.all.send_redirects = 0
net.ipv4.conf.default.send_redirects = 0
net.ipv4.conf.ens33.send_redirects = 0
sysctl -p在centos7-11上
curl 192.168.52.188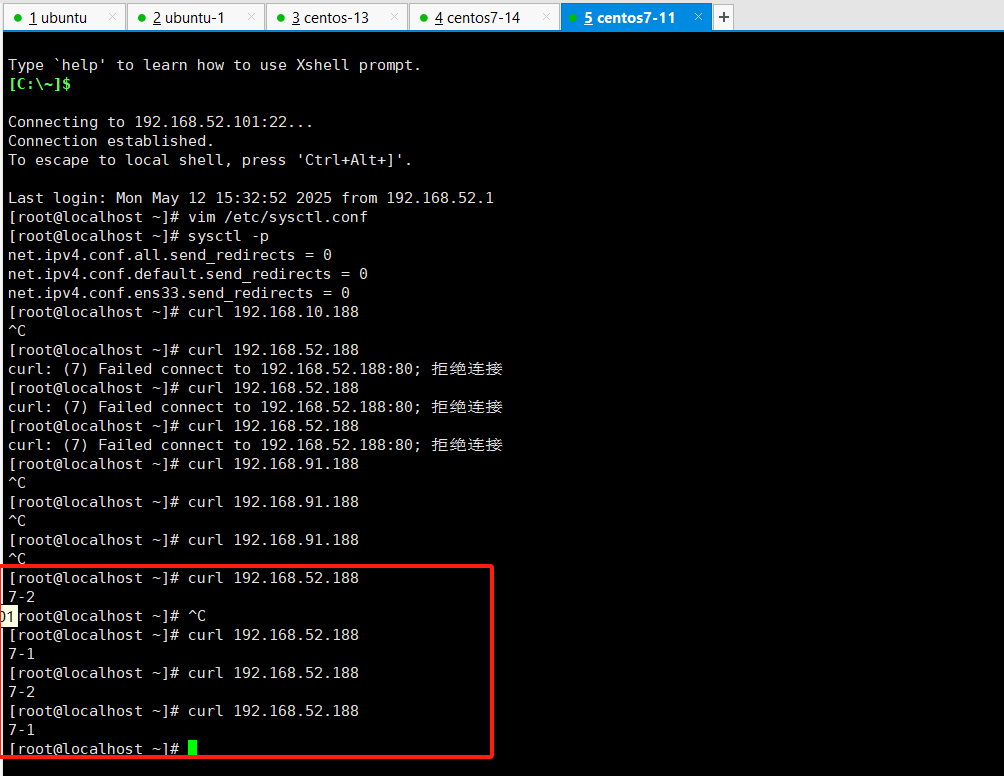
断开Ubuntu(主服务器)的连接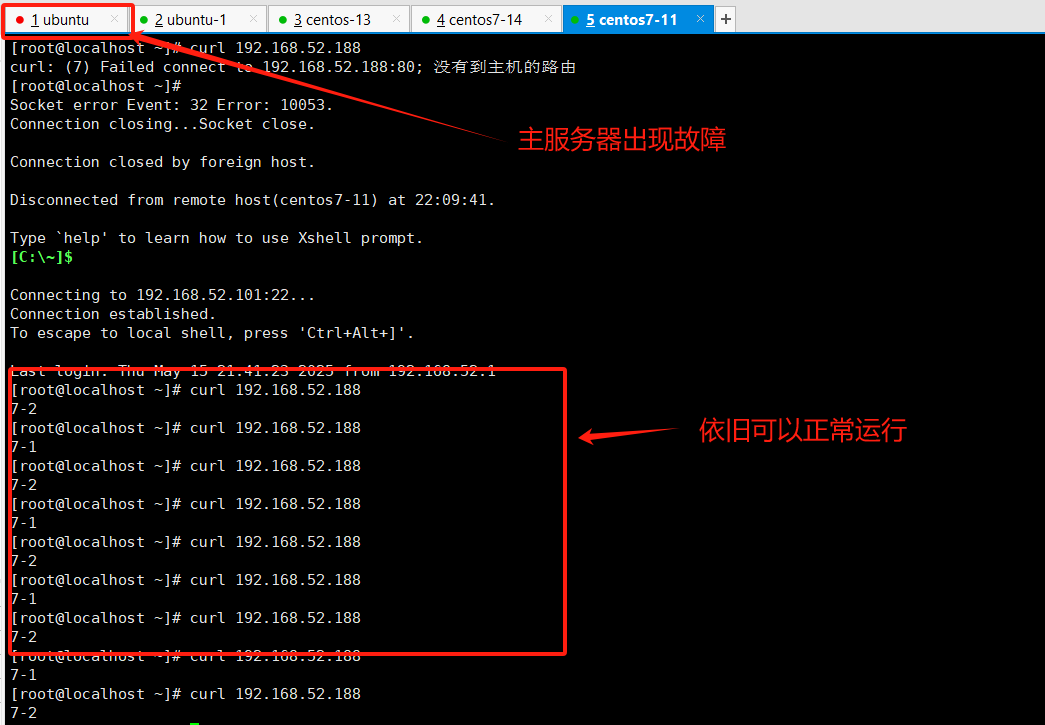
八. nginx和keepalived
Ubuntu和Ubuntu1
killall -0 keepalived
echo $?
apt install nginx -y
vim /etc/keepalived/keepalived.conf
删除
systemctl restart keepalived
Ubuntu中
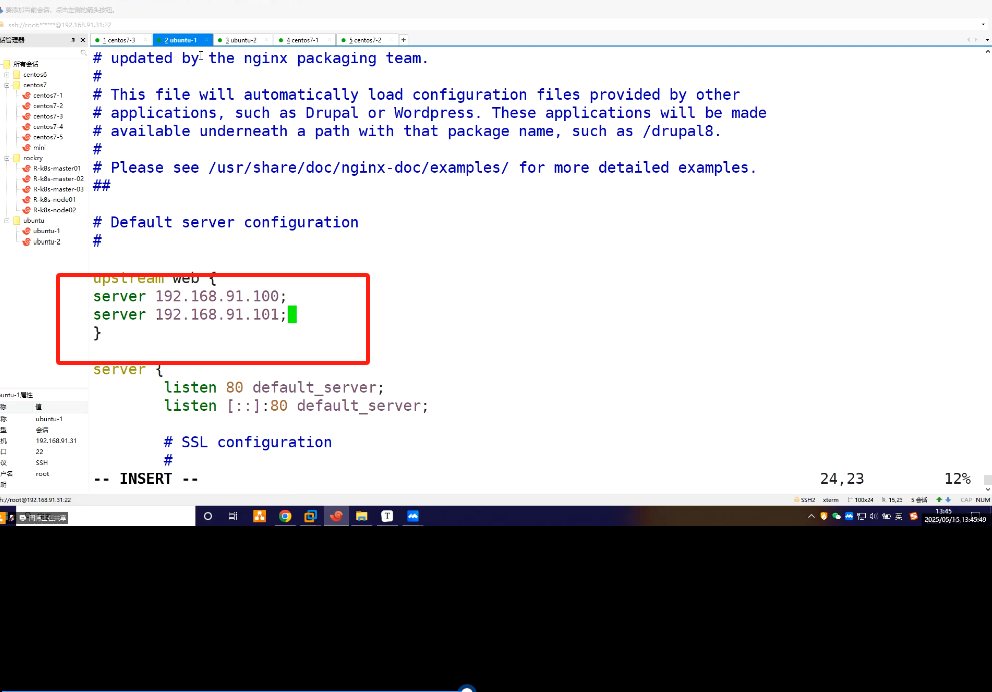
vim /etc/nginx/sites-enabled/default
upstream web {
server 192.168.52.103;
server 192.168.52.104;
}
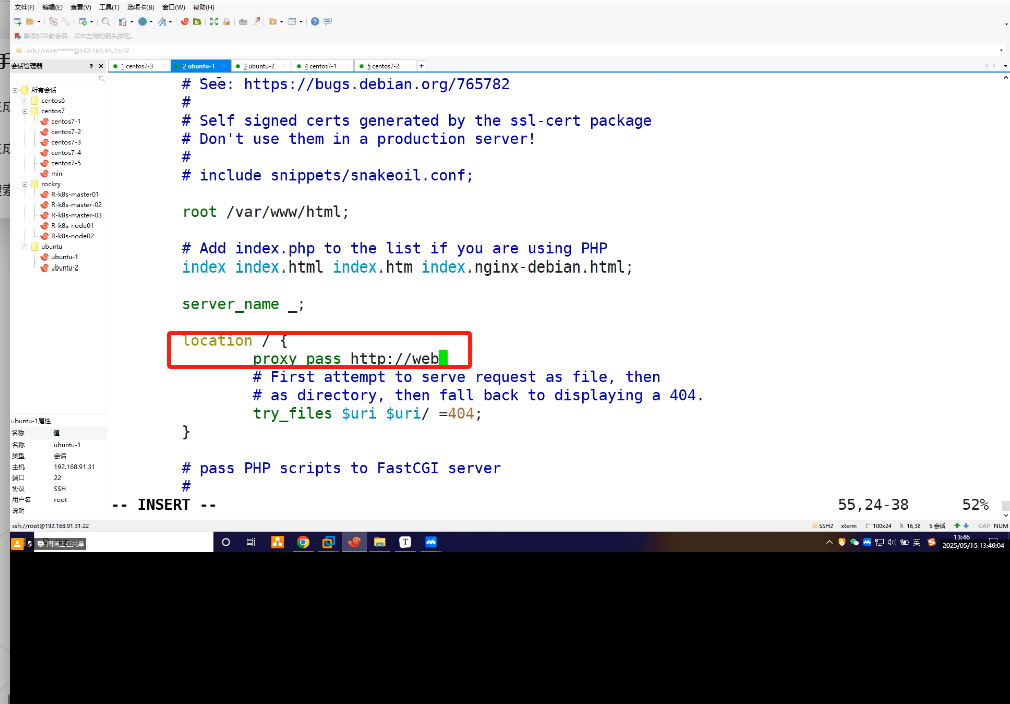
proxy_pass http://web;
systemctl restart nginx
scp /etc/nginx/sites-available/default 192.168.52.31:/etc/nginx/sites-available/default
yes
010918
centos7-11
systemctl stop httpd
curl 192.168.52.188
Ubuntu1

systemctl restart nginx

curl 192.168.52.188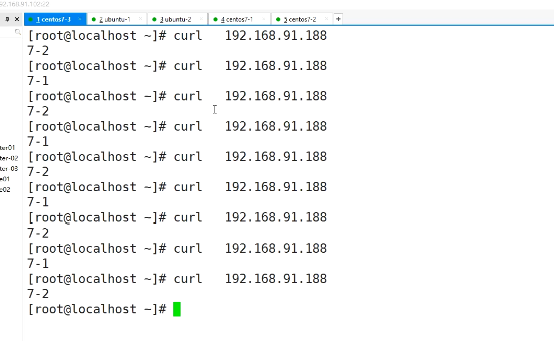
Ubuntu
systemctl stop nginx
systemctl start nginx
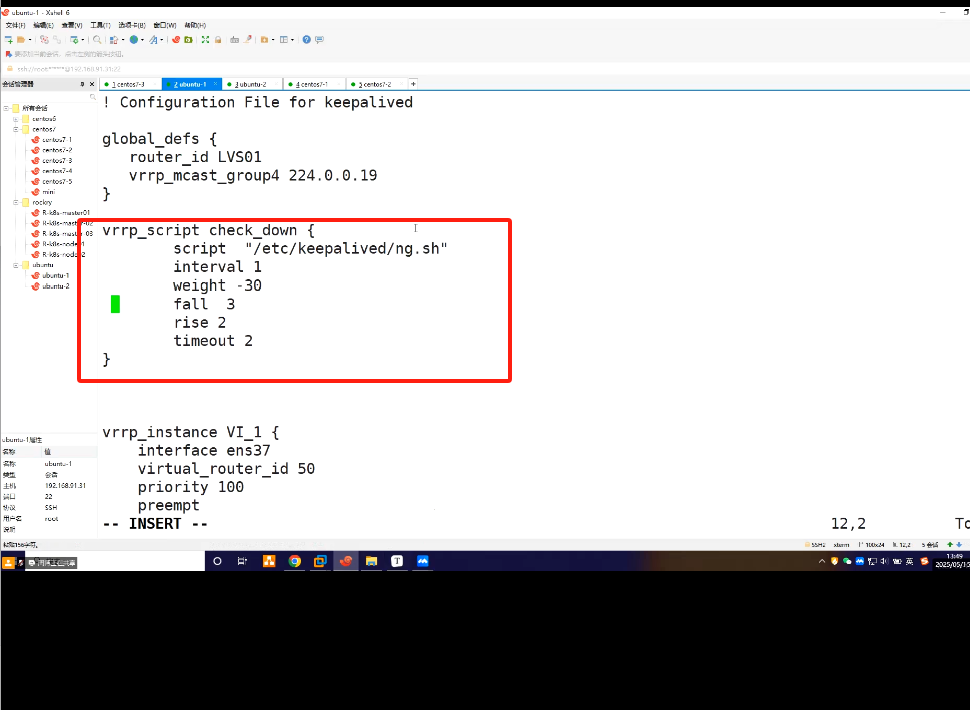
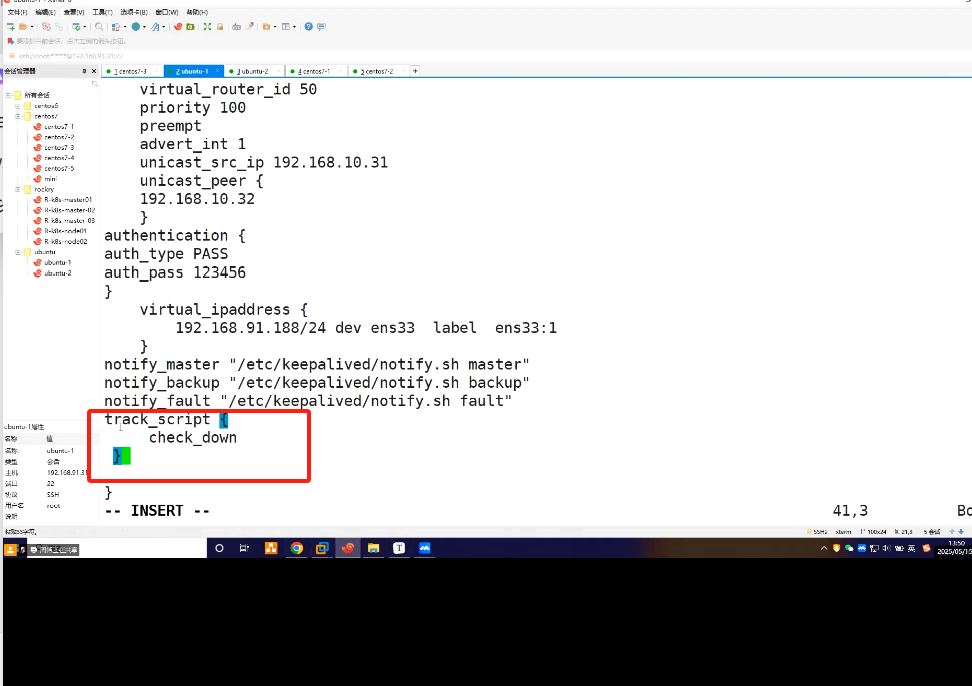
vim /etc/keepalived/keepalived.conf
vrrp_script check_down {
script "/etc/keepalived/ng.sh"
interval 1
weight -30
fall 3
rise 2
timeout 2
}
track_script {
check_down
}
Ubuntu
cd /etc/keepalived/
vim ng.sh
#!/bin/bash
killall -0 nginx
chmod +x /etc/keepalived/ng.sh
Ubuntu1
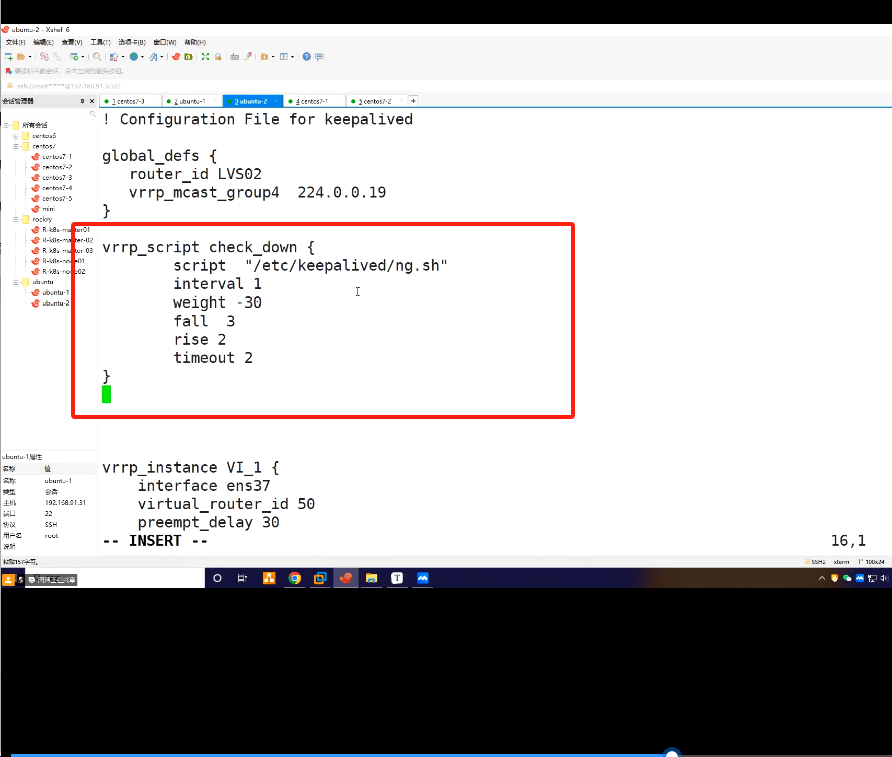
vim /etc/keepalived/keepalived.conf
vrrp_script check_down {
script "/etc/keepalived/ng.sh"
interval 1
weight -30
fall 3
rise 2
timeout 2
}
track_script {
check_down
}
vim ng.sh
#!/bin/bash
killall -0 nginx
killall -0 nginx
Ubuntu和Ubuntu1
systemctl restart keepalived

#在测试机centos7-11上

curl 192.168.52.188
#模拟Ubuntu故障
systemctl stop nginx

curl 192.168.52.188