本文介绍时序数据库Influxdb3 core(开源版本)的安装和简单使用以及调优参数的介绍。
预期:
安装时序数据库Influxdb3 core
创建数据库mydb
写入数据;
使用influxdb3-cli 和 grafana2种方式查询写入的数据
前期准备:
linux服务器(本文服务器配置为debain12.6 64G内存、32 cpu、 1T存储)
influxdb3-core_3.1.0-1_amd64.deb(截稿时的最新版本) 下载地址:InfluxData - Package Repository
开始安装:
- 上传influxdb3-core_3.1.0-1_amd64.deb至服务器;
- 执行安装命令(必须root用户安装)
sudo dpkg -i influxdb3-core_3.1.0-1_amd64.deb- 验证安装完成
influxdb3 --version![]()
简单使用:
1. 启动服务:
influxdb3 serve \
  --node-id host01 \
  --object-store file \
  --query-file-limit 10000 \
  --exec-mem-pool-bytes 42949672960 \
  --parquet-mem-cache-size 16000 \
  --last-cache-eviction-interval 5s \
  --datafusion-max-parquet-fanout 10000 \
  --wal-max-write-buffer-size 200000 \
  --log-filter info \
  --data-dir /root/influxdb3 \
  > /root/influxdb3/influxdb3.log 2>&1 &
serve参数介绍:
--exec-mem-pool-bytes 17179869184 单位是Bytes
--parquet-mem-cache-size 2000 单位是MB
--query-file-limit 4320 设置查询允许扫描的文件个数
--datafusion-max-parquet-fanout 5000 sort是可同时处理file的数量
--last-cache-eviction-interval 5s 从Last-N-Value缓存中清除过期条目的时间间隔
--gen1-duration default10m,可选值:1m, 5m, and 10m(query-file-limit基于这个参数计算得出)
2. 创建token
influxdb3 create token --admin记住该命令返回的Token,后续使用都要用。
3. 创建数据库:
influxdb3 create database mydb --token <第2步生成的token>4. 写入数据:
influxdb3 write \
  --database mydb \
  --token <第2步生成的token> \
  'home,room=Living\ Room temp=21.1,hum=35.9,co=0i 1641024000
home,room=Kitchen temp=21.0,hum=35.9,co=0i 1641024000
home,room=Living\ Room temp=21.4,hum=35.9,co=0i 1641027600
home,room=Kitchen temp=23.0,hum=36.2,co=0i 1641027600
home,room=Living\ Room temp=21.8,hum=36.0,co=0i 1641031200
home,room=Kitchen temp=22.7,hum=36.1,co=0i 1641031200
home,room=Living\ Room temp=22.2,hum=36.0,co=0i 1641034800
home,room=Kitchen temp=22.4,hum=36.0,co=0i 1641034800
home,room=Living\ Room temp=22.2,hum=35.9,co=0i 1641038400
home,room=Kitchen temp=22.5,hum=36.0,co=0i 1641038400
home,room=Living\ Room temp=22.4,hum=36.0,co=0i 1641042000
home,room=Kitchen temp=22.8,hum=36.5,co=1i 1641042000'
5. 查询数据:
a. 使用influxdb3-cli
influxdb3 query \
  --database mydb \
  --token <第2步生成的token> \
  "SELECT * FROM home"
b. 使用grafana
-
-
- Add new Connetcion
-

-
-
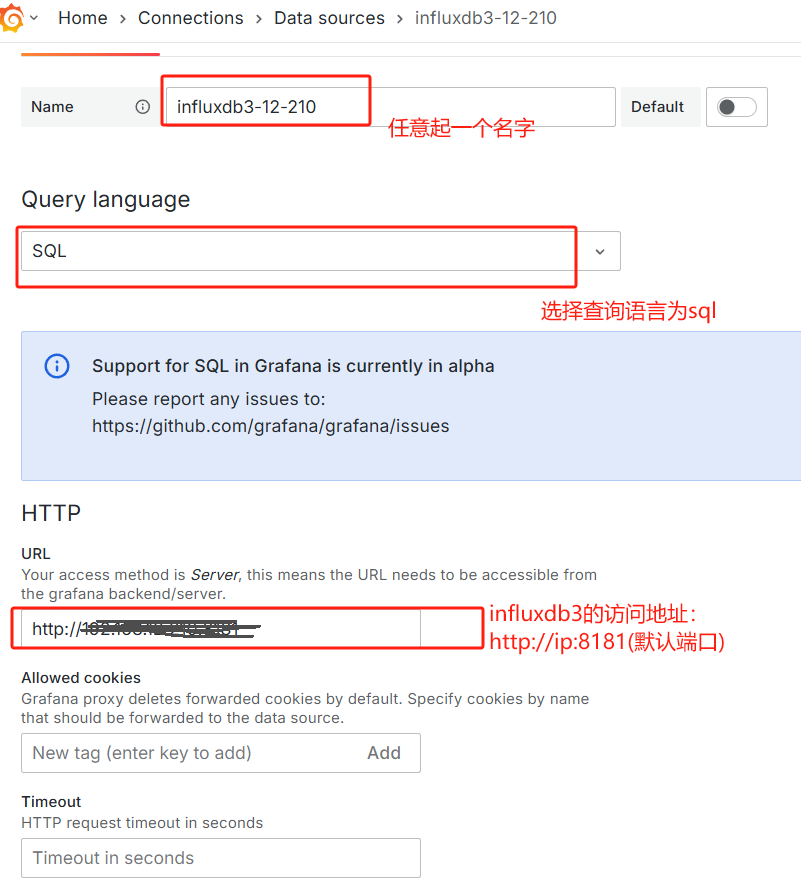
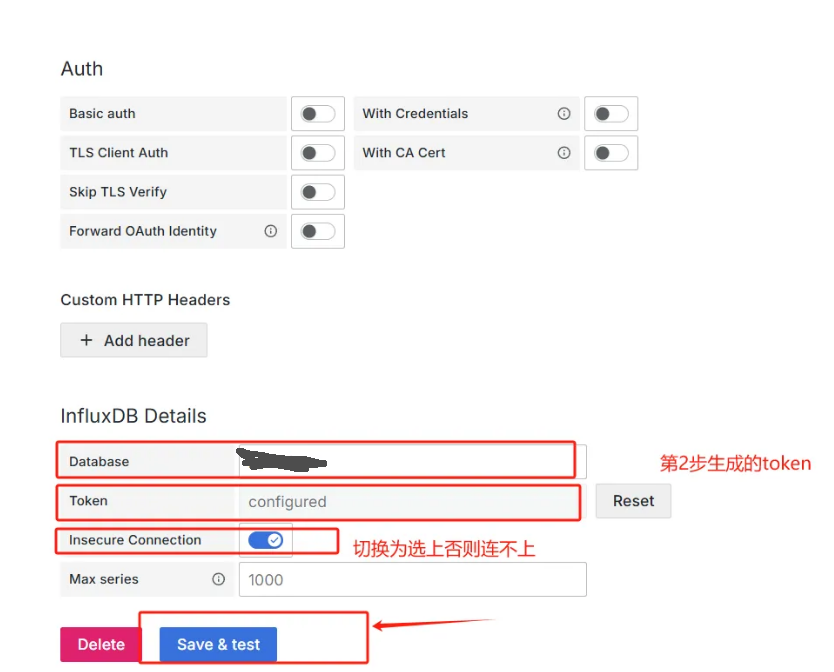
- 按页面提示输入信息:
-
-
-
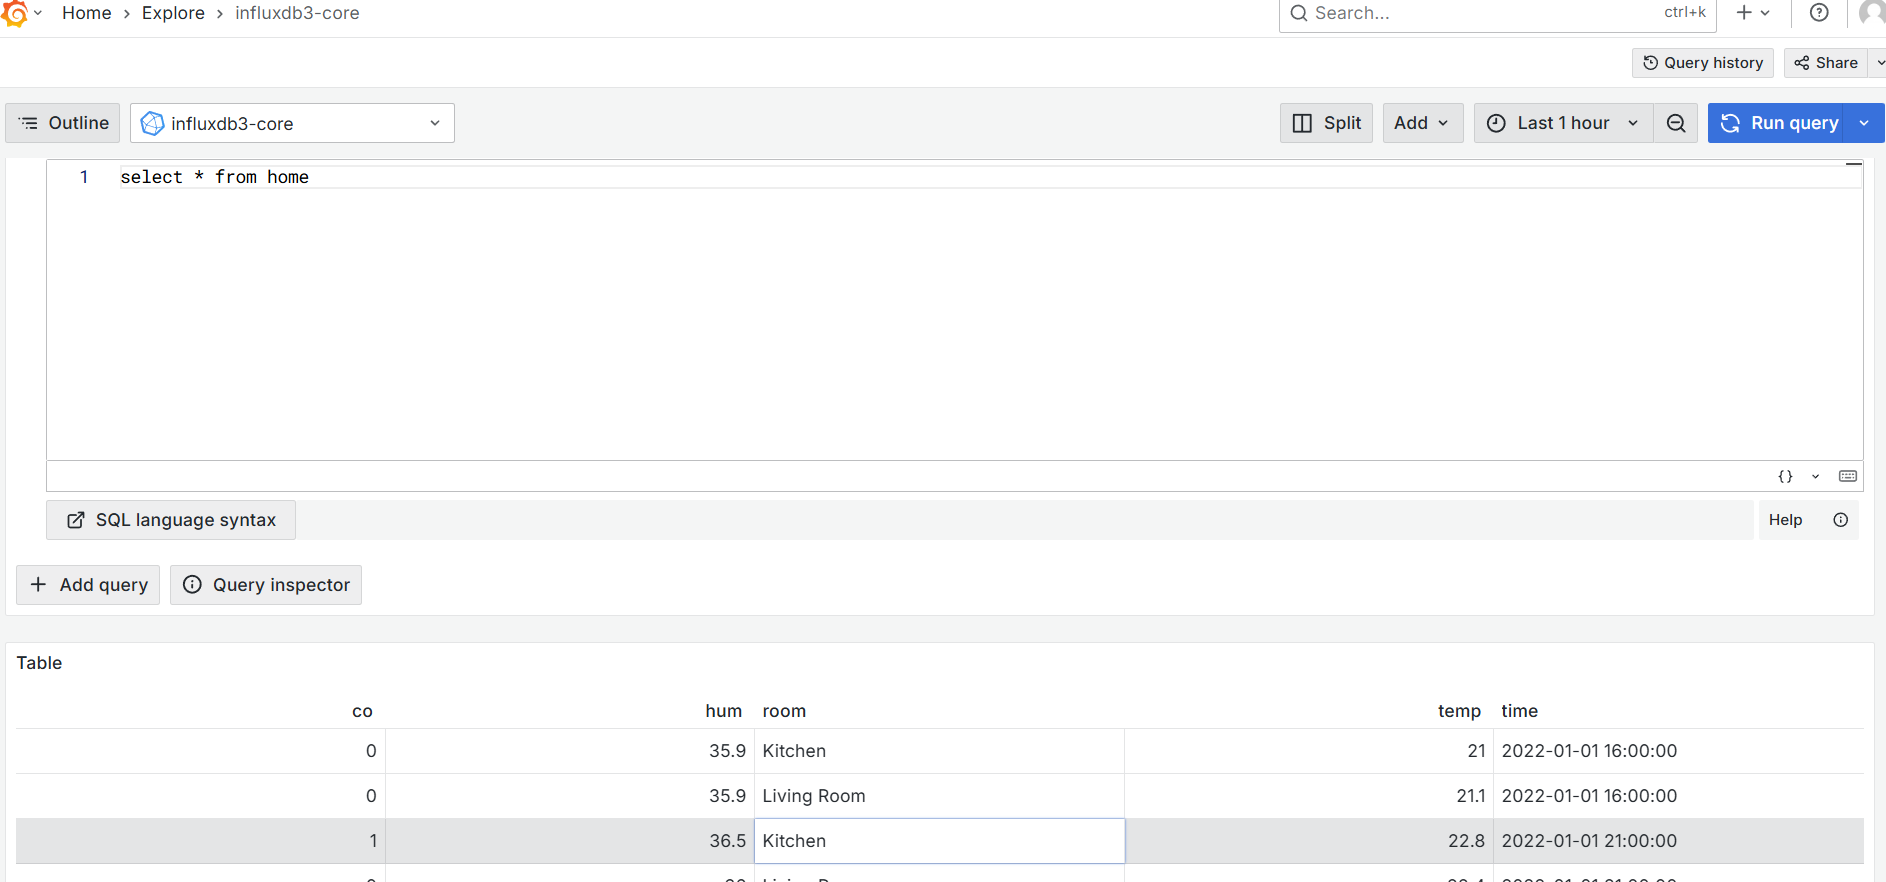
- 点击grafana左侧面板上的explore,选择数据源,开始使用
-
本文完。
附录: