文章目录
0. 老男孩思想-高薪四板斧
- 坚持第一个来,最后一个走
- 以领导的岗位职责要求自己
- 积极主动、勇于承担
- 为领导、其他同事干活
- 把公司当做自己的去工作
- 不要频繁的跳槽
- 当公司有困难时,要主动承担责任,为领导、公司解难
- 对公司要有一定的忠心
- 把前三条坚持做5-10年
薪资的高低和对公司的价值成正比
1. web集群架构图

2. 搭建异地备份服务
- 服务:rsync
- 服务端:阿里云Ubuntu
- 客户端:backup
2.1 服务端-阿里云服务器
2.1.1 查看rsync软件包
# Ubuntu默认安装了rsync
[root@aliyun-ubuntu ~]# dpkg -l |grep rsync
ii  rsync                                  3.2.7-0ubuntu0.22.04.4                  amd64        fast, versatile, remote (and local) file-copying tool
2.1.2 添加rsync配置文件
- 路径:
/etc/rsyncd.conf
[root@aliyun-ubuntu ~]# cat  /etc/rsyncd.conf
#created by oldboy 15:01 2009-6-5
##rsyncd.conf start##
fake super = yes
uid = rsync
gid = rsync
use chroot = no
max connections = 2000
timeout = 600
pid file = /var/run/rsyncd.pid
lock file = /var/run/rsync.lock
log file = /var/log/rsyncd.log
ignore errors
read only = false
list = false
#hosts allow = 172.16.1.0/24
#hosts deny = 0.0.0.0/32
auth users = aliyun_rsync_backup
secrets file = /etc/rsync.password
#####################################
[backup]
comment = www by old0boy 14:18 2012-1-13
path = /nfs/backup/blog
2.1.3 添加虚拟用户
[root@aliyun-ubuntu ~]# id rsync
id: ‘rsync’: no such user
[root@aliyun-ubuntu ~]# useradd -s /sbin/nologin -M rsync
[root@aliyun-ubuntu ~]# id rsync
uid=1001(rsync) gid=1001(rsync) groups=1001(rsync)
[root@aliyun-ubuntu ~]# tail -1 /etc/passwd
rsync:x:1001:1001::/home/rsync:/sbin/nologin
2.1.4 创建校验用户密码文件
[root@aliyun-ubuntu ~]# echo aliyun_rsync_backup:1 >/etc/rsync.password
[root@aliyun-ubuntu ~]# chmod 600 /etc/rsync.password
[root@aliyun-ubuntu ~]# ll /etc/rsync.password
-rw------- 1 root root 22 Jun 24 17:32 /etc/rsync.password
2.1.5 创建备份目录
[root@aliyun-ubuntu ~]# mkdir -p /nfs/backup/blog
[root@aliyun-ubuntu ~]# ll /nfs/backup/blog -d
drwxr-xr-x 2 root root 4096 Jun 24 17:34 /nfs/backup/blog/
[root@aliyun-ubuntu ~]# chown -R rsync:rsync /nfs/backup/blog
[root@aliyun-ubuntu ~]# ll /nfs/backup/blog -d
drwxr-xr-x 2 rsync rsync 4096 Jun 24 17:34 /nfs/backup/blog/
2.1.6 启动服务
[root@aliyun-ubuntu ~]# systemctl enable --now rsync.service
Synchronizing state of rsync.service with SysV service script with /lib/systemd/systemd-sysv-install.
Executing: /lib/systemd/systemd-sysv-install enable rsync
Created symlink /etc/systemd/system/multi-user.target.wants/rsync.service → /lib/systemd/system/rsync.service.
[root@aliyun-ubuntu ~]# systemctl is-active rsync.service
active
[root@aliyun-ubuntu ~]# systemctl is-enabled rsync.service
enabled
[root@aliyun-ubuntu ~]# ps -ef |grep [r]sync
root      128116       1  0 17:36 ?        00:00:00 /usr/bin/rsync --daemon --no-detach
[root@aliyun-ubuntu ~]# ss -lntup |grep rsync
tcp   LISTEN 0      5                 0.0.0.0:873       0.0.0.0:*    users:(("rsync",pid=128116,fd=5))
tcp   LISTEN 0      5                    [::]:873          [::]:*    users:(("rsync",pid=128116,fd=6))
2.1.7 开放安全组端口

2.1.8 发送检查邮件
- 配置邮件服务器
- 下载邮件服务:
apt install -y s-nail - 邮件服务的配置文件:
/etc/s-nail.rc
- 下载邮件服务:
set from=skx2554798585@163.com
set smtp=smtps://smtp.163.com:465
set smtp-auth-user=skx2554798585@163.com
set smtp-auth-password=CPVZ6355KsCtEUik
set smtp-auth=login
set ssl-verify=ignore
set nss-config-dir=/etc/pki/nssdb/
- 编写发送邮件脚本
[root@aliyun-ubuntu /server/scripts]# cat check_rsync_remote_backup.sh
#!/bin/bash
##############################################################
# File Name: check_rsync_remote_backup.sh
# Version: V1.0
# Author: SunKexu
# Organization: www.oldboyedu.com
# Description:check remote backup
##############################################################
export LANG=en_US.UTF-8

# vars
# backup file
file=`mktemp`
# year
year=`date +%Y`
# month
month=`date +%m`
# date
date=`date +%F_%w`
# backup dir
backup="/nfs/backup/blog/"
# title
title="aliyun-backup_check-${date}"
# mail
mail="skx2554798585@qq.com"
# command
echo "Number of documents this month:" >${file}
ls -l "${backup}${year}/${month}" |awk 'NR>1' |wc -l >>${file}
echo "backup dir size:" >>${file}
du -sh ${backup} |cut -f1 >>${file}
# send mail
cat ${file} |s-nail -s "${title}" ${mail}
- 设置定时任务
[root@aliyun-ubuntu /server/scripts]# crontab -e
crontab: installing new crontab
[root@aliyun-ubuntu /server/scripts]# crontab -l
# rsync remote backup check
0 8 * * * bash /server/scripts/rsync/check_rsync_remote_backup.sh >/dev/null 2>&1
2.2 客户端
- 查看本机公网ip
[root@backup ~]# curl ifconfig.io
123.117.19.236
2.2.1 检查与服务端的网络连通性
# 阿里云的公网ip
[root@backup ~]# grep aliyun /etc/hosts
8.140.211.162 aliyun
[root@backup ~]# ping aliyun -c1
PING aliyun (8.140.211.162) 56(84) bytes of data.
64 bytes from aliyun (8.140.211.162): icmp_seq=1 ttl=128 time=7.41 ms

--- aliyun ping statistics ---
1 packets transmitted, 1 received, 0% packet loss, time 0ms
rtt min/avg/max/mdev = 7.409/7.409/7.409/0.000 ms
2.2.2 创建rsync用户的密码文件
[root@backup ~]# echo 1 >/etc/rsync-client.password
[root@backup ~]# ll /etc/rsync-client.password
-rw-r--r-- 1 root root 2  6月 24 17:45 /etc/rsync-client.password
[root@backup ~]# chmod 600 /etc/rsync-client.password
[root@backup ~]# ll /etc/rsync-client.password
-rw------- 1 root root 2  6月 24 17:45 /etc/rsync-client.password
2.2.3 测试
- 备份路径:
/nfs/backup/blog - 创建备份目录
[root@backup ~]# mkdir -p /nfs/backup/blog/
- 测试

2.2.4 编写定时备份脚本
[root@backup /server/scripts]# cat rsync_remote_backup.sh
#!/bin/bash
##############################################################
# File Name:rsync_remote_backup.sh
# Version:V1.0
# Author:SunKexu
# Organization:www.oldboyedu.com
# Desc:rsync 异地备份
##############################################################
export LANG=en_US.UTF-8

# vars
username="aliyun_rsync_backup"
server_ip="aliyun"
bak_module="backup"
bak_dir="/nfs/backup/blog/"
client_password="/etc/rsync-client.password"
# command
# rsync同步备份
send_backup_files(){
	rsync -avz "${bak_dir}" "${username}"@"${server_ip}"::"${bak_module}" --password-file="${client_password}"
	[ $? -eq 0 ] && echo "rsync success!" || {
		echo "rsync failed"
		exit 1
	}
}
send_backup_files
2.2.5 设置定时任务
[root@backup /nfs/backup/blog]# crontab -e
crontab: installing new crontab
[root@backup /nfs/backup/blog]# crontab -l
#1. sync time by lidao996 at 20230101
*/3 * * * * /sbin/ntpdate ntp.aliyun.com  >/dev/null  2>&1
#2. 异地备份
0 1 * * * bash /server/scripts/rsync_remote_backup.sh >/dev/null 2>&1
3. 搭建实时备份服务
- 服务:rsync服务、lsyncd服务
- backup服务器:rsync服务端、lsyncd客户端
- nfs服务器:rsync客户端、lsyncd服务端
3.1 backup服务器
3.1.1 编辑rsync配置文件
[root@backup ~]# cat /etc/rsyncd.conf
#created by oldboy 15:01 2009-6-5
##rsyncd.conf start##
fake super = yes
uid = rsync
gid = rsync
use chroot = no
max connections = 2000
timeout = 600
pid file = /var/run/rsyncd.pid
lock file = /var/run/rsync.lock
log file = /var/log/rsyncd.log
ignore errors
read only = false
list = false
#hosts allow = 10.0.0.0/24
#hosts deny = 0.0.0.0/32
auth users = rsync_backup
secrets file = /etc/rsync.password
#####################################
[backup]
comment = www by old0boy 14:18 2012-1-13
path = /nfs/backup/blog
3.1.2 创建虚拟用户rsync
[root@backup ~]# id rsync
id: “rsync”:无此用户
[root@backup ~]# useradd -s /sbin/nologin -M rsync
[root@backup ~]# id rsync
用户id=1000(rsync) 组id=1000(rsync) 组=1000(rsync)
3.1.3 创建校验用户密码文件
[root@backup ~]# echo "rsync_backup:1" >/etc/rsync.password
[root@backup ~]# chmod 600 /etc/rsync.password
[root@backup ~]# ll /etc/rsync.password
-rw------- 1 root root 15  6月 24 19:49 /etc/rsync.password
3.1.4 修改备份目录所属用户/组
[root@backup ~]# chown -R rsync:rsync /nfs/backup/blog/
[root@backup ~]# ll -d /nfs/backup/blog/
drwxr-xr-x 2 rsync rsync 4096  6月 24 19:05 /nfs/backup/blog/
接下来backup作为lsyncd客户端进行配置
3.1.5 lsyncd测试

3.2 nfs服务器
3.2.1 添加rsync用户密码文件
[root@nfs01 ~]# echo 1 >/etc/rsync-client.password
[root@nfs01 ~]# chmod 600 /etc/rsync-client.password
[root@nfs01 ~]# ll /etc/rsync-client.password
-rw------- 1 root root 2  6月 24 19:53 /etc/rsync-client.password
3.2.2 rsync测试

接下来nfs作为lsyncd服务端进行配置
3.2.3 检查lsyncd软件包
[root@nfs01 ~]# rpm -qa |grep lsyncd
lsyncd-2.2.3-2.ky10.x86_64
[root@nfs01 ~]# rpm -ql lsyncd
/etc/logrotate.d/lsyncd
/etc/lsyncd.conf
/etc/sysconfig/lsyncd
……
3.2.4 修改lsyncd配置文件
[root@nfs01 ~]# cat /etc/lsyncd.conf
--全局部分主要配置lsyncd服务,日志,pid文件.
settings {
   --※※※※※日志文件,主要查看日志文件.
   logfile    = "/var/log/lsyncd.log",
   --pid文件
   pidfile    = "/var/run/lsyncd.pid",
   --服务状态文件
   statusFile = "/var/log/lsyncd.status",
   --改为非守护进程模式,默认.rsync命令,lsyncd
   nodaemon   = true,
   --控制最多用于传输数据的进程数量 rsync进程数(最大)
   --※※※※※根据cpu核心数来 一致或2倍
   maxProcesses = 2
}

--配置rsync命令,rsync服务端与客户端模式
--sync部分可以有多个.
sync {
    --指定rsync工作模式
    default.rsync,
    --※※※※※ 指定lsyncd监控目录,源目录
    source    = "/nfs/backup/blog",
    --※※※※※ 指定目标 rsync服务端    用户名@rsync ip地址::模块名字
    target    = "rsync_backup@172.16.1.41::backup",
    --※※※※※ 每隔5秒同步一次.
    delay     = 5,
    --rsync命令的  --delete 选项  保存客户端与服务端 内容一致.
    delete    = true,
    -- 配置rsync命令位置,rsync命令选项,
    rsync     = {
        -- 命令位置
        binary   = "/usr/bin/rsync",
        -- rsync命令的 -a选项
        archive  = true,
        -- rsync命令的  -z选项 压缩
        compress = true,
        -- ※※※※※配置rsync--password-file密码文件
        password_file = "/etc/rsync-client.password"
    }
}
3.2.5 创建备份目录
[root@nfs01 ~]# mkdir -p /nfs/backup/blog
[root@nfs01 ~]# ll -d /nfs/backup/blog
drwxr-xr-x 2 root root 6  6月 24 20:19 /nfs/backup/blog
3.2.6 设置lsyncd服务自启动
[root@nfs01 ~]# systemctl enable --now lsyncd.service
Created symlink /etc/systemd/system/multi-user.target.wants/lsyncd.service → /usr/lib/systemd/system/lsyncd.service.
[root@nfs01 ~]# systemctl is-active lsyncd.service
active
[root@nfs01 ~]# systemctl is-enabled lsyncd.service
enabled
4. 搭建nfs服务
- 服务:nfs
- 服务端:nfs服务器
- 客户端:web服务器
4.1 服务端
4.1.1 查看nfs服务的软件包
[root@nfs01 ~]# rpm -qa |grep -E 'nfs-utils|rpcbind'
nfs-utils-2.5.1-5.p04.ky10.x86_64
rpcbind-1.2.5-2.p01.ky10.x86_64
rpcbind-help-1.2.5-2.p01.ky10.noarch
nfs-utils-help-2.5.1-5.p04.ky10.x86_64
4.1.2 启动rpc中介服务
[root@nfs01 ~]# systemctl enable --now  rpcbind.service
[root@nfs01 ~]# systemctl is-active rpcbind.service
active
[root@nfs01 ~]# systemctl is-enabled rpcbind.service
enabled
[root@nfs01 ~]# rpcinfo -p
   program vers proto   port  service
    100000    4   tcp    111  portmapper
    100000    3   tcp    111  portmapper
    100000    2   tcp    111  portmapper
……
4.1.3 创建虚拟用户:www,修改共享目录所属用户/组
[root@nfs01 ~]# id www
id: “www”:无此用户
[root@nfs01 ~]# useradd -s /sbin/nologin -M -u 1999 www
[root@nfs01 ~]# id www
用户id=1999(www) 组id=1999(www) 组=1999(www)
[root@nfs01 ~]# tail -1 /etc/passwd
www:x:1999:1999::/home/www:/sbin/nologin
[root@nfs01 ~]# chown -R www:www /nfs/backup/blog/
[root@nfs01 ~]# ll -d /nfs/backup/blog/
drwxr-xr-x 3 www www 87  6月 24 20:25 /nfs/backup/blog/
4.1.4 修改nfs配置文件,添加挂载路径
[root@nfs01 ~]# cat /etc/exports |grep '/nfs/backup/blog'
/nfs/backup/blog 172.16.1.0/24(rw,all_squash,anonuid=1999,anongid=1999)
4.1.5 启动nfs服务
[root@nfs01 ~]# systemctl enable --now nfs
[root@nfs01 ~]# systemctl is-active nfs
active
[root@nfs01 ~]# systemctl is-enabled nfs
enabled
[root@nfs01 ~]# rpcinfo -p |grep nfs
    100003    3   tcp   2049  nfs
    100003    4   tcp   2049  nfs
    100227    3   tcp   2049  nfs_acl
[root@nfs01 ~]# showmount -e |grep '/nfs/backup/blog'
/nfs/backup/blog 172.16.1.0/24
4.2 客户端
4.2.1 查看是否有nfs
[root@web01 ~]# rpcinfo -p nfs01 |grep nfs
    100003    3   tcp   2049  nfs
    100003    4   tcp   2049  nfs
    100227    3   tcp   2049  nfs_acl
[root@web01 ~]# showmount -e nfs01 |grep '/nfs/backup'
/nfs/backup/blog 172.16.1.0/24
4.2.2 挂载测试
[root@web01 ~]# mount -t nfs nfs01:/nfs/backup/blog /mnt/
[root@web01 ~]# df -hT /mnt/
文件系统               类型  容量  已用  可用 已用% 挂载点
nfs01:/nfs/backup/blog nfs4   77G  4.1G   73G    6% /mnt
[root@web01 ~]# ll -d /mnt/
drwxr-xr-x 3 www www 87  6月 24 20:25 /mnt/
[root@web01 ~]# ll /mnt/
总用量 0
-rw-r--r-- 1 www www 0  6月 24 20:23 孙克旭.com
-rw-r--r-- 1 www www 0  6月 24 20:24 oldboy-lidao-孙克旭.com
drwxr-xr-x 2 www www 6  6月 24 20:25 skx
-rw-r--r-- 1 www www 0  6月 24 20:24 skx.com
5. 搭建mariadb数据库
- 服务器:db01
5.1 安装mariadb
[root@web01 ~]# yum install -y mariadb-server
上次元数据过期检查:1:15:23 前,执行于 2025年06月23日 星期一 18时21分42秒。
软件包 mariadb-server-3:10.3.39-1.p01.ky10.x86_64 已安装。
依赖关系解决。
无需任何处理。
完毕!
# 设置开机自启动
[root@web01 ~]# systemctl enable --now mariadb-server
[root@web01 ~]# systemctl is-active mariadb.service
active
[root@web01 ~]# systemctl is-enabled mariadb.service
enabled
# 检查
[root@db01 ~]# ps -ef |grep [m]ysql
mysql       1015       1  0 09:22 ?        00:00:17 /usr/libexec/mysqld
[root@db01 ~]# ss -lntup |grep mysql
tcp     LISTEN   0        80                     *:3306                *:*       users:(("mysqld",pid=1015,fd=33))
5.2 数据库配置
- 安装配置:
mysql_secure_installation - 创建blog数据库:
create database blog; - 添加blog用户,并设置权限,可以远程登录:
grant all on blog.* to 'blog'@'172.16.1.%' identified by '1';
5.3 远程登录测试
- 数据库客户端:web01
[root@web01 ~]# mysql -ublog -p1 -h db01
……
MariaDB [(none)]> select user();
+------------+
| user()     |
+------------+
| blog@web01 |
+------------+
1 row in set (0.001 sec)

MariaDB [(none)]> show databases;
+--------------------+
| Database           |
+--------------------+
| blog               |
| information_schema |
+--------------------+
2 rows in set (0.001 sec)
6. 搭建nginx服务
- 服务器:web01
6.1 配置nginx官方yum源
[root@web01 ~]# cat /etc/yum.repos.d/nginx.repo
[nginx-stable]
name=nginx stable repo
baseurl=http://nginx.org/packages/centos/7/$basearch/
gpgcheck=1
enabled=1
gpgkey=https://nginx.org/keys/nginx_signing.key
module_hotfixes=true

[nginx-mainline]
name=nginx mainline repo
baseurl=http://nginx.org/packages/mainline/centos/7/$basearch/
gpgcheck=1
enabled=0
gpgkey=https://nginx.org/keys/nginx_signing.key
module_hotfixes=true
6.2 下载并启动nginx
[root@web01 /etc/yum.repos.d]# yum install -y nginx
上次元数据过期检查:0:03:22 前,执行于 2025年06月22日 星期日 11时49分44秒。
软件包 nginx-1:1.26.1-2.el7.ngx.x86_64 已安装。
依赖关系解决。
无需任何处理。
完毕!
[root@web01 /etc/yum.repos.d]# systemctl enable --now nginx
Created symlink /etc/systemd/system/multi-user.target.wants/nginx.service → /usr/lib/systemd/system/nginx.service.
[root@web01 /etc/yum.repos.d]# systemctl status nginx
……
6.3 修改nginx的虚拟用户并创建该虚拟用户
[root@web01 /etc/nginx]# grep -nE '^user ' nginx.conf
3:user  www;
[root@web01 /app/code/blog]# useradd -s /sbin/nologin -M www
[root@web01 /app/code/blog]# id www
用户id=1999(www) 组id=1999(www) 组=1999(www)
6.4 添加站点子配置文件
[root@web01 /etc/nginx/conf.d]# cat blog.oldboy.cn.conf
server {
	listen 80;
	server_name blog.oldboy.cn;
	root /app/code/blog;
	error_log /var/log/nginx/blog.oldboy.cn-error.log notice;
	access_log /var/log/nginx/blog.oldboy.cn-access.log main;

	location / {
		index index.php;
	}
	location ~ \.php$ {
		fastcgi_pass 127.0.0.1:9000;
		fastcgi_index index.php;
		fastcgi_param SCRIPT_FILENAME $document_root$fastcgi_script_name;
		include fastcgi_params;
	}
}
6.5 创建站点根目录并修改所属用户/组
[root@web01 /app/code/blog]# mkdir -p /app/code/blog/
[root@web01 /app/code/blog]# chown -R www:www /app/code/blog/
6.6 在站点跟目录添加php文件
[root@web01 /app/code/blog]# cat chk_db.php
<?php
//数据库地址
$db_host='db01'
$db_user='blog'
$db_pass='1'
//数据库名字
$db_name='blog'

$link_id=mysqli_connect($db_host,$db_user,$db_pass,$db_name);
if($link_id){
	echo "mysql successflu by oldboy lidao996!\n";
}else{
	echo "connection failed!\n"
}
?>
6.7 部署WordPress代码
6.7.1 下载压缩包并解压
[root@web01 ~]# wget https://cn.wordpress.org/latest-zh_CN.zip
[root@web01 ~]# unzip latest-zh_CN.zip
6.7.2 移动代码至站点目录,重启nginx
[root@web01 ~]# mv wordpress/* /app/code/blog/
[root@web01 ~]# chown -R www:www /app/code/blog/
[root@web01 /app/code/blog]# systemctl reload nginx.service
6.7.3 配置本地hosts解析

6.7.4 本地浏览器访问


- 在文章中上传一张图片

6.8 配置数据库信息
- 查看下数据库信息是否正确
[root@web01 /app/code/blog]# grep 'DB' wp-config.php
define( 'DB_NAME', 'blog' );
define( 'DB_USER', 'blog' );
define( 'DB_PASSWORD', '1' );
define( 'DB_HOST', 'db01' );
define( 'DB_CHARSET', 'utf8mb4' );
define( 'DB_COLLATE', '' );
6.9 挂载nfs共享目录
[root@web01 /app/code/blog/wp-content/uploads]# df -h
文件系统                容量  已用  可用 已用% 挂载点
devtmpfs                962M     0  962M    0% /dev
tmpfs                   979M     0  979M    0% /dev/shm
tmpfs                   979M  9.0M  970M    1% /run
tmpfs                   979M     0  979M    0% /sys/fs/cgroup
/dev/mapper/klas-root    77G  4.6G   73G    6% /
/dev/sda1               2.0G  178M  1.9G    9% /boot
tmpfs                   196M     0  196M    0% /run/user/0
nfs01:/nfs/backup/blog   77G  4.1G   73G    6% /mnt
[root@web01 /app/code/blog/wp-content/uploads]# umount /mnt
[root@web01 /app/code/blog/wp-content/uploads]# mkdir /backup/up -p
[root@web01 /app/code/blog/wp-content/uploads]# mv ./* /backup/up
[root@web01 /app/code/blog/wp-content/uploads]# mount -t nfs nfs01:/nfs
/nfs/backup/blog  /nfs/blog         /nfsdata          /nfs/pics
[root@web01 /app/code/blog/wp-content/uploads]# mount -t nfs nfs01:/nfs/backup/blog ./
[root@web01 /app/code/blog/wp-content/uploads]# df -hT /app/code/blog/wp-content/uploads/
文件系统               类型  容量  已用  可用 已用% 挂载点
nfs01:/nfs/backup/blog nfs4   77G  4.1G   73G    6% /app/code/blog/wp-content/uploads
[root@web01 /app/code/blog/wp-content/uploads]# mv /backup/up/* ./
- 上面是临时挂载,可以永久挂载
[root@web01 ~]# tail -n1 /etc/fstab
nfs01:/nfs/backup/blog /app/code/blog/wp-content/uploads	nfs	defaults        0 0
6.10 重启nginx
[root@web01 ~]# systemctl reload nginx.service
7. 搭建php服务
- 服务器:web01
7.1 下载php
yum -y install php php-bcmath php-cli php-common php-devel php-embedded php-fpm php-gd php-intl php-mbstring php-mysqlnd php-opcache php-pdo php-process php-xml php-json
- 开机自启动
[root@web01 ~]# systemctl enable --now php-fpm
7.2 修改php配置文件
[root@web01 ~]# grep -En '^(user|group|listen) ' /etc/php-fpm.d/www.conf
24:user = www
26:group = www
38:listen = 127.0.0.1:9000
7.3 检查语法并重启
[root@web01 ~]# php-fpm -t
[24-Jun-2025 21:52:40] NOTICE: configuration file /etc/php-fpm.conf test is successful

[root@web01 ~]# systemctl reload php-fpm.service
8. 测试


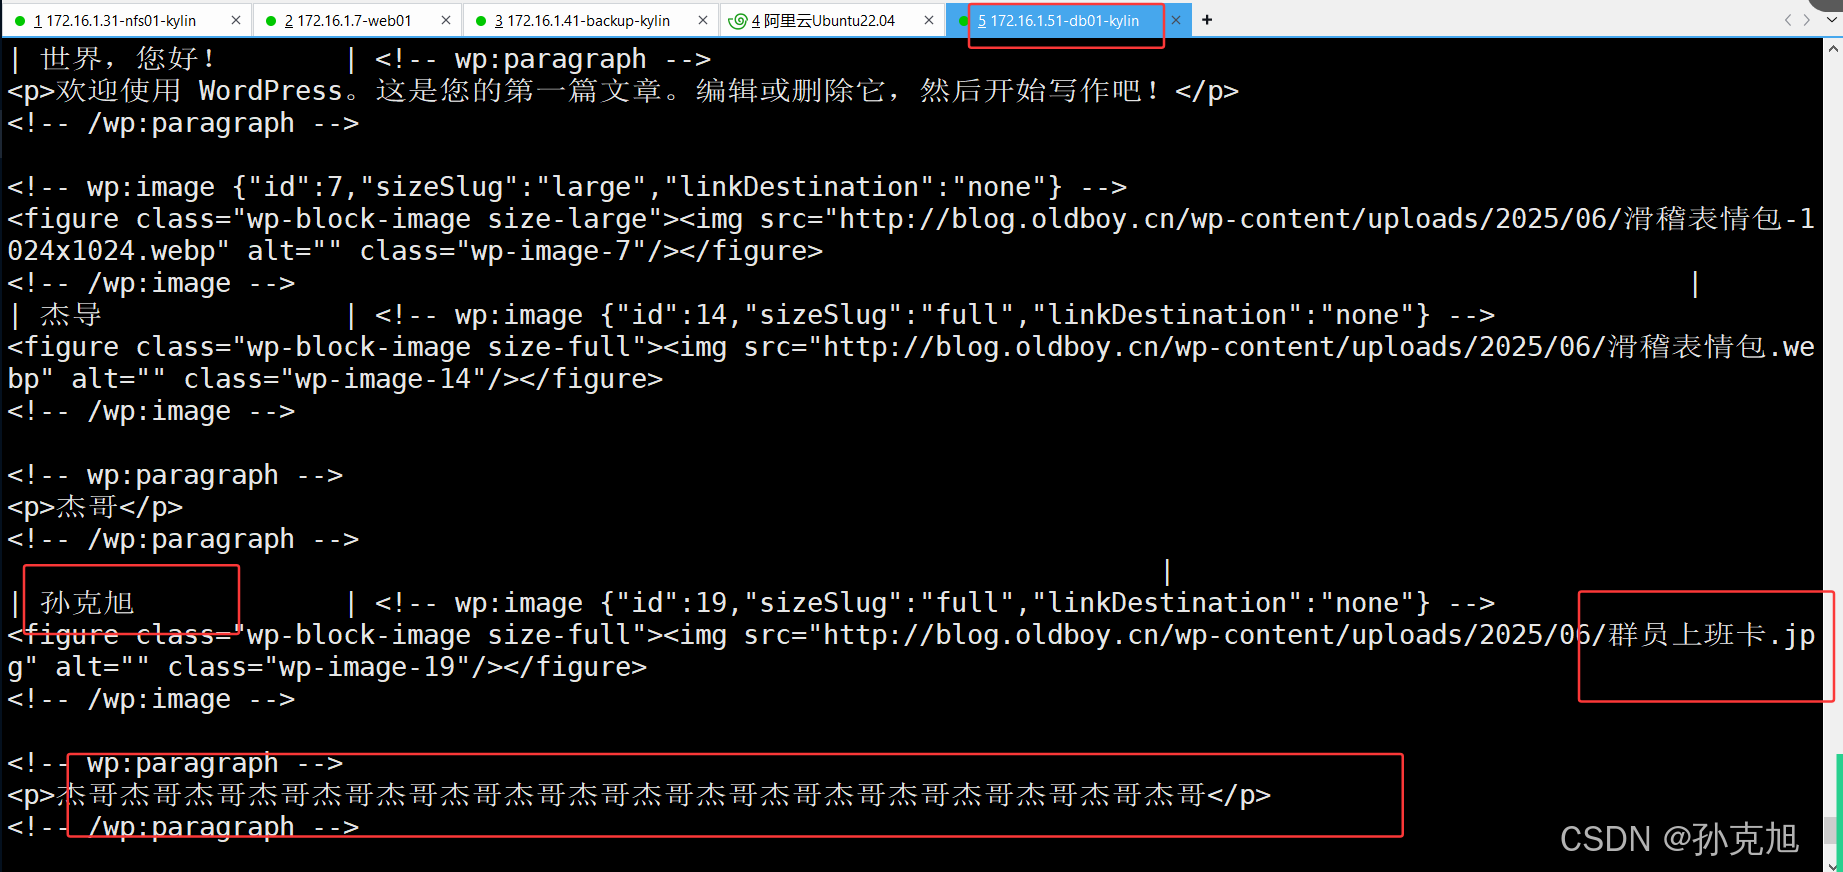
- 查看数据库文本信息:SELECT post_title, post_content FROM wp_posts WHERE post_type = ‘post’;
- 测试总结
- 太过完美🙂

9. 踩坑记录
1. lsyncd.service: Start request repeated too quickly.


- lsyncd监听的目录没创建(;・∀・)
2. 云服务器Ubuntu,不能使用中文

- 修改字符集:
localectl set-locale LANG=en_US.UTF-8
