目录
一、线程库thread
1.使用外部函数
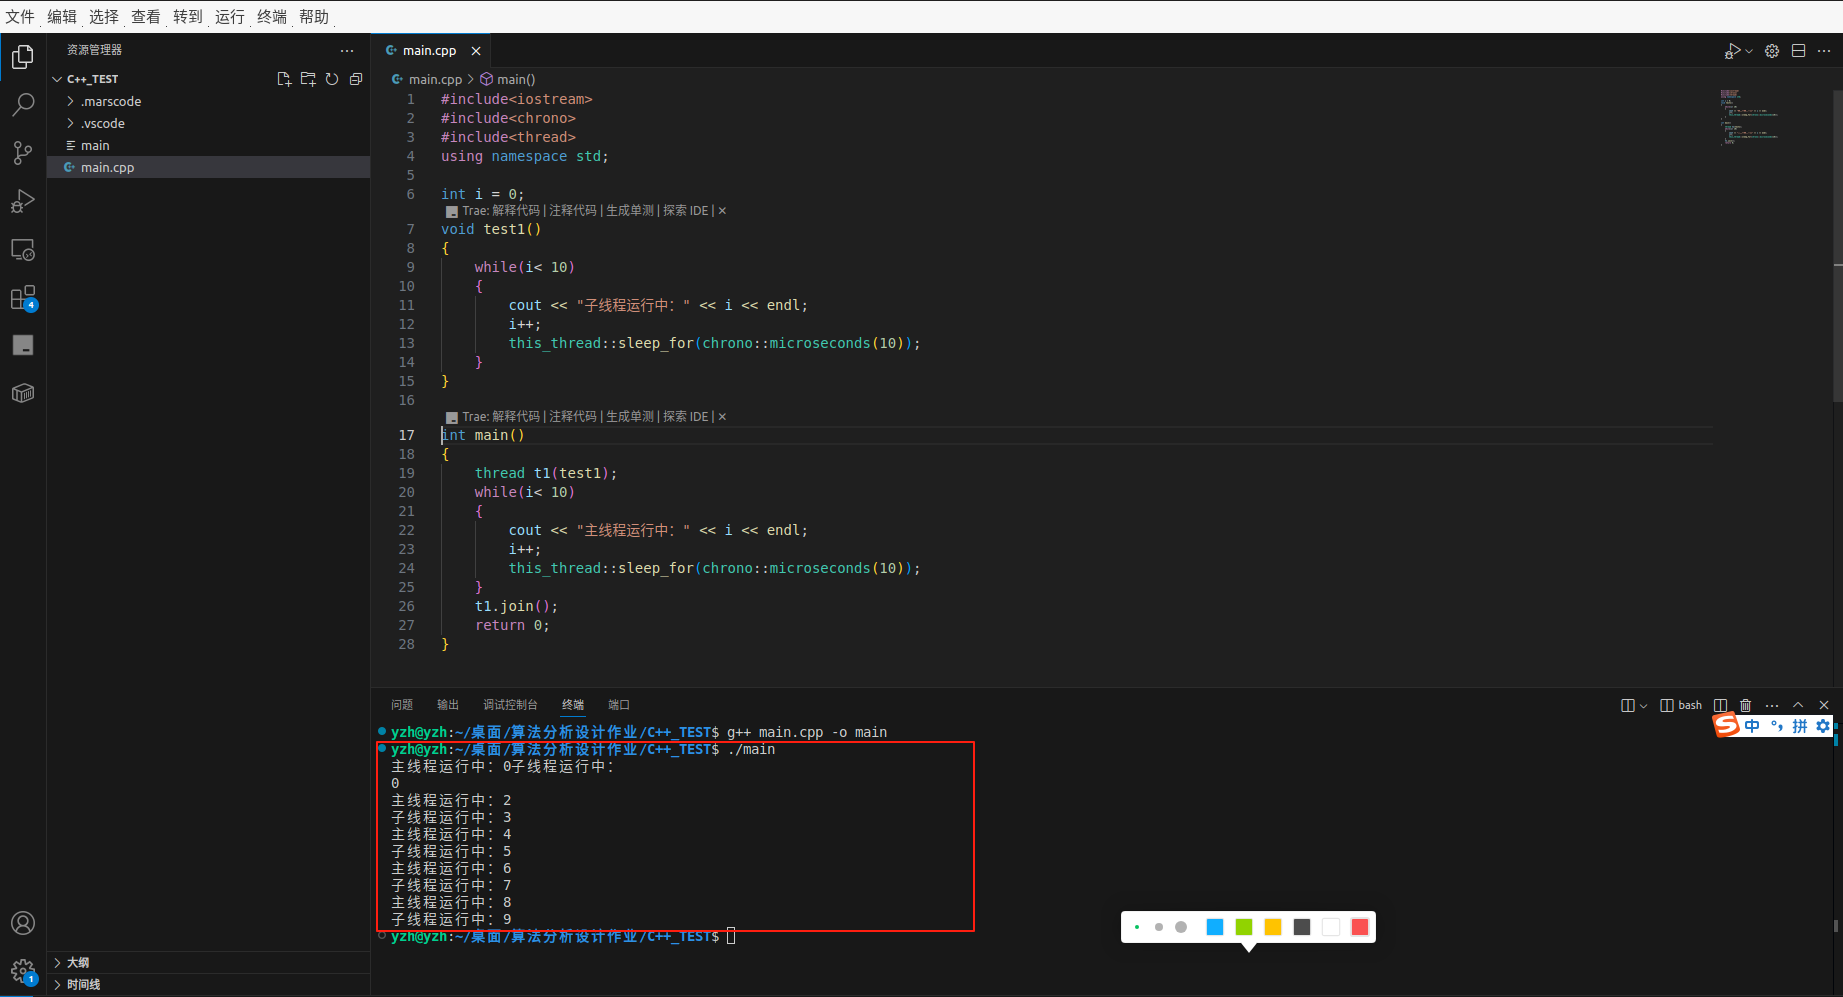
下面这段代码的目的是等待子线程运行结束,因为可能存在主线程已经结束了,但是子线程还有程序要运行,此时直接return可能会出问题。
t1.join();
2. 使用类的函数
#include<iostream>
#include<chrono>
#include<thread>
using namespace std;

int i = 0;
void test1()
{
    while(i< 10)
    {
        cout << "子线程运行中:" << i << endl;
        i++;
        this_thread::sleep_for(chrono::microseconds(10));
    }
}
class A
{
    private:
        int i = 0;
    public:
    void test2()
    {
        while(i< 10)
        {
            cout << "子线程运行中:" << i << endl;
            i++;
            this_thread::sleep_for(chrono::microseconds(10));
        }
    }
};

int main()
{
    A a;
    thread t1(&A::test2, &a);
    while(i< 10)
    {
        cout << "主线程运行中:" << i << endl;
        i++;
        this_thread::sleep_for(chrono::microseconds(10));
    }
    t1.join();
    return 0;
}
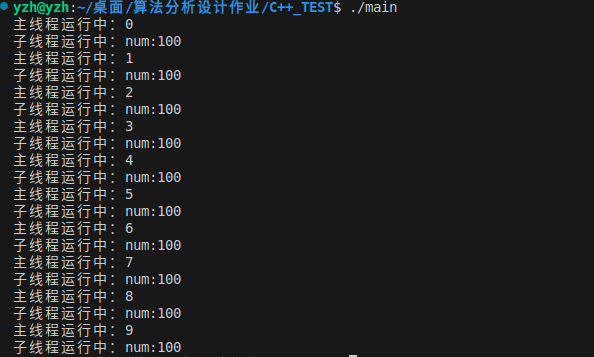
3. 添加参数
#include<iostream>
#include<chrono>
#include<thread>
using namespace std;
int i = 0;
class A
{
    private:
        int i = 0;
    public:
    void test2(int num)
    {
        while(i< 10)
        {
            cout << "子线程运行中:num:" << num << endl;
            this_thread::sleep_for(chrono::microseconds(10));
            i++;
        }
    }
};

int main()
{
    A a;
    thread t1(&A::test2, &a, 100);
    while(i< 10)
    {
        cout << "主线程运行中:" << i << endl;
        i++;
        this_thread::sleep_for(chrono::microseconds(10));
    }
    t1.join();
    return 0;
}
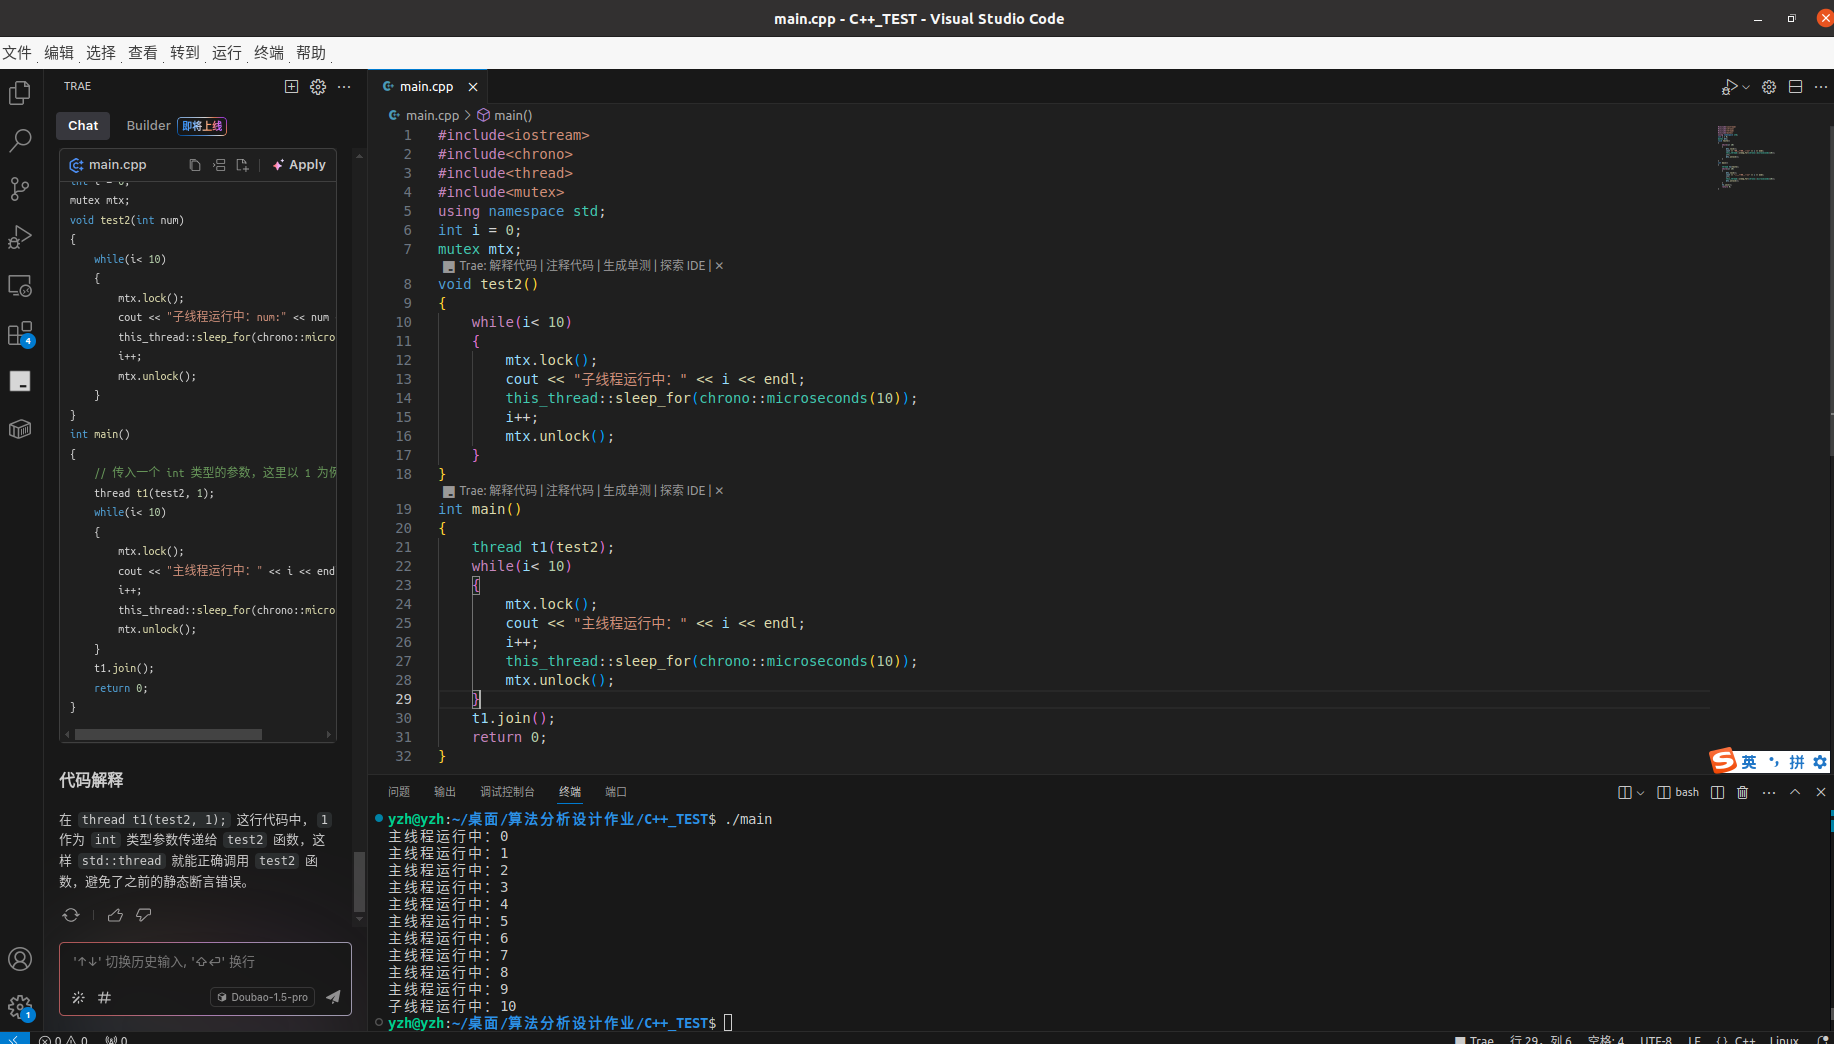
二、线程库 mutex
对于上面第一个的例子,存在主线程或者子线程打印一半,时间片结束,进入另外一个线程打印,导致乱码,为了解决这个问题,引入锁。
1.使用lock()方法
使用lock加锁之后,当子线程执行一般,此时还没释放锁,进入主线程,主线程也调用lock(),发现锁已经被占用了,于是就等待,之后时间片到了进入子线程,子线程程序执行完毕后释放锁unlock()。
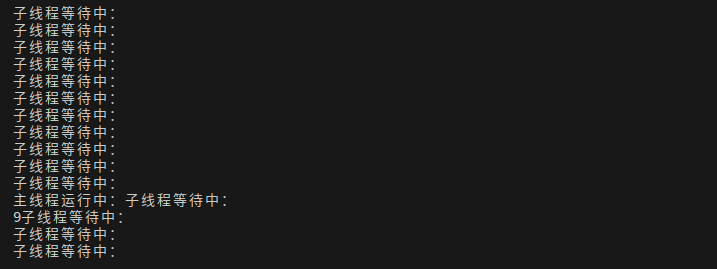
2.try_lock()方法
这个方法尝试获取锁,成功获得返回true,否则返回false,他不会阻塞,获取不到锁也可以做一些其他操作。
#include<iostream>
#include<chrono>
#include<thread>
#include<mutex>
using namespace std;
int i = 0;
mutex mtx;
void test2()
{
    while(i< 10)
    {
        if(mtx.try_lock())
        {
        cout << "子线程运行中:" << i << endl;
        this_thread::sleep_for(chrono::microseconds(10000));
        i++;
        mtx.unlock();
        }
        else
        {
            cout << "子线程等待中:"<< endl;
        }
    }
}
int main()
{
    thread t1(test2);
    while(i< 10)
    {
        if(mtx.try_lock())
        {
            cout << "主线程运行中:" << i << endl;
            i++;
            this_thread::sleep_for(chrono::microseconds(10000));
            mtx.unlock();
        }
        else
        {
            cout << "主线程等待中:"<< endl;
        }
    }
    t1.join();
    return 0;
}
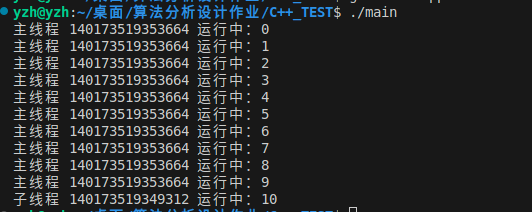
三、线程库lock_guard
上面每次都需要手动释放,可能存在忘了释放锁,就会有bug,下面解决这个问题。本质上当这个变量作用域结束的时候执行析构函数,自动释放锁。
#include<iostream>
#include<chrono>
#include<thread>
#include<mutex>
#include<sstream>
using namespace std;

int i = 0;
mutex mtx;

// 辅助函数,用于获取线程 ID 字符串
string getThreadId() {
    stringstream ss;
    ss << this_thread::get_id();
    return ss.str();
}

void test2()
{
    while(i < 10)
    {
        lock_guard<mutex> lock(mtx);
        cout << "子线程 " << getThreadId() << " 运行中:" << i << endl;
        this_thread::sleep_for(chrono::microseconds(10));
        i++;
    }
}

int main()
{
    thread t1(test2);
    while(i < 10)
    {
        lock_guard<mutex> lock(mtx);
        cout << "主线程 " << getThreadId() << " 运行中:" << i << endl;
        i++;
        this_thread::sleep_for(chrono::microseconds(10));
    }
    t1.join();
    return 0;
}
四、线程库unique_lock
unique_lock提供了更高级的用法。它可以多传一个参数,也可以不传,不穿的用法和lock_guard一样。
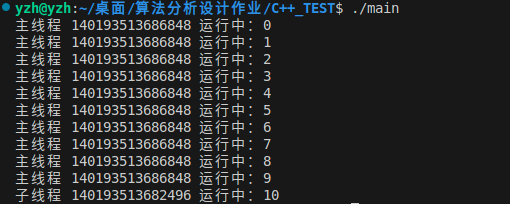
1.adopt_lock
它的作用是接管锁,上面先创建一个锁,之后由他接管,作用域结束的时候自动释放。
#include<iostream>
#include<chrono>
#include<thread>
#include<mutex>
#include<sstream>
using namespace std;

int i = 0;
mutex mtx;

// 辅助函数,用于获取线程 ID 字符串
string getThreadId() {
    stringstream ss;
    ss << this_thread::get_id();
    return ss.str();
}

void test2()
{
    while(i < 10)
    {
        mtx.lock();
        unique_lock<mutex> lock(mtx, adopt_lock);
        cout << "子线程 " << getThreadId() << " 运行中:" << i << endl;
        this_thread::sleep_for(chrono::microseconds(10));
        i++;
    }
}

int main()
{
    thread t1(test2);
    while(i < 10)
    {
        mtx.lock();
        unique_lock<mutex> lock(mtx, adopt_lock);
        cout << "主线程 " << getThreadId() << " 运行中:" << i << endl;
        i++;
        this_thread::sleep_for(chrono::microseconds(10));
    }
    t1.join();
    return 0;
}
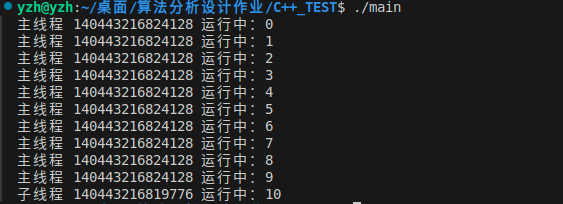
2.defer_lock()
defer_lock的作用是延迟锁,在后面调用lock.lock();才会获取锁和加锁。
#include<iostream>
#include<chrono>
#include<thread>
#include<mutex>
#include<sstream>
using namespace std;

int i = 0;
mutex mtx;

// 辅助函数,用于获取线程 ID 字符串
string getThreadId() {
    stringstream ss;
    ss << this_thread::get_id();
    return ss.str();
}

void test2()
{
    while(i < 10)
    {
        unique_lock<mutex> lock(mtx, defer_lock);
        lock.lock();
        cout << "子线程 " << getThreadId() << " 运行中:" << i << endl;
        this_thread::sleep_for(chrono::microseconds(10));
        i++;
    }
}

int main()
{
    thread t1(test2);
    while(i < 10)
    {
        unique_lock<mutex> lock(mtx, defer_lock);
        lock.lock();
        cout << "主线程 " << getThreadId() << " 运行中:" << i << endl;
        i++;
        this_thread::sleep_for(chrono::microseconds(10));
    }
    t1.join();
    return 0;
}
五、线程库call_once
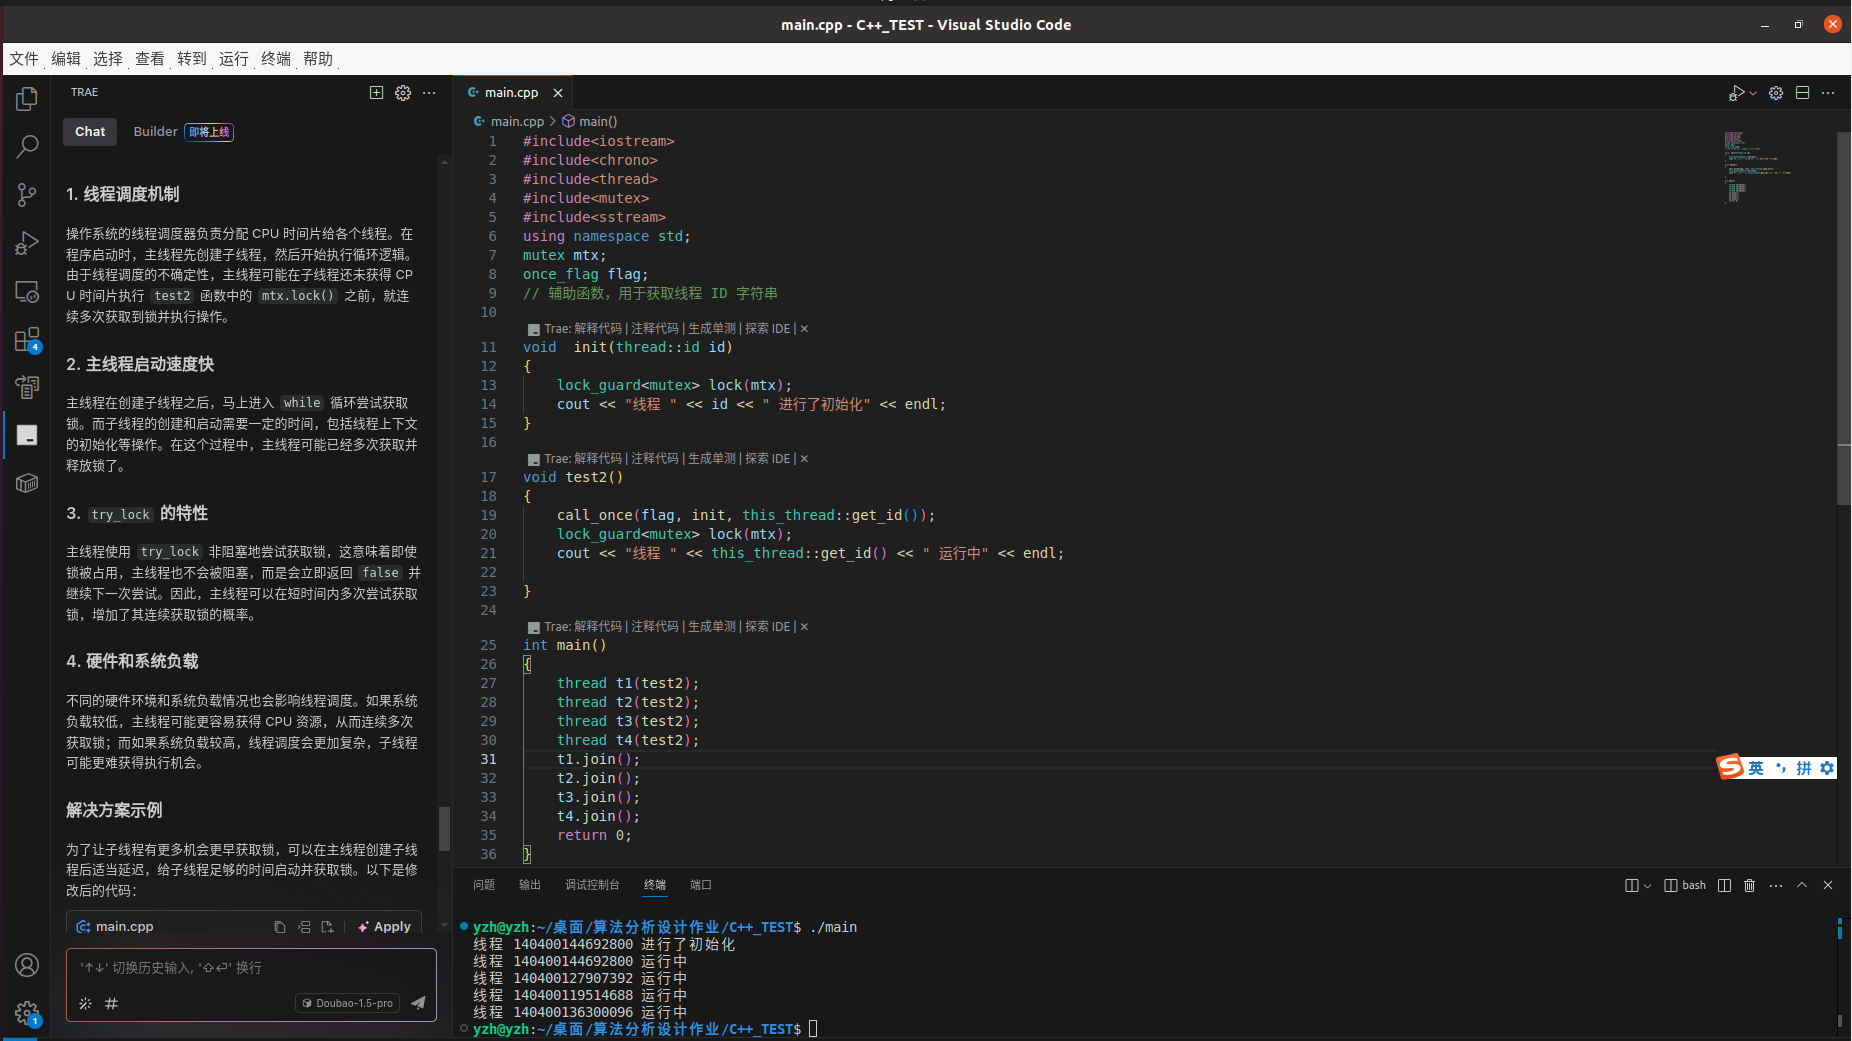
如果存在好几个线程,调用一个函数,这个函数里面有个初始化操作,这个操作只需要被执行一次,就会用到下面的操作。
声明once_flag, 之后将once_flag,init函数和以及init函数的参数传递给call_once。
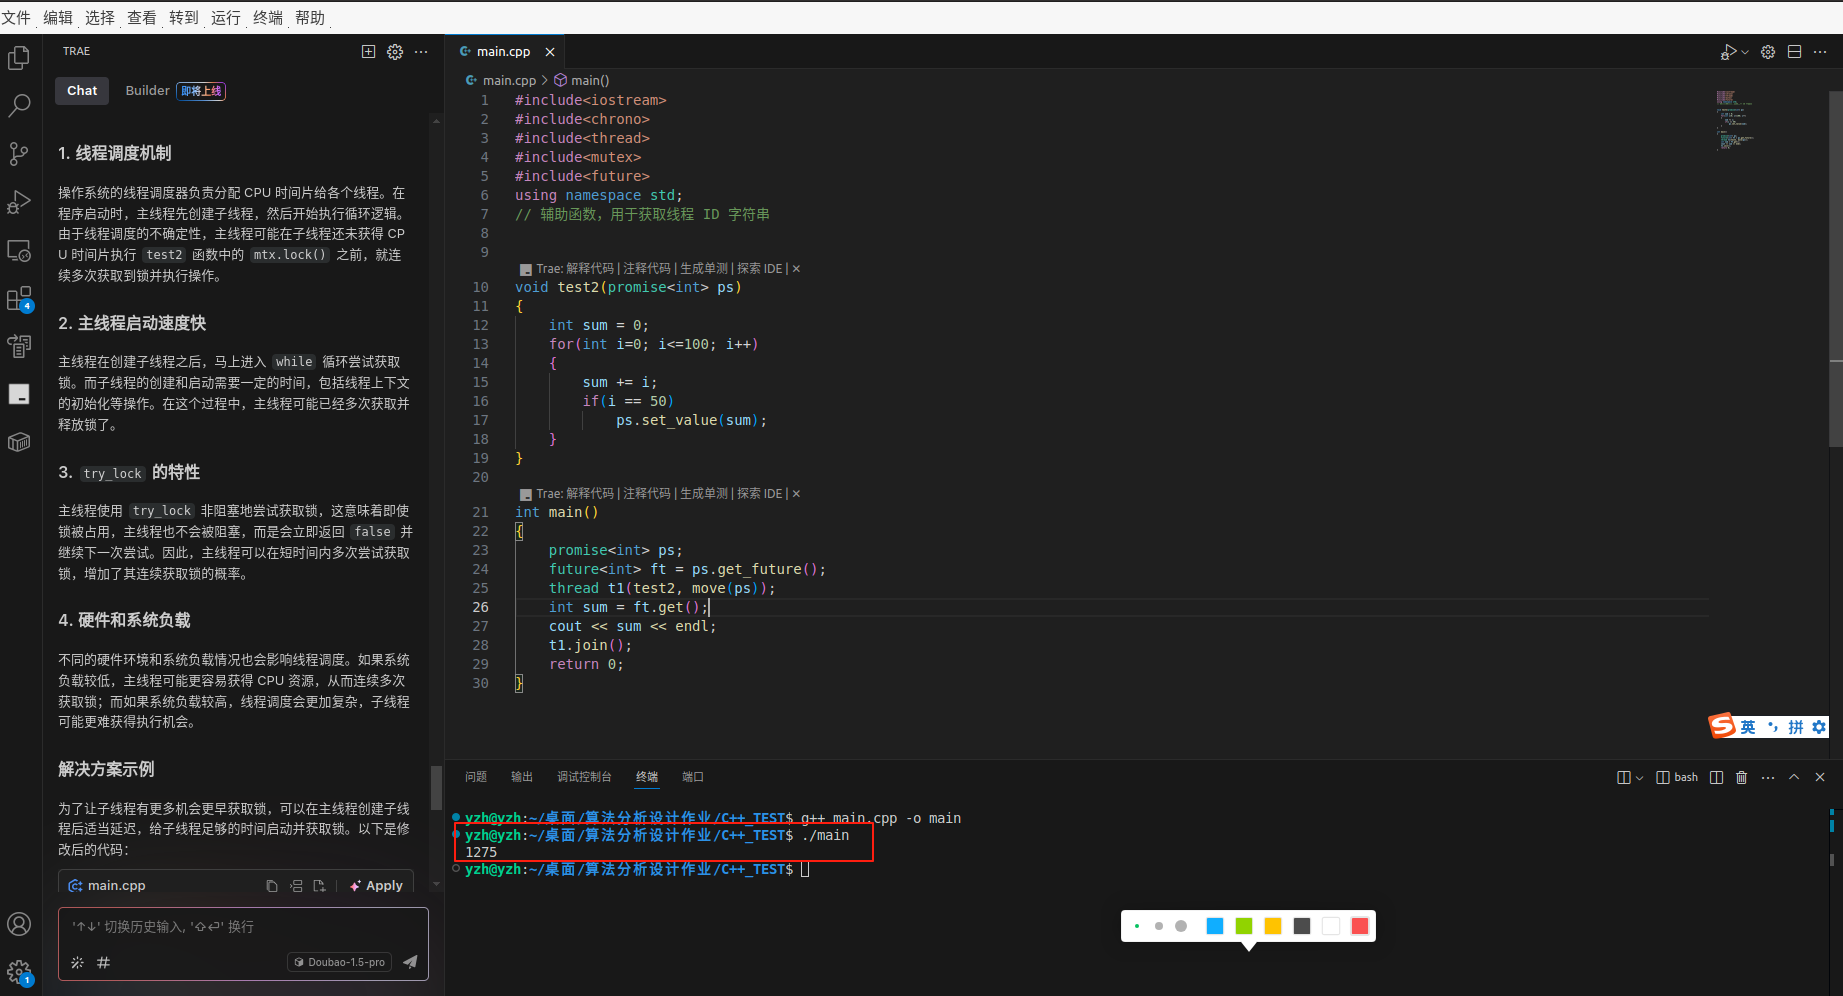
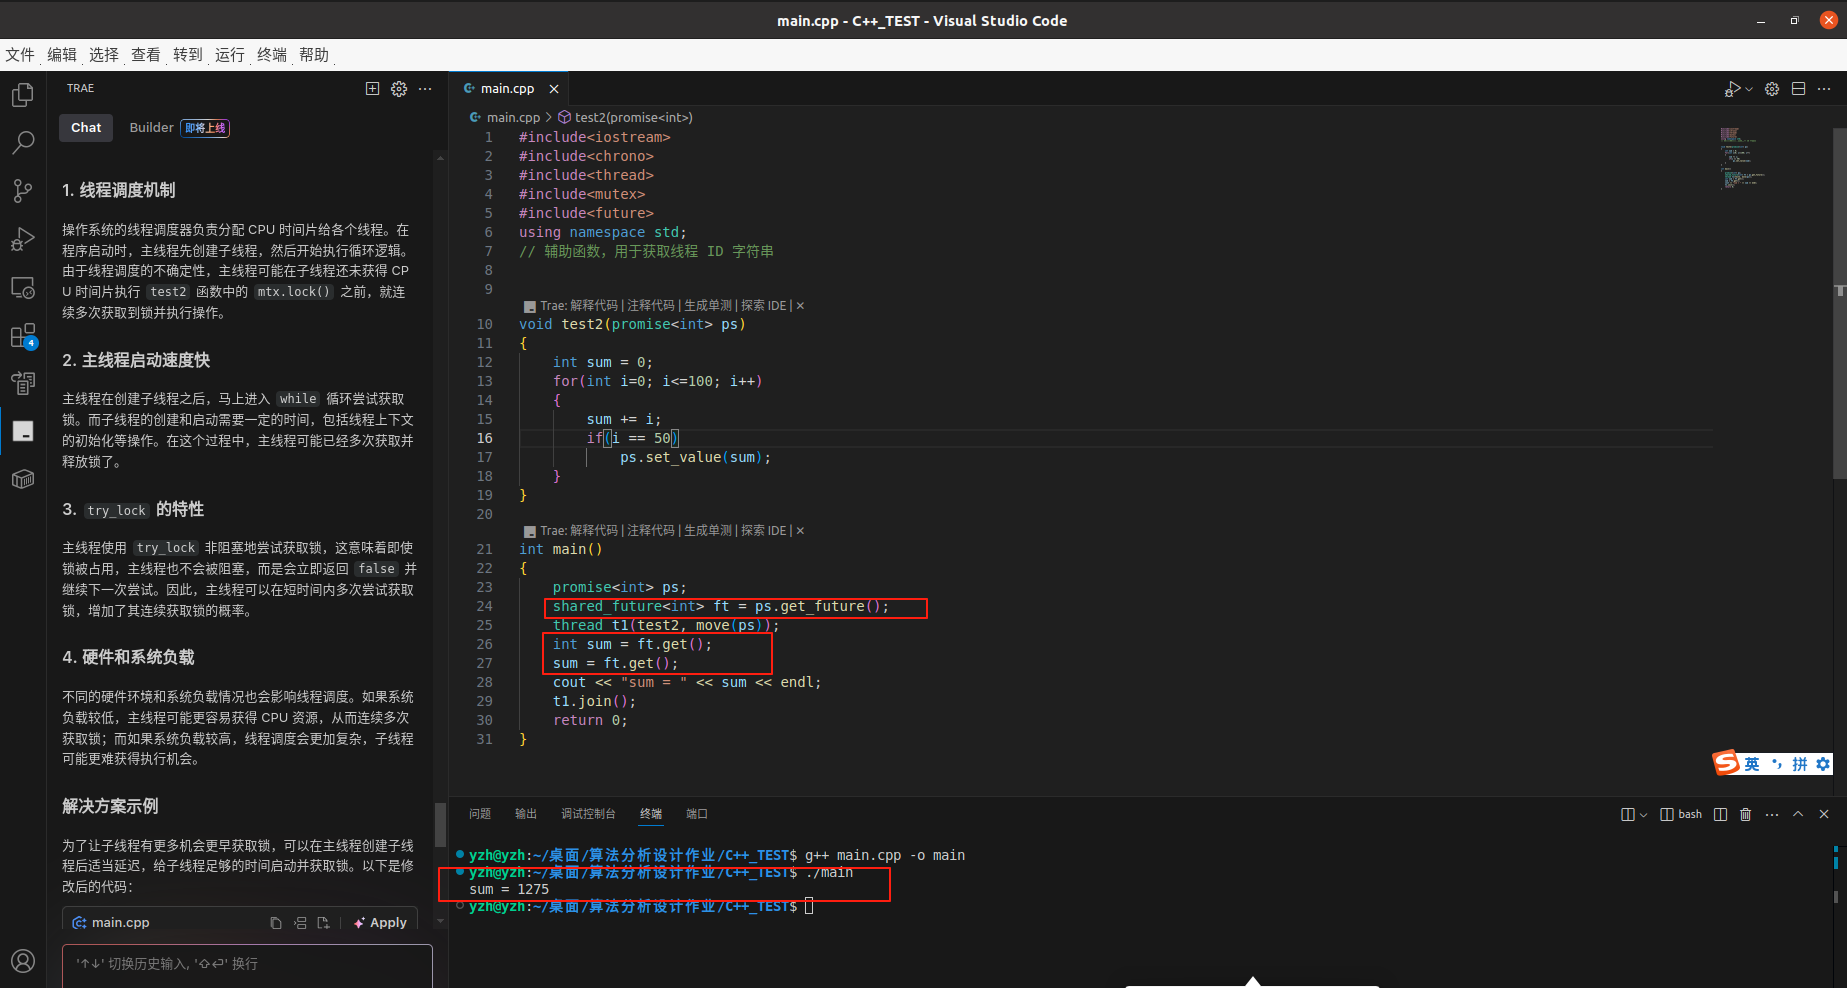
六、线程库promise & future
这个主要作用是异步获取线程函数里面的数据。int sum = ft.get();这段代码会阻塞,直到子线程设置ps.set_value(sum);。注意使用future<int> ft = ps.get_future();声明的话,主线程只能get一次,如果想要get多次,那么使用shared_future<int> ft = ps.get_future();。
七、condition变量使用场景
生产者消费者模型,生产者不断往队列中添加任务,之后通知消费者取任务。
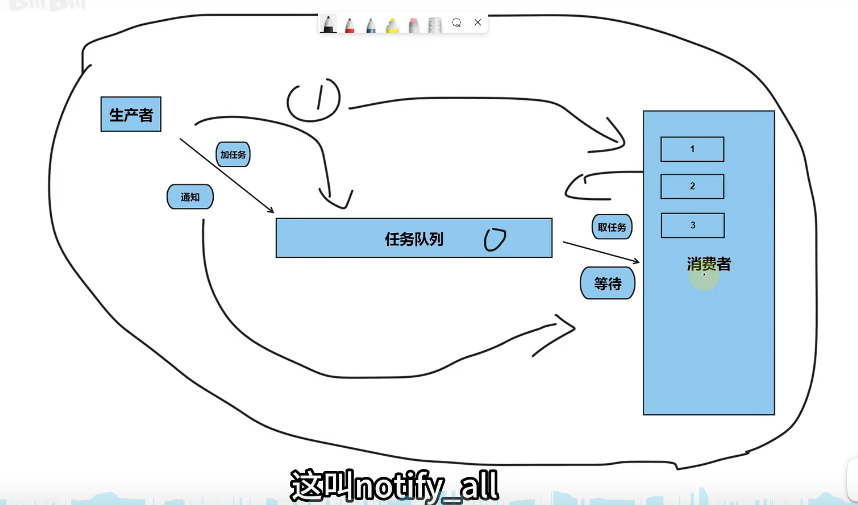
关键代码解释
cv.notify_one(); // 通知另外一个线程取任务
cv.wait(lck, []{return !q.empty();}); // 这个锁的参数很有必要,因为上面给锁住了,所以需要先释放了锁才行,所以锁也需要作为参数传入,后面的就是条件,如果为True就等待。
#include<iostream>
#include<chrono>
#include<thread>
#include<mutex>
#include<queue>
#include<condition_variable>
using namespace std;
queue<int> q;
condition_variable cv;
mutex mtx;
void Product()
{
for(int i=0; i<10; i++)
{
{
unique_lock<mutex> lck(mtx);
q.push(i);
cv.notify_one();
cout << "生产了" << i << endl << flush;
}
this_thread::sleep_for(chrono::milliseconds(5)); // 延长时间
}
}
void Consumer()
{
while(true)
{
unique_lock<mutex> lck(mtx);
cv.wait(lck, []{return !q.empty();});
int data = q.front();
q.pop();
cout << "消费了" << data << ",队列大小: " << q.size() << endl << flush;
if(data == -1) break; // 正确退出
this_thread::sleep_for(chrono::milliseconds(3));
}
}
void test2()
{
thread t2(Consumer);
thread t1(Product);
t1.join();
// 添加退出条件,避免消费者线程无限循环
{
unique_lock<mutex> lck(mtx);
q.push(-1); // 发送结束信号
cv.notify_one();
}
t2.join();
}
int main()
{
test2();
return 0;
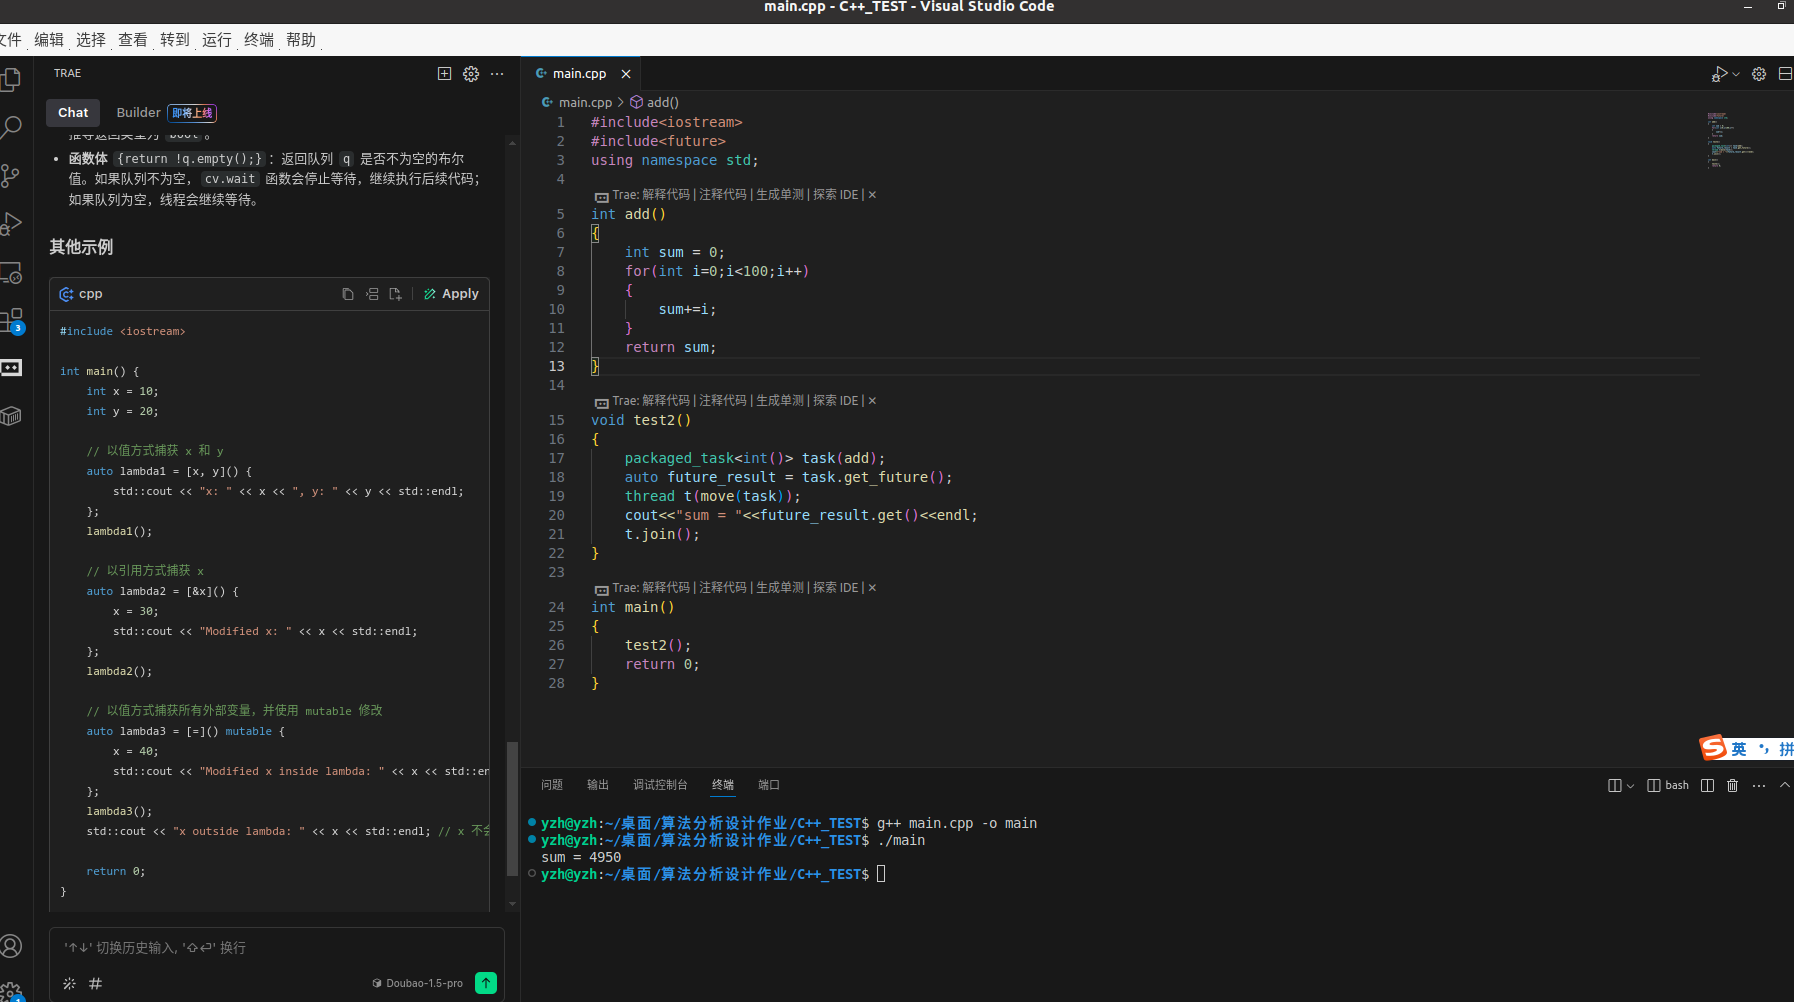
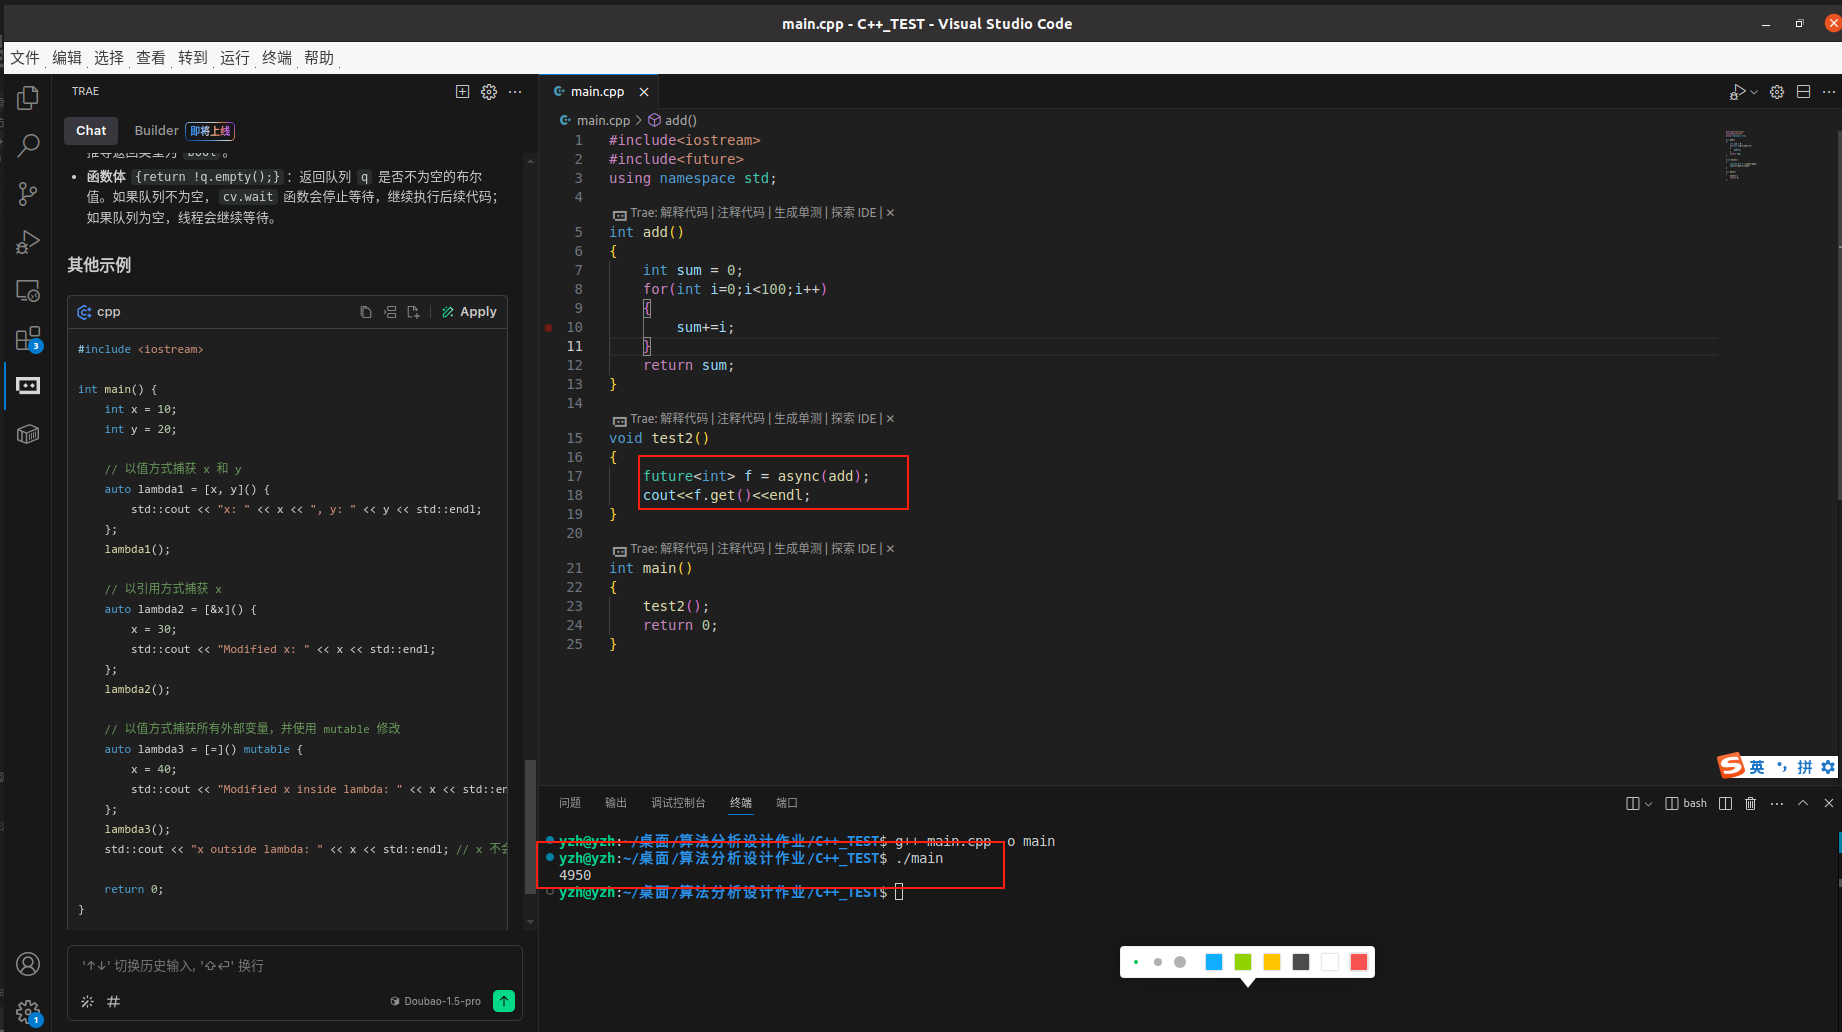
}八、async 和 packaged_task
他俩的作用都是异步获取函数返回值。
1.async
关键代码解释:
future<int> f = async(add); // 自动产生一个线程执行add这个函数
f.get() // 读取函数的返回值
2.packaged_task
关键代码解释:
packaged_task<int()> task(add); // 创建一个packaged_task对象,不会创建线程
auto future_result = task.get_future(); // 得到这个任务的future对象
thread t(move(task)); // 根据任务创建线程,开始这行任务里面的函数
cout<<"sum = "<<future_result.get()<<endl; // 等待函数执行完成,获得返回值,对于future的get方法,如果函数没有执行完成,就会阻塞。