一 、创建私有索引库
1.1 、第一步
首先检查本地是否存在需要的私有索引库
pod repo list
例如:dp_base_ios_spec 在本地不存在该私有索引库
1.2 、第二步
在git下下创建一个新的库,这个库用来保存私有库的podspec文件,取名叫xxxSpec用以区分这个库的作用,如下base_ios_spec索引库

1.3 、第三步
接着创建本地索引库,也就是将刚才创建的远程索引库dp_base_ios_spec关联到本地
pod repo add base_ios_spec git@git.xxx/base_ios_spec.git
此时本地就有了 base_ios_spec这个索引库

二 、开始创建本地私有库
2.1 第一步
首先创建本地私有库(该库是代码库)
pod lib create DPApplePurchasing
2.2 第二步
按照提示输入相应的配置

2.3 、第三步
配置完成后会自动打开一个xcode工程,具体层级如下图

2.4 、第四步
在CommonUtil里面放入自己的私有库代码同时删除掉ReplaceMe

2.5 、第五步
到demo中进行
pod install
2.6 、第六步
然后编写podspec文件,详情见以下

三 、 将私有库push到远程仓库
3.1 、Push an existing folder
cd existing_folder
git init
git remote add origin git@xxx/dpalipaymodule.git
git add .
git commit -m "Initial commit"
3.2 、Push an existing Git repository
cd existing_repo
git remote rename origin old-origin
git remote add origin git@xxx/dpalipaymodule.git
3.4 拉取远程内容
git pull --rebase origin master 拉取远程仓库的内容和本地的合并
git push -u origin master 将代码推送到远程仓库的master分支
四 、进行本地校验
4.1 、pod lib lint --allow-warnings
组组件依赖了三方QKYYKit,需要添加三方库的git地址

4.2 、 修改本地校验添加三方库的cocoapods地址
pod lib lint --sources="https://github.com/CocoaPods/Specs.git" --use-libraries --allow-warnings --no-clean
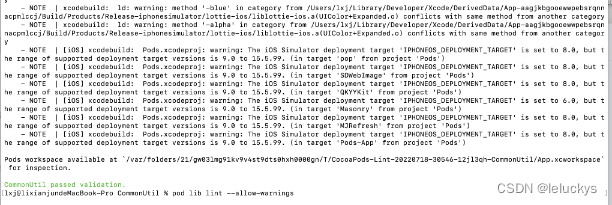
出现上述提示,代表本地校验成功
五 、进行远程校验
pod spec lint --sources="https://github.com/CocoaPods/Specs.git" --use-libraries --allow-warnings
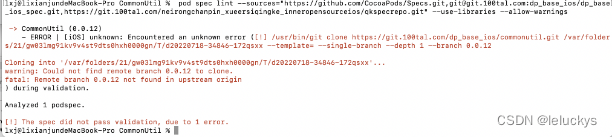
出现以上错误信息,表示需要先打tag才能进行远程校验
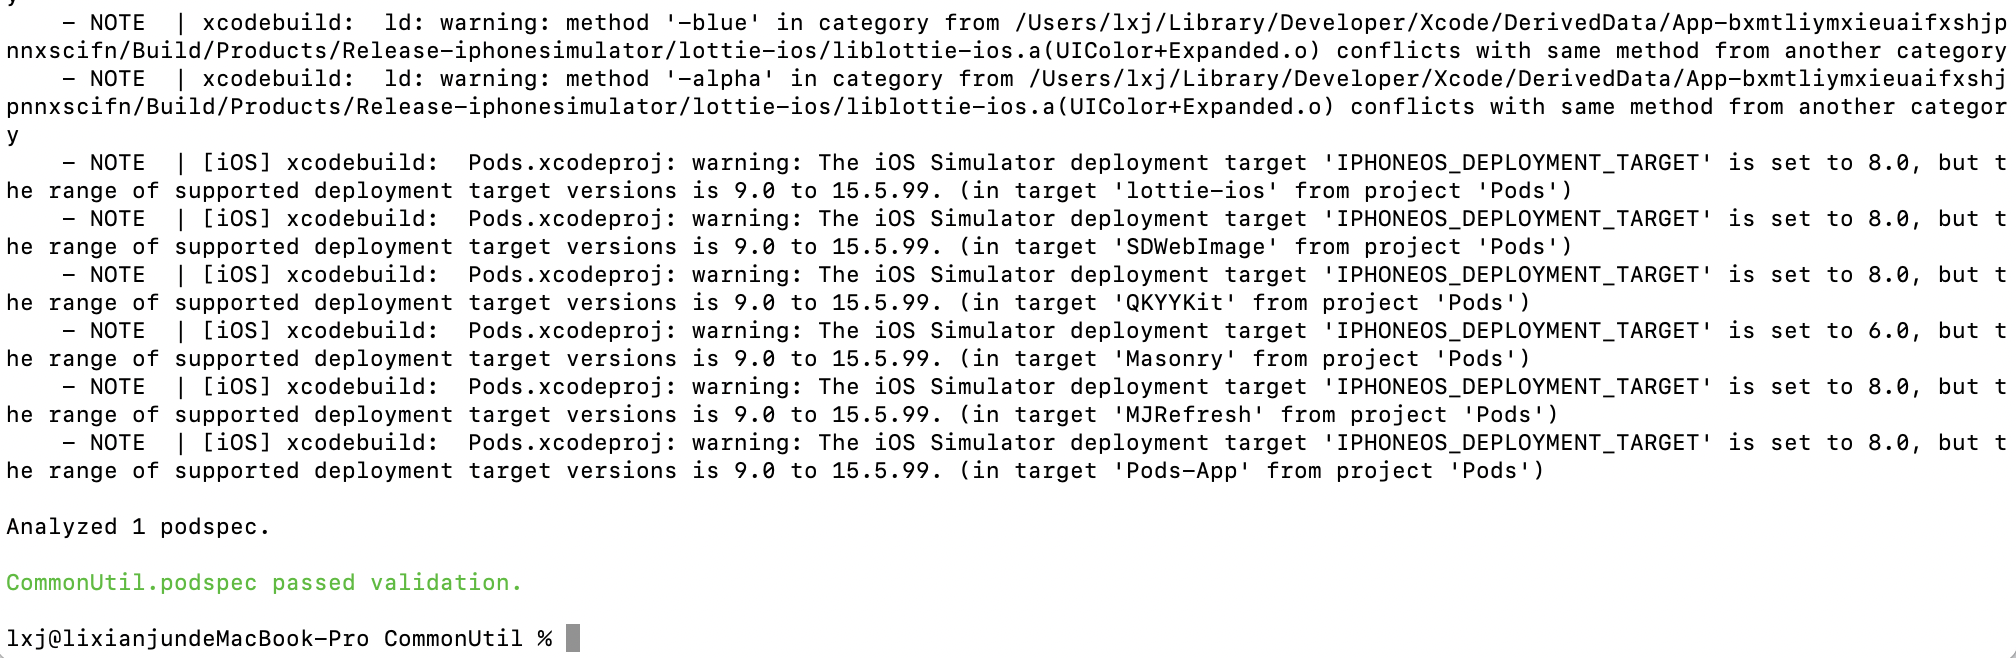
执行完第六步再次执行上面的远程校验显示如下,代表远程校验通过
六 、打tag
![]()
七 、接着需要把podspec推送到远程私有索引库
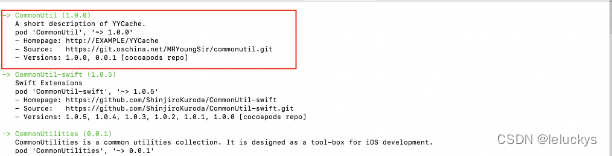
pod repo push dp_base_ios_spec CommonUtil.podspec --verbose --use-libraries --allow-warnings
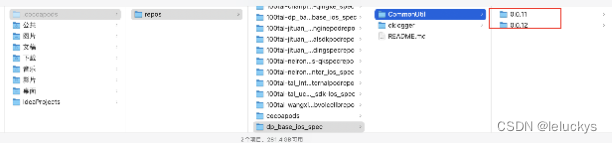

上传成功后在远程和本地索引库显示如上
八 、 验证私有库是否发布成功

到此手动发布私有库CommonUtil 成功,就可以正常使用