py 版本:Python 3.12.7
安装库: pip install numpy torch torchvision matplotlib
运行: python test.py
py版本不对可能无法运行,默认数据集需要科学上网才能下载,默认的验证代码是从验证包里取图片,注释的代码是我本地构造的图片,用库里的图片,替换纯色背景,手写一个数字,大小改到28x28就可以验证了
import torch
from torch.utils.data import DataLoader
from torchvision import transforms
from torchvision.datasets import MNIST
import matplotlib.pyplot as plt
from PIL import Image
class Net(torch.nn.Module):
def __init__(self):
super().__init__()
self.fc1 = torch.nn.Linear(28*28, 64)
self.fc2 = torch.nn.Linear(64, 64)
self.fc3 = torch.nn.Linear(64, 64)
self.fc4 = torch.nn.Linear(64, 10)
def forward(self, x):
x = torch.nn.functional.relu(self.fc1(x))
x = torch.nn.functional.relu(self.fc2(x))
x = torch.nn.functional.relu(self.fc3(x))
x = torch.nn.functional.log_softmax(self.fc4(x), dim=1)
return x
def get_data_loader(is_train):
to_tensor = transforms.Compose([transforms.ToTensor()])
data_set = MNIST("", is_train, transform=to_tensor, download=True)
return DataLoader(data_set, batch_size=15, shuffle=True)
def evaluate(test_data, net):
n_correct = 0
n_total = 0
with torch.no_grad():
for (x, y) in test_data:
outputs = net.forward(x.view(-1, 28*28))
for i, output in enumerate(outputs):
if torch.argmax(output) == y[i]:
n_correct += 1
n_total += 1
return n_correct / n_total
def main():
train_data = get_data_loader(is_train=True)
test_data = get_data_loader(is_train=False)
net = Net()
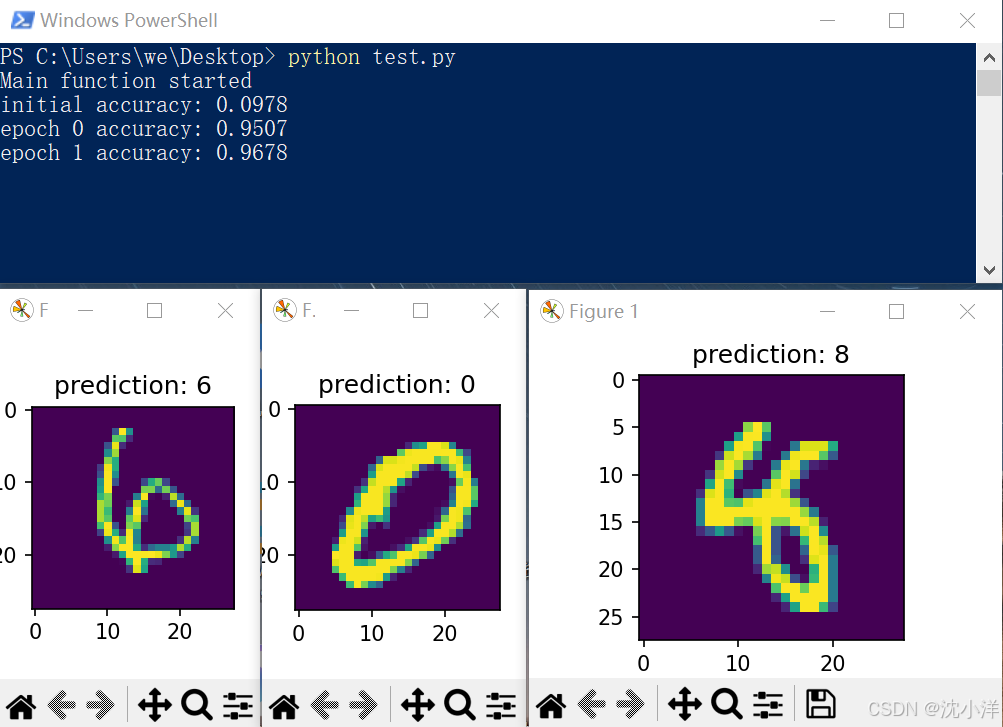
print("initial accuracy:", evaluate(test_data, net))
optimizer = torch.optim.Adam(net.parameters(), lr=0.001)
for epoch in range(2):
for (x, y) in train_data:
net.zero_grad()
output = net.forward(x.view(-1, 28*28))
loss = torch.nn.functional.nll_loss(output, y)
loss.backward()
optimizer.step()
print("epoch", epoch, "accuracy:", evaluate(test_data, net))
for (n, (x, _)) in enumerate(test_data):
if n > 3:
break
predict = torch.argmax(net.forward(x[0].view(-1, 28*28)))
plt.figure(n)
plt.imshow(x[0].view(28, 28))
plt.title("prediction: " + str(int(predict)))
plt.show()
def load_custom_image(image_path):
""" 加载自定义手写数字图片,并转换为 MNIST 兼容格式 """
transform = transforms.Compose([
transforms.Grayscale(num_output_channels=1), # 转换为灰度图
transforms.Resize((28, 28)), # 调整大小
transforms.ToTensor(), # 转换为 PyTorch 张量
transforms.Normalize((0.1307,), (0.3081,)) # 使用 MNIST 的归一化参数
])
image = Image.open(image_path)
return transform(image).unsqueeze(0) # 添加 batch 维度
if __name__ == "__main__":
main()
"""
train_data = get_data_loader(is_train=True)
test_data = get_data_loader(is_train=False)
net = Net()
print("initial accuracy:", evaluate(test_data, net))
optimizer = torch.optim.Adam(net.parameters(), lr=0.001)
for epoch in range(2):
for (x, y) in train_data:
net.zero_grad()
output = net.forward(x.view(-1, 28*28))
loss = torch.nn.functional.nll_loss(output, y)
loss.backward()
optimizer.step()
print("epoch", epoch, "accuracy:", evaluate(test_data, net))
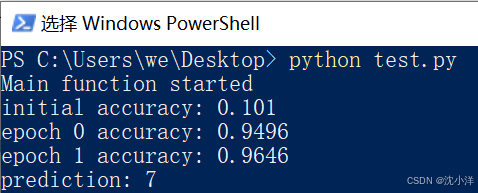
image_tensor = load_custom_image("C:\\Users\\we\\Desktop\\7.png")
predict = torch.argmax(net.forward(image_tensor.view(-1, 28*28)))
print("prediction: " + str(int(predict)))
"""默认代码验证结果
手写图片
![]()
验证结果
来源:【10分钟入门神经网络 PyTorch 手写数字识别】 https://www.bilibili.com/video/BV1GC4y15736/?share_source=copy_web&vd_source=33a387ed337161d7e4f60dd9167ab954