Python环境准备
1. 安装pipx。如已经安装,可跳过本步骤:
    python -m pip install --user pipx
    python -m pipx ensurepath
    ##  验证安装
    pipx --version
2. 安装 uv。如已经安装,可跳过本步骤:
pipx install uv
## 设置为阿里云 PyPI 镜像源
set UV_INDEX=https://mirrors.aliyun.com/pypi/simple
3. 克隆 RAGFlow
git clone https://github.com/infiniflow/ragflow.git
cd ragflow/
4.安装 Python 依赖项:
slim:
# install RAGFlow dependent python modules
uv sync --python 3.11
slim不用full
full:
--all-extras # install RAGFlow dependent python modules
uv sync --python 3.11
注2:会存在无法安装pyicu得问题,本地运行若只需要聊天/知识库可以先忽略
pyicu (国际化依赖源包)版本 ==2.14 安装可能会不成功,需要注释pyproject.toml中的pyicu,对于现阶段开发无影响,
注释掉 docker/entrypoint.sh 中的这一行。nginx
# /usr/sbin/nginx
激活 Python 虚拟环境:
source .venv/bin/activate
export PYTHONPATH=$(pwd)
5.下载项目必备模型
找到目录下得download_depts.py文件,开启加速器运行,当前目录下会下载这些文件
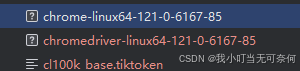
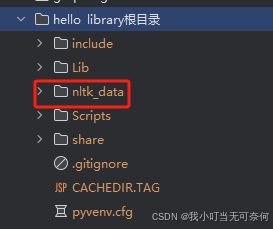
注:如果存在虚拟环境则需要把nltk_data文件夹移到虚拟环境文件目录下
6. 修改配置文件(service_conf.yml)
编辑/conf/service_conf.yml
ragflow:
  host: 0.0.0.0
  http_port: 9380
mysql:
  # 需要先在数据库创建该库
  name: '库名'
  user: 'xx'
  password: 'xxx'
  host: 'ip'
  port: port
  max_connections: 100
  stale_timeout: 30
minio:
  user: 'access_key'
  password: 'secret_key'
  host: 'ip:port'
es:
  hosts: 'http://ip:port'
  username: 'xx'
  password: 'xxx'
infinity:
  uri: 'localhost:23817'
  db_name: 'default_db'
redis:
  db: 1
  password: 'x'
  host: 'ip:port'

# postgres:
#   name: 'rag_flow'
#   user: 'rag_flow'
#   password: 'infini_rag_flow'
#   host: 'postgres'
#   port: 5432
#   max_connections: 100
#   stale_timeout: 30
# s3:
#   access_key: 'access_key'
#   secret_key: 'secret_key'
#   region: 'region'
# oss:
#   access_key: 'access_key'
#   secret_key: 'secret_key'
#   endpoint_url: 'http://oss-cn-hangzhou.aliyuncs.com'
#   region: 'cn-hangzhou'
#   bucket: 'bucket_name'
# azure:
#   auth_type: 'sas'
#   container_url: 'container_url'
#   sas_token: 'sas_token'
# azure:
#   auth_type: 'spn'
#   account_url: 'account_url'
#   client_id: 'client_id'
#   secret: 'secret'
#   tenant_id: 'tenant_id'
#   container_name: 'container_name'
# user_default_llm:
#   factory: 'Tongyi-Qianwen'
#   api_key: 'sk-xxxxxxxxxxxxx'
#   base_url: ''
# oauth:
#   github:
#     client_id: xxxxxxxxxxxxxxxxxxxxxxxxx
#     secret_key: xxxxxxxxxxxxxxxxxxxxxxxxxxxx
#     url: https://github.com/login/oauth/access_token
#   feishu:
#     app_id: cli_xxxxxxxxxxxxxxxxxxx
#     app_secret: xxxxxxxxxxxxxxxxxxxxxxxxxxxx
#     app_access_token_url: https://open.feishu.cn/open-apis/auth/v3/app_access_token/internal
#     user_access_token_url: https://open.feishu.cn/open-apis/authen/v1/oidc/access_token
#     grant_type: 'authorization_code'
# authentication:
#   client:
#     switch: false
#     http_app_key:
#     http_secret_key:
#   site:
#     switch: false
# permission:
#   switch: false
#   component: false
#   dataset: false
6.下载项目必备模型
用git bash进入D:\code\python\ragflow
export HF_ENDPOINT=https://hf-mirror.com
找到目录下得download_depts.py文件,开启加速器运行,当前目录下会下载这些文件
7.启动服务
接口服务python路径:api/ragflow_server.py
python api/ragflow_server.py
任务服务python路径:rag/svr/task_executor.py
python rag/svr/task_executor.py
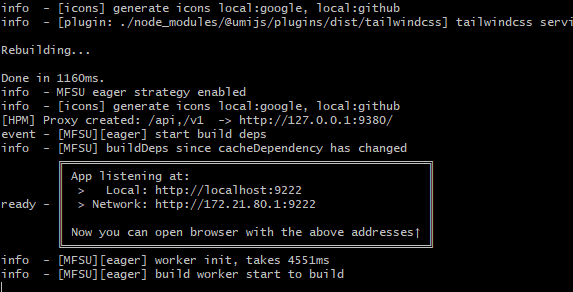
8.前端
准备:安装node>16
idea打开web的Terminal窗口执行:
依赖安装
npm run install
程序启动
npm run dev
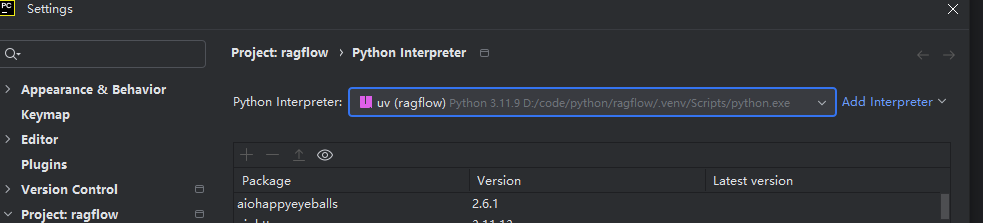
9.pycharm配置虚拟环境
参考:
https://ragflow.io/docs/dev/launch_ragflow_from_source
https://blog.csdn.net/university96/article/details/146361237
https://blog.csdn.net/qq_33407429/article/details/146182253
https://blog.csdn.net/weixin_45535519/article/details/146199830
http://mp.weixin.qq.com/s?__biz=MjM5NzQxMTAyNw==&mid=2247486291&idx=1&sn=2b5cd4d0e884683b7597d9efa5faaac1&chksm=a7e28746e040f049c53b0cf8558f969cc1699ff35dc17a9a04726c1bc59d22f2741ddc59510a&mpshare=1&scene=1&srcid=0416xjiIyCzsKwumLEySgZw3&sharer_shareinfo=30a70149dc5a708922287838404bcf5a&sharer_shareinfo_first=30a70149dc5a708922287838404bcf5a#rd