1. 搭建私服(windows)
- 软件下载
https://help.sonatype.com/en/download.html - 修改端口
etc/nexus-default.properties - 启动程序
管理员身份进入进入bin目录下执行.\nexus.exe /run - 创建Maven仓库
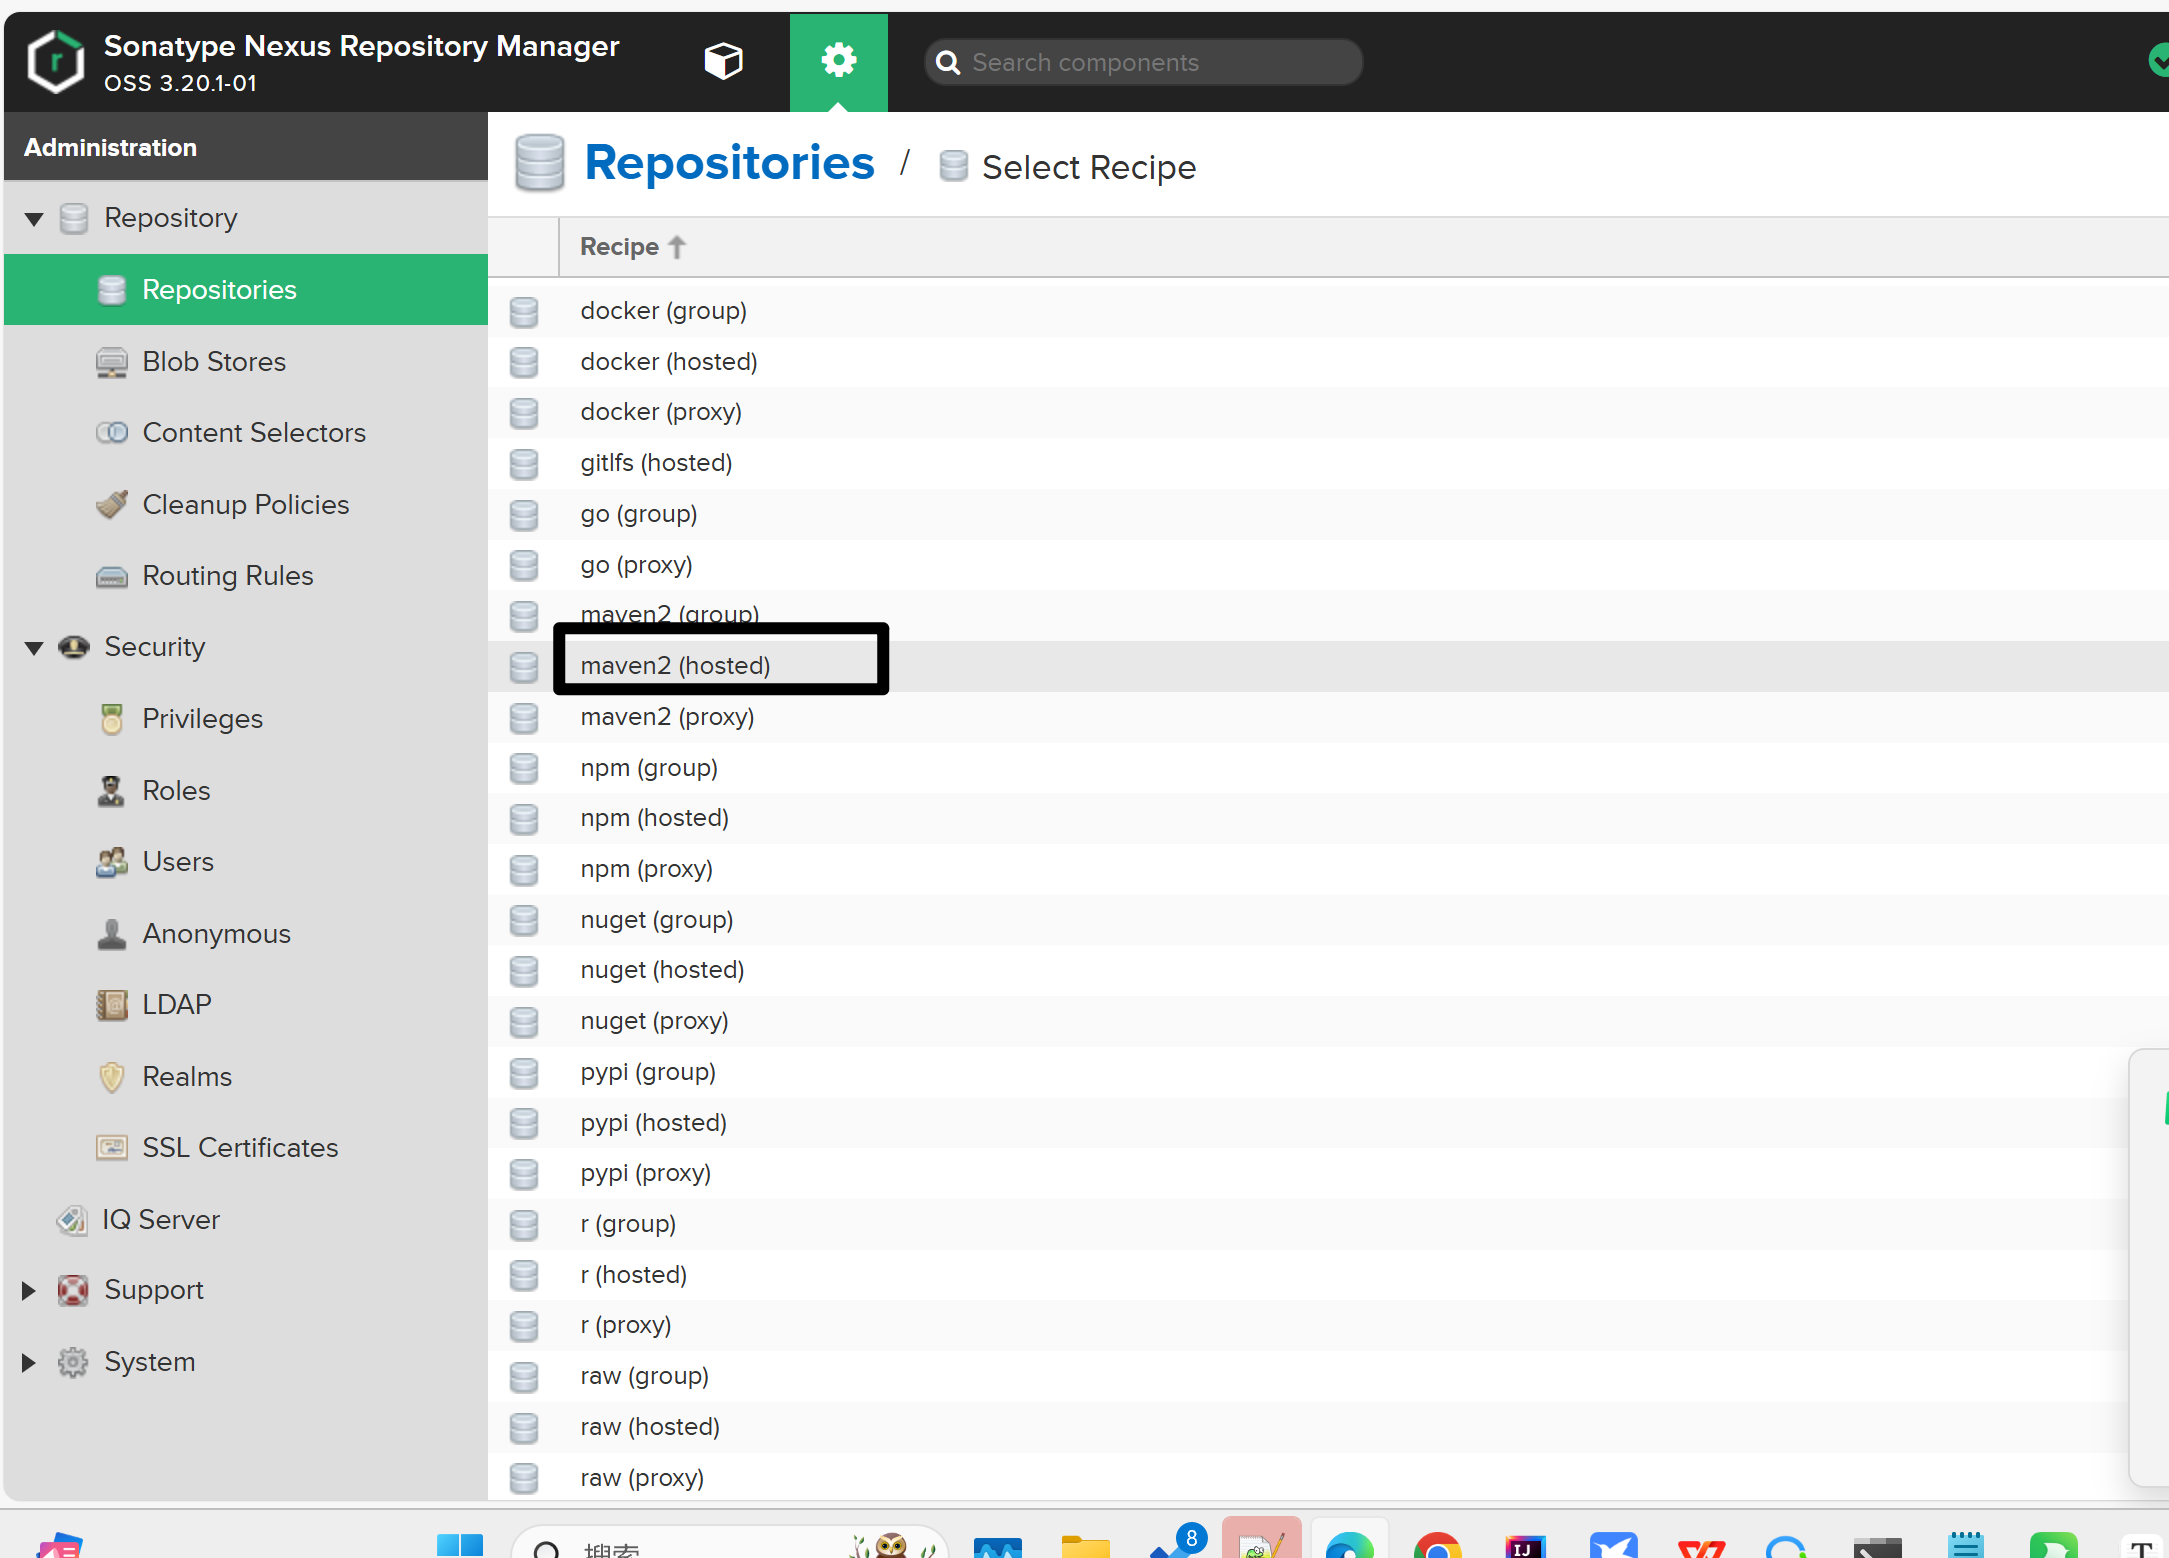
- 选择hosted类型
(如果需要创建npm的js库也可以选择npm类型的)

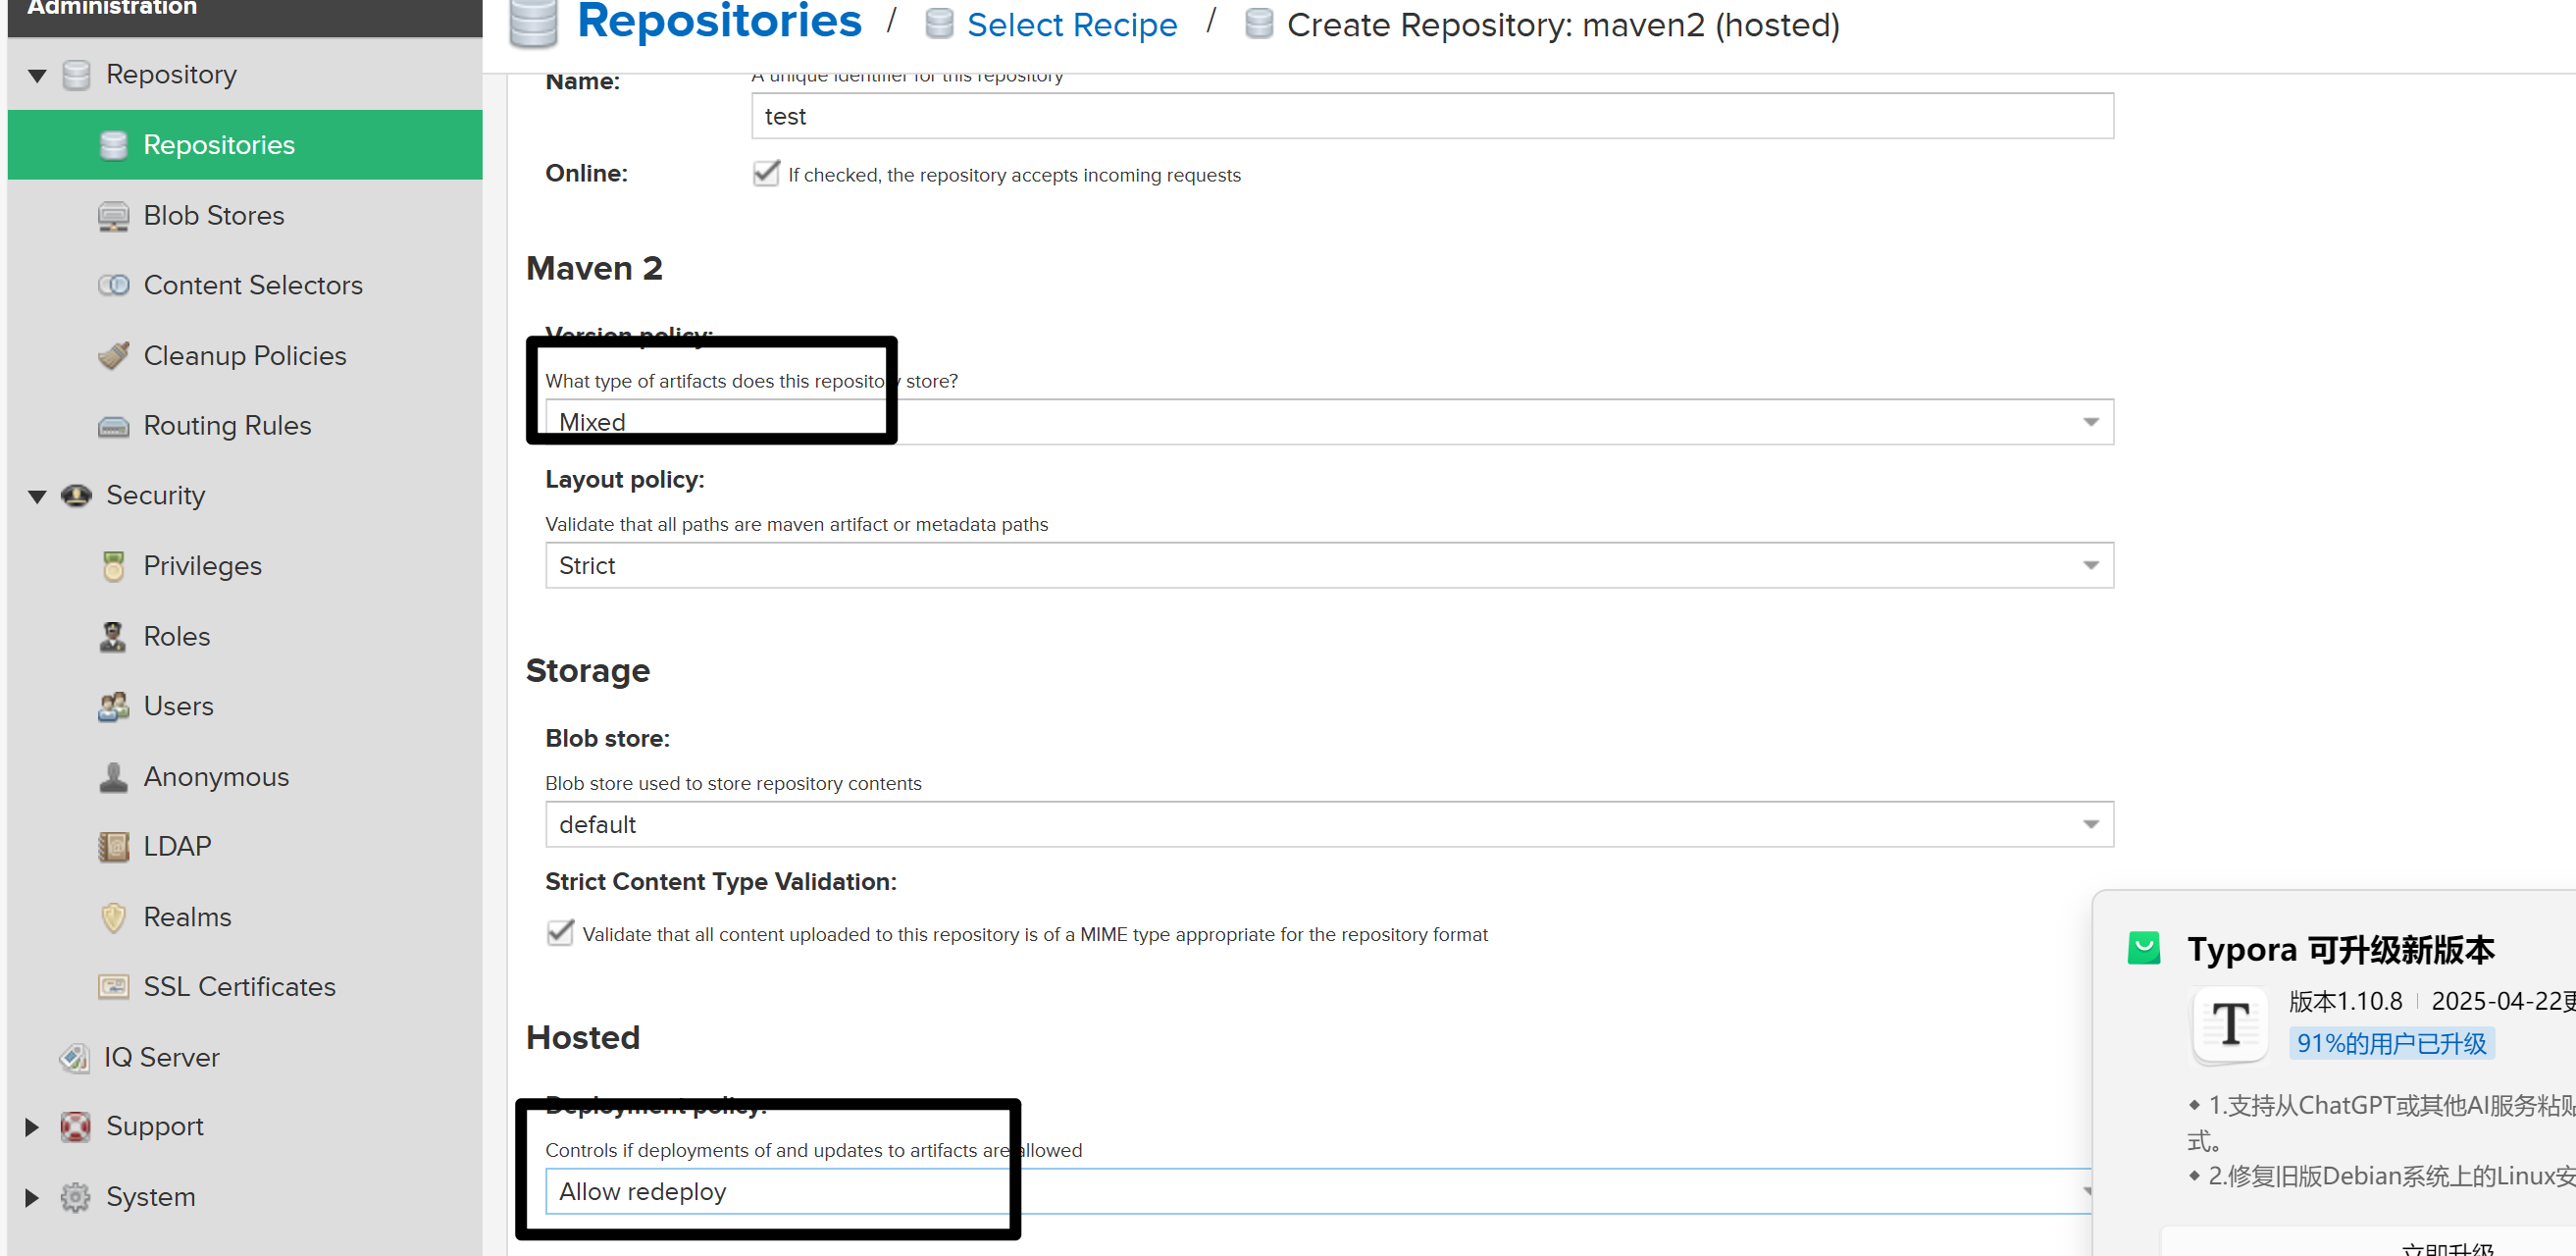
设置类型为Mixed和Allow Redeploy(可以重复deploy仓库)
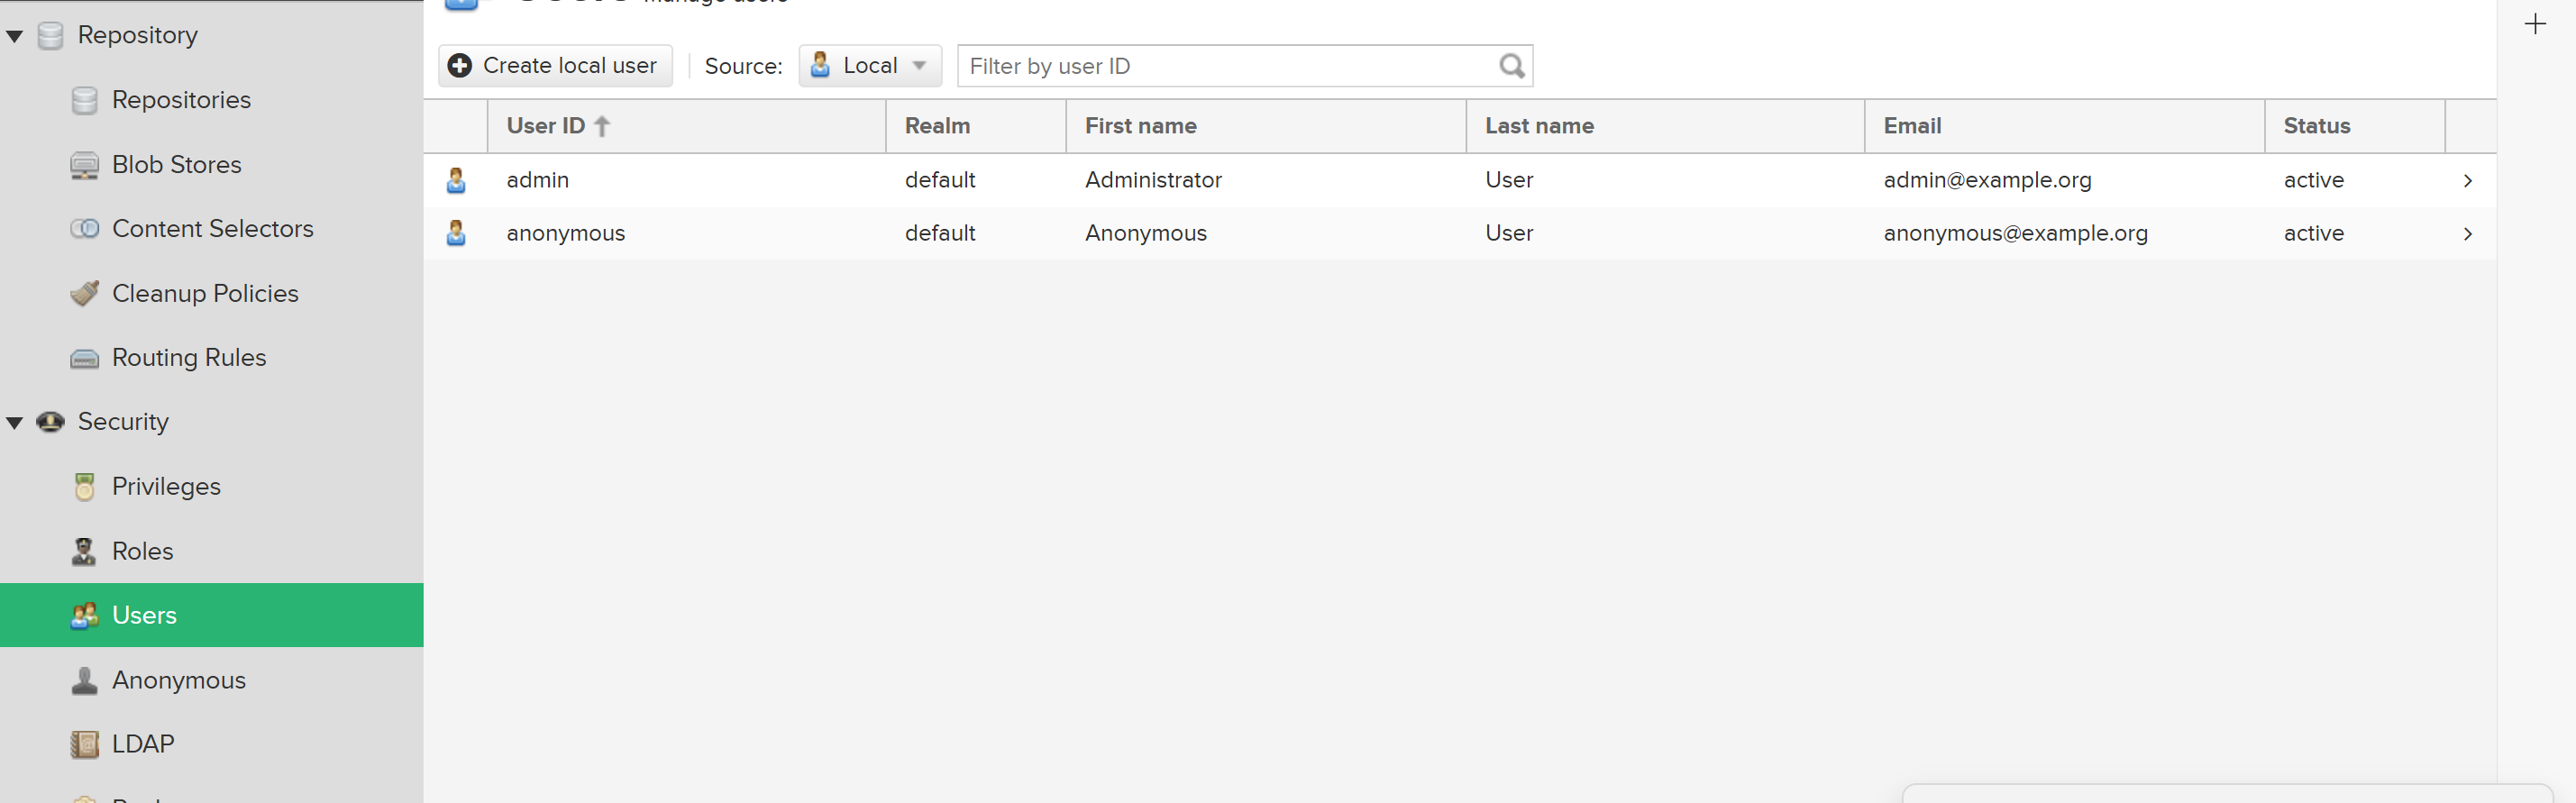
如果需要更细粒度的控制用户权限可以在左侧菜单设置
在这里可以指定用户是否有上传依赖的权限
2.上传依赖
- 批量上传依赖(Linux版本,利用Curl命令上传Jar包)
#!/bin/bash
# copy and run this script to the root of the repository directory containing files
# this script attempts to exclude uploading itself explicitly so the script name is important
# Get command line params

while getopts ":r:u:p:" opt; do
  case $opt in
    r) REPO_URL="$OPTARG"
    ;;
    u) USERNAME="$OPTARG"
    ;;
    p) PASSWORD="$OPTARG"
    ;;
    \?) echo "Invalid option -$OPTARG" >&2
    ;;
  esac
done

echo $USERNAME
echo $PASSWORD
echo $REPO_URL

find . -type f -not -path './mavenImport.sh' -not -path '*/\.*' -not -path '*/\archetype-catalog.xml' -not -path '*/\maven-metadata-local.xml' -not -path '*/\maven-metadata-deployment.xml' | sed "s|^\./||" | xargs -I '{}' curl -u "$USERNAME:$PASSWORD" -X PUT -v -T {} ${REPO_URL}/{} ;
将脚本复制到依赖的根目录下,执行命令
sh mavenImport.sh -uadmin -rpassword -p仓库地址
- Maven Deploy
如果是开源依赖建议使用批量脚本上传到仓库中,如果自己开发的依赖需要上传到仓库中则建议通过deploy
在项目中配置仓库地址
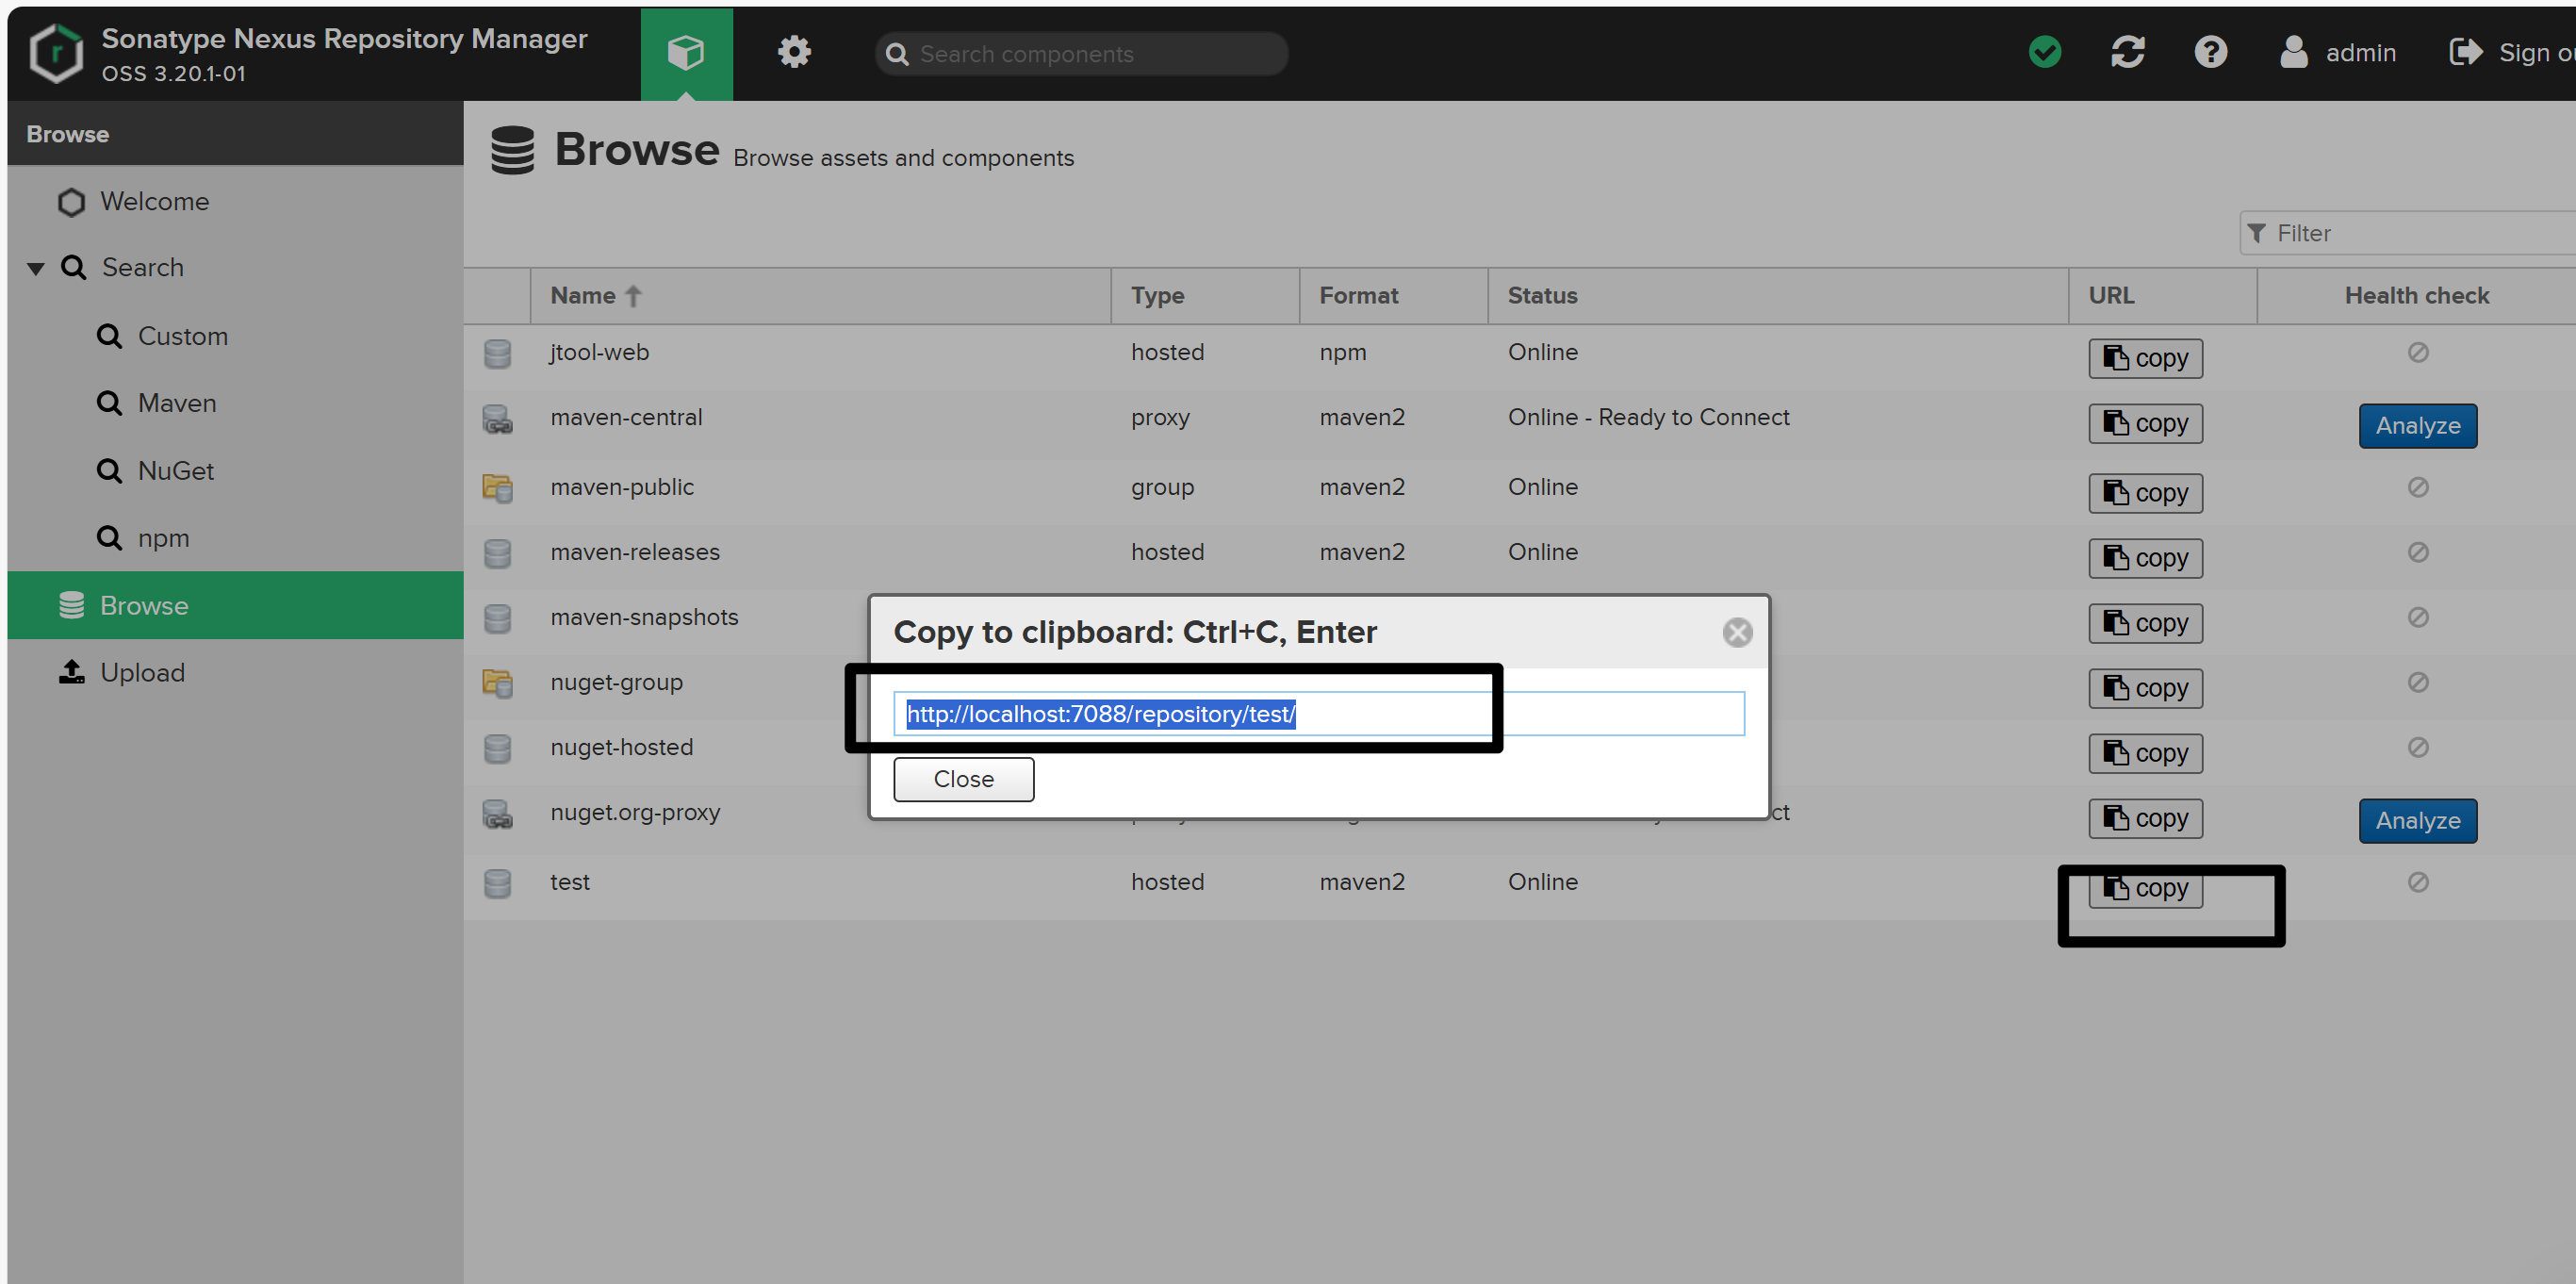
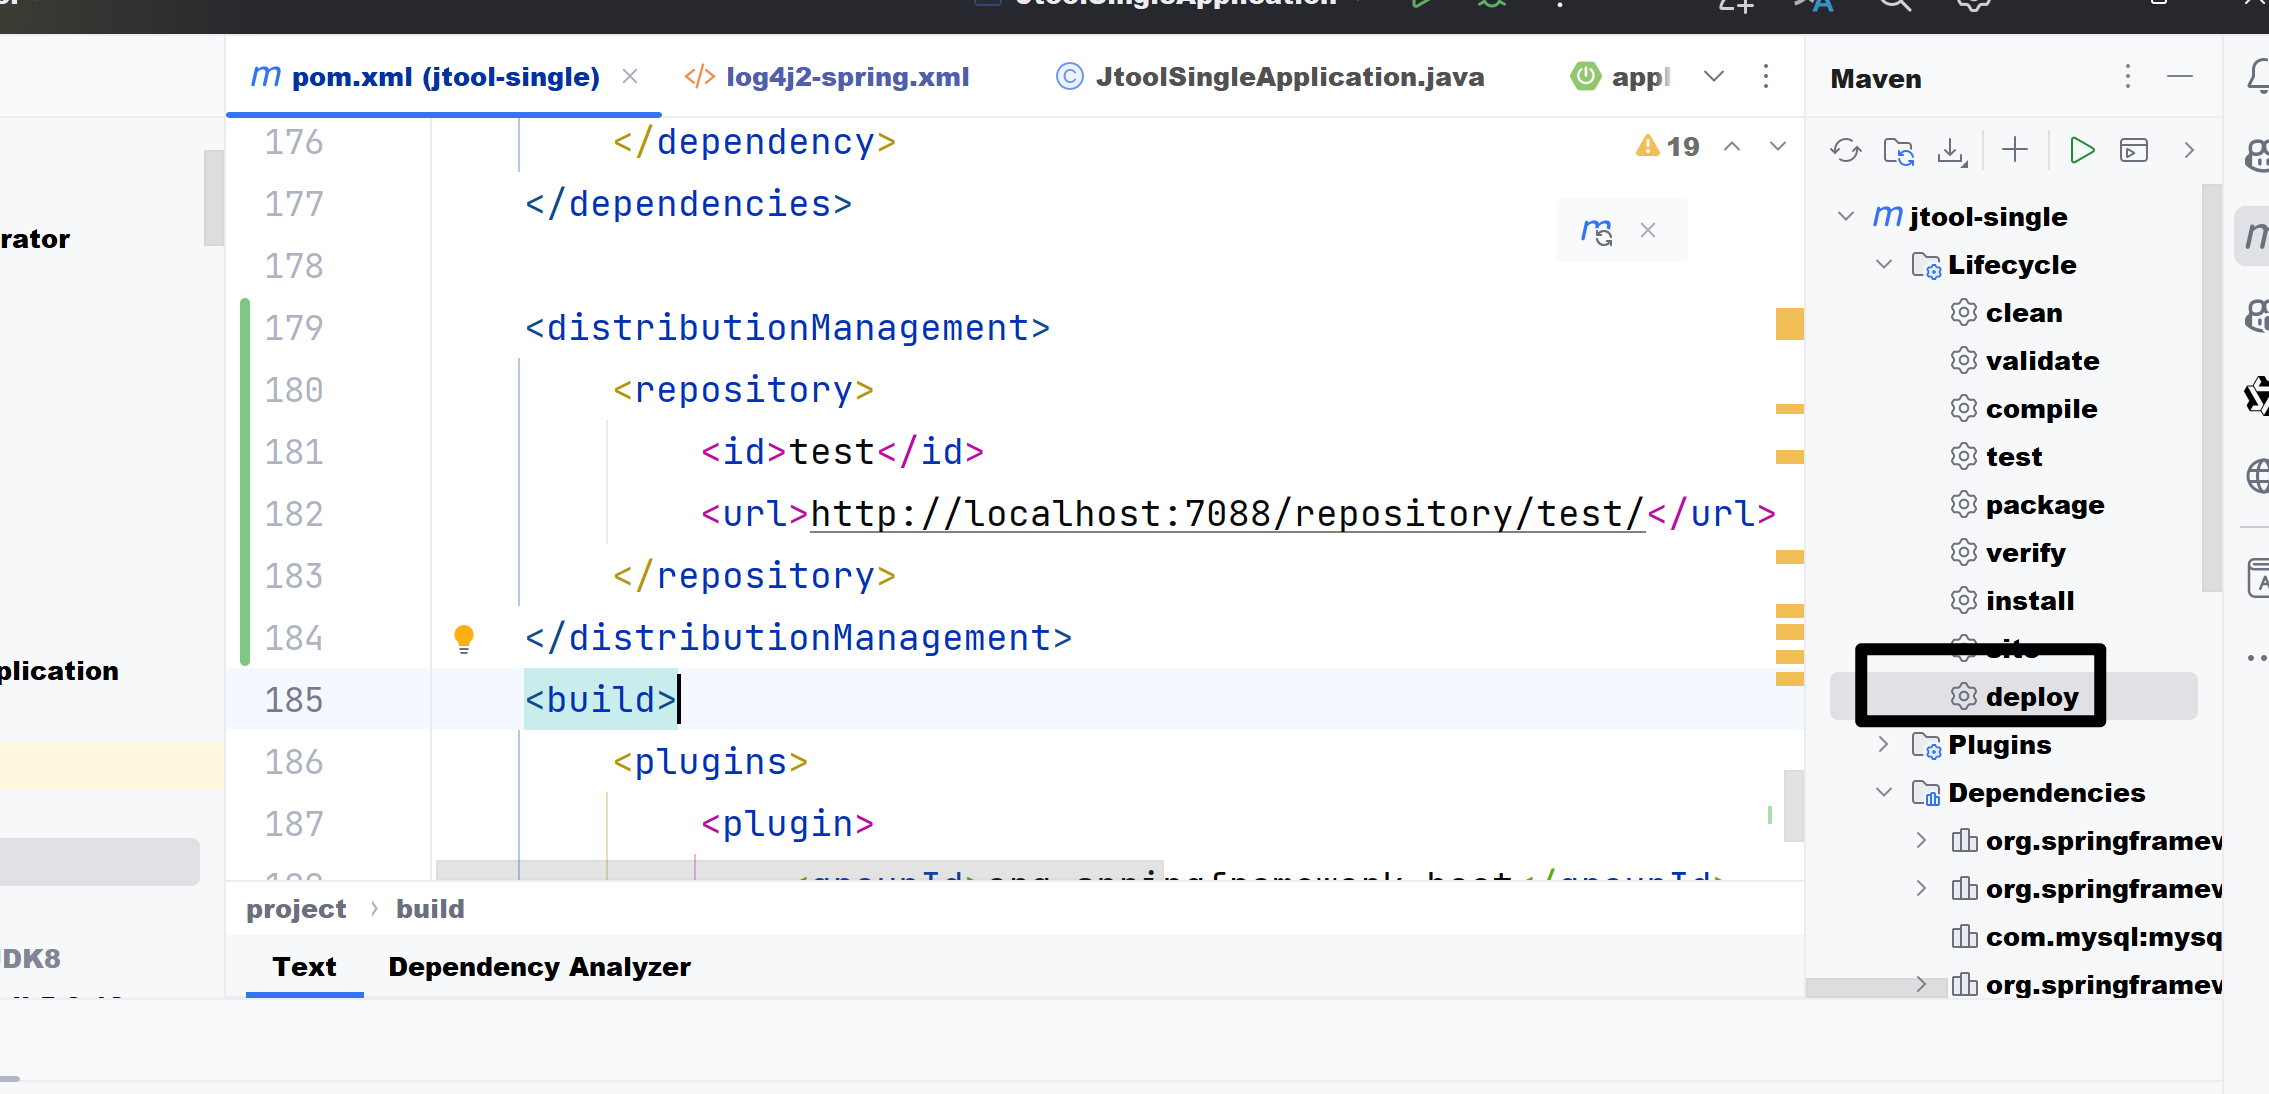
在pom中设置发布的仓库
    <distributionManagement>
        <repository>
            <id>test</id>
            <url>http://localhost:7088/repository/test/</url>
        </repository>
    </distributionManagement>
    <build>
        <plugins>
            <plugin>
                <groupId>org.springframework.boot</groupId>
                <artifactId>spring-boot-maven-plugin</artifactId>
            </plugin>
        </plugins>
    </build>
在settings.xml中设置仓库的用户密码(仓库id要对应上)
 <servers>
	 <server>
      <id>test</id>
      <username>admin</username>
      <password>马赛克</password>
    </server>
  </servers>
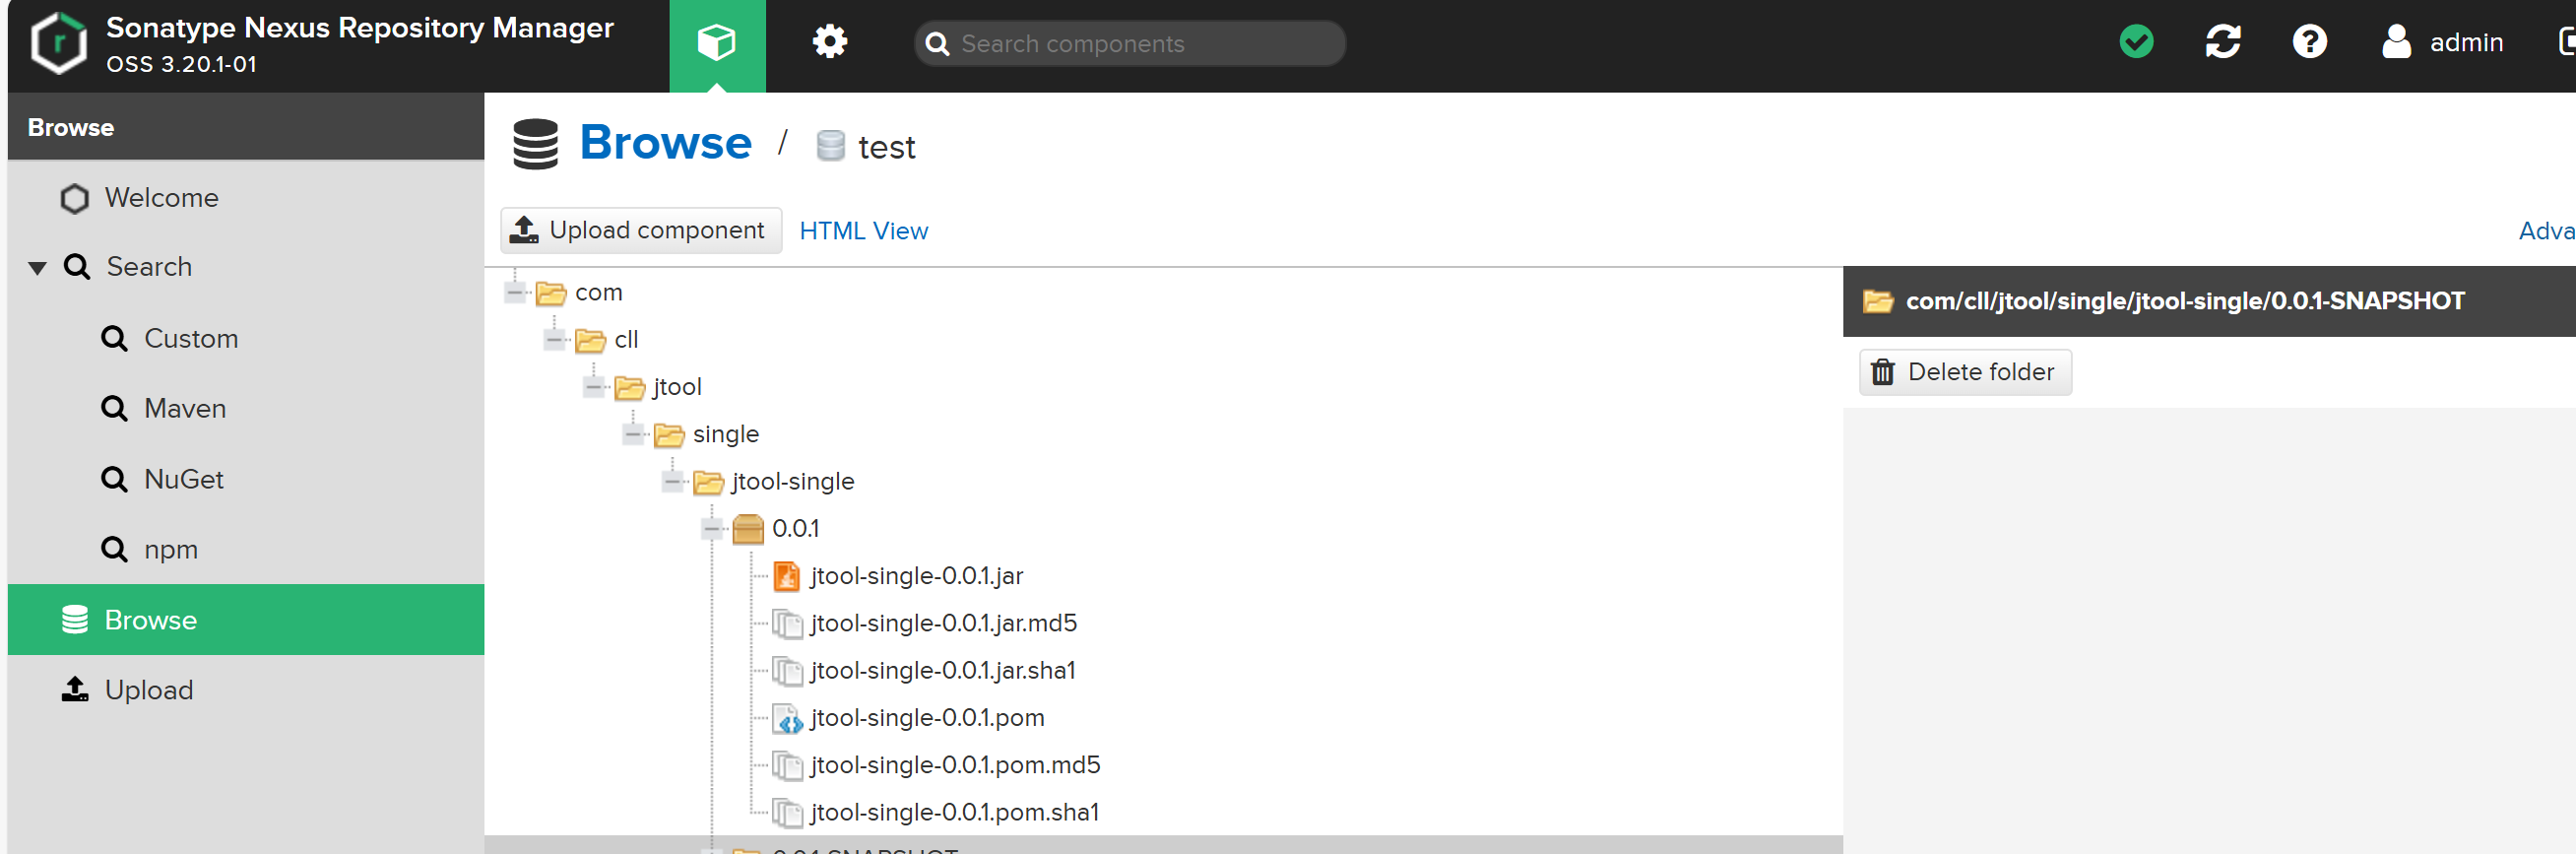
然后在IDEA里面deploy
可以看到已经成功上传到nexus
3.多个远程仓库配置
目标就是解决如何将自己搭建的nexus私服和开源依赖配合使用,因为apache是没有我们自己上传的依赖,而我们自己的nexus私服中有没有开源依赖。(当然也可以将缓存的开源依赖通过上面的批量脚本上传到nexus私服中,内网开发如果无法联网可以参考该做法)
在此之前需要了解仓库和镜像的区别
仓库分为本地仓库,远程仓库,中央仓库。本地仓库很好理解,远程仓库就是公司或者组织自己搭建的仓库,比如本文上面用nexus搭建的仓库,而中央仓库就是apache的仓库,默认配置好了,不用显式配置。
如果我们的settings.xml什么都不配置,就会默认使用Maven自带的仓库,缺点是速度慢。
镜像就是提供与原始仓库相同的内容,通常位于地理位置更近或网络条件更好的服务器上,用于加速依赖下载,比如阿里云镜像仓库,镜像本质上也是仓库,但是阿里云的镜像只是apache中央仓库一个复制品,他们不会将公司内部的依赖上传上去。
所以镜像使用和多仓库还是有区别的,如果我们只为了加快开源依赖的缓存速度可以使用一个镜像(远程仓库)去cover中央仓库,比如阿里云镜像的配置
 <mirror>
<id>aliyunmaven</id>
<mirrorOf>central</mirrorOf>
<name>阿里云公共仓库</name>
<url>https://maven.aliyun.com/repository/public</url>
</mirror>
但是maven中央仓库和阿里云镜像是不会有我们自己上传的私有依赖的,还需要配置自己的仓库
在pom中配置自己搭建的远程仓库(settings.xml中配置也可以)
<repositories>
   <repository>
            <id>test</id>
            <url>http://localhost:7088/repository/test/</url>
        </repository>
   <repository>
</repositories>
这里同时在另一个项目中引入上面的私有依赖和开源依赖
    <dependencies>
        <!-- Spring Boot Starter -->
        <dependency>
            <groupId>org.springframework.boot</groupId>
            <artifactId>spring-boot-starter-web</artifactId>
            <exclusions>
                <exclusion>
                    <artifactId>spring-boot-starter-logging</artifactId>
                    <groupId>org.springframework.boot</groupId>
                </exclusion>
            </exclusions>
        </dependency>

        <dependency>
            <groupId>com.cll.jtool.single</groupId>
            <artifactId>jtool-single</artifactId>
            <version>0.0.1</version>
        </dependency>
    </dependencies>

    <!-- 定义版本属性 -->
    <repositories>
        <repository>
            <id>test</id>
            <url>http://localhost:7088/repository/test/</url>
        </repository>
    </repositories>
完整的settings.xml配置
<?xml version="1.0" encoding="UTF-8"?>


<settings xmlns="http://maven.apache.org/SETTINGS/1.2.0"
          xmlns:xsi="http://www.w3.org/2001/XMLSchema-instance"
          xsi:schemaLocation="http://maven.apache.org/SETTINGS/1.2.0 https://maven.apache.org/xsd/settings-1.2.0.xsd">
  <servers>
	 <server>
      <id>test</id>
      <username>admin</username>
      <password>马赛克</password>
    </server>
  </servers>

  <mirrors>
     <mirror>
      <id>alimaven</id>
      <mirrorOf>central</mirrorOf>
      <name>aliyun maven</name>
      <url>http://maven.aliyun.com/nexus/content/groups/public/</url>
    </mirror>
  </mirrors>
<repositories>
   <repository>
            <id>test</id>
            <url>http://localhost:7088/repository/test/</url>
        </repository>

</repositories>
</settings>
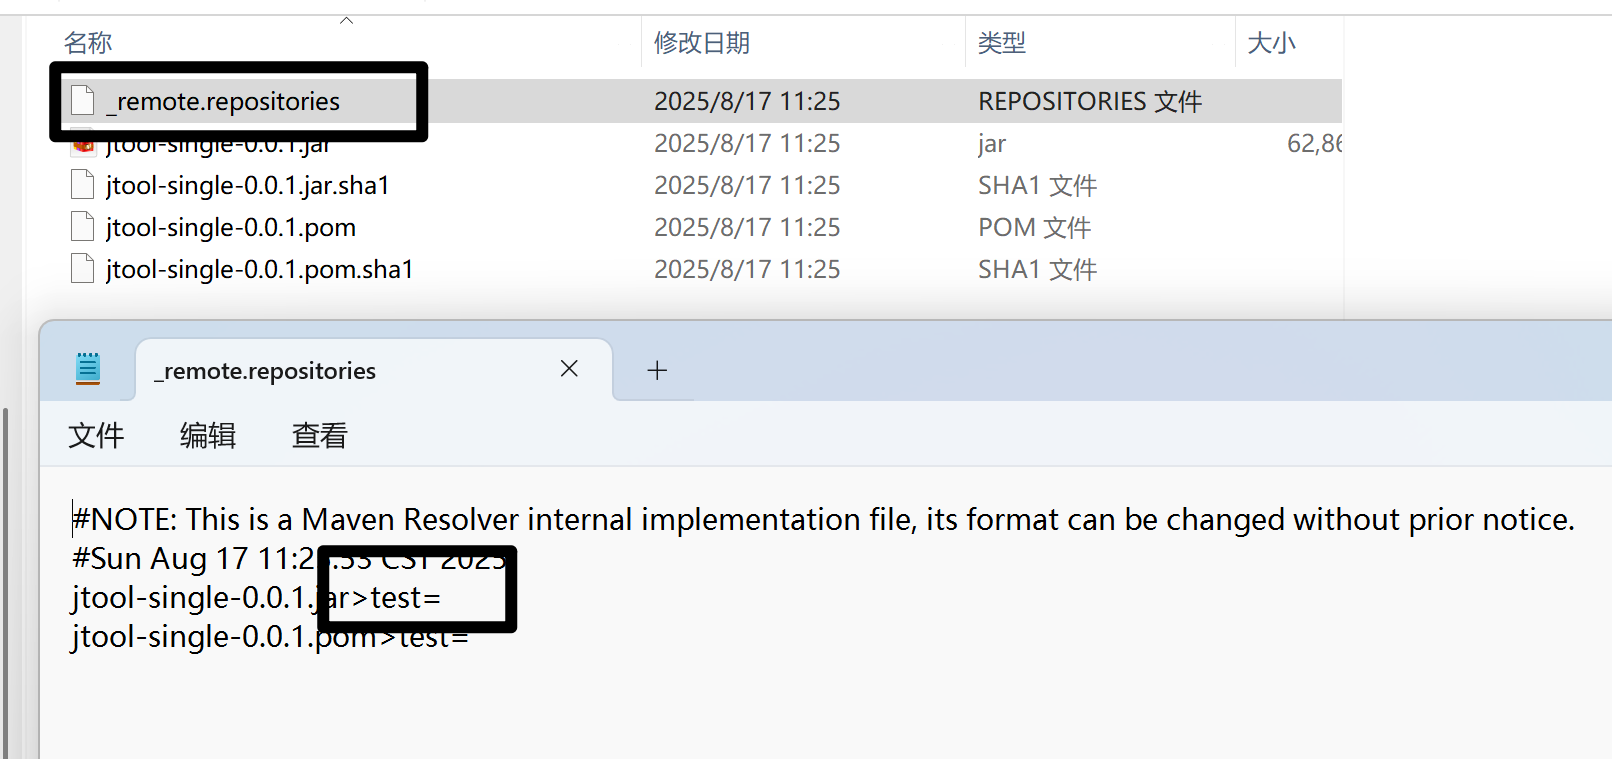
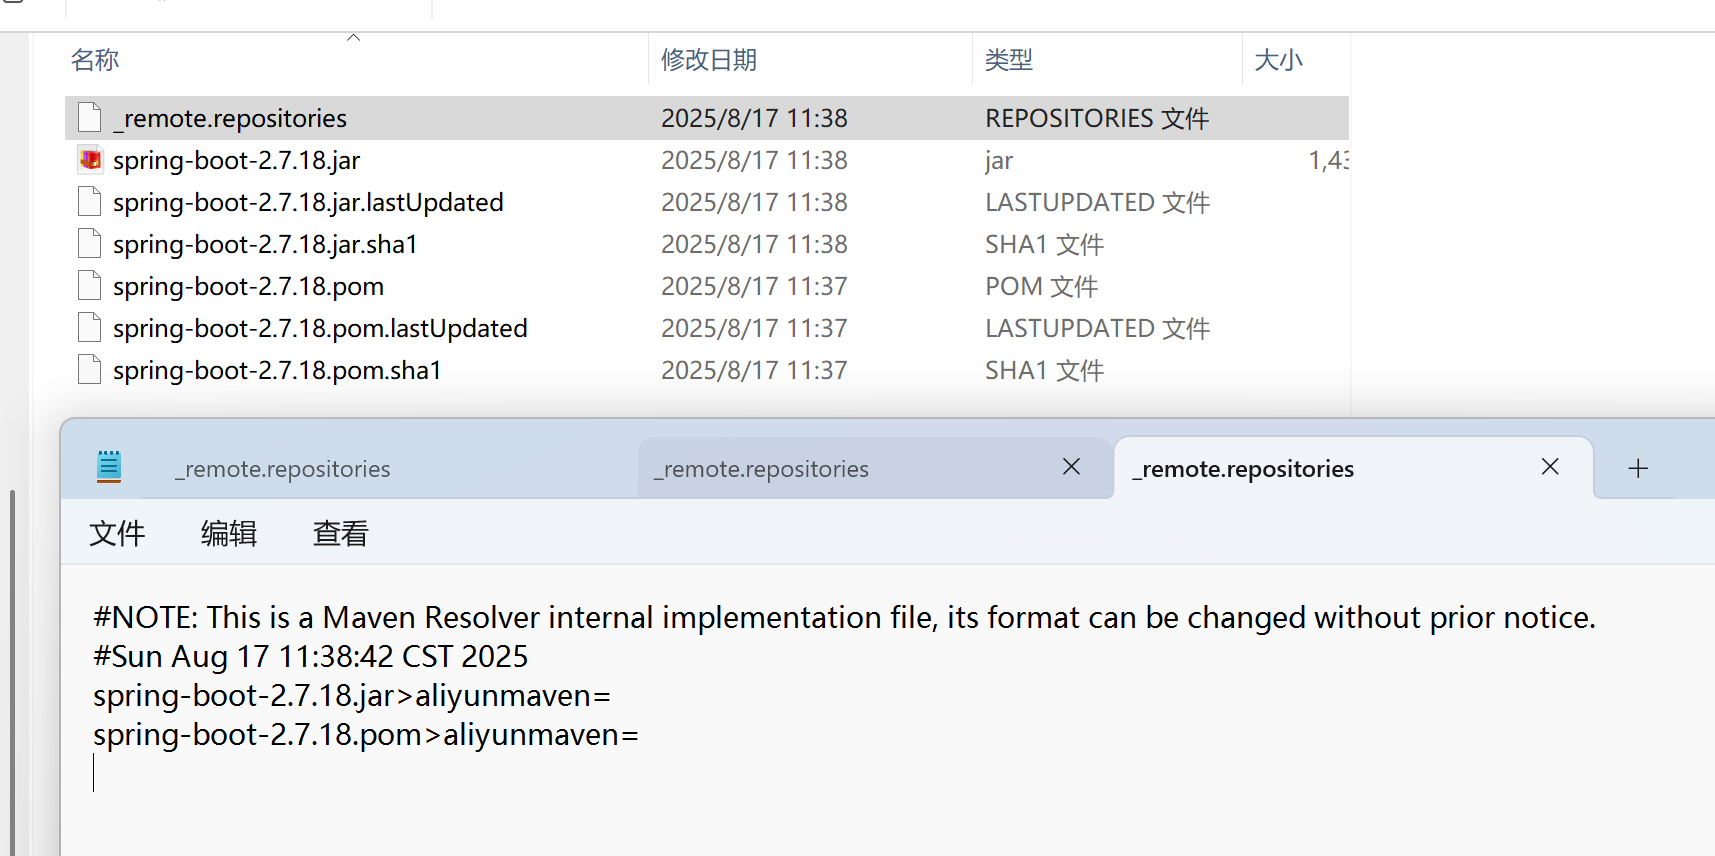
在这个项目的repo中可以看到所以私有依赖和缓存依赖都被加载下来了
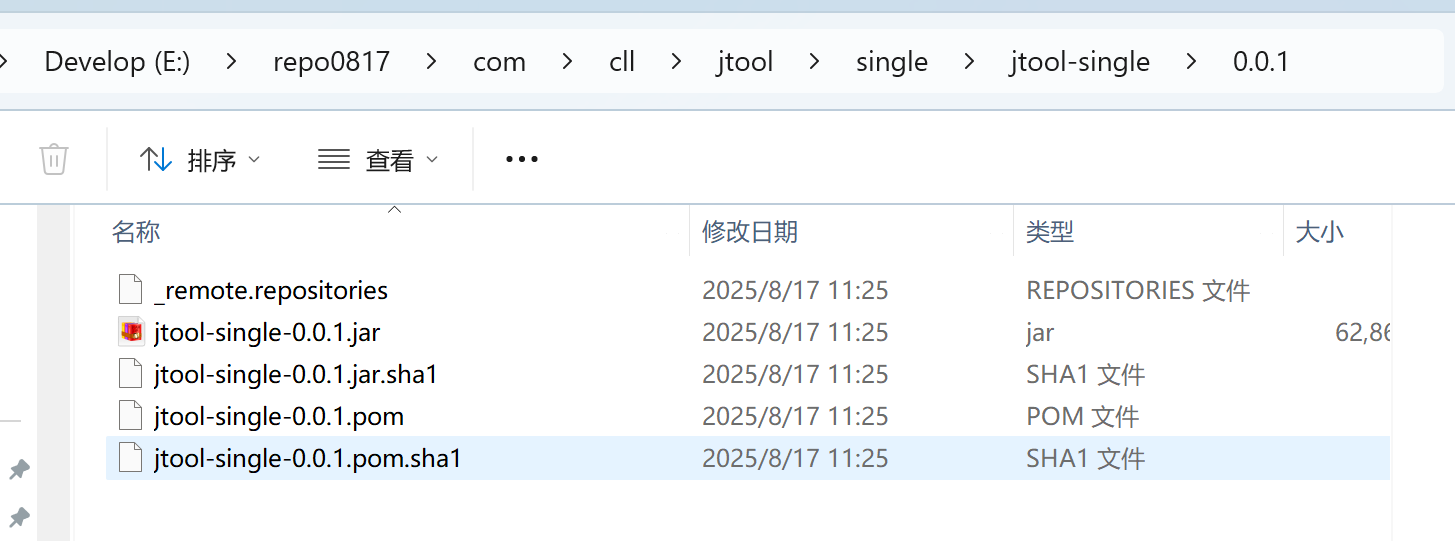
通过_remote.repositories可以看到jar的来源
开源依赖的来源为aliyun仓库
注意上面的阿里云镜像仓库仅仅覆盖了maven中央仓库,而不包括nexus私服test,如果设置如下,那么maven在加载私服的依赖时就不会去真正的私服加载而是去阿里云镜像仓库加载,最终也会缓存失败。
<mirror>
<id>aliyunmaven</id>
<mirrorOf>*</mirrorOf>
<name>阿里云公共仓库</name>
<url>https://maven.aliyun.com/repository/public</url>
</mirror>
清空本地仓库重新加载就会报错
Could not find artifact com.cll.jtool.single:jtool-single:pom:0.0.1 in aliyunmaven (https://maven.aliyun.com/repository/public)
4.其它
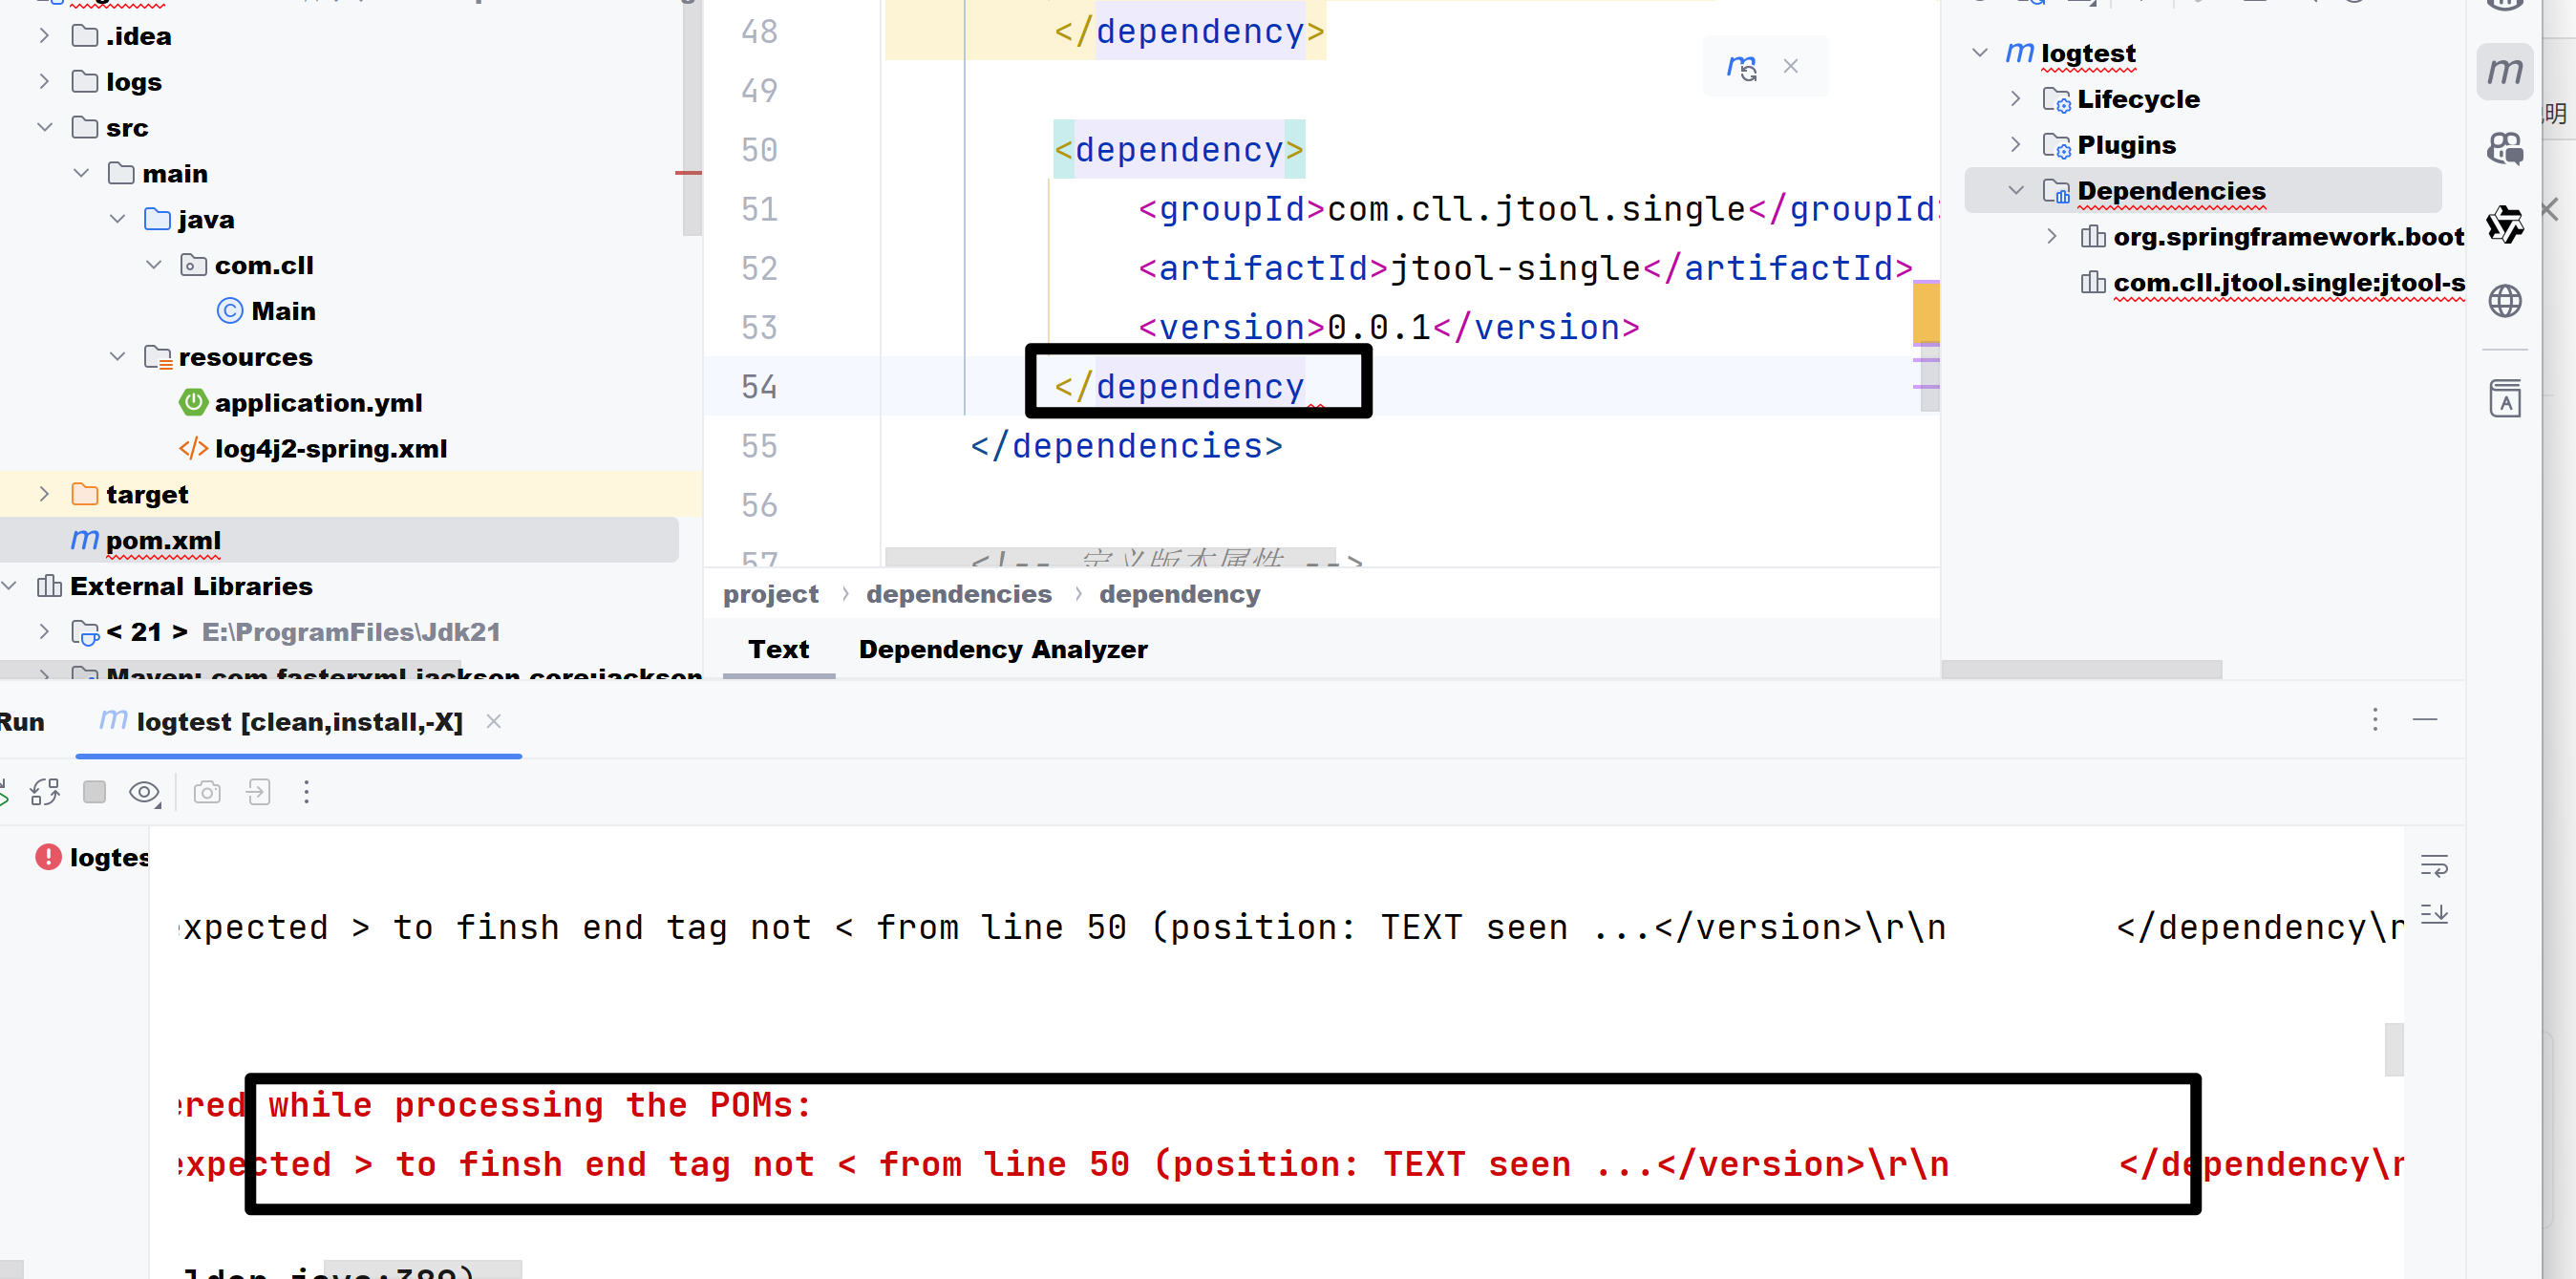
- 开启debug模式
即使pom正确配置,idea也可能因为本地缓存问题导致加载依赖缓慢,这时候可以直接执行
有时候因为pom的语法出现问题,可以借助debug模式快速定位
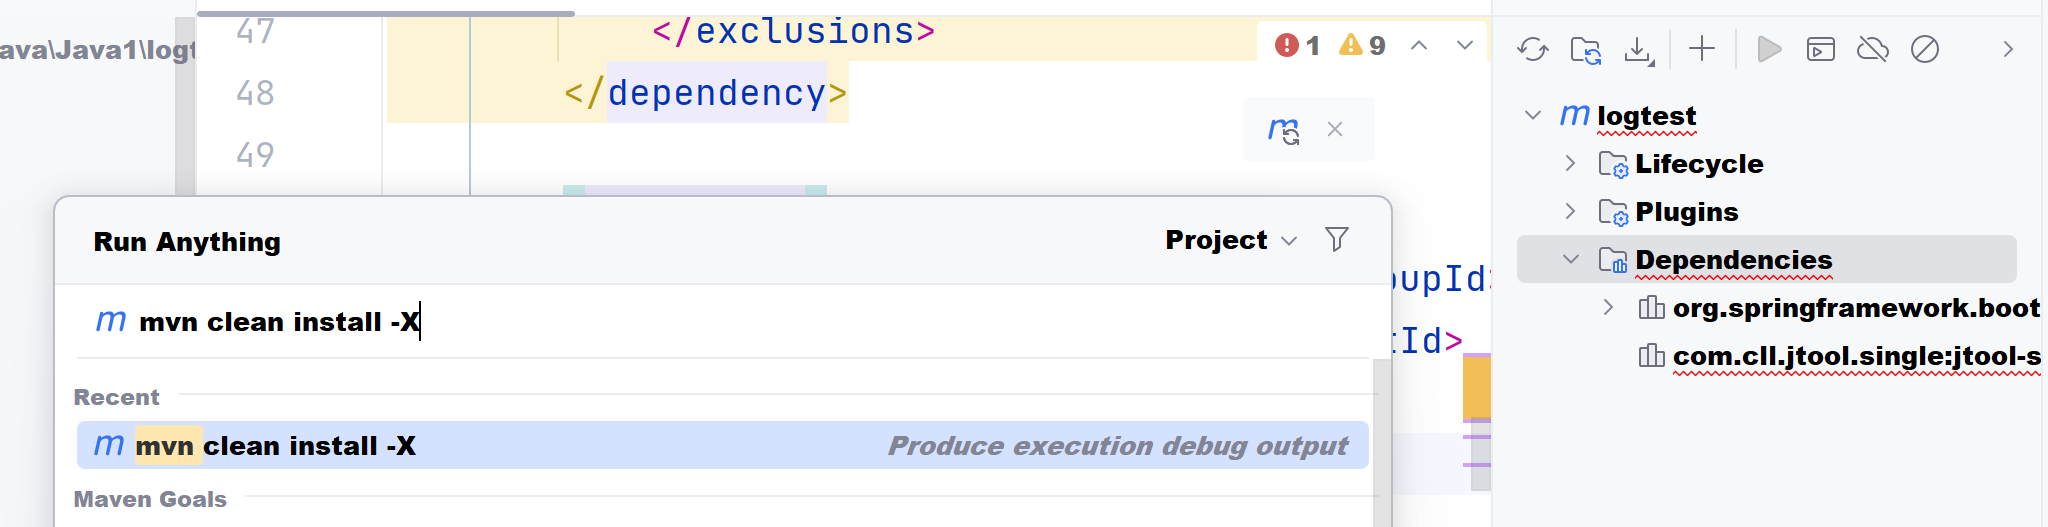
尤其是当pom文件过大借助debug模式可以快速定位问题