作为国内开源领域极具影响力的微服务快速开发框架,RuoYi-Cloud 凭借 “开箱即用” 的特性,成了不少团队搭建企业级应用的首选 —— 从权限管理到业务模块集成,它几乎封装了开发中常见的核心需求,官方文档(介绍 | RuoYi)也早已为基础功能和架构设计做了清晰说明。
一、引入
RuoYi-Cloud 是一个 Java EE 分布式微服务架构平台,基于经典技术组合(Spring Boot、Spring Cloud & Alibaba、Vue、Element),内置模块如:部门管理、角色用户、菜单及按钮授权、数据权限、系统参数、日志管理、代码生成等。在线定时任务配置;支持集群,支持多数据源。
架构设计
图片源地址: 微服务基础架构 流程图模板_ProcessOn思维导图、流程图
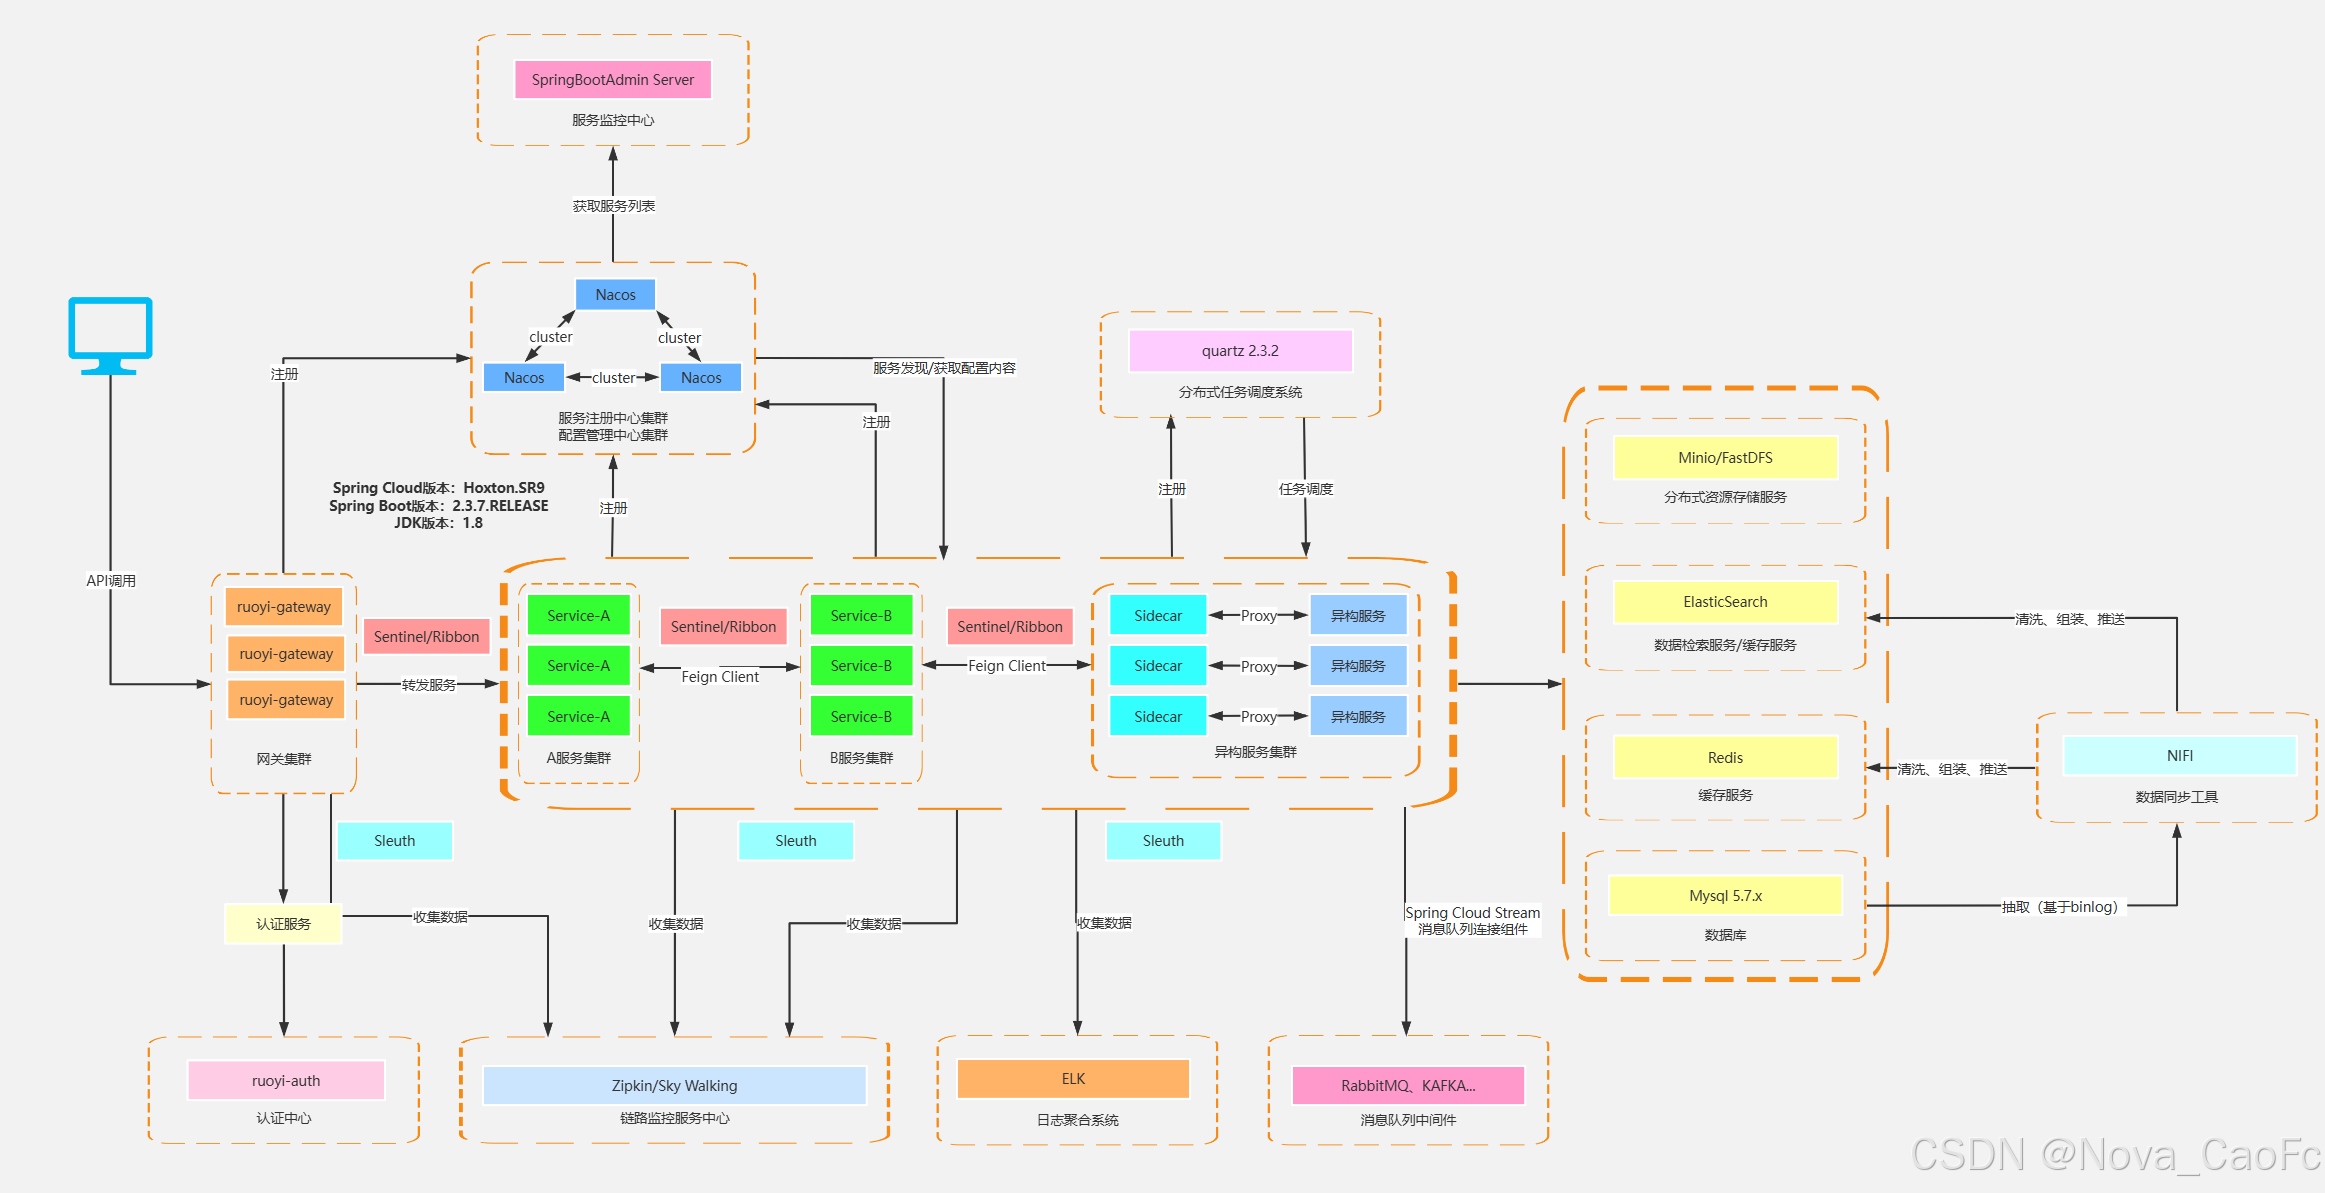
RuoYi-Cloud 基于 Spring Cloud Alibaba 构建,完全契合微服务架构规范,从下到上可分为基础设施层、公共支撑层、核心服务层、接入层四层,每层职责明确,通过服务注册、配置中心等组件实现联动。官网图示中提到的 “服务治理”“配置统一”“流量控制” 等能力,均通过以下层级落地:
- 基础设施层:依赖 Nacos(服务注册 / 配置中心)、Redis(缓存)、MySQL(数据库)、Seata(分布式事务)等中间件,对应你目录中
docker文件夹下的nacos、redis、mysql等容器配置,是整个架构的 “底层支撑”; - 公共支撑层:对应项目中的
ruoyi-common模块,封装了微服务开发的通用能力(如工具类、安全框架、日志组件等),避免重复开发; - 核心服务层:包含认证服务、业务服务等,是实际处理业务逻辑的 “核心载体”;
- 接入层:通过网关统一接收请求,实现路由、限流等功能,对应
ruoyi-gateway模块。
二、本地环境准备
本文采用单机方式部署,只用到了一台Ubuntu22.04的虚拟机,配置为4Core8G内存100G硬盘
系统需求
- JDK >= 1.8
- MySQL >= 5.7
- Maven >= 3.0
- Node >= 12
- Redis >= 3
- 3 > nacos-server >=2.x.x
1. 准备代码
代码仓库地址:
RuoYi-Cloud: 🎉 基于Spring Boot、Spring Cloud & Alibaba的分布式微服务架构权限管理系统,同时提供了 Vue3 的版本
root@Microservice:~# git clone https://gitee.com/y_project/RuoYi-Cloud.git
root@Microservice:~# ll RuoYi-Cloud/
total 76
drwxr-xr-x  2 root root  4096 Aug 26 00:42 bin
drwxr-xr-x  7 root root  4096 Aug 26 00:42 docker
-rw-r--r--  1 root root  1063 Aug 26 00:42 LICENSE
drwxr-xr-x  3 root root  4096 Aug 26 02:10 logs
-rw-r--r--  1 root root 12419 Aug 26 00:42 pom.xml
-rw-r--r--  1 root root  9480 Aug 26 00:42 README.md
drwxr-xr-x  3 root root  4096 Aug 26 00:42 ruoyi-api
drwxr-xr-x  4 root root  4096 Aug 26 01:55 ruoyi-auth
drwxr-xr-x 11 root root  4096 Aug 26 00:42 ruoyi-common
drwxr-xr-x  4 root root  4096 Aug 26 01:55 ruoyi-gateway
drwxr-xr-x  6 root root  4096 Aug 26 00:42 ruoyi-modules
drwxr-xr-x  7 root root  4096 Aug 26 02:22 ruoyi-ui
drwxr-xr-x  3 root root  4096 Aug 26 00:42 ruoyi-visual
drwxr-xr-x  2 root root  4096 Aug 26 00:42 sql
2. 组件介绍
2.1 基础支撑组件
- ruoyi-gateway(网关):所有前端请求的入口,负责路由转发(比如把
/system/*请求转给系统服务)、限流、跨域处理,相当于微服务的 “流量管家”。 - ruoyi-auth(认证中心):处理用户登录、生成 JWT 令牌,统一校验接口权限,避免每个服务重复做认证,是框架的 “安全屏障”。
- ruoyi-common(公共工具):封装通用能力,比如工具类、全局异常处理、Redis 操作、安全注解等,所有服务都依赖它,减少重复开发。
2.2 业务功能模块
对应 ruoyi-modules 目录,每个子模块是独立微服务:
- ruoyi-system(系统模块):最核心的业务模块,包含用户管理、角色权限、菜单配置等基础功能,是企业应用的 “标配模块”。
- ruoyi-file(文件模块):处理文件上传、下载、存储(支持本地或 MinIO),对应官网 “文件管理” 功能。
- ruoyi-gen(代码生成):根据数据库表结构自动生成前后端代码(Controller、Vue 页面等),官网 “代码生成” 章节有具体用法,能省开发时间。
- ruoyi-job(任务模块):基于 Quartz 实现定时任务(比如定时备份数据),支持动态启停任务。
2.3 前端与部署工具
- ruoyi-ui(前端模块):基于 Vue + Element UI 的前端界面,和后端通过网关通信,就是用户实际操作的页面。
3. 安装必要服务
在这里博主采用的基本是二进制安装,因为安装与配置的方式大同小异,这里有些服务的安装就不过多演示了,只要版本符合系统要求,能正常启动即可。
3.1 安装jdk
root@Microservice:~# java -version
java version "1.8.0_461"
Java(TM) SE Runtime Environment (build 1.8.0_461-b11)
Java HotSpot(TM) 64-Bit Server VM (build 25.461-b11, mixed mode)
3.2 安装MySQL
root@Microservice:~# mysql -V
mysql  Ver 8.4.5 for Linux on x86_64 (MySQL Community Server - GPL)
root@Microservice:~# systemctl status mysqld
● mysqld.service - MySQL Server Daemon
     Loaded: loaded (/lib/systemd/system/mysqld.service; enabled; vendor preset: enabled)
     Active: active (running) since Tue 2025-08-26 01:31:37 UTC; 1h 17min ago
       Docs: https://dev.mysql.com/doc/
   Main PID: 52557 (mysqld_safe)
      Tasks: 53 (limit: 9346)
     Memory: 452.5M
        CPU: 23.922s
     CGroup: /system.slice/mysqld.service
             ├─52557 /bin/sh /usr/local/mysql/bin/mysqld_safe --datadir=/data/mysql/data --pid-file=/data/mysql/data/Microservice.pid
             └─52695 /usr/local/mysql/bin/mysqld --basedir=/usr/local/mysql --datadir=/data/mysql/data --plugin-dir=/usr/local/mysql/lib/plugin --user=mysql>

Aug 26 01:31:36 Microservice systemd[1]: Starting MySQL Server Daemon...
Aug 26 01:31:36 Microservice mysqld[52543]: Starting MySQL
Aug 26 01:31:36 Microservice mysqld[52543]: .
Aug 26 01:31:36 Microservice mysqld[52557]: Logging to '/data/mysql/data/Microservice.err'.
Aug 26 01:31:37 Microservice mysqld[52543]:  *
Aug 26 01:31:37 Microservice systemd[1]: Started MySQL Server Daemon.
3.3 安装Maven
root@Microservice:~# mvn -v
Apache Maven 3.9.9 (8e8579a9e76f7d015ee5ec7bfcdc97d260186937)
Maven home: /usr/local/maven
Java version: 1.8.0_461, vendor: Oracle Corporation, runtime: /usr/local/jdk1.8.0_461/jre
Default locale: en_US, platform encoding: UTF-8
OS name: "linux", version: "5.15.0-151-generic", arch: "amd64", family: "unix"
3.4 安装Redis
root@Microservice:~# systemctl status redis
● redis.service - Redis In-Memory Data Store
     Loaded: loaded (/etc/systemd/system/redis.service; enabled; vendor preset: enabled)
     Active: active (running) since Tue 2025-08-26 00:58:11 UTC; 1h 52min ago
   Main PID: 9940 (redis-server)
      Tasks: 6 (limit: 9346)
     Memory: 2.5M
        CPU: 8.922s
     CGroup: /system.slice/redis.service
             └─9940 "/usr/local/redis/bin/redis-server 127.0.0.1:6379" "" "" "" "" "" "" "" "" "" "" "" "" ""

Aug 26 00:58:11 Microservice redis-server[9940]: 9940:M 26 Aug 2025 00:58:11.320 * RDB age 0 seconds
Aug 26 00:58:11 Microservice redis-server[9940]: 9940:M 26 Aug 2025 00:58:11.320 * RDB memory usage when created 0.86 Mb
3.5 部署Node
root@Microservice:~/RuoYi-Cloud# node -v
v12.22.9
root@Microservice:~/RuoYi-Cloud# nodejs -v
v12.22.9
3.6 安装nacos
root@Microservice:~# systemctl status nacos
● nacos.service
     Loaded: loaded (/etc/systemd/system/nacos.service; static)
     Active: active (running) since Tue 2025-08-26 01:53:04 UTC; 57min ago
    Process: 55572 ExecStart=/usr/local/nacos/bin/startup.sh -m standalone (code=exited, status=0/SUCCESS)
   Main PID: 55594 (java)
      Tasks: 294 (limit: 9346)
     Memory: 728.7M
        CPU: 1min 17.860s
     CGroup: /system.slice/nacos.service
             └─55594 /usr/local/jdk1.8.0_461/bin/java -Djava.ext.dirs=/usr/local/jdk1.8.0_461/jre/lib/ext:/usr/local/jdk1.8.0_461/lib/ext -Xms512m -Xmx512m >

Aug 26 01:53:04 Microservice systemd[1]: Starting nacos.service...
Aug 26 01:53:04 Microservice startup.sh[55572]: /usr/local/jdk1.8.0_461/bin/java -Djava.ext.dirs=/usr/local/jdk1.8.0_461/jre/lib/ext:/usr/local/jdk1.8.0_461>
Aug 26 01:53:04 Microservice startup.sh[55572]: nacos is starting with standalone
Aug 26 01:53:04 Microservice startup.sh[55572]: nacos is starting. you can check the /usr/local/nacos/logs/start.out
Aug 26 01:53:04 Microservice systemd[1]: Started nacos.service.
4. 使用Maven打包项目
先进入项目目录
root@Microservice:~# cd RuoYi-Cloud/
root@Microservice:~/RuoYi-Cloud# mvn clean package -Dmaven.test.skip=true

[INFO] --- jar:3.4.1:jar (default-jar) @ ruoyi-common-sensitive ---
[INFO] Building jar: /root/RuoYi-Cloud/ruoyi-common/ruoyi-common-sensitive/target/ruoyi-common-sensitive-3.6.6.jar
[INFO] ------------------------------------------------------------------------
[INFO] Reactor Summary for ruoyi 3.6.6:
[INFO]
[INFO] ruoyi .............................................. SUCCESS [  2.421 s]
[INFO] ruoyi-common ....................................... SUCCESS [  0.003 s]
[INFO] ruoyi-common-core .................................. SUCCESS [ 22.848 s]
[INFO] ruoyi-api .......................................... SUCCESS [  0.006 s]
[INFO] ruoyi-api-system ................................... SUCCESS [  0.255 s]
[INFO] ruoyi-common-redis ................................. SUCCESS [  1.685 s]
[INFO] ruoyi-common-security .............................. SUCCESS [  0.378 s]
[INFO] ruoyi-auth ......................................... SUCCESS [ 18.275 s]
[INFO] ruoyi-gateway ...................................... SUCCESS [  5.580 s]
[INFO] ruoyi-visual ....................................... SUCCESS [  0.002 s]
[INFO] ruoyi-visual-monitor ............................... SUCCESS [  2.521 s]
[INFO] ruoyi-common-datasource ............................ SUCCESS [  4.993 s]
[INFO] ruoyi-common-datascope ............................. SUCCESS [  0.131 s]
[INFO] ruoyi-common-log ................................... SUCCESS [  0.138 s]
[INFO] ruoyi-common-swagger ............................... SUCCESS [  0.326 s]
[INFO] ruoyi-modules ...................................... SUCCESS [  0.002 s]
[INFO] ruoyi-modules-system ............................... SUCCESS [  2.652 s]
[INFO] ruoyi-modules-gen .................................. SUCCESS [  1.039 s]
[INFO] ruoyi-modules-job .................................. SUCCESS [  1.101 s]
[INFO] ruoyi-modules-file ................................. SUCCESS [  3.734 s]
[INFO] ruoyi-common-seata ................................. SUCCESS [  7.820 s]
[INFO] ruoyi-common-sensitive ............................. SUCCESS [  0.126 s]
[INFO] ------------------------------------------------------------------------
[INFO] BUILD SUCCESS
[INFO] ------------------------------------------------------------------------
[INFO] Total time:  01:20 min
[INFO] Finished at: 2025-08-26T01:55:38Z
[INFO] ------------------------------------------------------------------------
三、配置中间件
1. 配置MySQL
1.1 修改root账号密码与主机
tips: 博主安装数据的时候对数据库进行了不安全初始化,默认没有密码,如果你安装的时候设置好了密码这一步可以省略,直接修改主机即可。
root@Microservice:~/RuoYi-Cloud# mysqladmin -uroot password '123456'然后登入数据库修改主机
root@Microservice:~/RuoYi-Cloud# mysql -uroot -p
Enter password:
Welcome to the MySQL monitor.  Commands end with ; or \g.
Your MySQL connection id is 49
Server version: 8.4.5 MySQL Community Server - GPL

Copyright (c) 2000, 2025, Oracle and/or its affiliates.

Oracle is a registered trademark of Oracle Corporation and/or its
affiliates. Other names may be trademarks of their respective
owners.

Type 'help;' or '\h' for help. Type '\c' to clear the current input statement.

mysql> USE mysql;
Reading table information for completion of table and column names
You can turn off this feature to get a quicker startup with -A

Database changed
mysql> UPDATE user SET host = '%' WHERE user = 'root' AND host = 'localhost';
Query OK, 0 rows affected (0.00 sec)
Rows matched: 0  Changed: 0  Warnings: 0

mysql> FLUSH PRIVILEGES;
Query OK, 0 rows affected (0.00 sec)
1.2 创建nacos连接的数据库
创建ry-cloud库
mysql> CREATE DATABASE `ry-cloud` CHARSET utf8mb4;
创建ry-config库
mysql> CREATE DATABASE `ry-config` CHARSET utf8mb4;
验证是否存在
mysql> show databases;
+--------------------+
| Database           |
+--------------------+
| information_schema |
| mysql              |
| performance_schema |
| ry-cloud           |
| ry-config          |
| sys                |
+--------------------+
6 rows in set (0.00 sec)
1.3 导入Ruoyi项目数据脚本
root@Microservice:~/RuoYi-Cloud/sql# pwd
/root/RuoYi-Cloud/sql
root@Microservice:~/RuoYi-Cloud/sql# ll
total 100
-rw-r--r-- 1 root root 11985 Aug 26 00:42 quartz.sql
-rw-r--r-- 1 root root 57592 Aug 26 00:42 ry_20250523.sql
-rw-r--r-- 1 root root 22250 Aug 26 00:42 ry_config_20250224.sql
-rw-r--r-- 1 root root  3083 Aug 26 00:42 ry_seata_20210128.sql
导入数据
root@Microservice:~/RuoYi-Cloud/sql# mysql -uroot -p123456 ry-config <ry_config_20250224.sql
mysql: [Warning] Using a password on the command line interface can be insecure.
root@Microservice:~/RuoYi-Cloud/sql# mysql -uroot -p123456 ry-cloud < ry_20250523.sql
mysql: [Warning] Using a password on the command line interface can be insecure.
2. 配置nacos
博主在此配置中启动了nacos的鉴权模式,可以直接借鉴。
nacos默认用户名和密码: nacos/nacos
主要修改的配置如下:
root@Microservice:/usr/local# vim nacos/conf/application.properties

把配置文件下方注释取消,使其生效,注意数据库信息要填写正确
spring.datasource.platform=mysql
db.num=1
db.url.0=jdbc:mysql://127.0.0.1:3306/ry-config?characterEncoding=utf8&connectTimeout=1000&socketTimeout=3000&autoReconnect=true&useUnicode=true&useSSL=false&serverTimezone=Asia/Shanghai
db.user.0=root
db.password.0=123456

开启鉴权的配置主要为下方配置,直接对应修改,缺少插入即可。nacos的token需要在32位以上
nacos.core.auth.system.type=nacos
nacos.core.auth.enabled=true
nacos.core.auth.caching.enabled=true
nacos.core.auth.enable.userAgentAuthWhite=false
nacos.core.auth.server.identity.key=nacos
nacos.core.auth.server.identity.value=nacos
nacos.core.auth.plugin.nacos.token.cache.enable=false
nacos.core.auth.plugin.nacos.token.expire.seconds=18000
nacos.core.auth.plugin.nacos.token.secret.key=SuYALHsuVE4XyjQelTMhFbzeHAgDptayAKa8d5pmkQ7K
nacos.istio.mcp.server.enabled=false
然后保存配置,去重启一下nacos服务
root@Microservice:/usr/local# systemctl restart nacos && systemctl status nacos
● nacos.service
     Loaded: loaded (/etc/systemd/system/nacos.service; static)
     Active: active (running) since Tue 2025-08-26 01:53:04 UTC; 1h 17min ago
    Process: 55572 ExecStart=/usr/local/nacos/bin/startup.sh -m standalone (code=exited, status=0/SUCCESS)
   Main PID: 55594 (java)
      Tasks: 295 (limit: 9346)
     Memory: 730.9M
        CPU: 1min 26.130s
     CGroup: /system.slice/nacos.service
             └─55594 /usr/local/jdk1.8.0_461/bin/java -Djava.ext.dirs=/usr/local/jdk1.8.0_461/jre/lib/ext:/usr/local/jdk1.8.0_461/lib/ext -Xms512m -Xmx512m >

Aug 26 01:53:04 Microservice systemd[1]: Starting nacos.service...
Aug 26 01:53:04 Microservice startup.sh[55572]: /usr/local/jdk1.8.0_461/bin/java -Djava.ext.dirs=/usr/local/jdk1.8.0_461/jre/lib/ext:/usr/local/jdk1.8.0_461>
Aug 26 01:53:04 Microservice startup.sh[55572]: nacos is starting with standalone
Aug 26 01:53:04 Microservice startup.sh[55572]: nacos is starting. you can check the /usr/local/nacos/logs/start.out
Aug 26 01:53:04 Microservice systemd[1]: Started nacos.service.
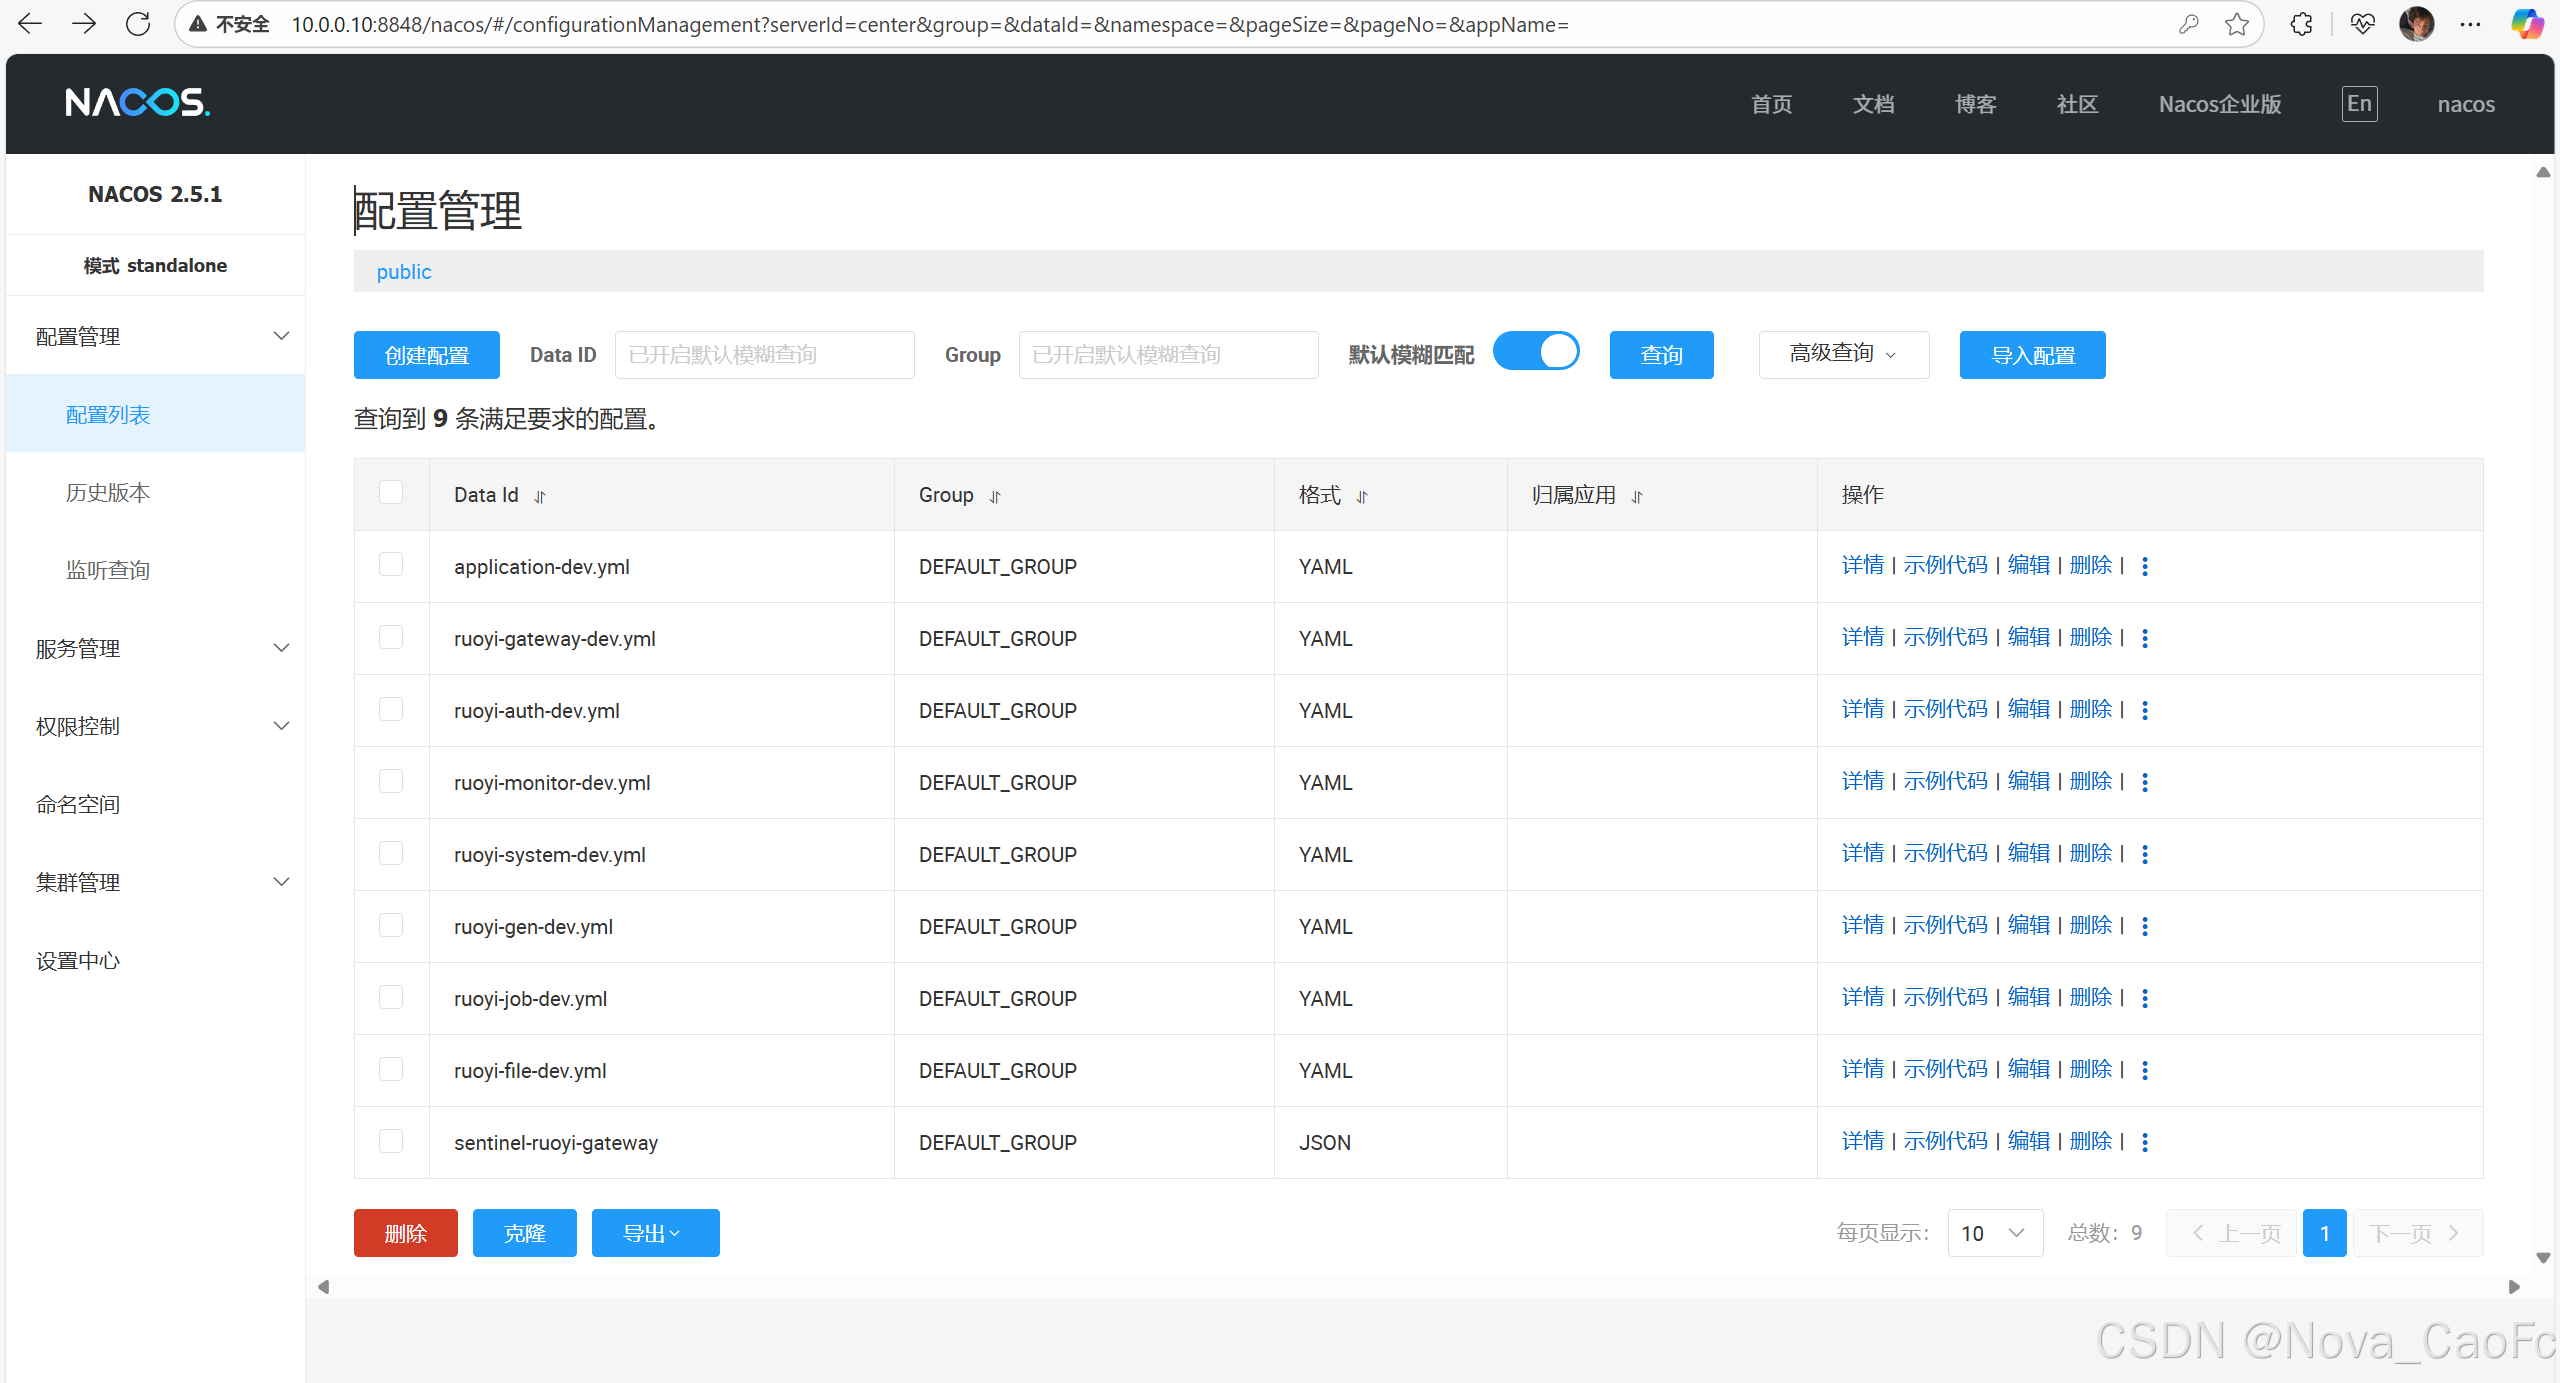
2.1 验证nacos是否已经读取到Ruoyi-cloud的配置
登录nacos【本机的ip+8848端口+/nacos后缀】查看配置已经出现即可,后续需要修改组件的数据库配置都在此修改。
四、部署Ruoyi组件
基础模块(启动没有先后顺序)
- RuoYiGatewayApplication (网关模块 必须)
- RuoYiAuthApplication (认证模块 必须)
- RuoYiSystemApplication (系统模块 必须)
- RuoYiMonitorApplication (监控中心 可选)
- RuoYiGenApplication (代码生成 可选)
- RuoYiJobApplication (定时任务 可选)
- RuoYiFileApplication (文件服务 可选)
1. 部署ruoyi-system
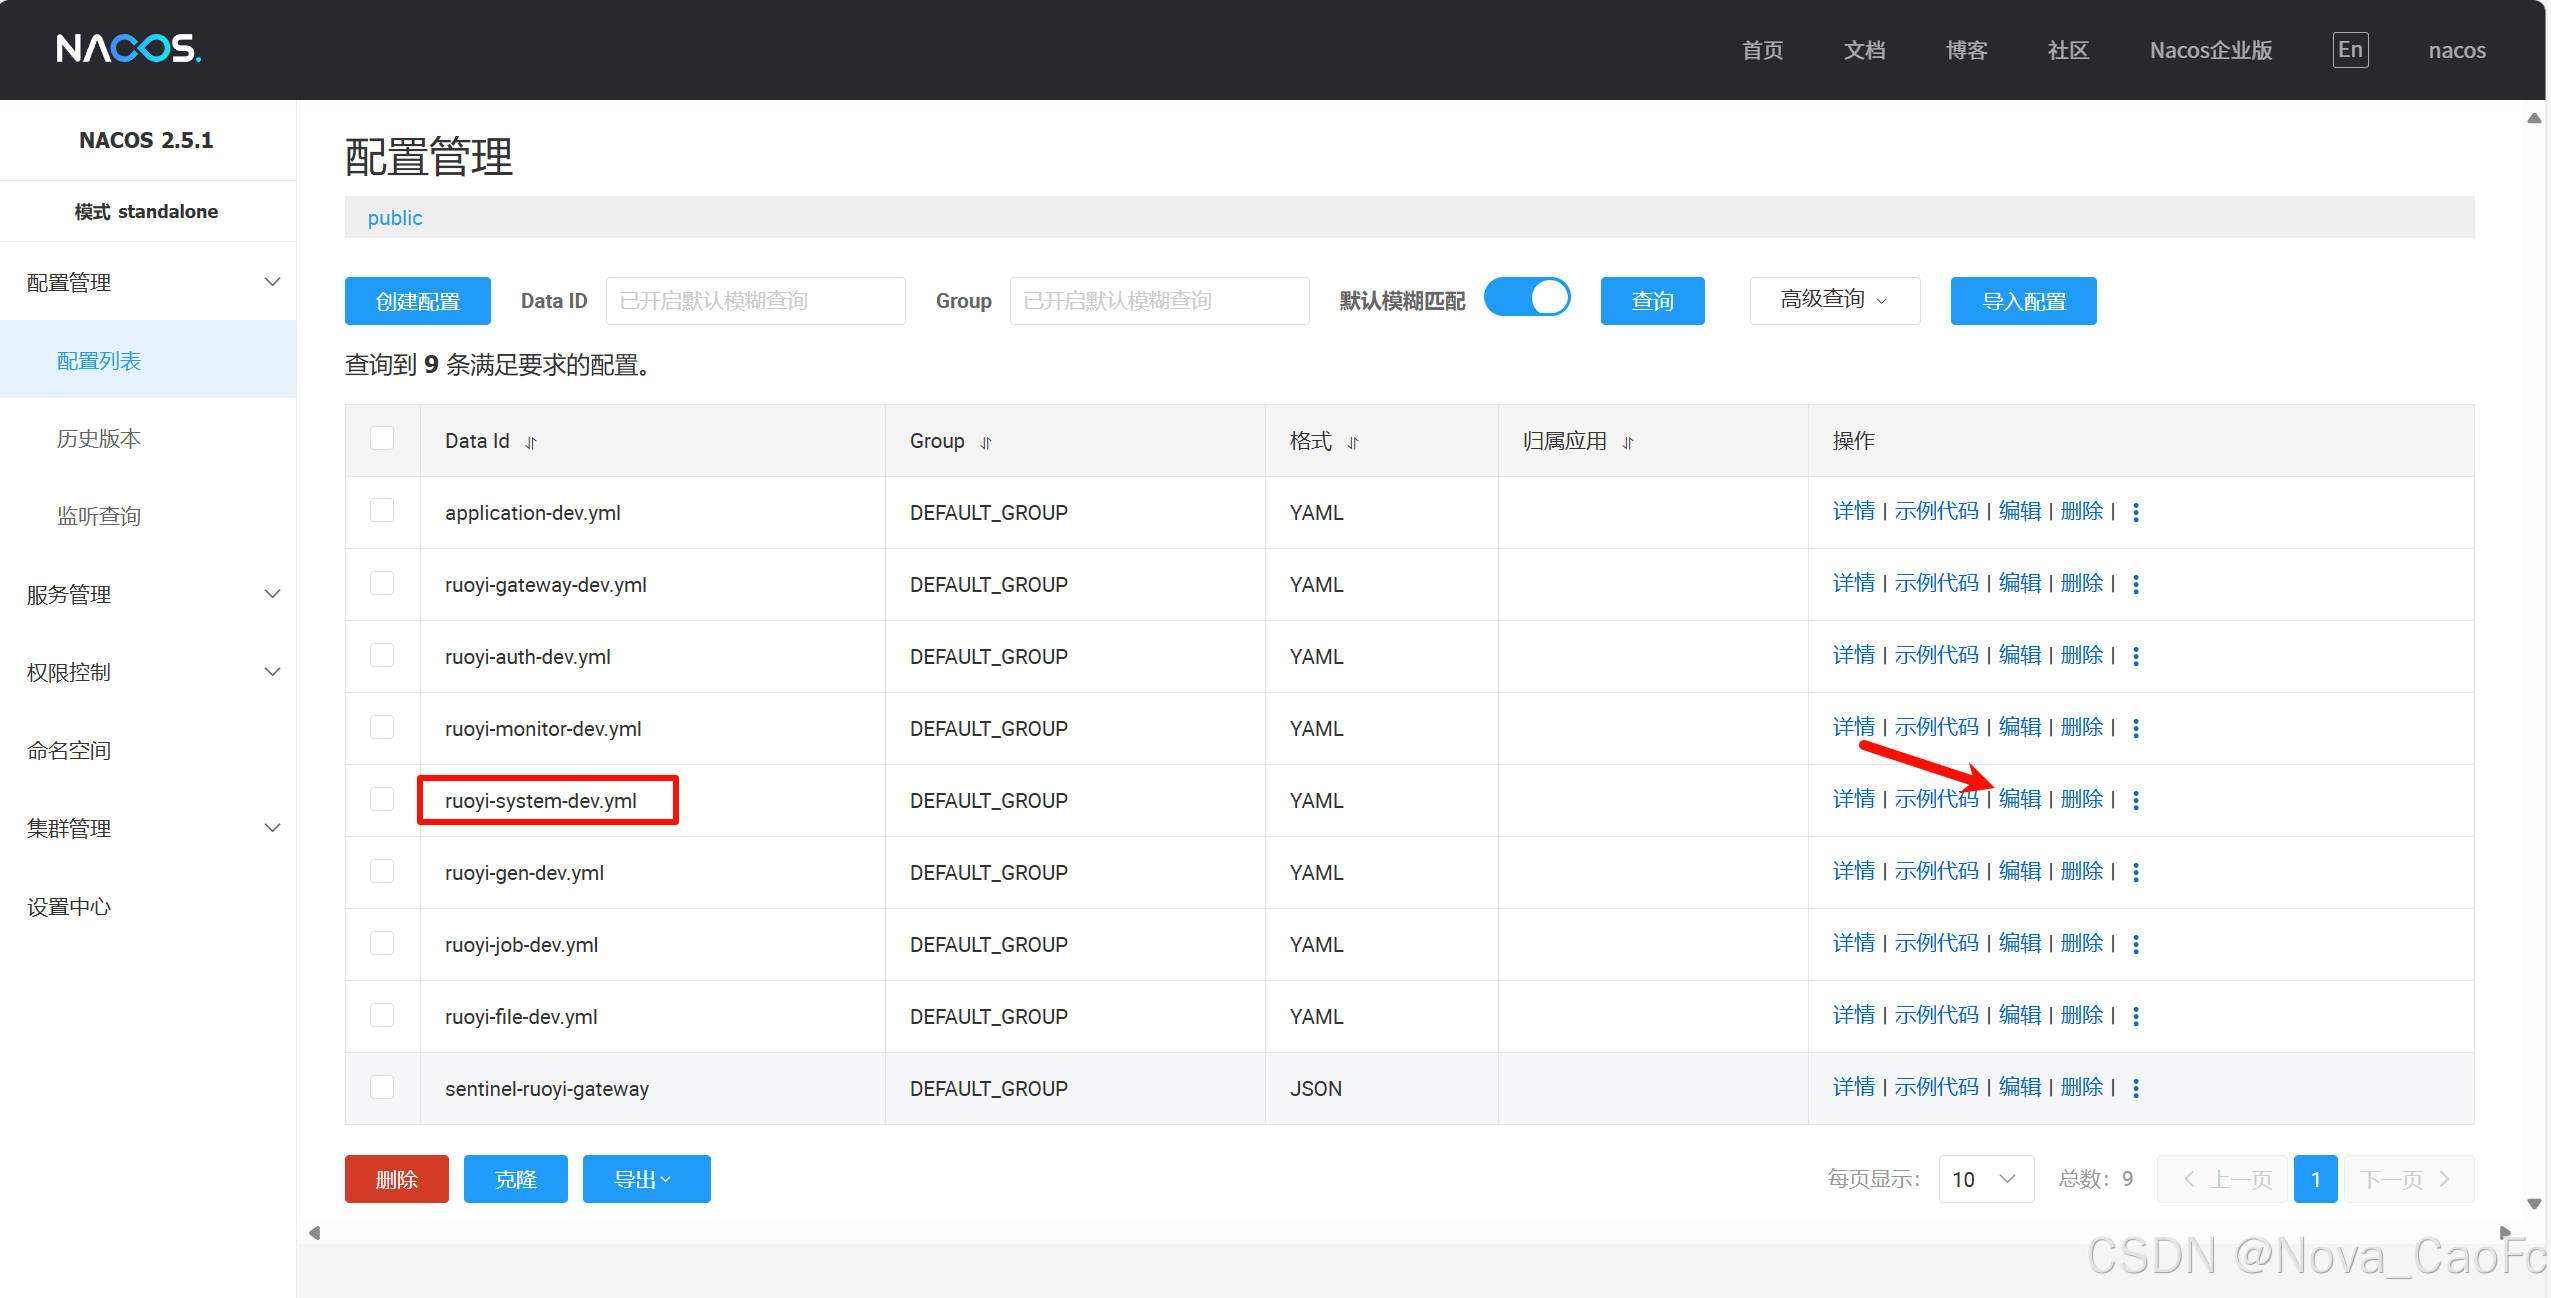
1.1 修改nacos配置
找到ruoyi-system配置,点击编辑
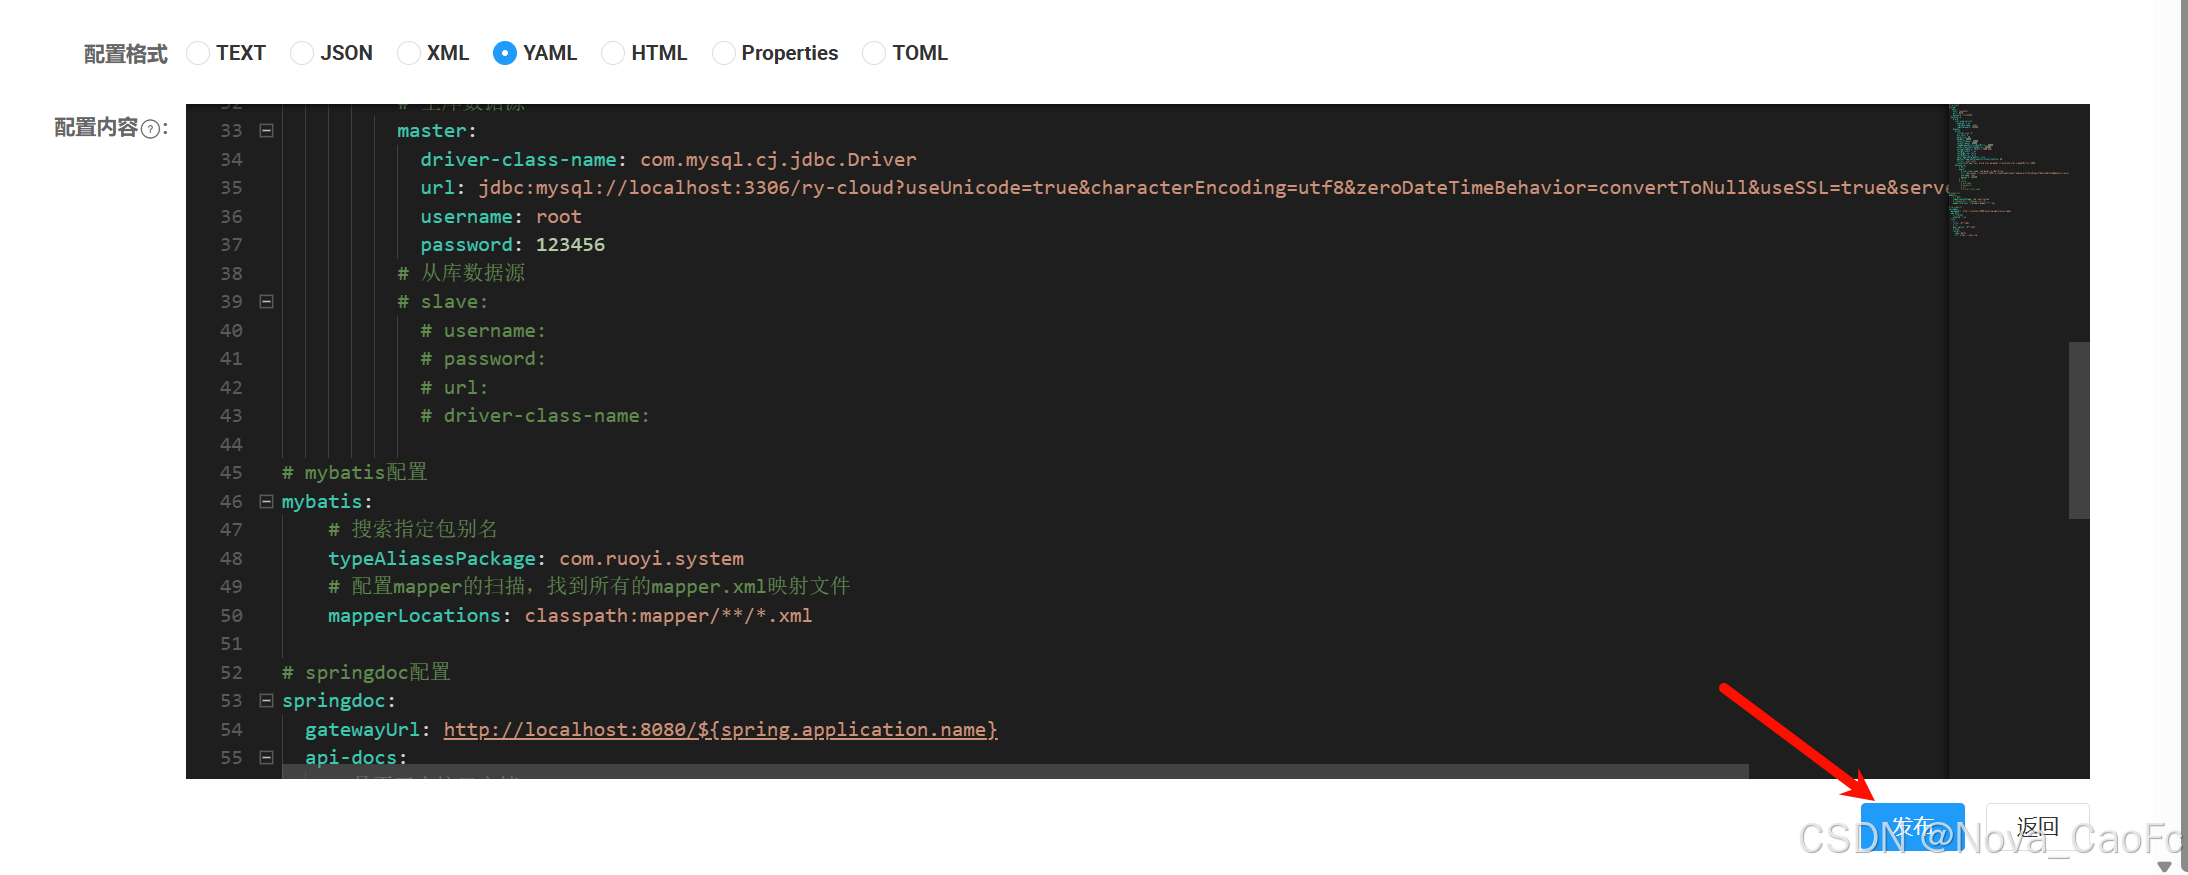
修改数据库配置
redis
注意redis的密码,若安装没有设置则为空即可。

MySQL
要注意修改默认的链接库和密码。

修改完成点击发布即可
1.2 java启动ruoyi-system
找到jar包位置
root@Microservice:~/RuoYi-Cloud# ll ruoyi-modules/ruoyi-system/target/
total 98068
drwxr-xr-x 4 root root      4096 Aug 26 02:04 classes
drwxr-xr-x 3 root root      4096 Aug 26 01:55 generated-sources
drwxr-xr-x 3 root root      4096 Aug 26 02:02 logs
drwxr-xr-x 2 root root      4096 Aug 26 01:55 maven-archiver
drwxr-xr-x 3 root root      4096 Aug 26 01:55 maven-status
-rw-r--r-- 1 root root 100273192 Aug 26 01:55 ruoyi-modules-system.jar
-rw-r--r-- 1 root root    121231 Aug 26 01:55 ruoyi-modules-system.jar.original
然后启动即可
java -Dspring.profiles.active=dev \
-Dspring.cloud.nacos.config.file-extension=yml \
-Dspring.cloud.nacos.discovery.server-addr=10.0.0.10:8848 \
-Dspring.cloud.nacos.config.server-addr=10.0.0.10:8848 \
-Dspring.cloud.nacos.config.username=nacos \
-Dspring.cloud.nacos.config.password=nacos \
-Dspring.cloud.nacos.discovery.username=nacos \
-Dspring.cloud.nacos.discovery.password=nacos \
-jar /root/RuoYi-Cloud/ruoyi-modules/ruoyi-system/target/ruoyi-modules-system.jar &> /var/log/ruoyi-system.log &
这里的第一行参数对应的是dev,因为对应nacos里面的application-dev.yml,通过这个参数可以快速切换环境,应用会自动加载
application-prod.yml。
如果你的nacos没有开启鉴权模式,没有用户名和密码的话则不需要username和password四行配置。
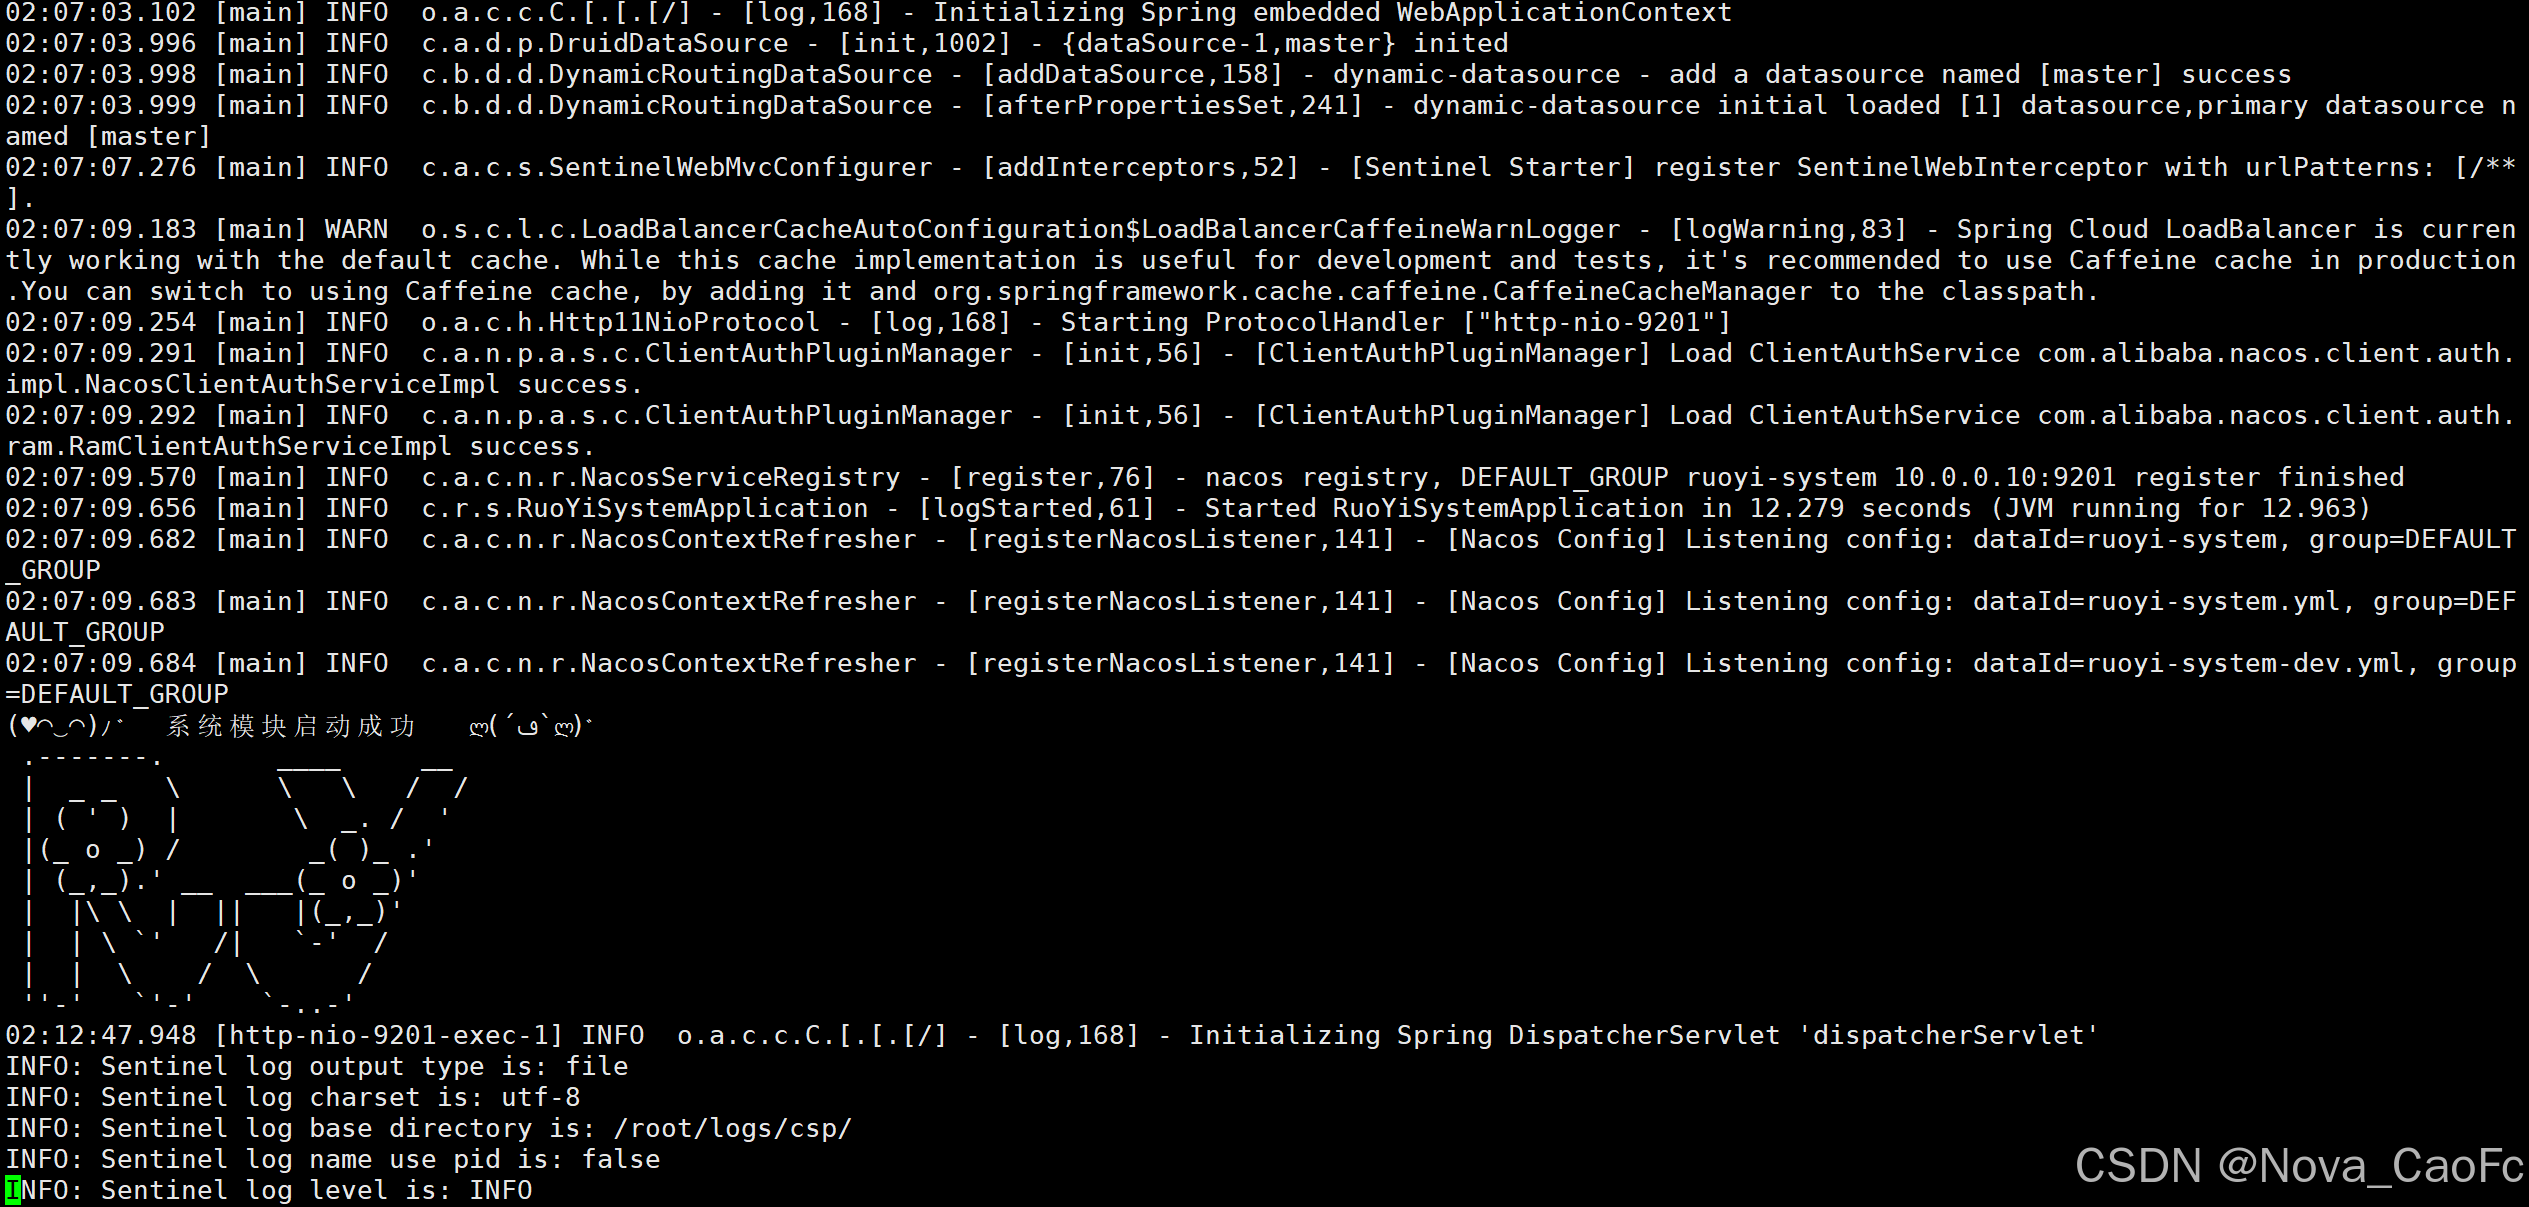
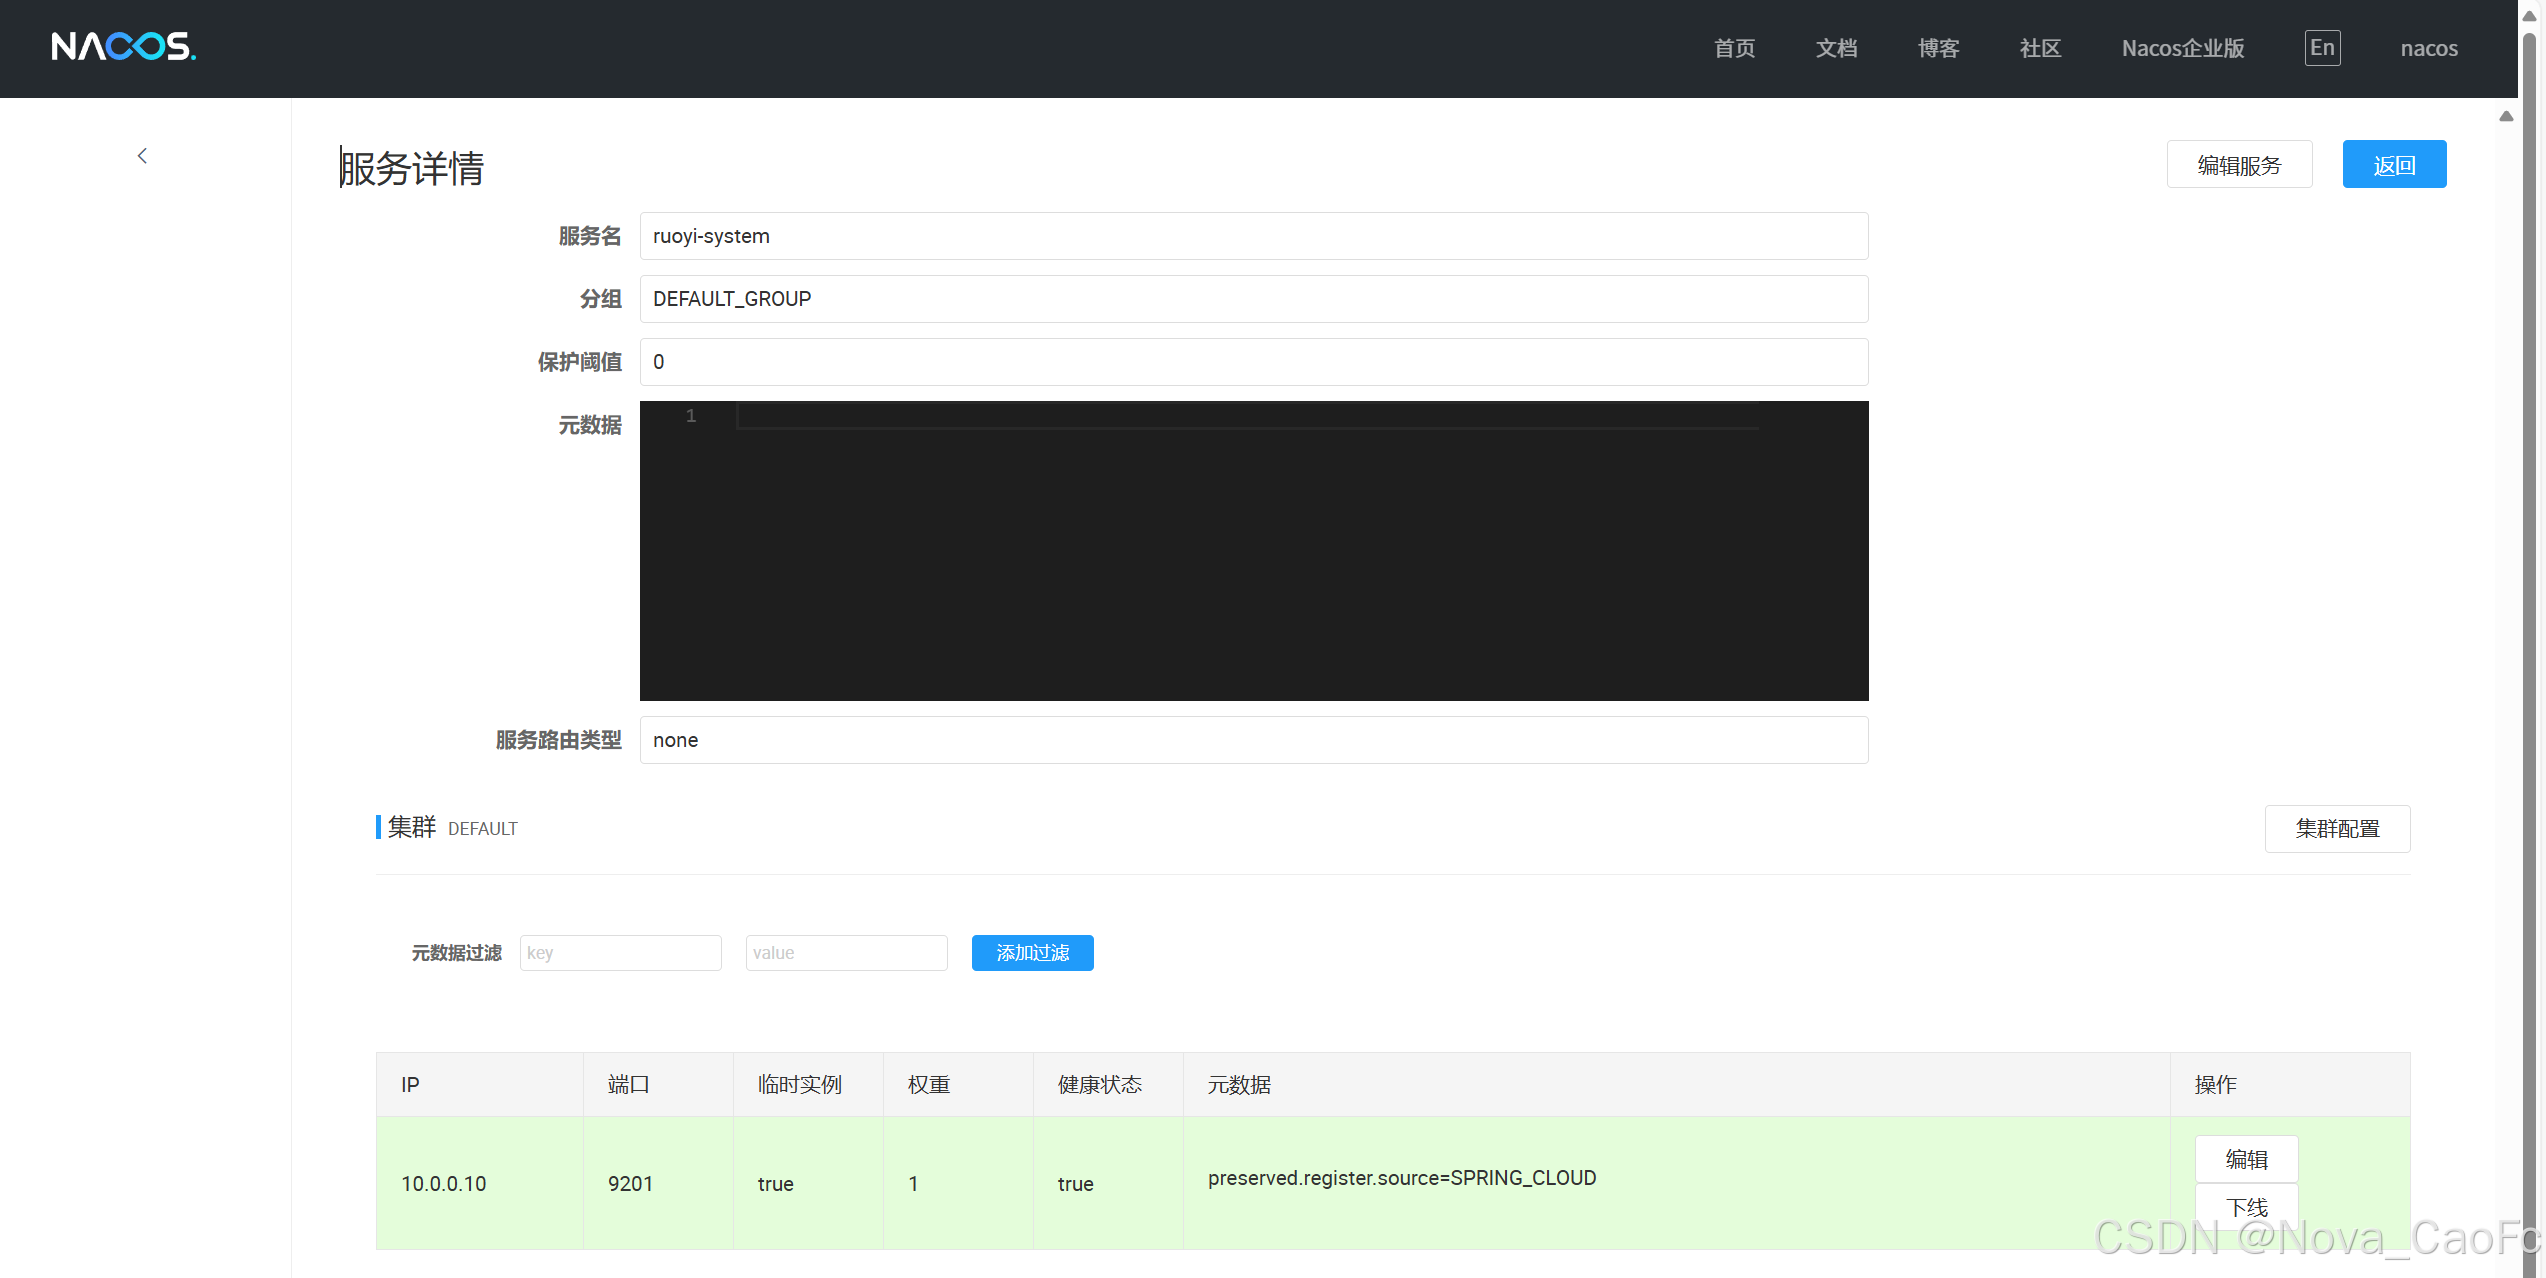
1.3查看nacos注册情况
在首页点击服务管理--->服务列表查看注册情况

2. 部署ruoyi-auth
2.1 修改nacos配置
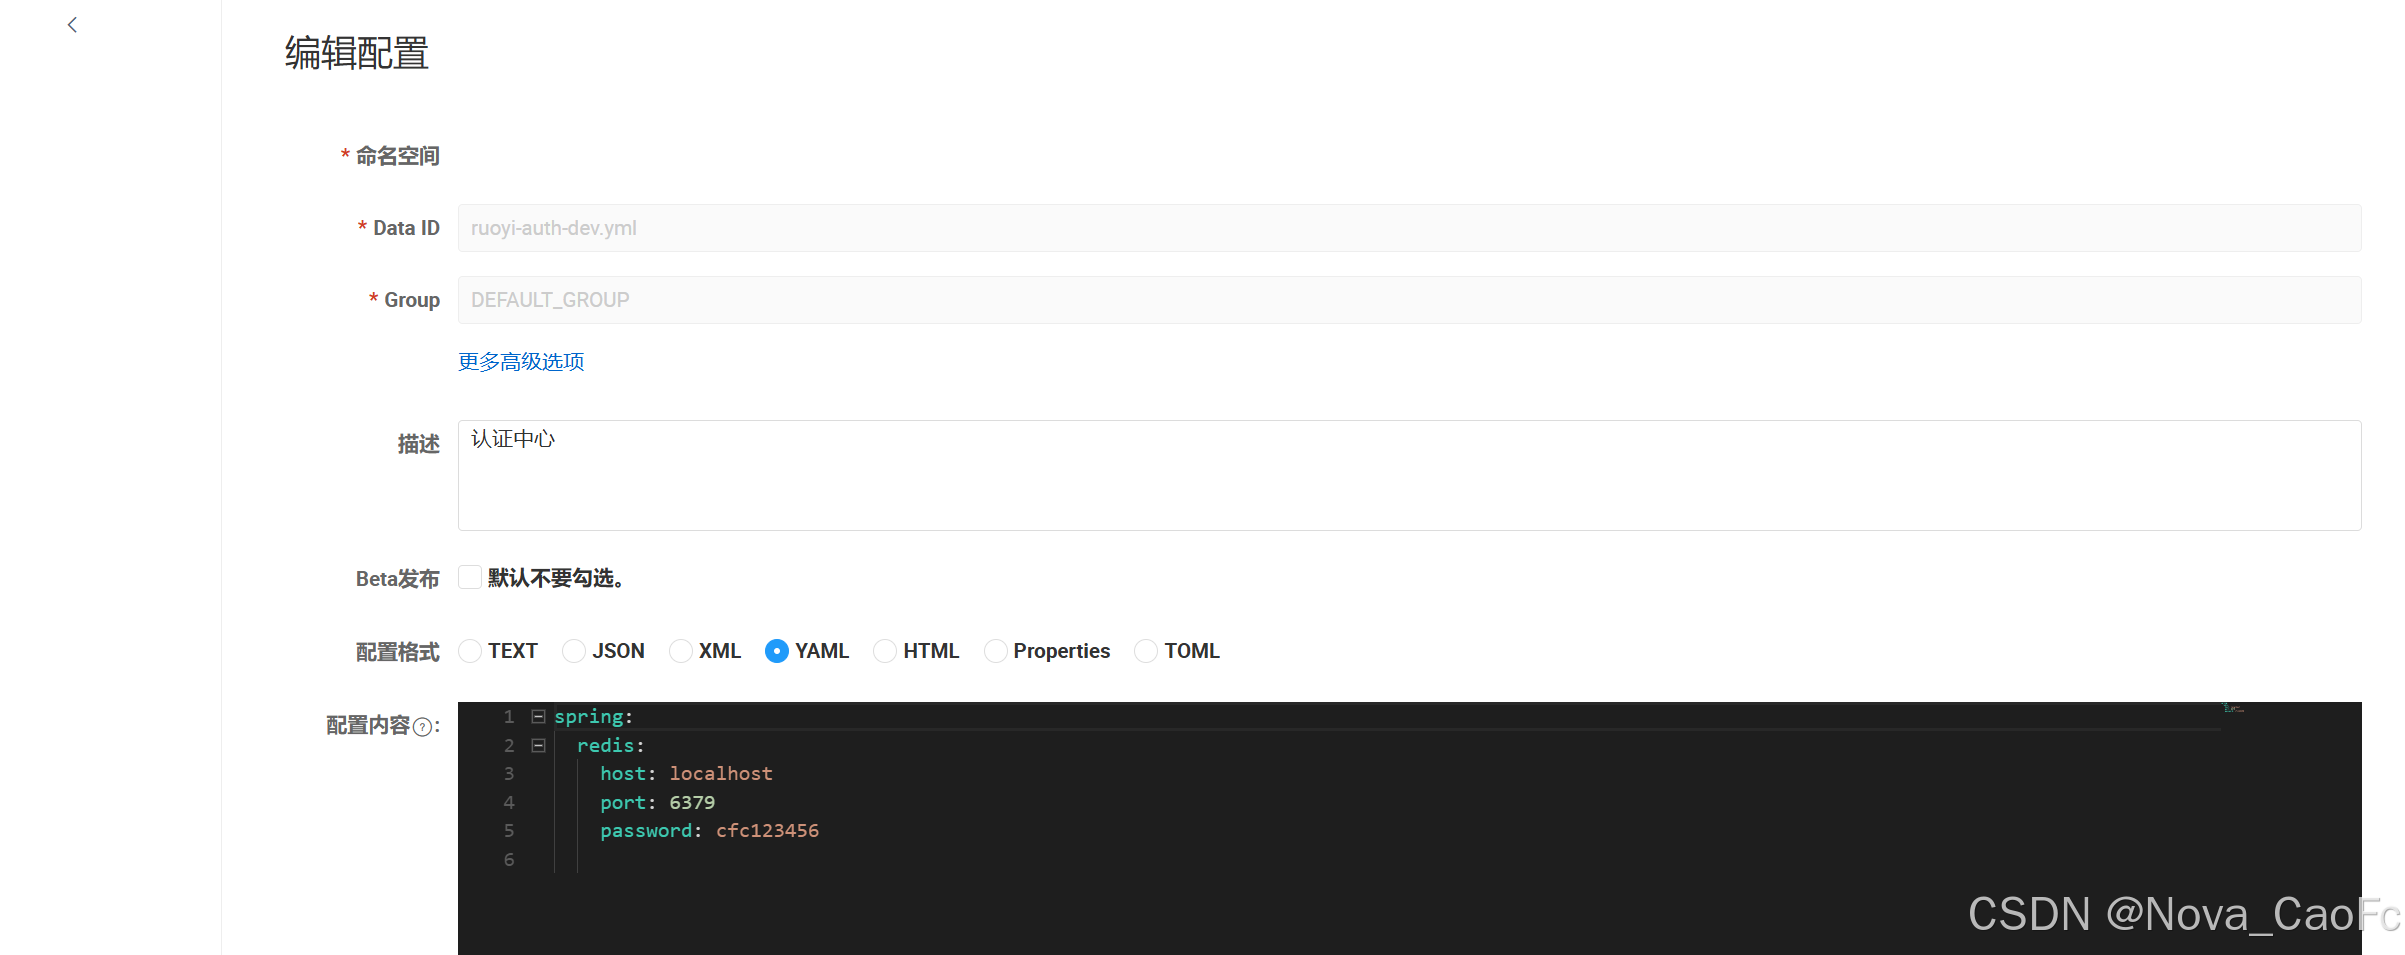
2.2 java启动ruoyi-auth
java -Dspring.profiles.active=dev \
-Dspring.cloud.nacos.config.file-extension=yml \
-Dspring.cloud.nacos.discovery.server-addr=10.0.0.10:8848 \
-Dspring.cloud.nacos.config.server-addr=10.0.0.10:8848 \
-Dspring.cloud.nacos.config.username=nacos \
-Dspring.cloud.nacos.config.password=nacos \
-Dspring.cloud.nacos.discovery.username=nacos \
-Dspring.cloud.nacos.discovery.password=nacos \
-jar /root/RuoYi-Cloud/ruoyi-auth/target/ruoyi-auth.jar &> /var/log/ruoyi-auth.log &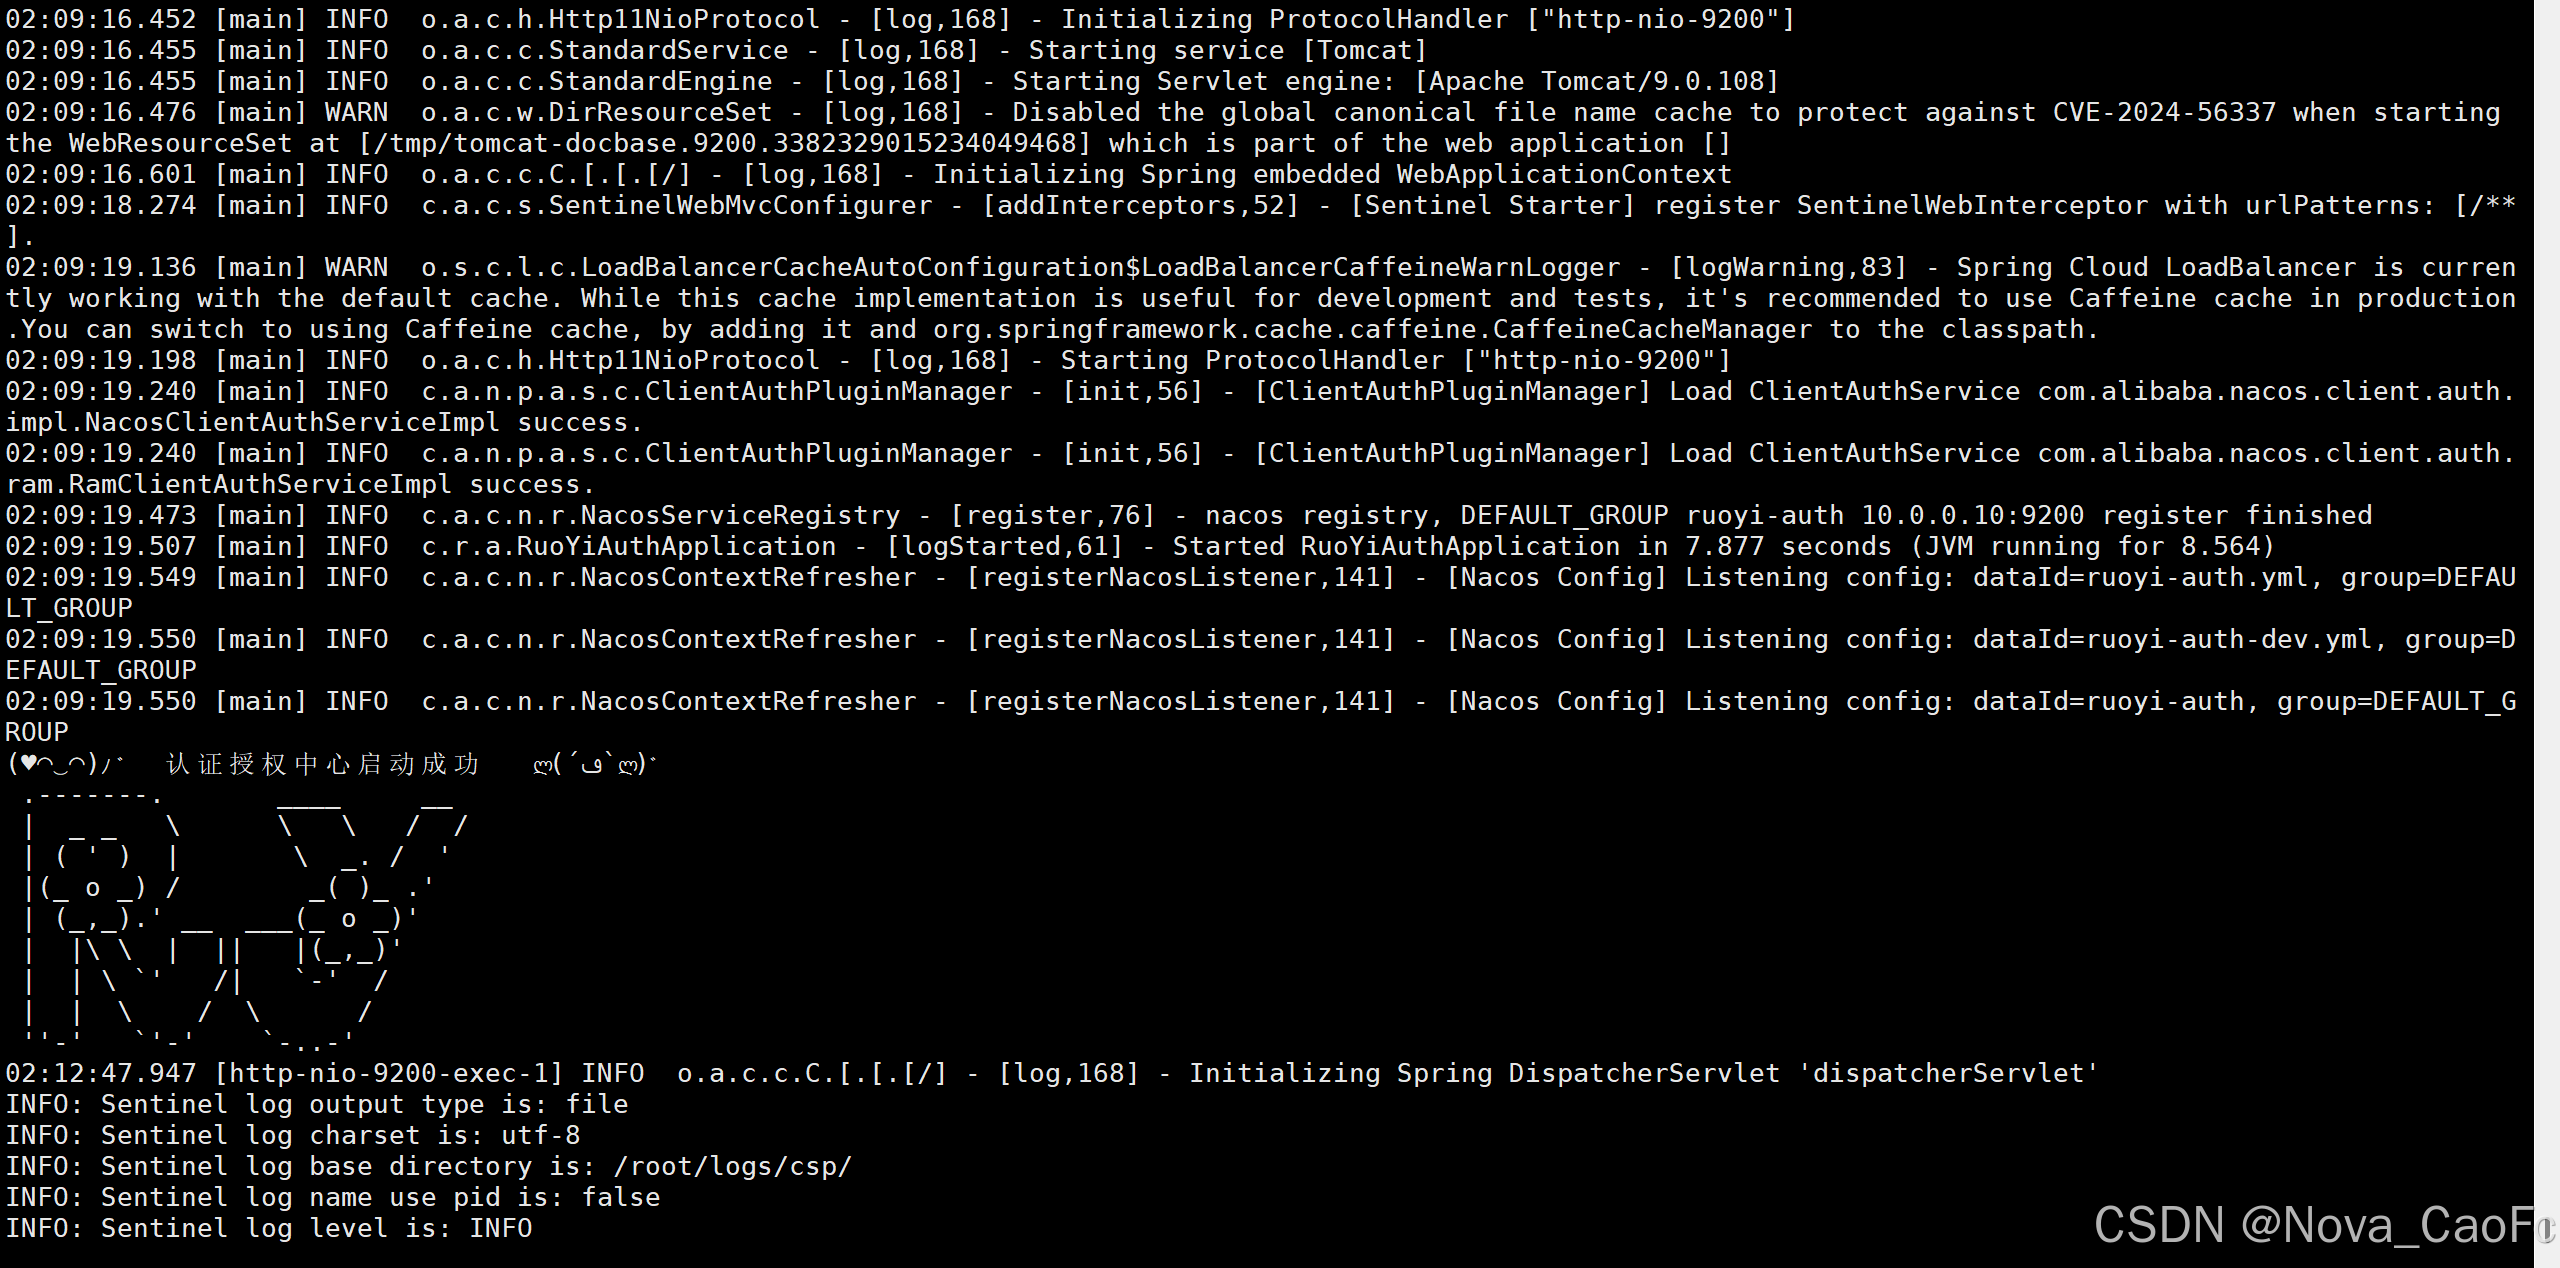
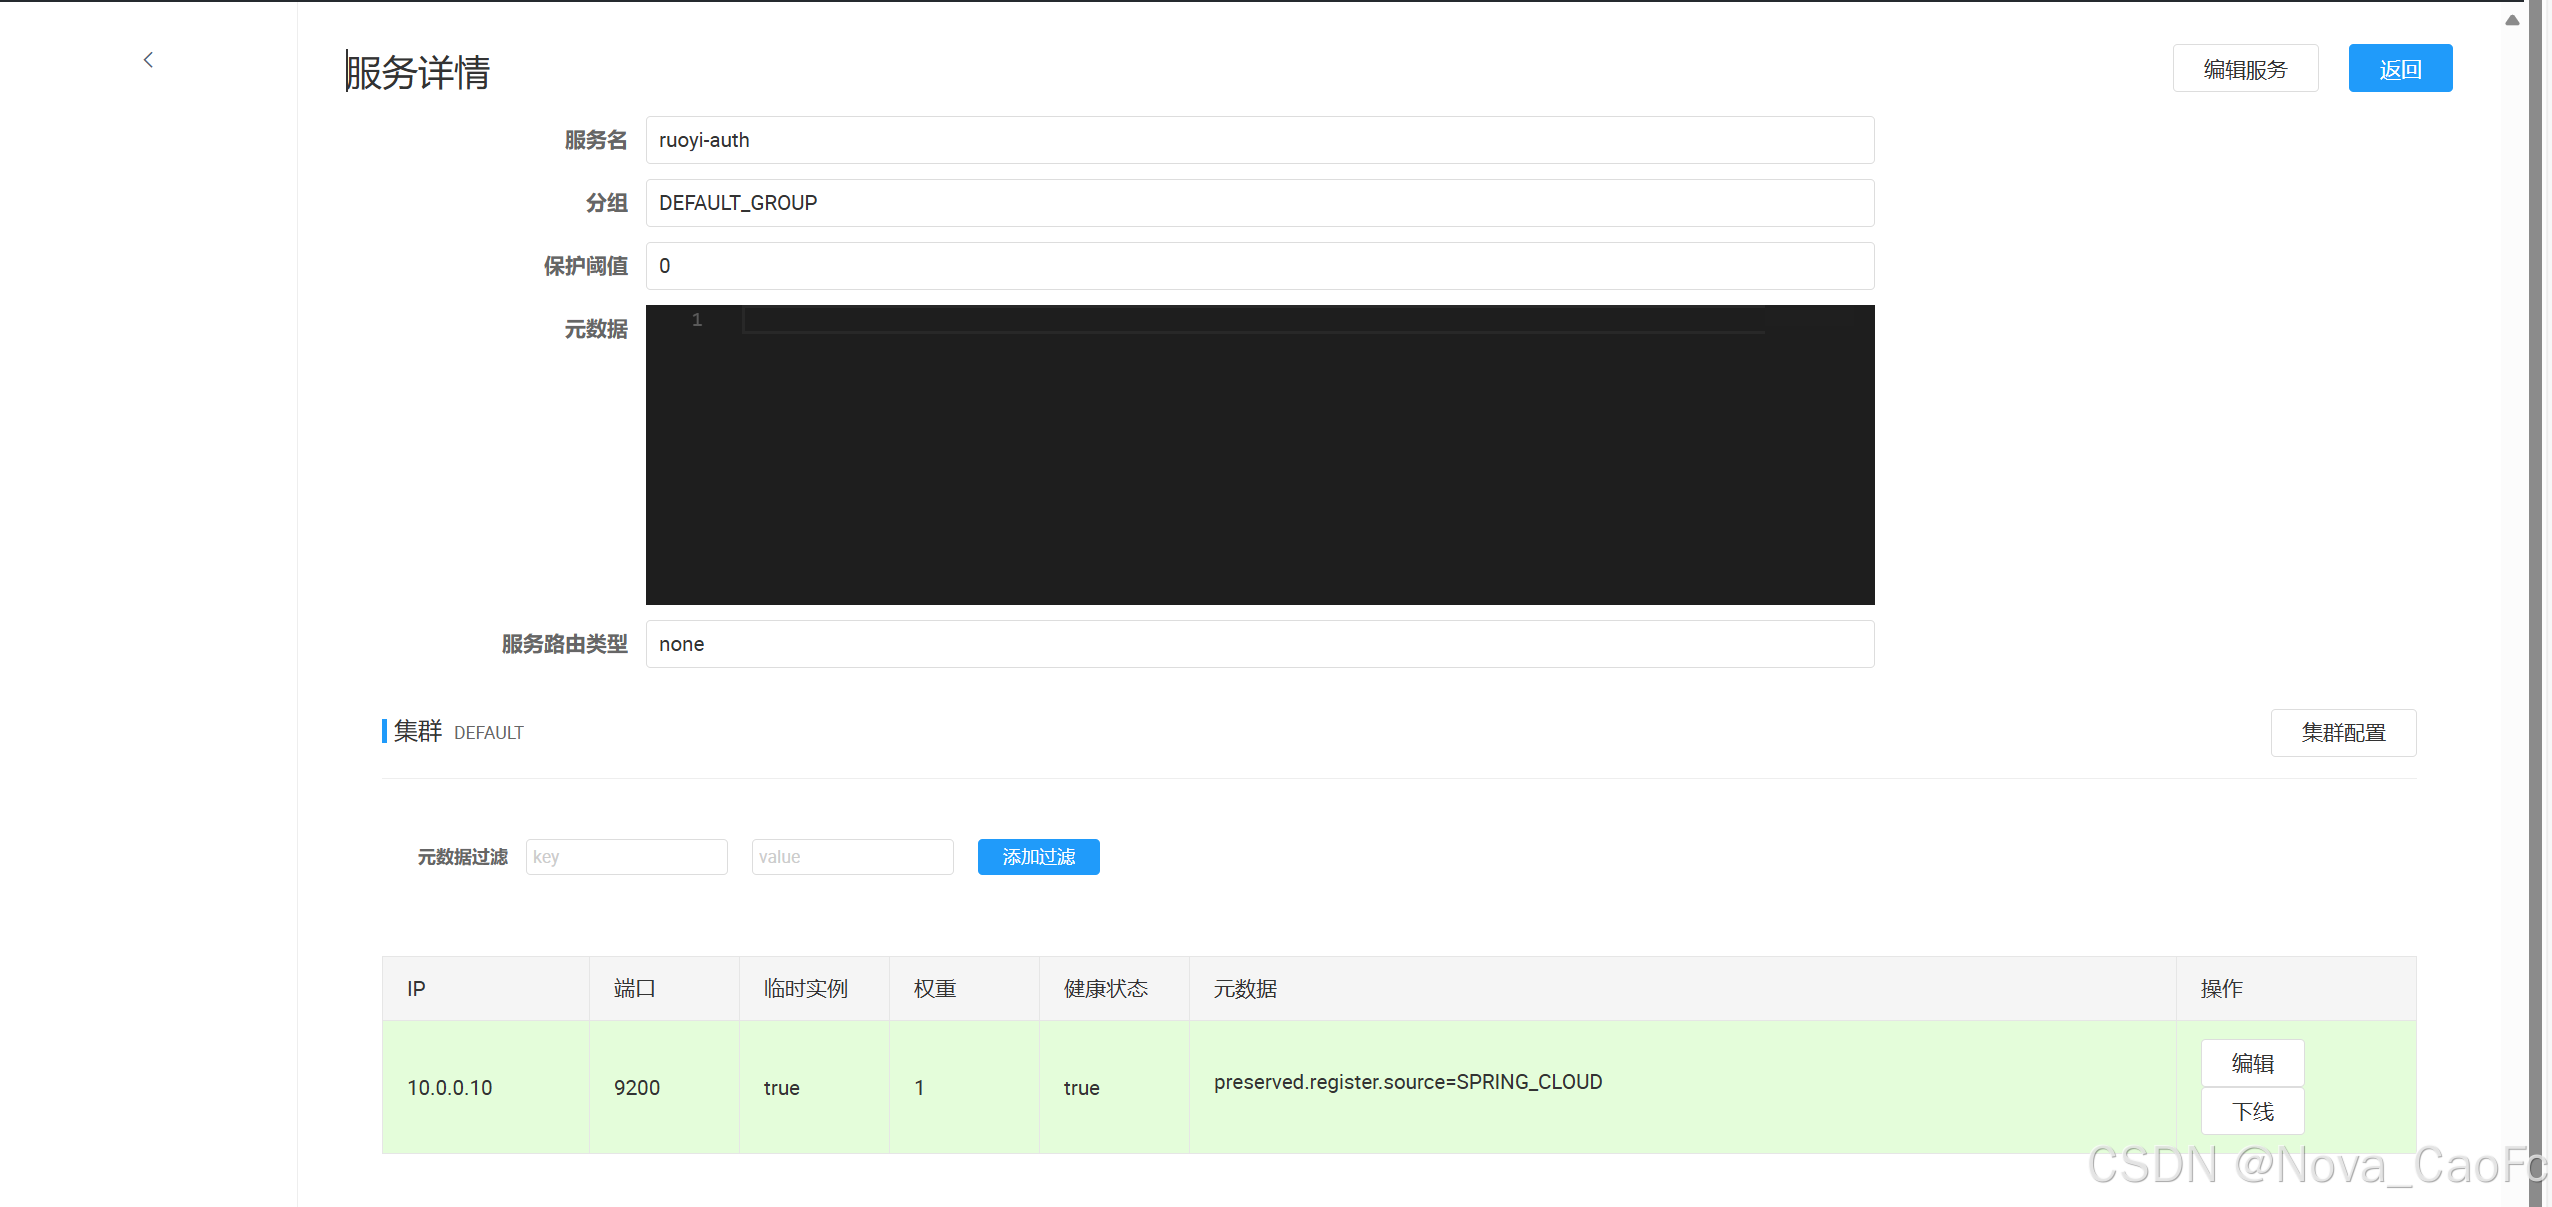
2.3查看nacos注册情况
在首页点击服务管理--->服务列表查看注册情况

3. 部署ruoyi-gateway
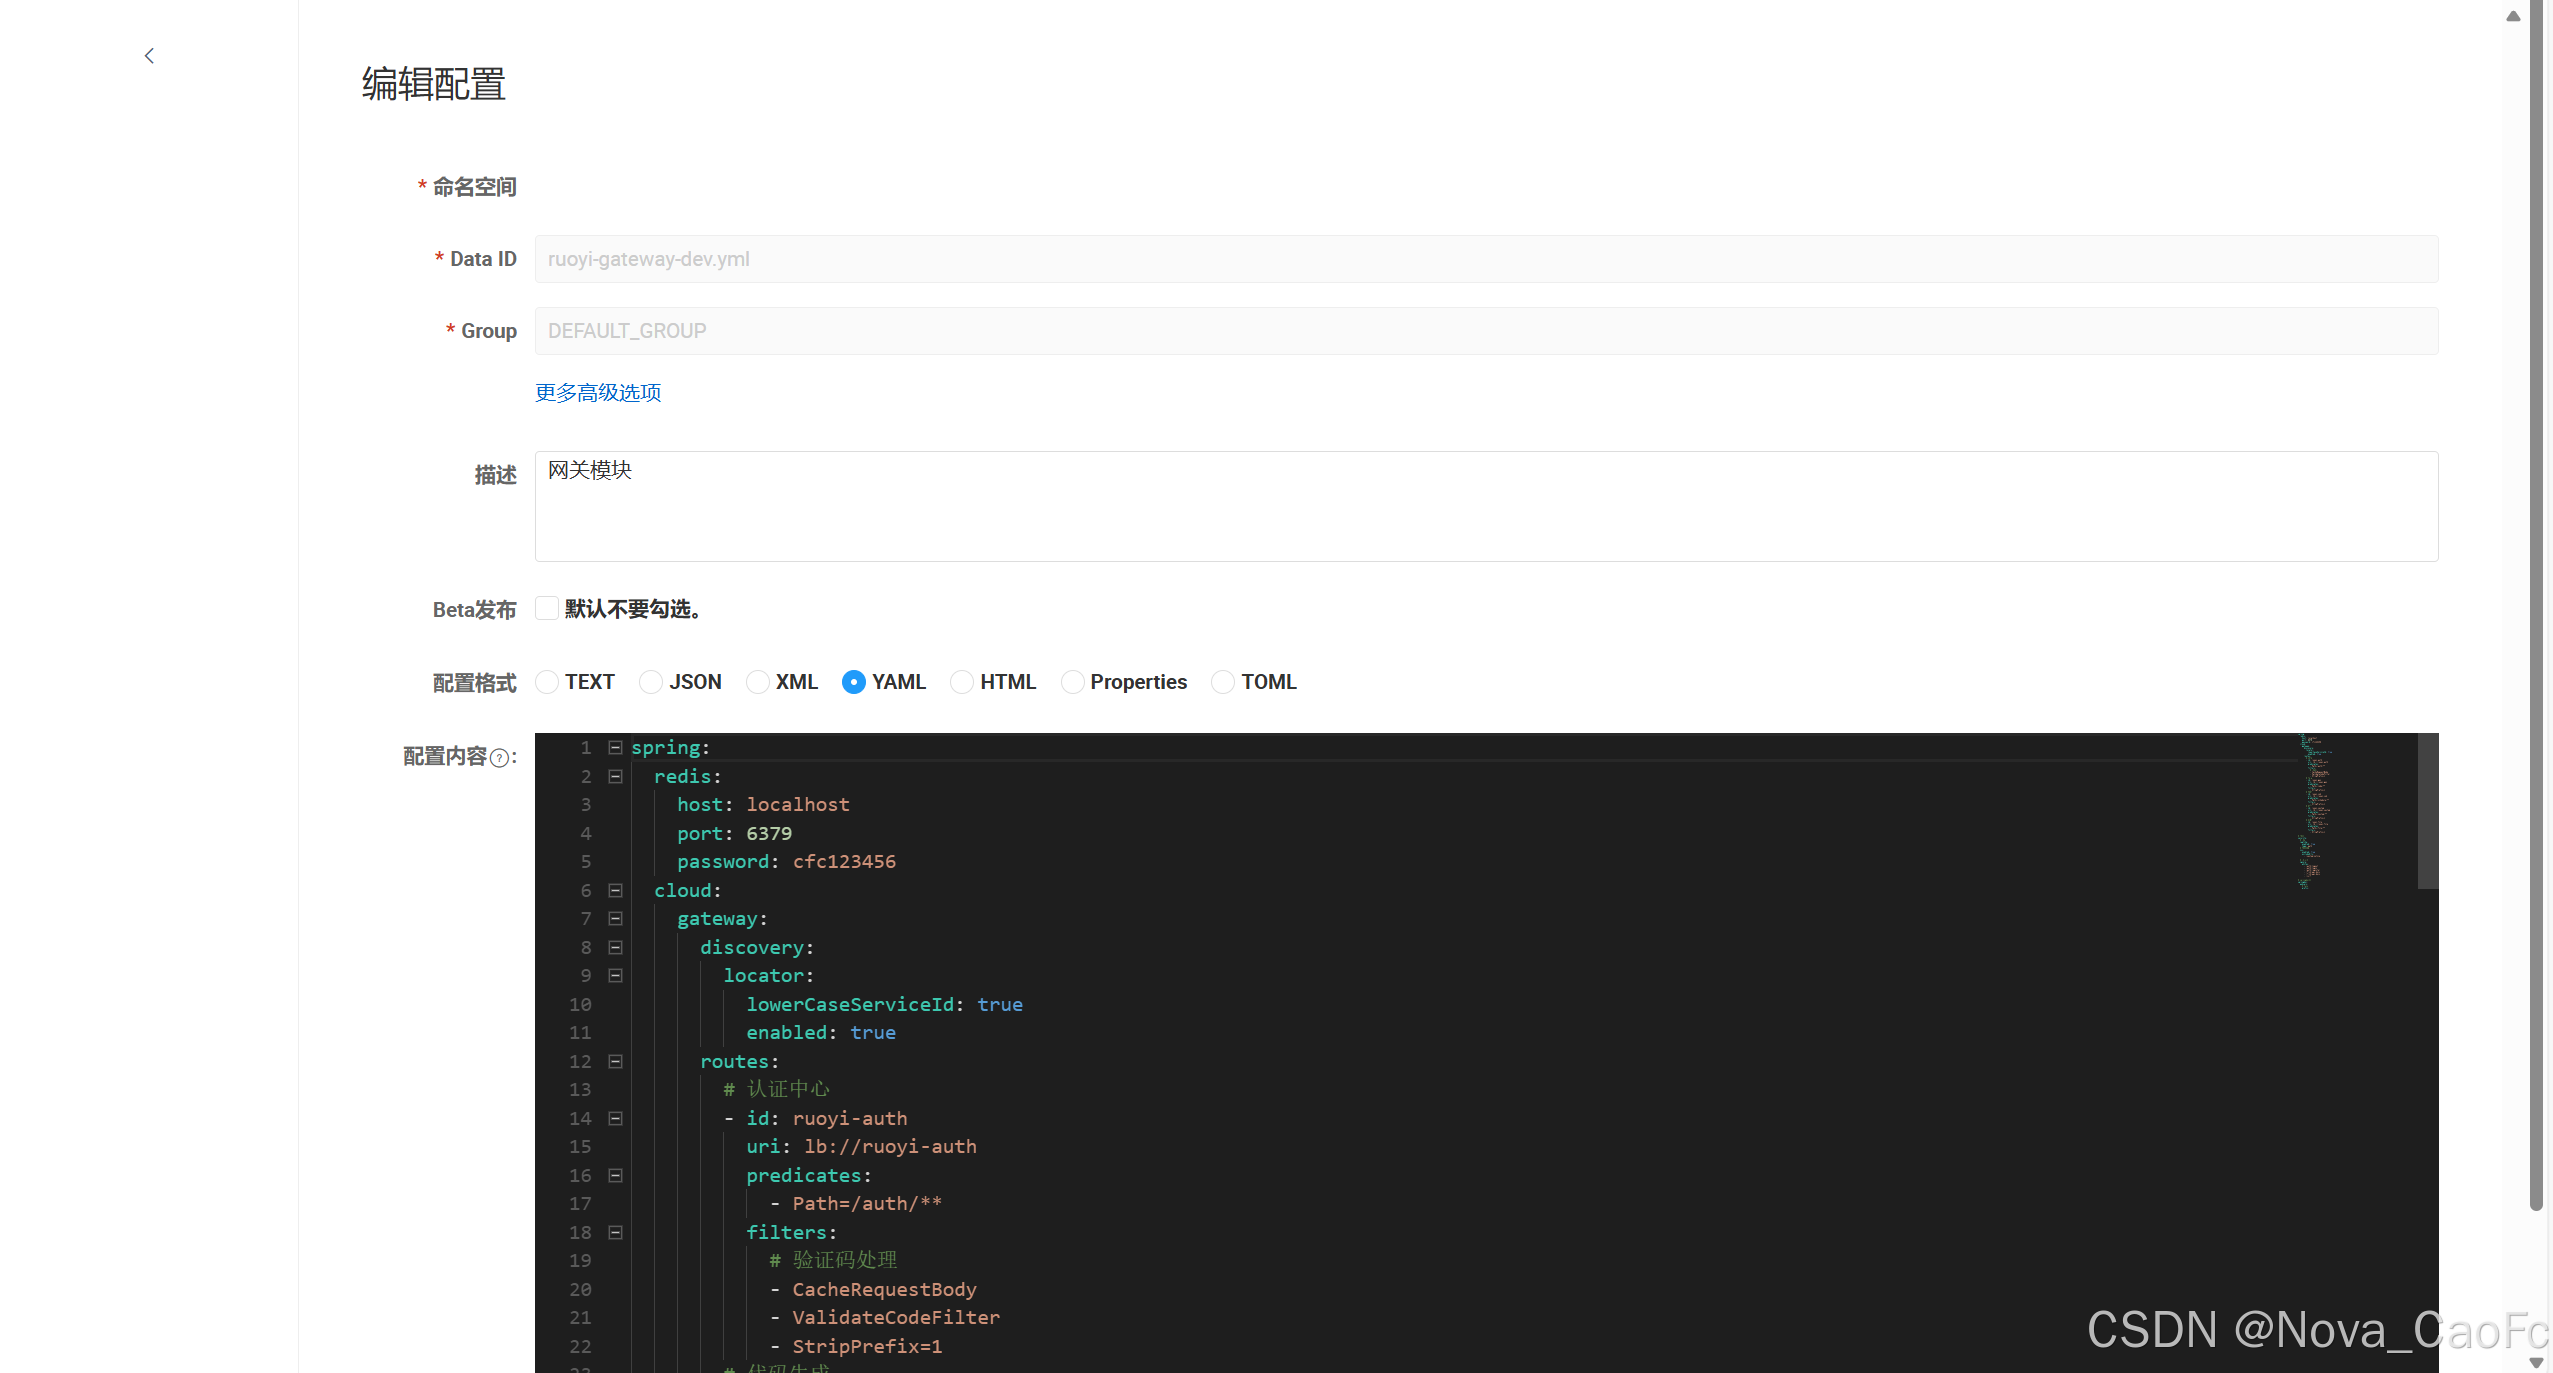
3.1 修改nacos配置
3.2 java启动ruoyi-gateway
java -Dspring.profiles.active=dev \
-Dspring.cloud.nacos.config.file-extension=yml \
-Dspring.cloud.nacos.discovery.server-addr=10.0.0.10:8848 \
-Dspring.cloud.nacos.config.server-addr=10.0.0.10:8848 \
-Dspring.cloud.nacos.config.username=nacos \
-Dspring.cloud.nacos.config.password=nacos \
-Dspring.cloud.nacos.discovery.username=nacos \
-Dspring.cloud.nacos.discovery.password=nacos \
-jar /root/RuoYi-Cloud/ruoyi-gateway/target/ruoyi-gateway.jar &> /var/log/ruoyi-gateway.log &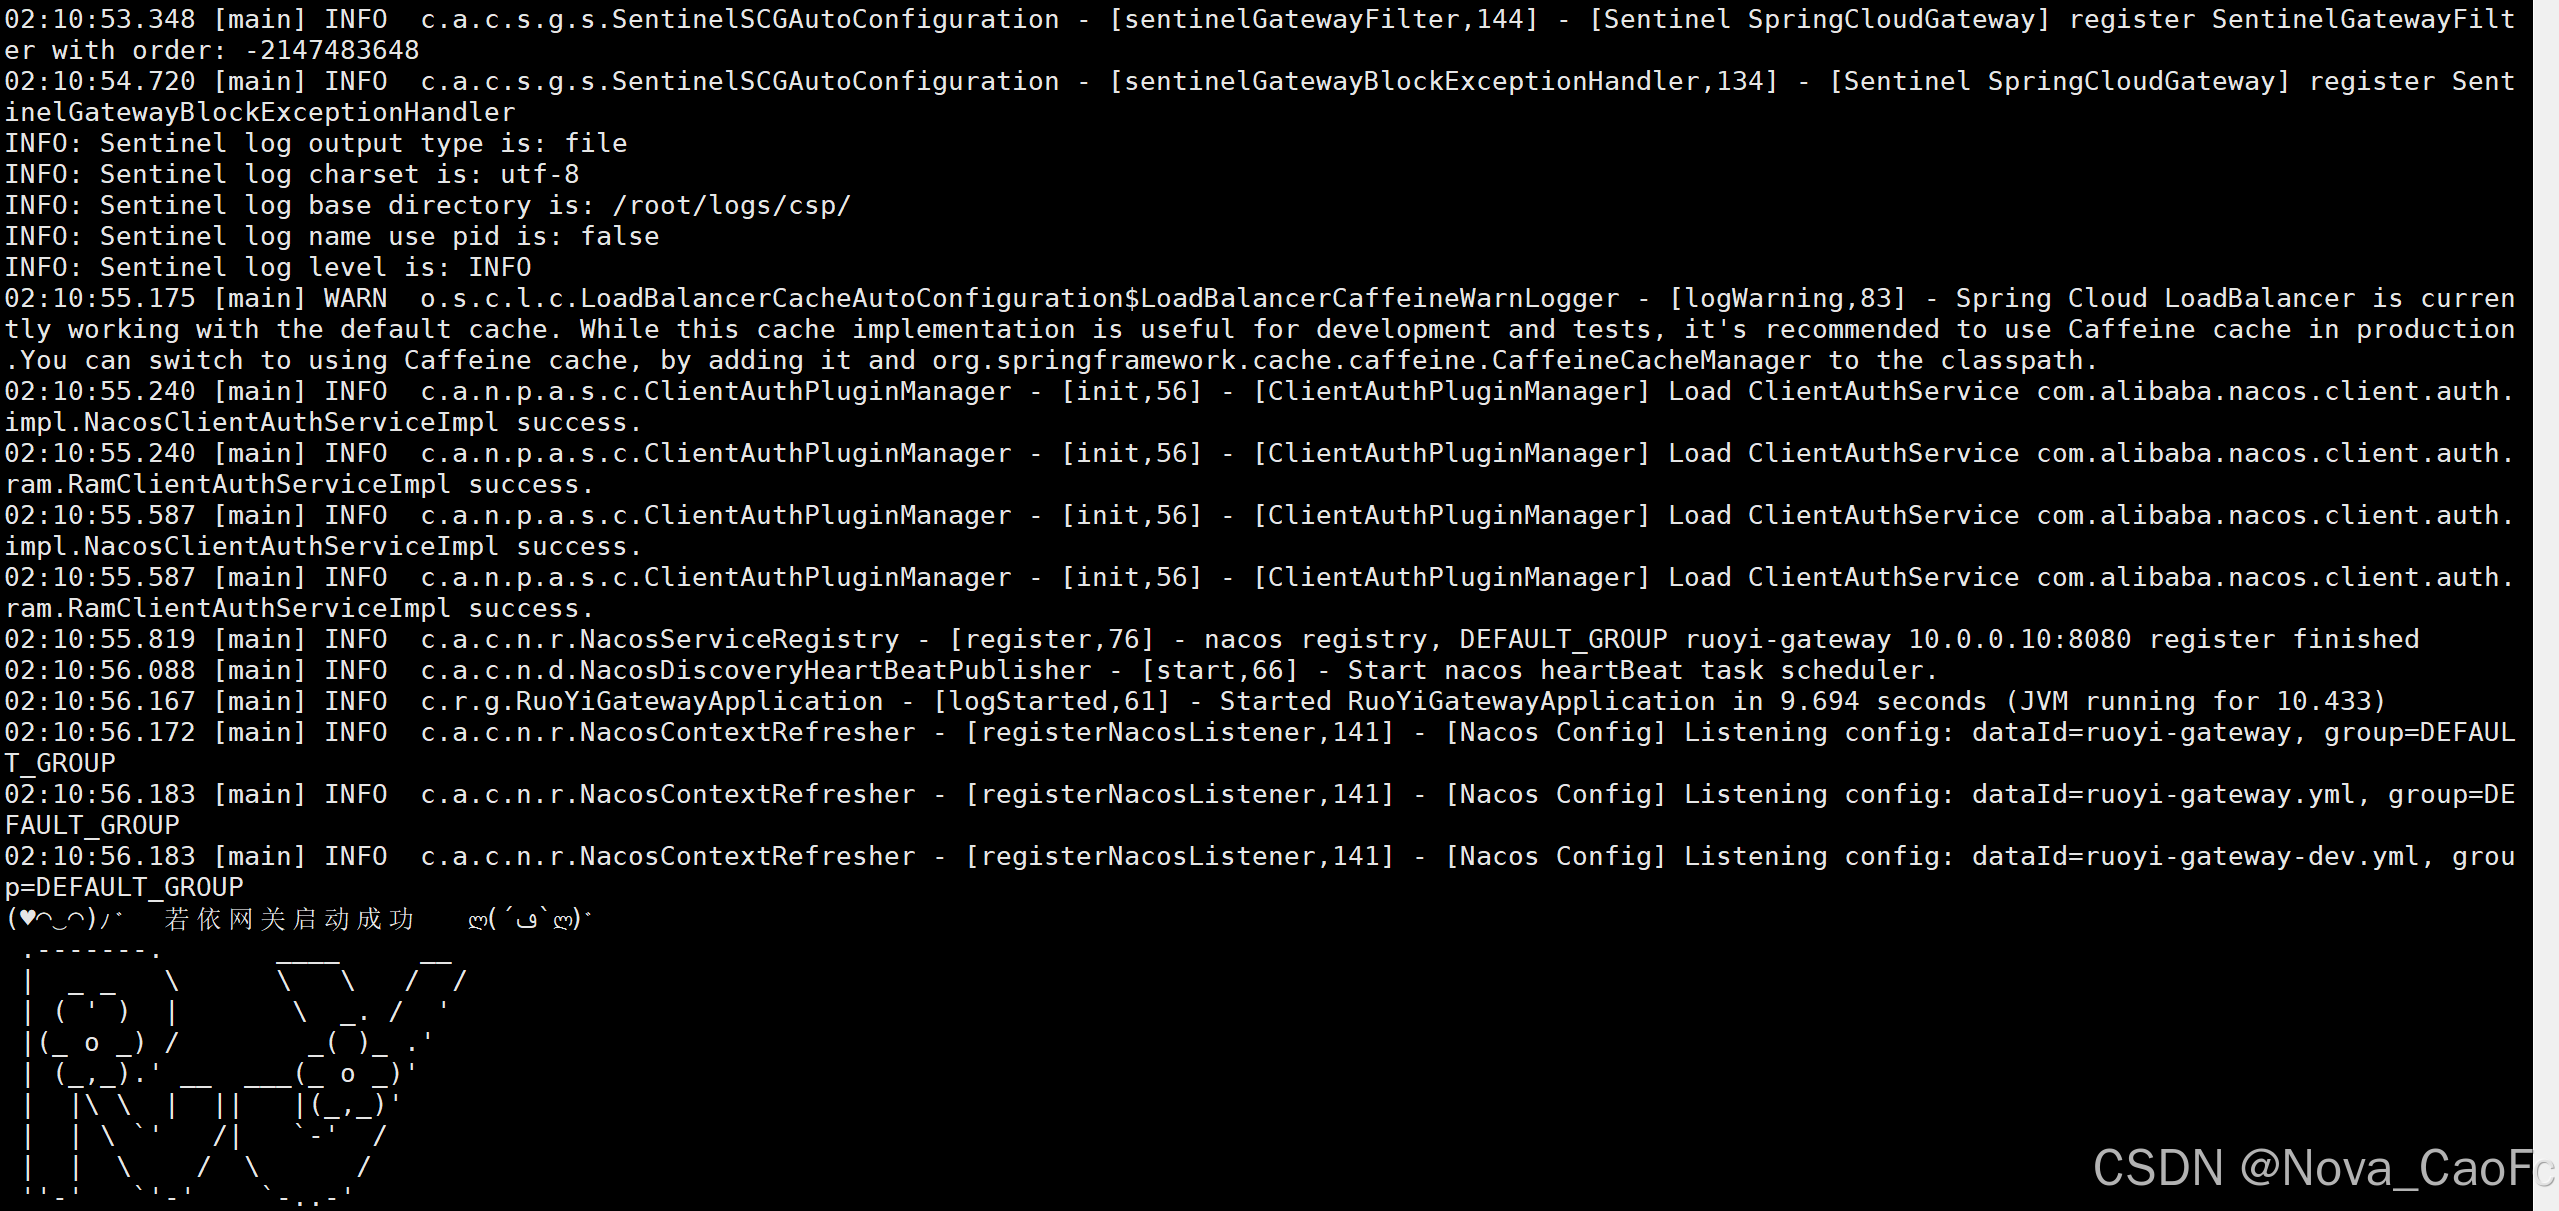
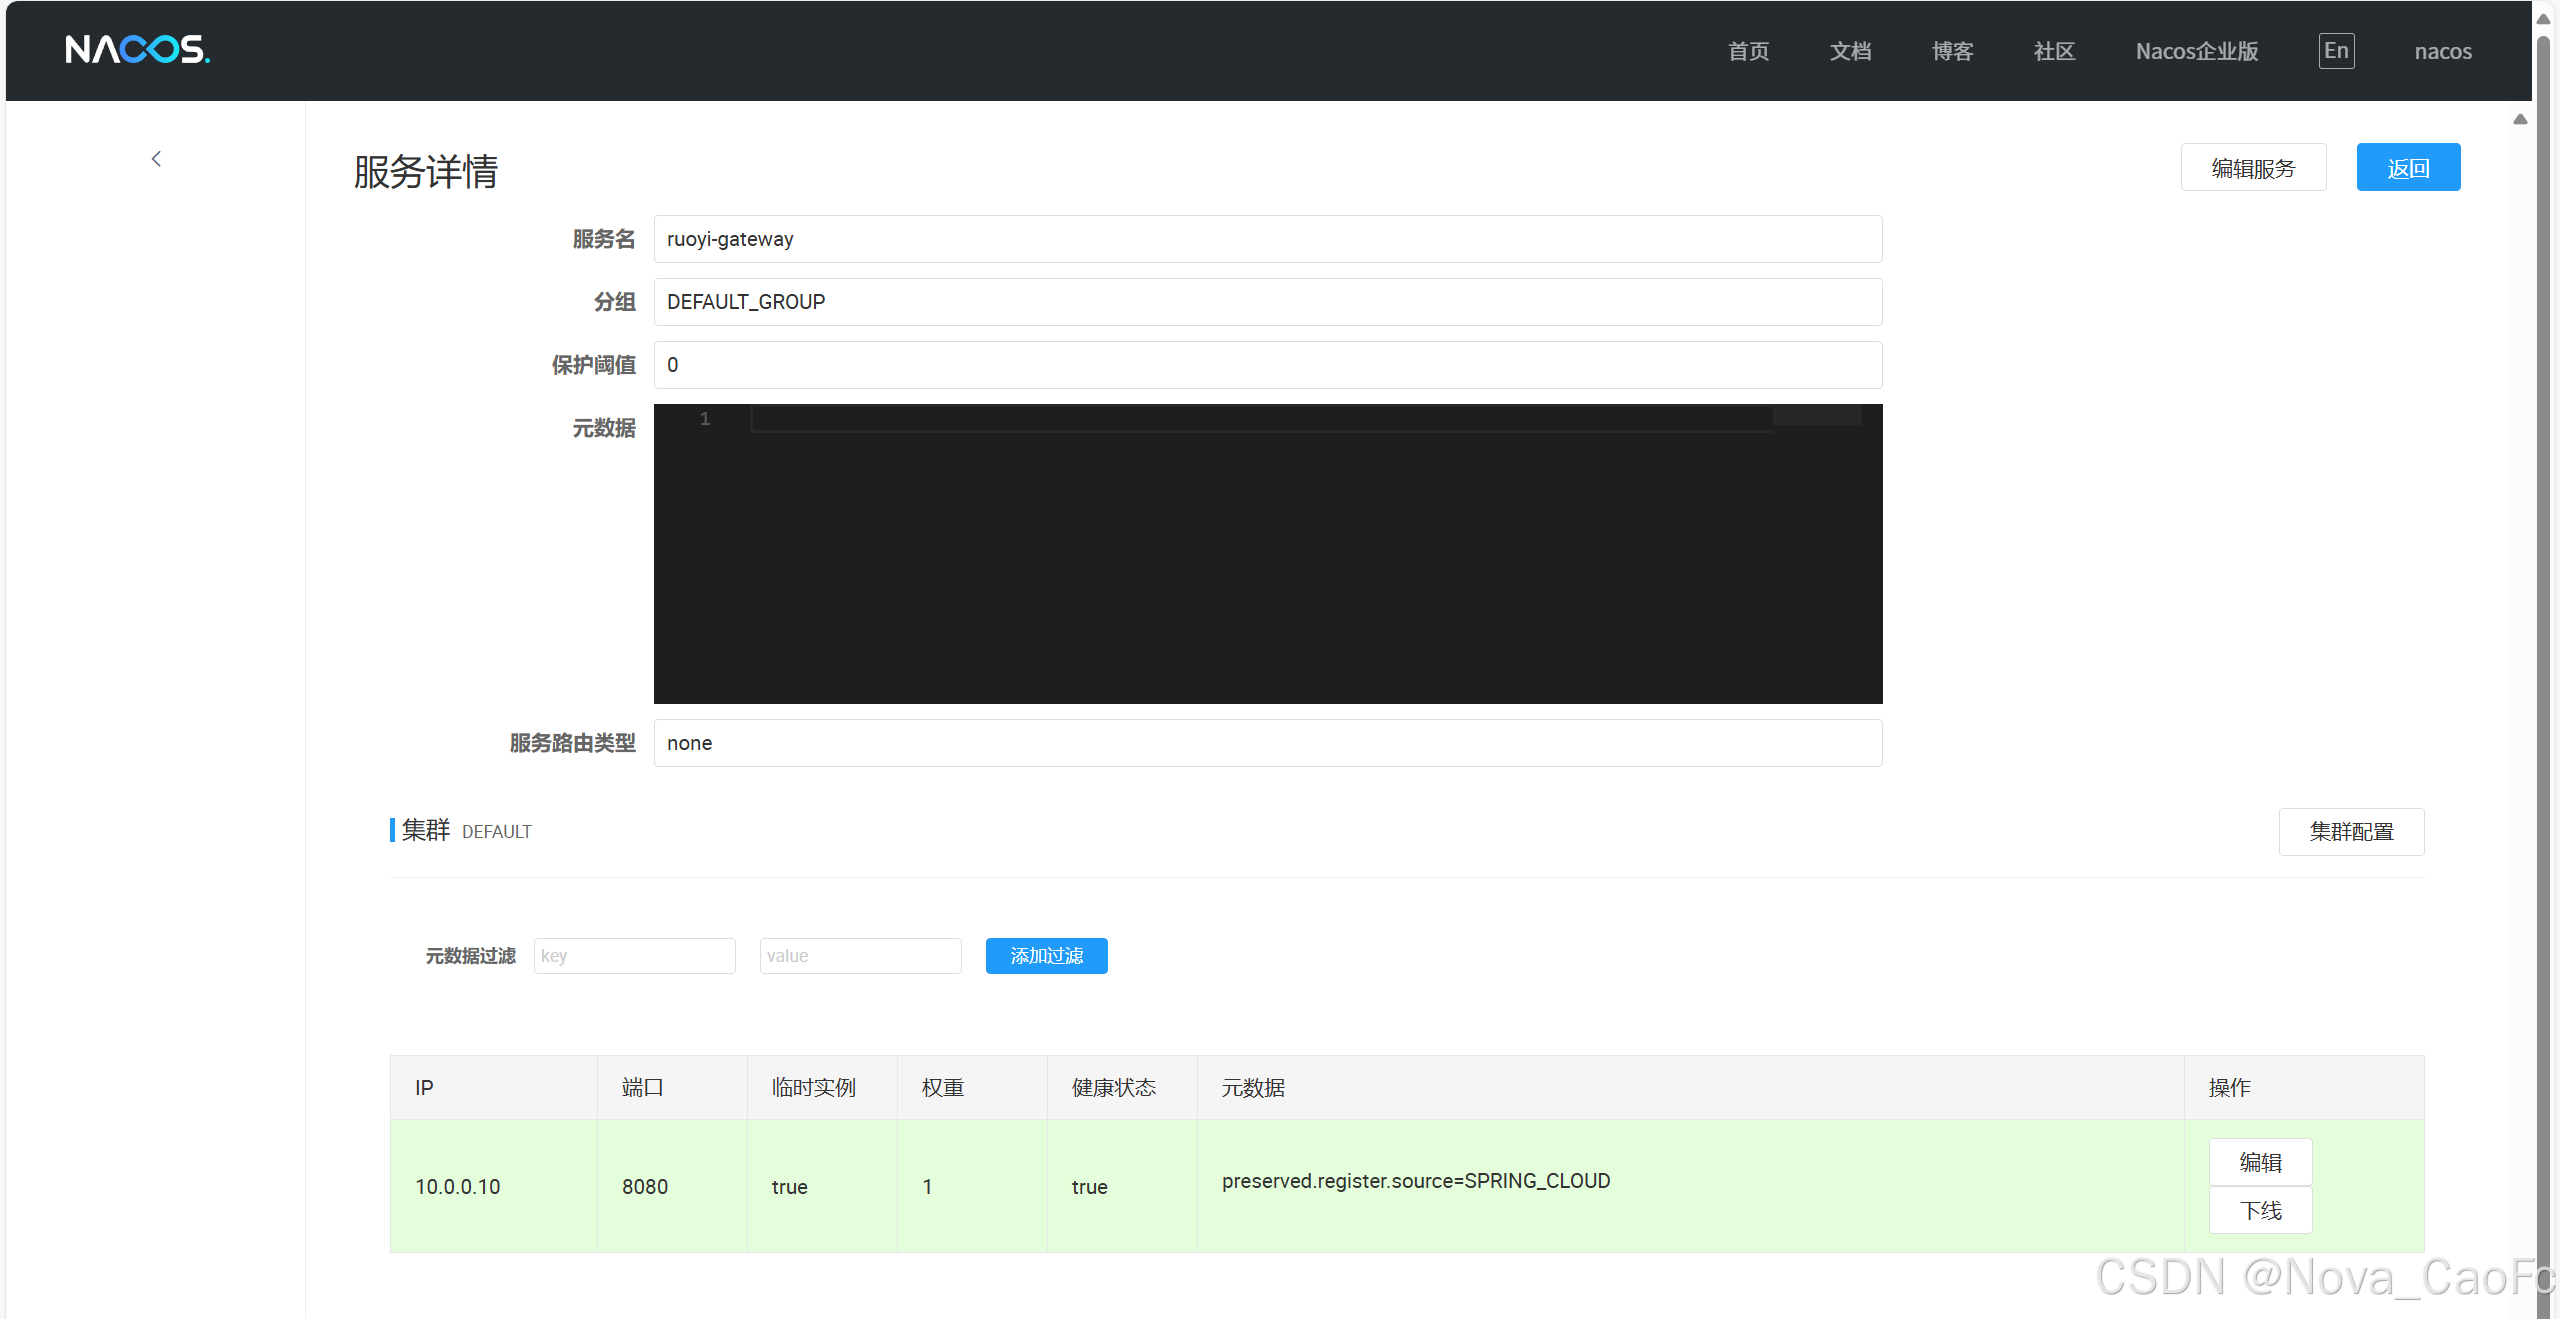
3.3 查看nacos注册情况
在首页点击服务管理--->服务列表查看注册情况

4. 部署RuoYi-Job
4.1 修改nacos配置

4.2 java启动ruoyi-job
java -Dspring.profiles.active=dev \
-Dspring.cloud.nacos.config.file-extension=yml \
-Dspring.cloud.nacos.discovery.server-addr=10.0.0.10:8848 \
-Dspring.cloud.nacos.config.server-addr=10.0.0.10:8848 \
-Dspring.cloud.nacos.config.username=nacos \
-Dspring.cloud.nacos.config.password=nacos \
-Dspring.cloud.nacos.discovery.username=nacos \
-Dspring.cloud.nacos.discovery.password=nacos \
-jar /root/RuoYi-Cloud/ruoyi-modules/ruoyi-job/target/ruoyi-modules-job.jar &> /var/log/ruoyi-job.log &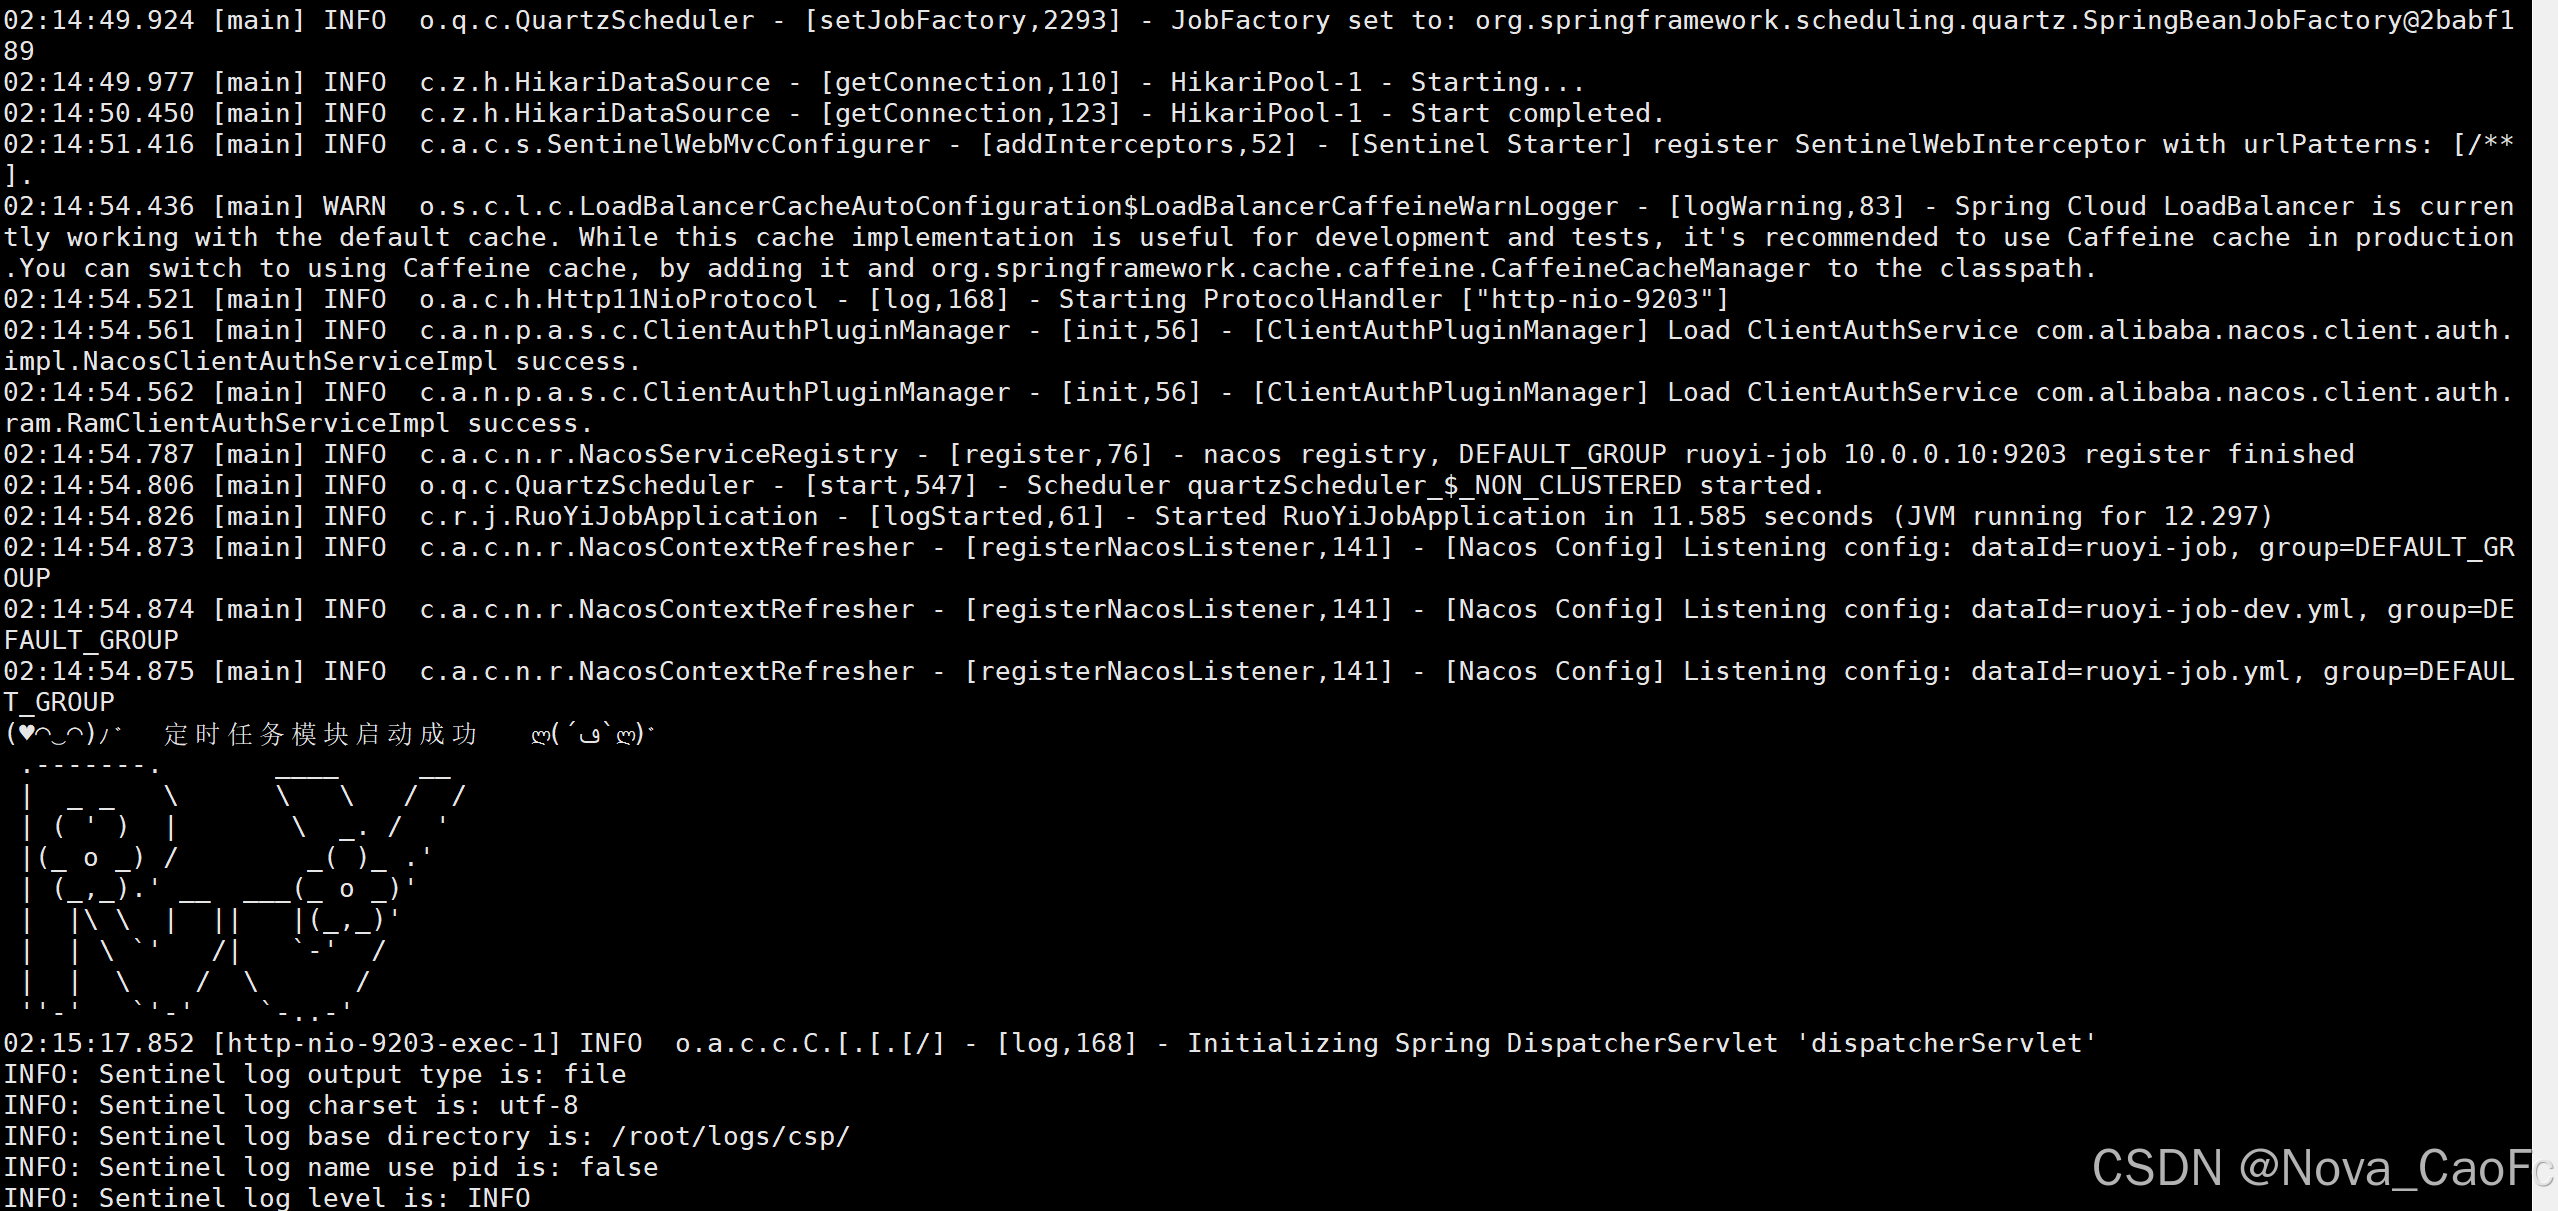
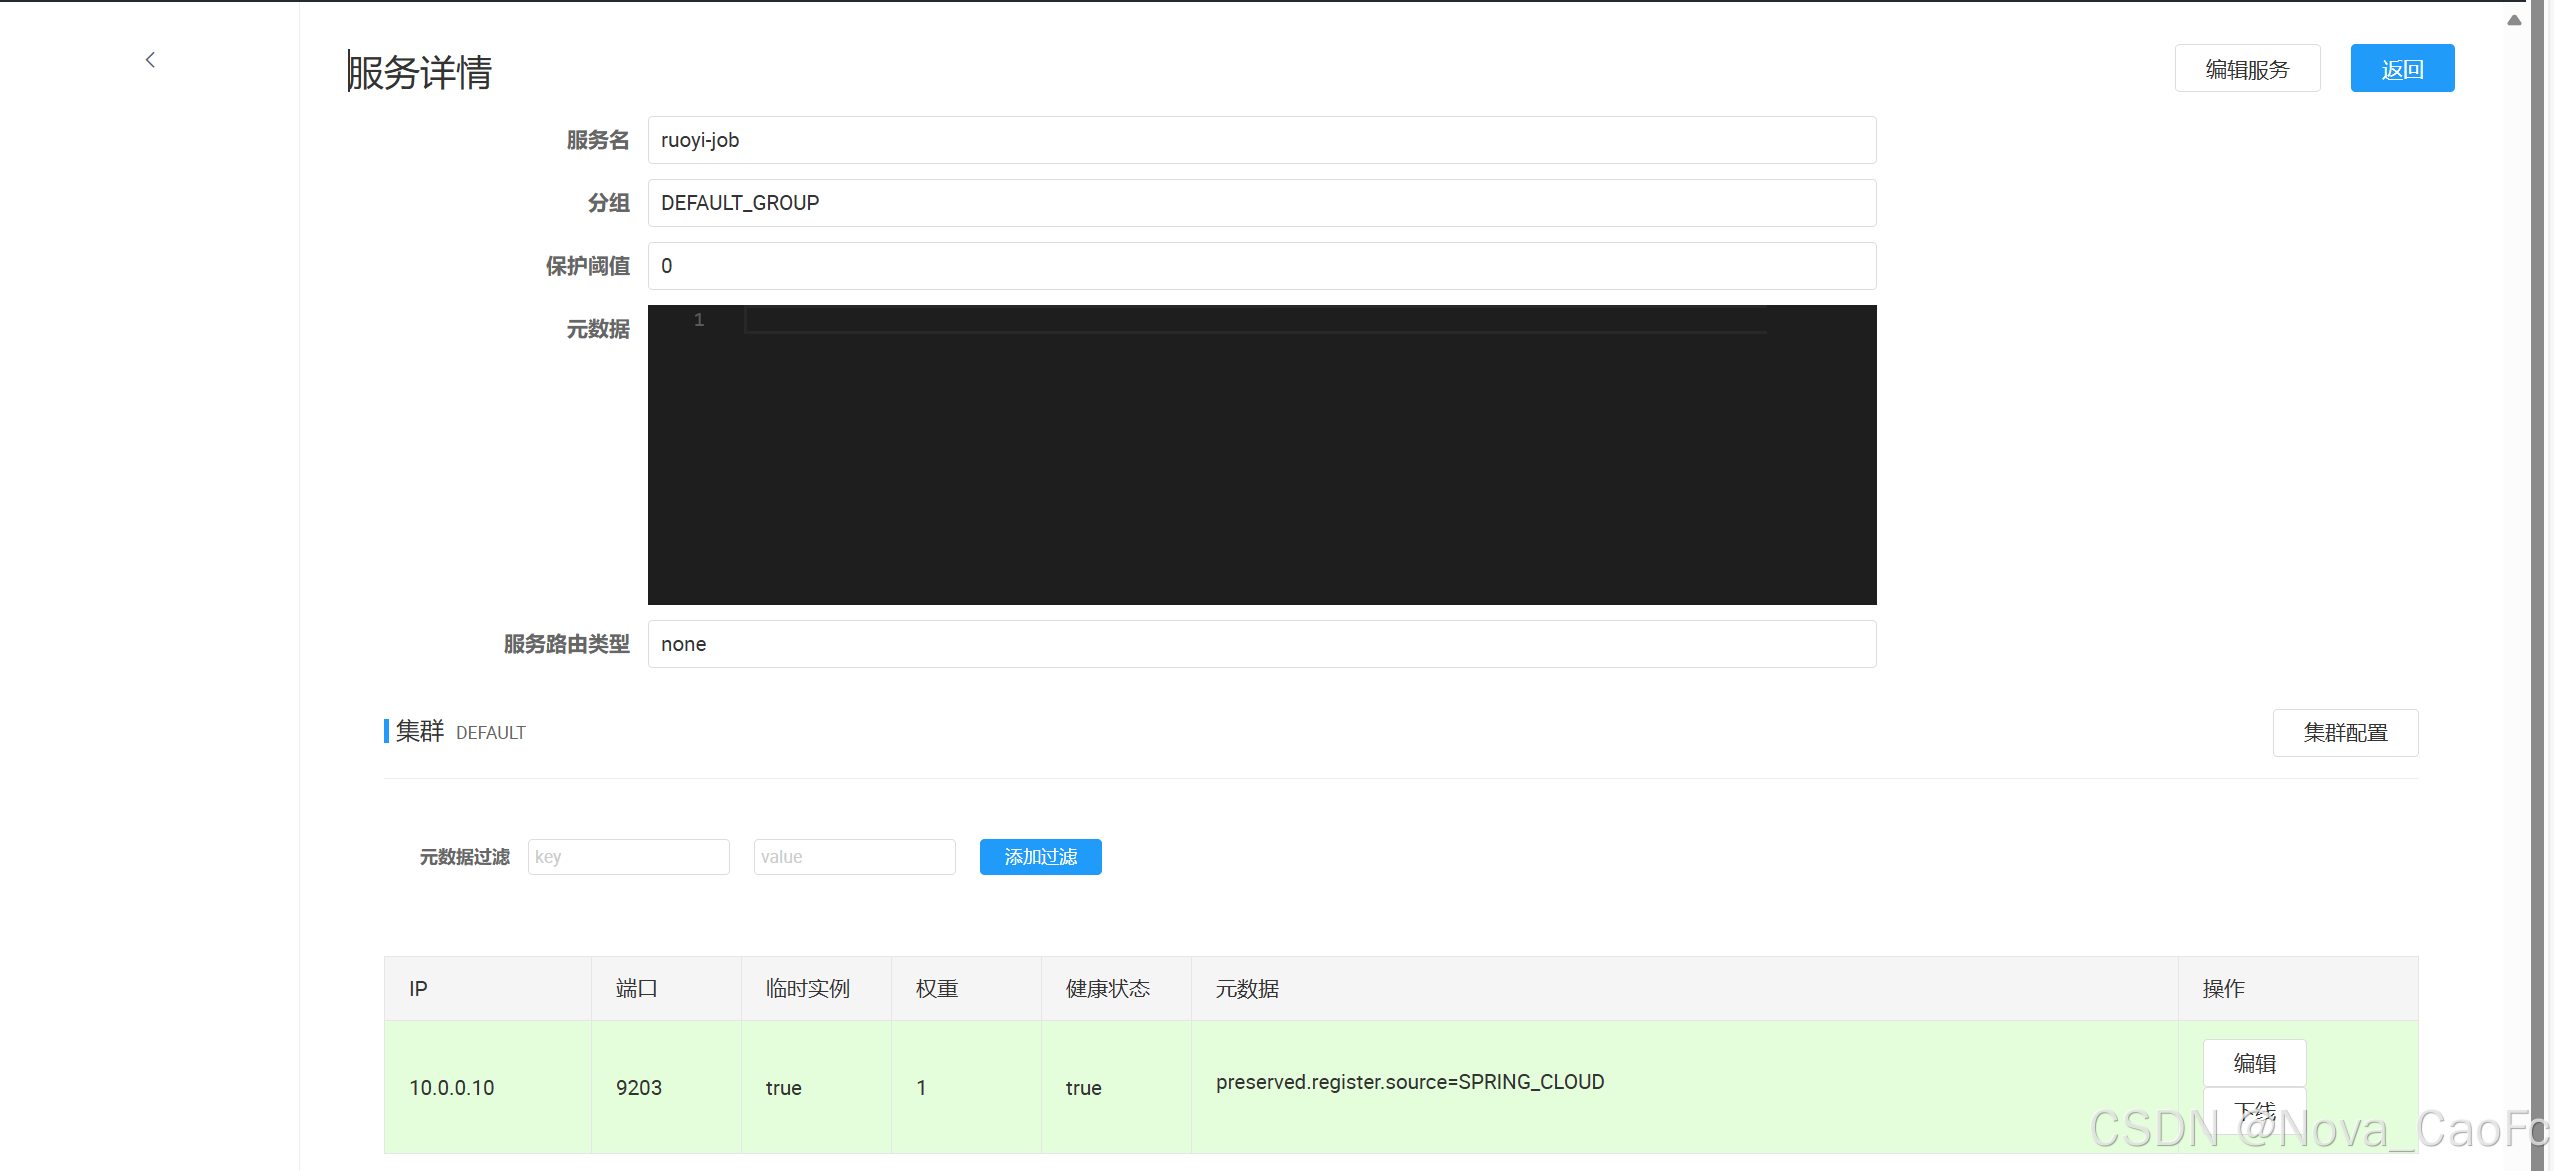
4.3 查看nacos注册情况
在首页点击服务管理--->服务列表查看注册情况
5. 部署ruoyi-monitor
5.1 修改nacos配置
保持默认即可,这个是我们登录页面的用户名和密码,修改也可以。

5.2 java启动ruoyi-monitor
java -Dspring.profiles.active=dev \
-Dspring.cloud.nacos.config.file-extension=yml \
-Dspring.cloud.nacos.discovery.server-addr=10.0.0.10:8848 \
-Dspring.cloud.nacos.config.server-addr=10.0.0.10:8848 \
-Dspring.cloud.nacos.config.username=nacos \
-Dspring.cloud.nacos.config.password=nacos \
-Dspring.cloud.nacos.discovery.username=nacos \
-Dspring.cloud.nacos.discovery.password=nacos \
-jar /root/RuoYi-Cloud/ruoyi-visual/ruoyi-monitor/target/ruoyi-visual-monitor.jar &> /var/log/ruoyi-monitor.log &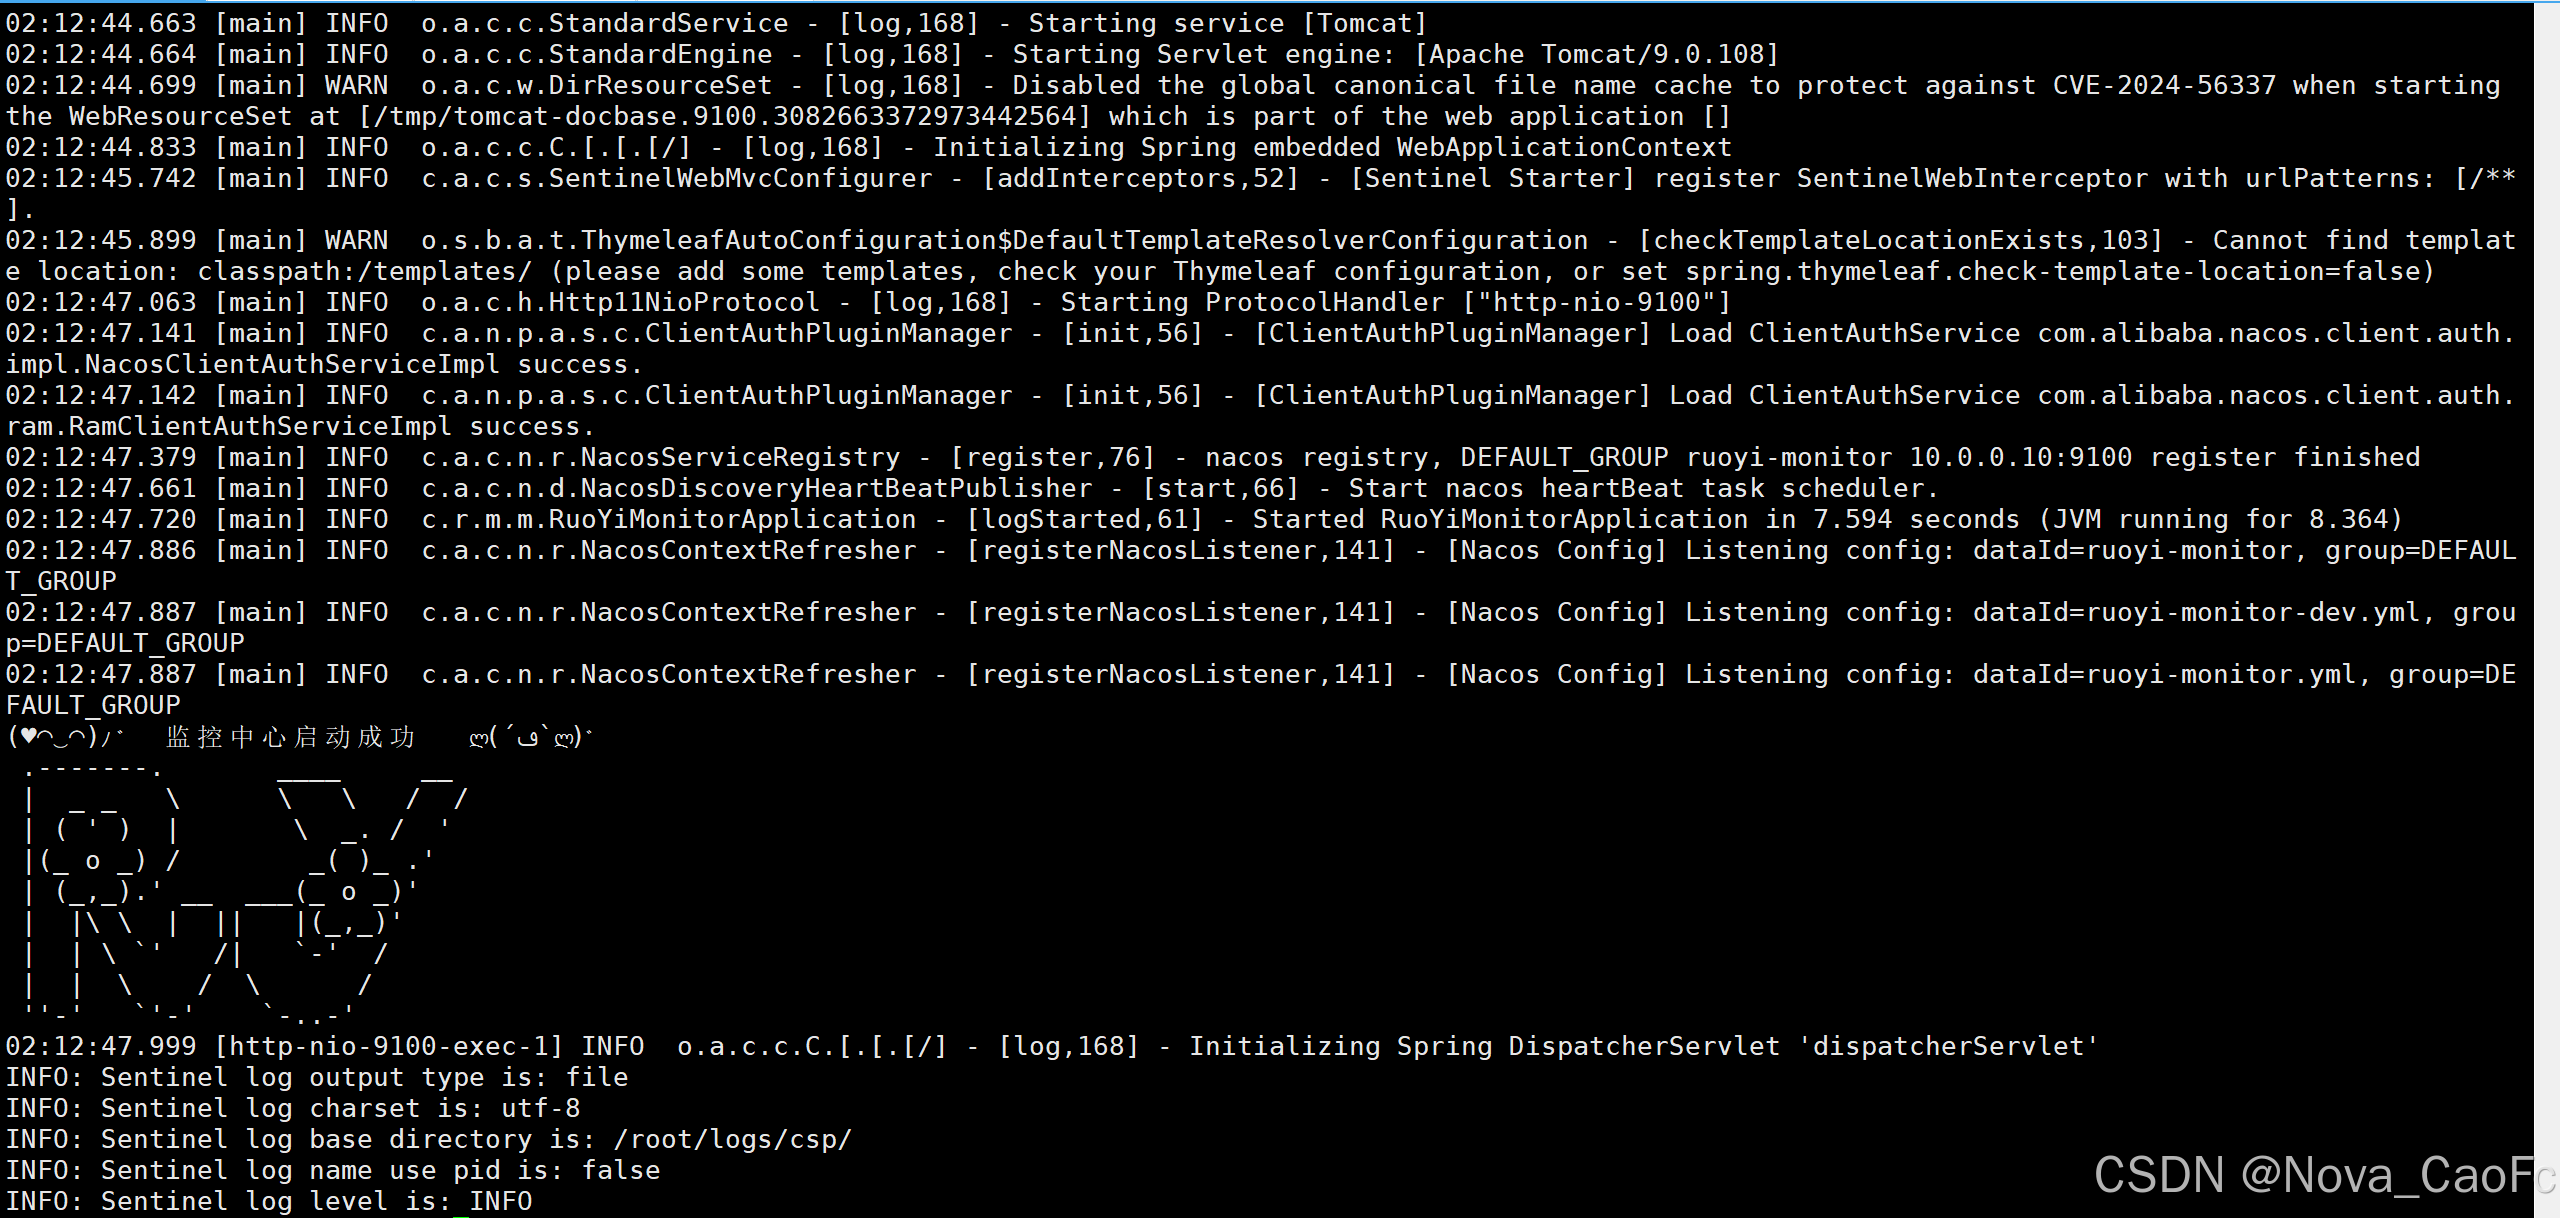
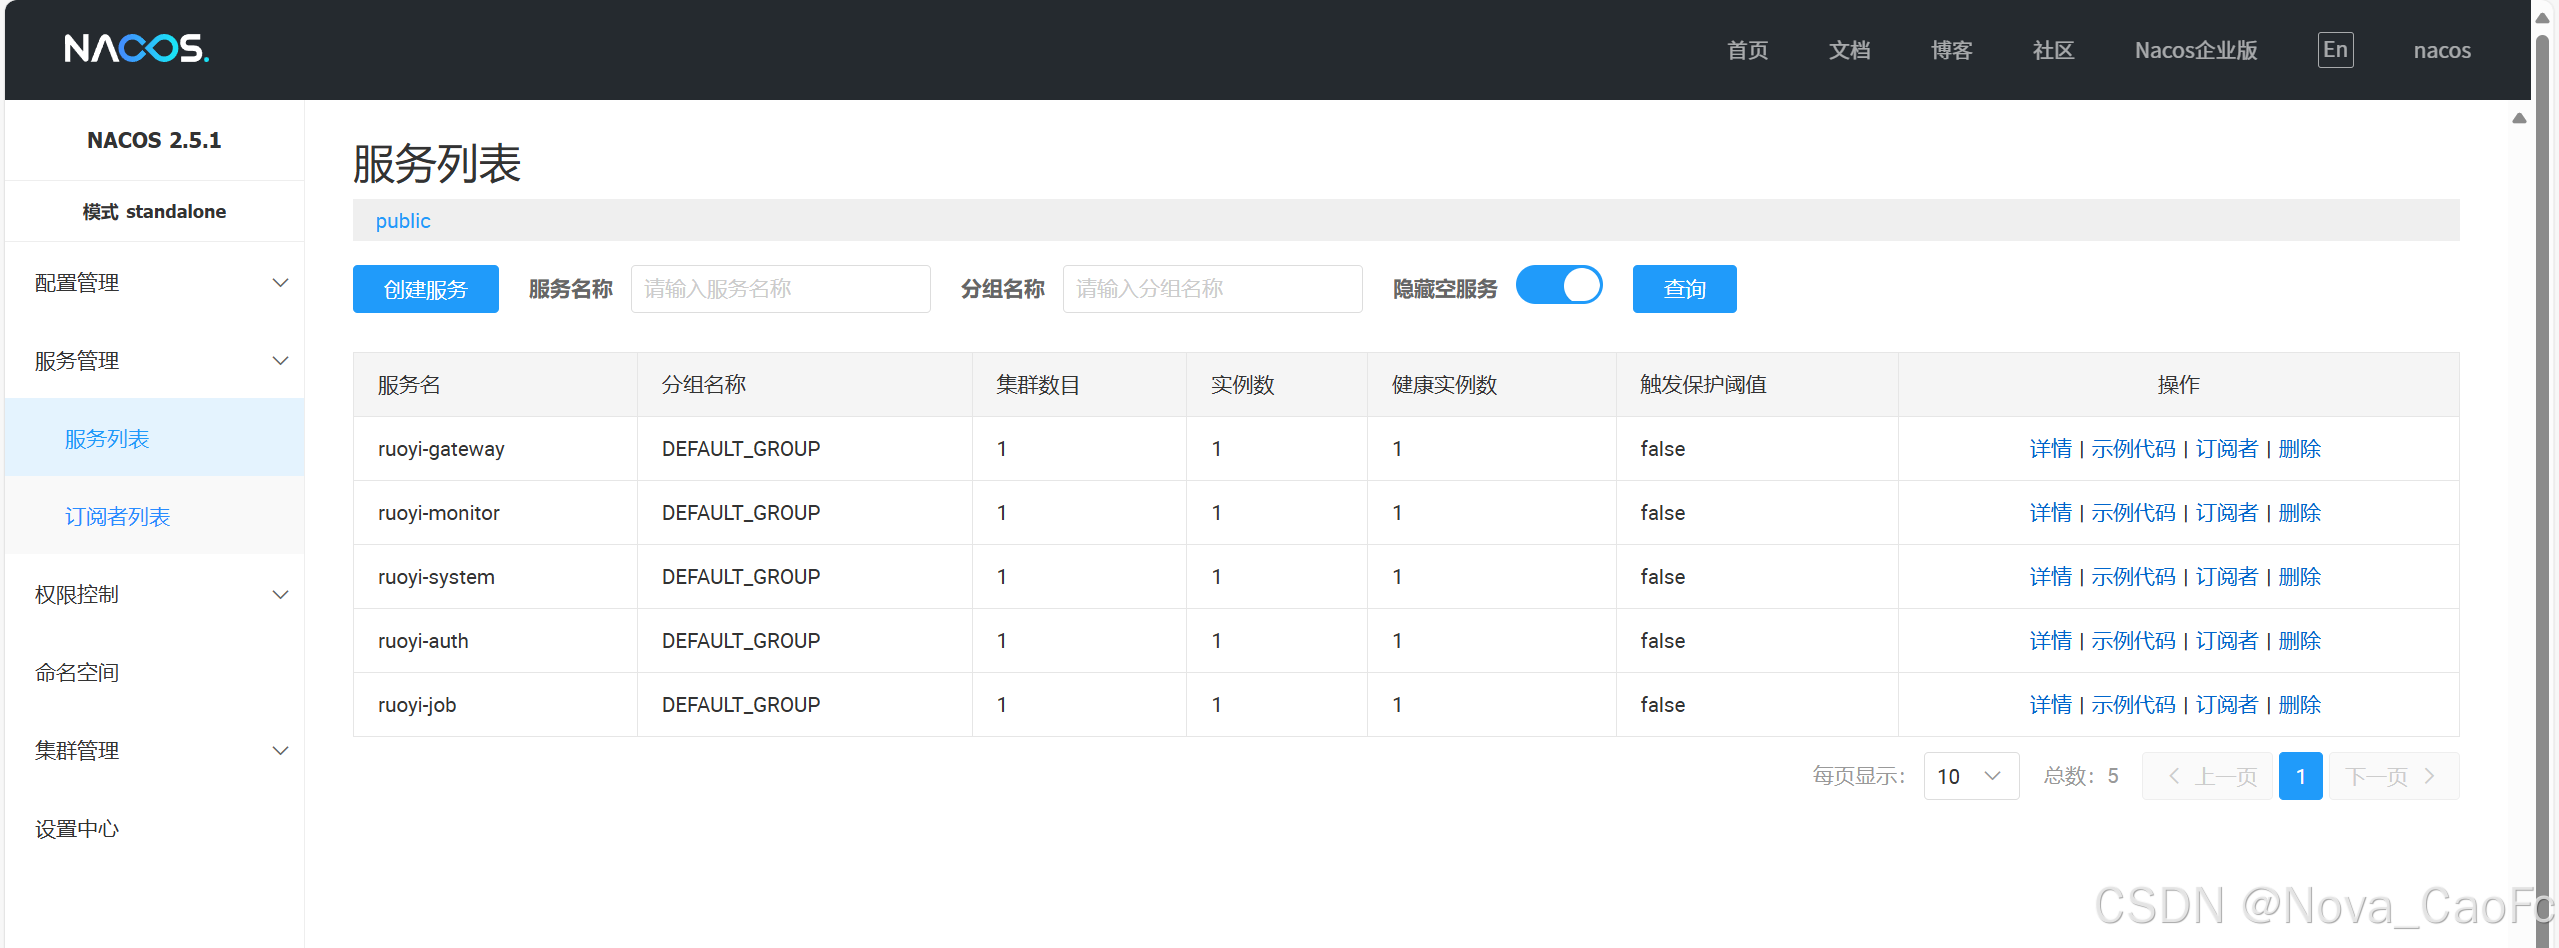
5.3 查看nacos注册情况
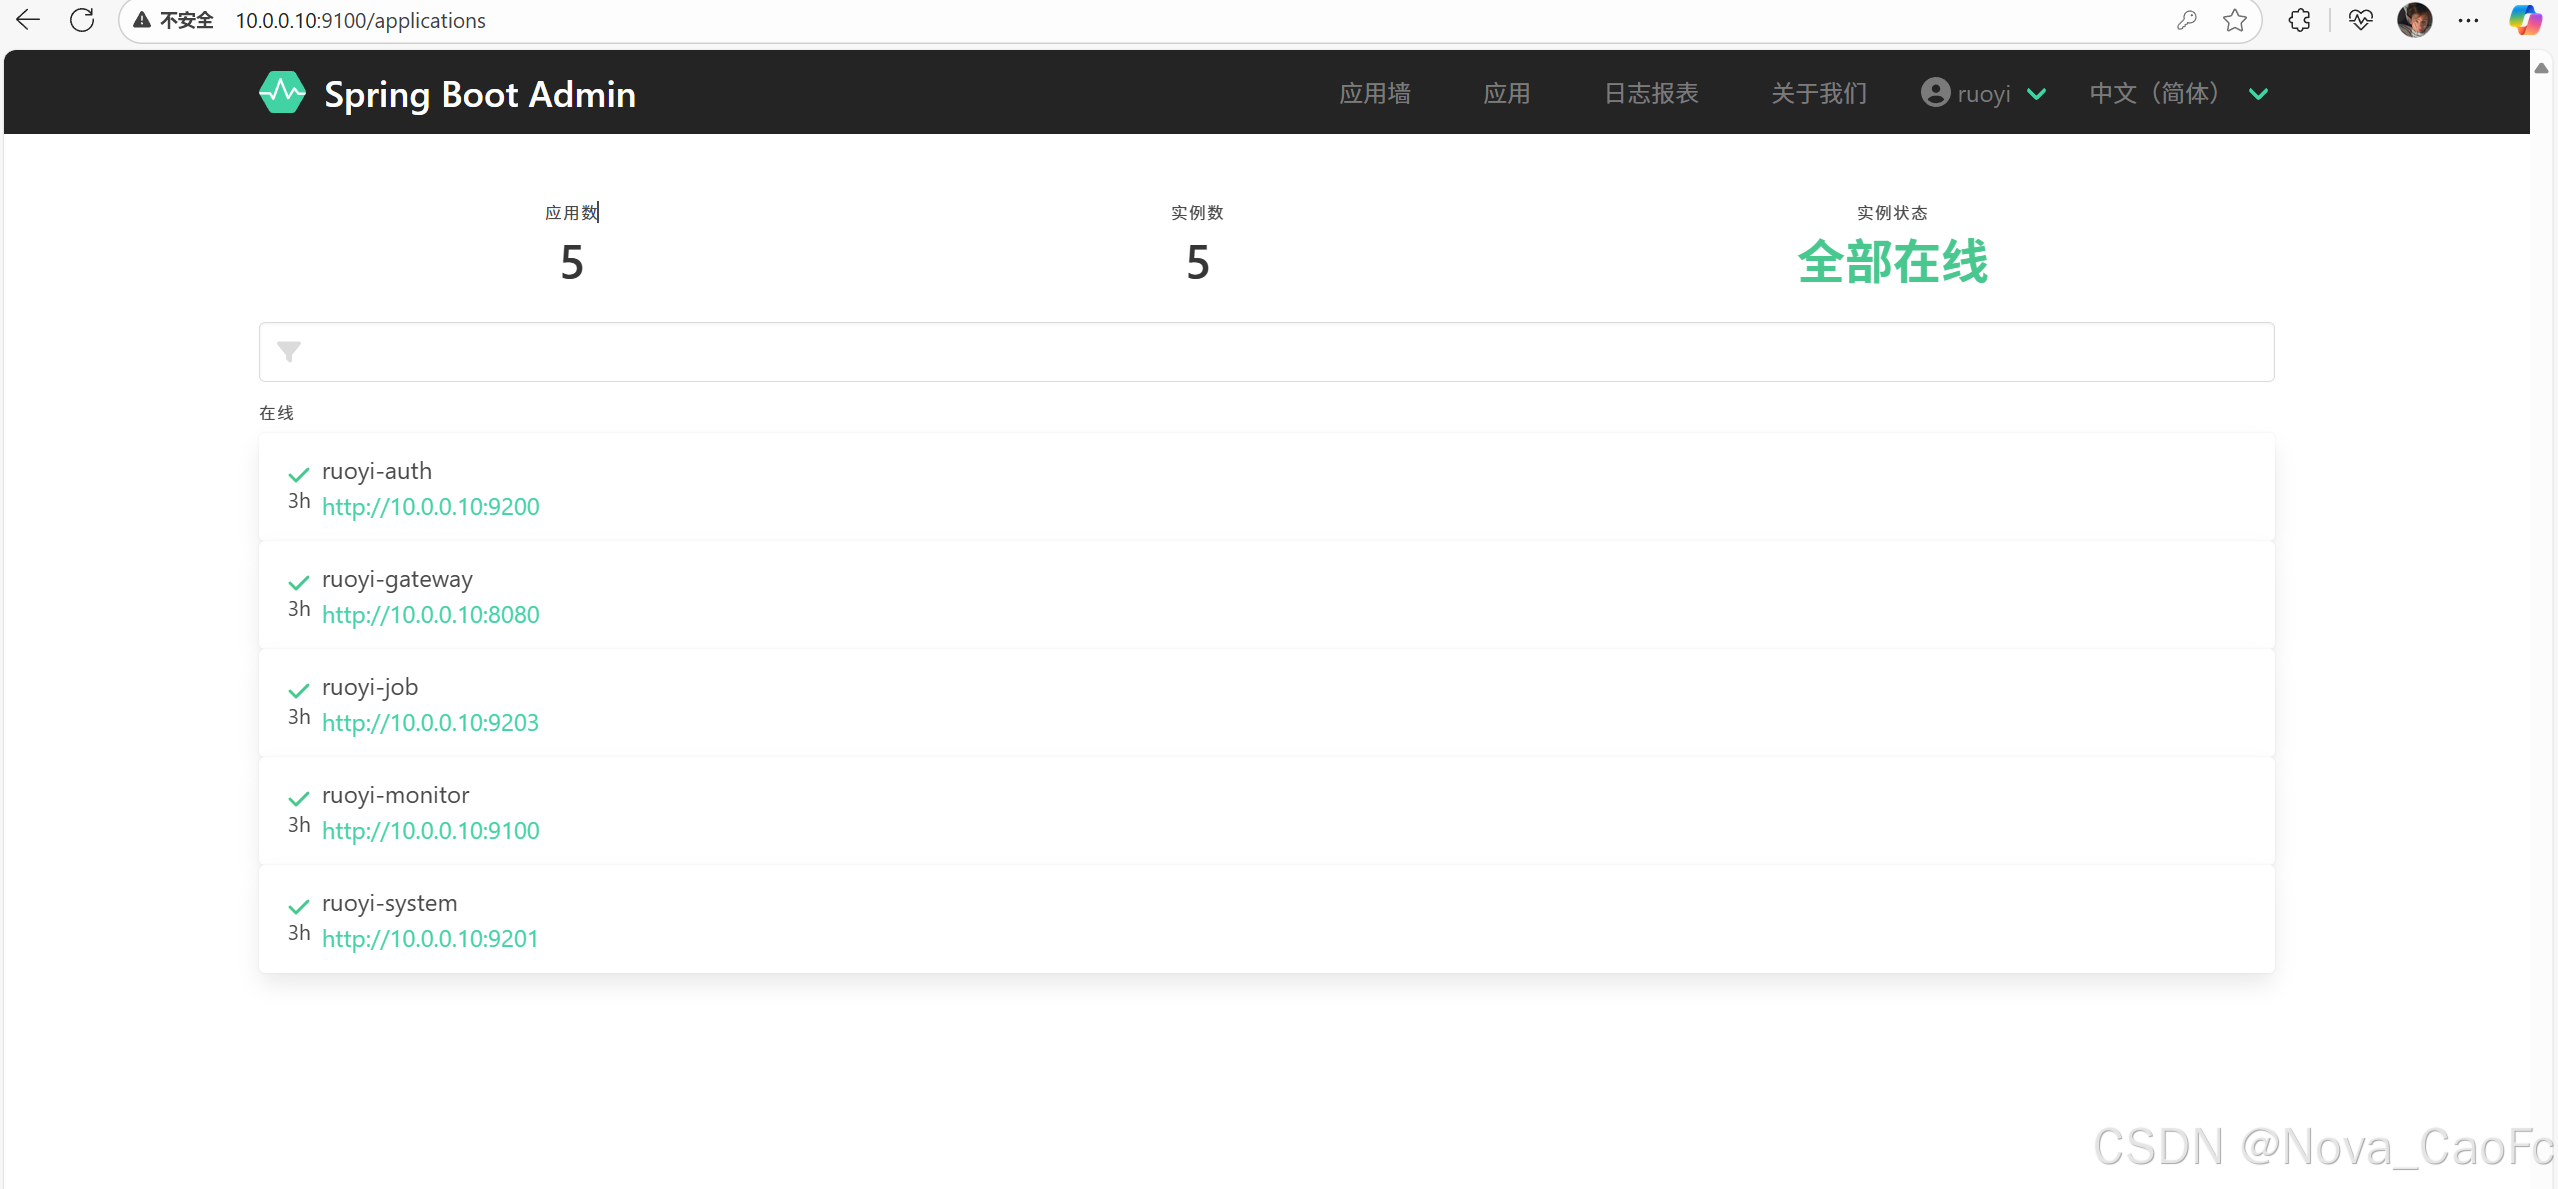
5.4 访问监控查看组件状态
本机的IP+9100端口访问
用户名和密码就是monitor的nacos配置中的,登录即可
五、部署Ruoyi前端
1. 进入到前端代码目录
root@Microservice:~/RuoYi-Cloud/ruoyi-ui# pwd
/root/RuoYi-Cloud/ruoyi-ui
root@Microservice:~/RuoYi-Cloud/ruoyi-ui# ll
total 1300
-rw-r--r--   1 root root     474 Aug 26 00:42 babel.config.js
drwxr-xr-x   2 root root    4096 Aug 26 00:42 bin
drwxr-xr-x   2 root root    4096 Aug 26 00:42 build
drwxr-xr-x 918 root root   36864 Aug 26 02:23 node_modules
-rw-r--r--   1 root root    1821 Aug 26 00:42 package.json
-rw-r--r--   1 root root 1251977 Aug 26 02:22 package-lock.json
drwxr-xr-x   4 root root    4096 Aug 26 00:42 public
-rw-r--r--   1 root root     537 Aug 26 00:42 README.md
drwxr-xr-x  12 root root    4096 Aug 26 00:42 src
-rw-r--r--   1 root root    4960 Aug 26 02:22 vue.config.js
2. 配置前端
注意:这里需要修改ruoyi-ui的配置也指向我们的gateway组件,如果你跟我一样ruoyi-ui跟gateway在同一台机器,则不需要对vue.config.js做任何配置,如果你不在同一台机器,则需要修改如下配置地址:
root@Microservice:~/RuoYi-Cloud/ruoyi-ui# grep -A 10 'devServer' vue.config.js
  devServer: {
    host: '0.0.0.0',
    port: port,
    open: true,
    proxy: {
      // detail: https://cli.vuejs.org/config/#devserver-proxy
      [process.env.VUE_APP_BASE_API]: {
        target: `http://localhost:8080`, // 这里指向你的gateway地址
        changeOrigin: true,
        pathRewrite: {
          ['^' + process.env.VUE_APP_BASE_API]: ''
3. 打包前端应用
root@Microservice:~/RuoYi-Cloud/ruoyi-ui# pwd
/root/RuoYi-Cloud/ruoyi-ui
root@Microservice:~/RuoYi-Cloud/ruoyi-ui# npm install --registry=https://registry.npmmirror.com
root@Microservice:~/RuoYi-Cloud/ruoyi-ui# npm run build:prod

> ruoyi@3.6.6 build:prod
> vue-cli-service build
注意,如果npm run build:prod命令报错,很有可能是你的node版本的问题,需要添加如下配置:
添加60-66行高亮的配置
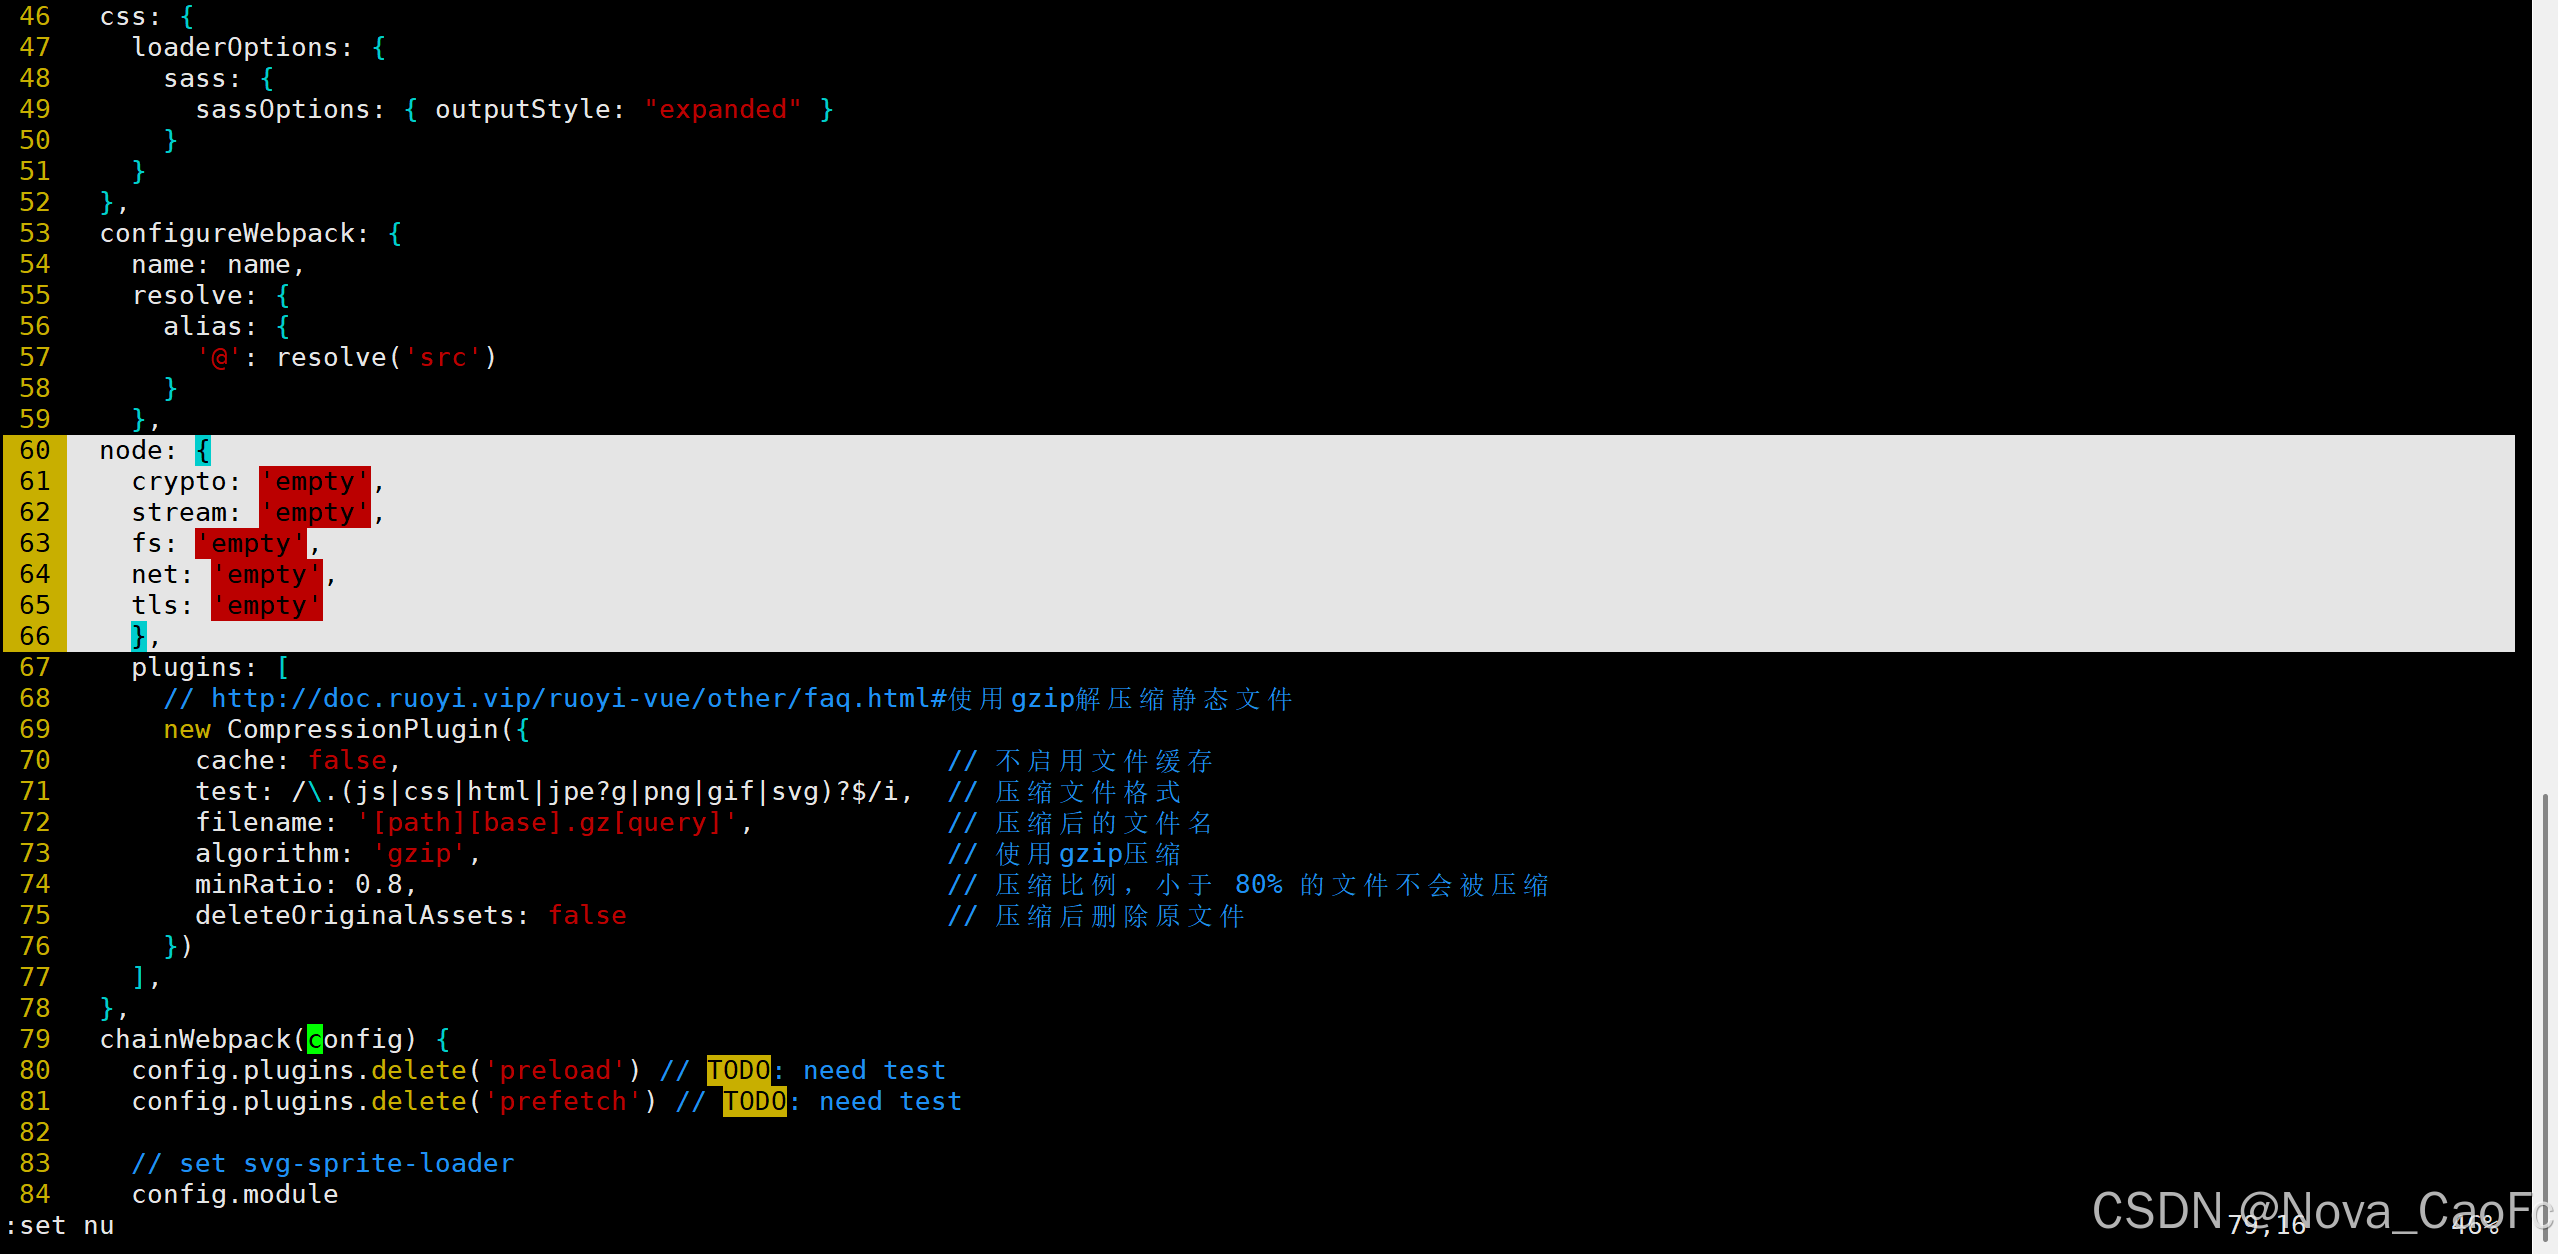
重新执行一下npm install 和 npm run命令即可。
如果不想添加配置,升级node版本到17以上版本也可以。
4. 验证是否构建成功
在ruoyi-ui目录下会出现dist目录,下面就是打包好的静态文件。
  dist/static/css/chunk-16ceb3d3.74cfcc5    0.37 KiB         0.26 KiB
  2.css
  dist/static/css/chunk-f92fc43c.74cfcc5    0.37 KiB         0.26 KiB
  2.css

  Images and other types of assets omitted.

 DONE  Build complete. The dist directory is ready to be deployed.
 INFO  Check out deployment instructions at https://cli.vuejs.org/guide/deployment.html

root@Microservice:~/RuoYi-Cloud/ruoyi-ui# ll
total 1304
-rw-r--r--   1 root root     474 Aug 26 00:42 babel.config.js
drwxr-xr-x   2 root root    4096 Aug 26 00:42 bin
drwxr-xr-x   2 root root    4096 Aug 26 00:42 build
drwxr-xr-x   5 root root    4096 Aug 26 05:59 dist
drwxr-xr-x 918 root root   36864 Aug 26 02:23 node_modules
-rw-r--r--   1 root root    1821 Aug 26 00:42 package.json
-rw-r--r--   1 root root 1251977 Aug 26 02:22 package-lock.json
drwxr-xr-x   4 root root    4096 Aug 26 00:42 public
-rw-r--r--   1 root root     537 Aug 26 00:42 README.md
drwxr-xr-x  12 root root    4096 Aug 26 00:42 src
-rw-r--r--   1 root root    4960 Aug 26 02:22 vue.config.js
root@Microservice:~/RuoYi-Cloud/ruoyi-ui# ll dist/
total 40
-rw-r--r-- 1 root root  5561 Aug 26 05:59 favicon.ico
drwxr-xr-x 2 root root  4096 Aug 26 05:59 html
-rw-r--r-- 1 root root 12048 Aug 26 05:59 index.html
-rw-r--r-- 1 root root  3942 Aug 26 05:59 index.html.gz
-rw-r--r-- 1 root root    26 Aug 26 05:59 robots.txt
drwxr-xr-x 6 root root  4096 Aug 26 05:59 static
drwxr-xr-x 3 root root  4096 Aug 26 05:59 styles
5. 配置nginx代理
root@Microservice apt install -y nginx
root@Microservice:/etc/nginx/conf.d# ll /usr/share/nginx/html/
total 4
-rw-r--r-- 1 root root 612 Apr 21  2020 index.html
root@Microservice:/etc/nginx/conf.d# cp -a /root/RuoYi-Cloud/ruoyi-ui/dist/* /usr/share/nginx/html/
root@Microservice:/etc/nginx/conf.d# ll /usr/share/nginx/html/
total 40
-rw-r--r-- 1 root root  5561 Aug 26 05:59 favicon.ico
drwxr-xr-x 2 root root  4096 Aug 26 05:59 html
-rw-r--r-- 1 root root 12048 Aug 26 05:59 index.html
-rw-r--r-- 1 root root  3942 Aug 26 05:59 index.html.gz
-rw-r--r-- 1 root root    26 Aug 26 05:59 robots.txt
drwxr-xr-x 6 root root  4096 Aug 26 05:59 static
drwxr-xr-x 3 root root  4096 Aug 26 05:59 styles
写入配置文件
root@Microservice:/etc/nginx/conf.d# cat ruoyi-ui.conf
server {
    listen 80;
    server_name localhost;  # 替换为实际域名(如 ruoyi-ui.example.com)

    # 匹配根路径,处理前端页面
    location / {
        root /usr/share/nginx/html;
        index index.html;
        try_files $uri $uri/ /index.html;  # 关键:支持前端路由
    }

    location /prod-api/ {
        proxy_pass http://10.0.0.10:8080/;  # 转发到网关,需保证网关可访问
        proxy_set_header Host $host;
        proxy_set_header X-Real-IP $remote_addr;
    }
}
重启nginx
需要注意,请确保nginx默认的首页index.html被覆盖或者弃用,让nginx的首页指向我们写入的配置中。
root@Microservice:/etc/nginx/conf.d# systemctl restart nginx
root@Microservice:/etc/nginx/conf.d# systemctl status nginx
● nginx.service - A high performance web server and a reverse proxy server
     Loaded: loaded (/lib/systemd/system/nginx.service; enabled; vendor preset: enabled)
     Active: active (running) since Tue 2025-08-26 06:17:31 UTC; 1s ago
       Docs: man:nginx(8)
    Process: 119564 ExecStartPre=/usr/sbin/nginx -t -q -g daemon on; master_process on; (code=exited, status=0/SUCCESS)
    Process: 119565 ExecStart=/usr/sbin/nginx -g daemon on; master_process on; (code=exited, status=0/SUCCESS)
   Main PID: 119566 (nginx)
      Tasks: 5 (limit: 9346)
     Memory: 4.8M
        CPU: 30ms
     CGroup: /system.slice/nginx.service
             ├─119566 "nginx: master process /usr/sbin/nginx -g daemon on; master_process on;"
             ├─119567 "nginx: worker process" "" "" "" "" "" "" "" "" "" "" "" "" "" "" "" "" "" "" "" "" "" "" "" "" "" "" ""
             ├─119568 "nginx: worker process" "" "" "" "" "" "" "" "" "" "" "" "" "" "" "" "" "" "" "" "" "" "" "" "" "" "" ""
             ├─119569 "nginx: worker process" "" "" "" "" "" "" "" "" "" "" "" "" "" "" "" "" "" "" "" "" "" "" "" "" "" "" ""
             └─119570 "nginx: worker process" "" "" "" "" "" "" "" "" "" "" "" "" "" "" "" "" "" "" "" "" "" "" "" "" "" "" ""

Aug 26 06:17:31 Microservice systemd[1]: Starting A high performance web server and a reverse proxy server...
Aug 26 06:17:31 Microservice systemd[1]: Started A high performance web server and a reverse proxy server.
六、访问Ruoyi系统
直接访问自己的主机IP即可,因为我们在nginx配置中默认了80端口。
用户名/密码: admin / admin123

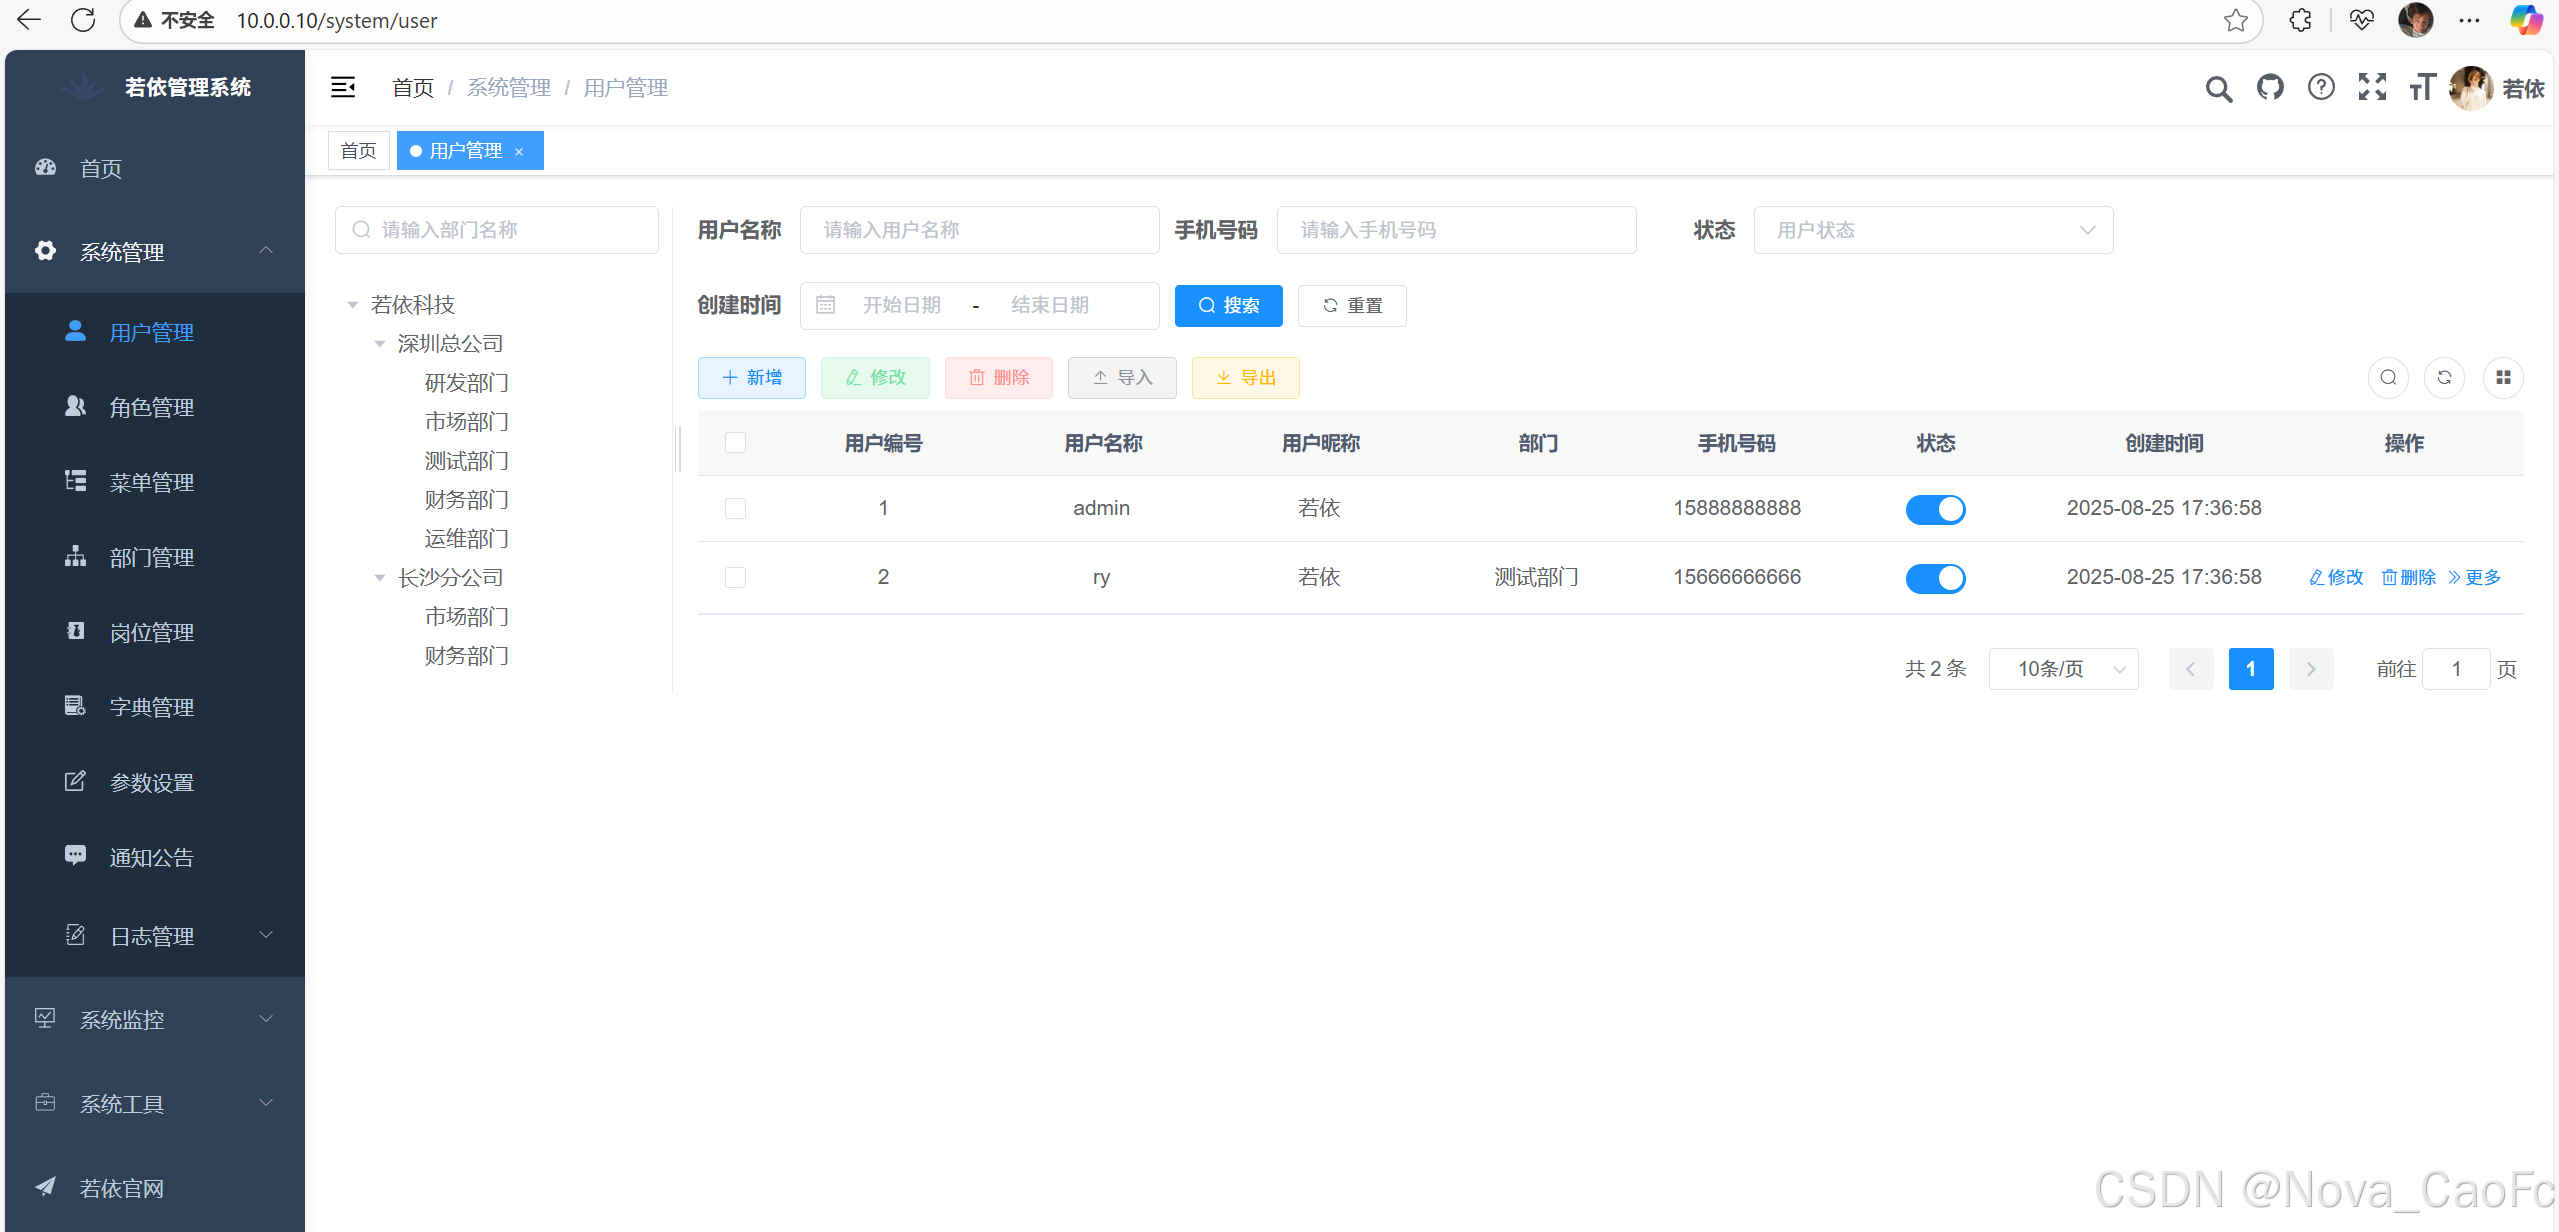
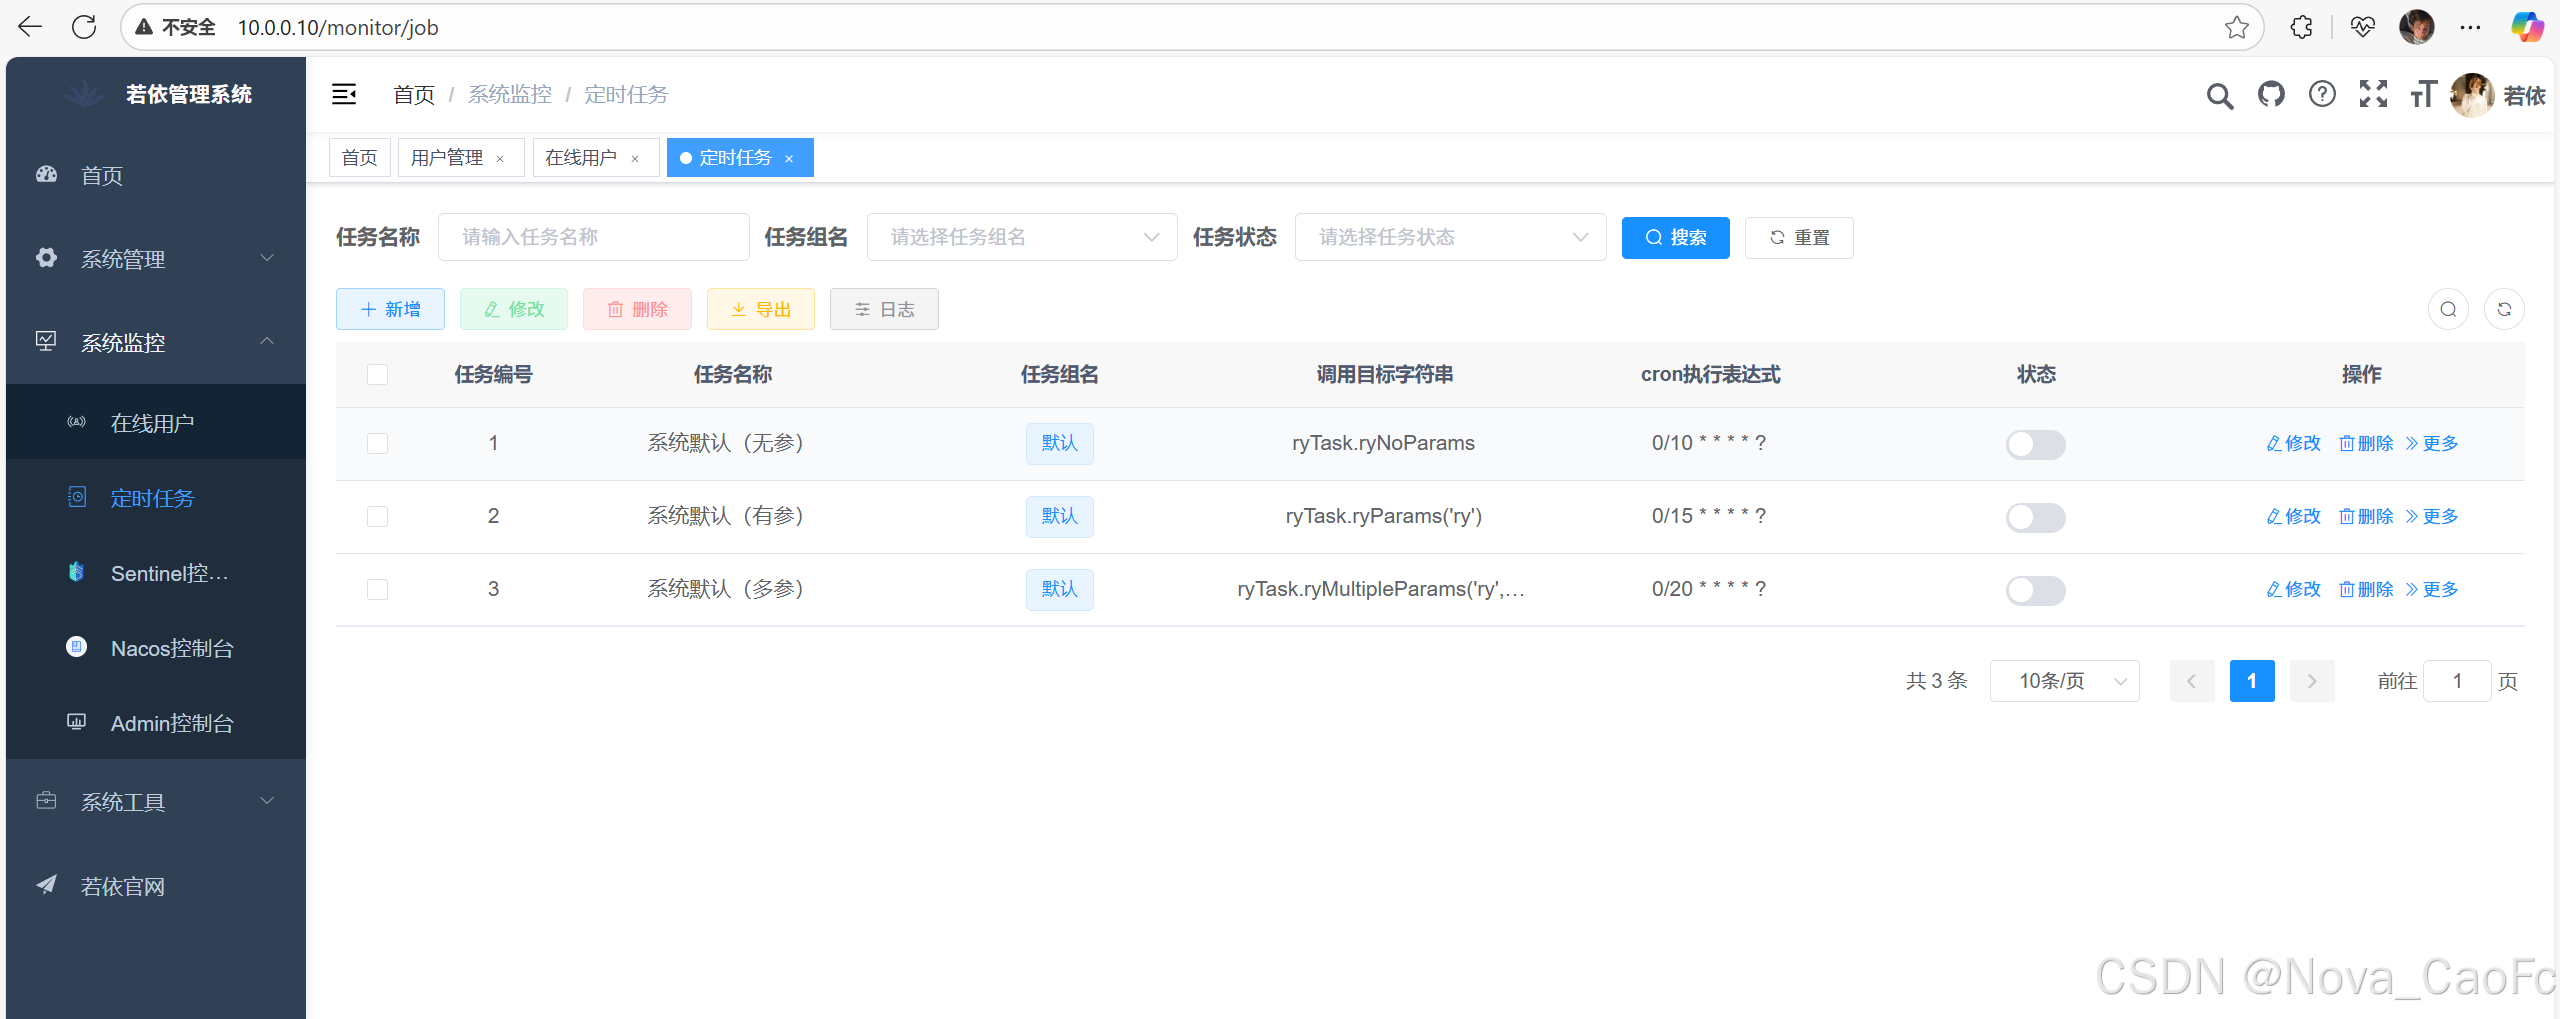
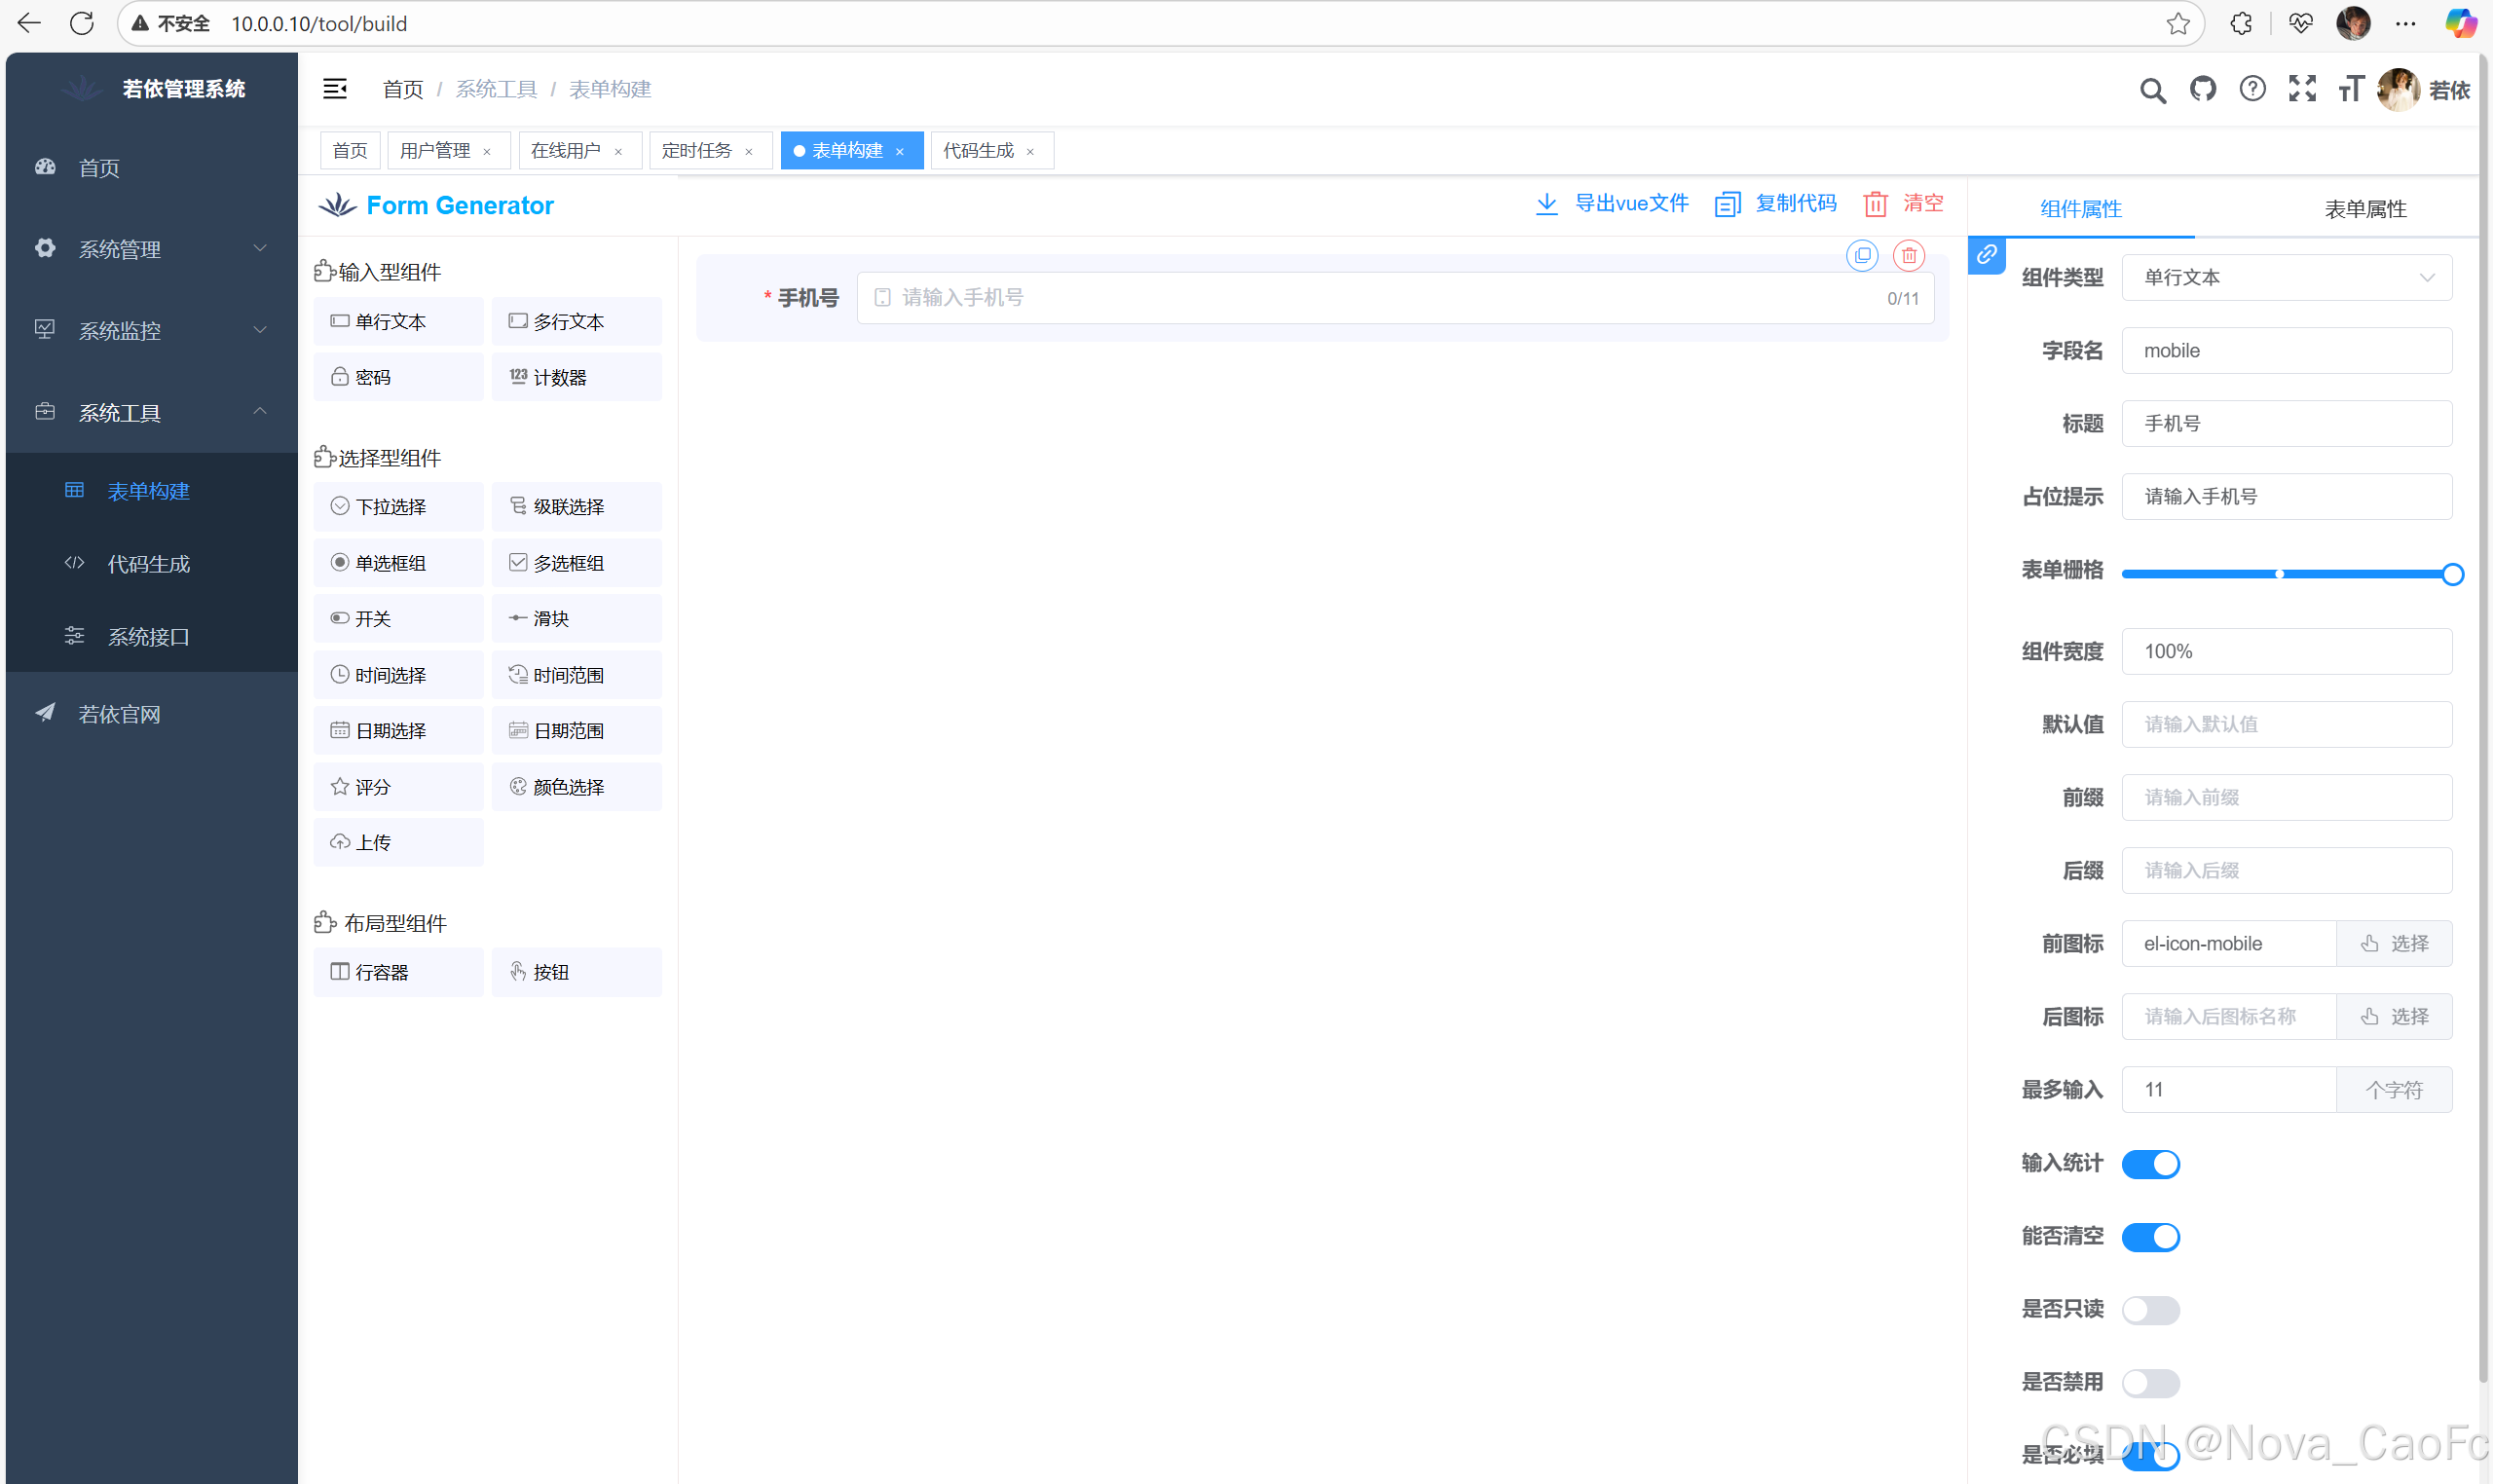
至此Ruoyi-cloud部署完成!
七、K8S容器环境准备
1. K8S环境准备
2. 克隆代码
[root@k8s-master ~]# git clone https://gitee.com/y_project/RuoYi-Cloud.git
Cloning into 'RuoYi-Cloud'...
remote: Enumerating objects: 18057, done.
remote: Counting objects: 100% (18057/18057), done.
remote: Compressing objects: 100% (5530/5530), done.
remote: Total 18057 (delta 8658), reused 17337 (delta 8263), pack-reused 0 (from 0)
Receiving objects: 100% (18057/18057), 3.48 MiB | 1.48 MiB/s, done.
Resolving deltas: 100% (8658/8658), done.
[root@k8s-master ~]# ll RuoYi-Cloud/
total 72
drwxr-xr-x  2 root root  4096 Aug 26 15:37 bin/
drwxr-xr-x  7 root root  4096 Aug 26 15:37 docker/
-rw-r--r--  1 root root  1063 Aug 26 15:37 LICENSE
-rw-r--r--  1 root root 12419 Aug 26 15:37 pom.xml
-rw-r--r--  1 root root  9480 Aug 26 15:37 README.md
drwxr-xr-x  3 root root  4096 Aug 26 15:37 ruoyi-api/
drwxr-xr-x  3 root root  4096 Aug 26 15:37 ruoyi-auth/
drwxr-xr-x 11 root root  4096 Aug 26 15:37 ruoyi-common/
drwxr-xr-x  3 root root  4096 Aug 26 15:37 ruoyi-gateway/
drwxr-xr-x  6 root root  4096 Aug 26 15:37 ruoyi-modules/
drwxr-xr-x  6 root root  4096 Aug 26 15:37 ruoyi-ui/
drwxr-xr-x  3 root root  4096 Aug 26 15:37 ruoyi-visual/
drwxr-xr-x  2 root root  4096 Aug 26 15:37 sql/
3. 部署必要服务
3.1. jdk1.8
[root@k8s-master /usr/local]# java -version
java version "1.8.0_461"
Java(TM) SE Runtime Environment (build 1.8.0_461-b11)
Java HotSpot(TM) 64-Bit Server VM (build 25.461-b11, mixed mode)
3.2. 安装Maven
[root@k8s-master /usr/local]# mvn -v
Apache Maven 3.9.9 (8e8579a9e76f7d015ee5ec7bfcdc97d260186937)
Maven home: /usr/local/maven
Java version: 1.8.0_461, vendor: Oracle Corporation, runtime: /usr/local/jdk1.8.0_461/jre
Default locale: en_US, platform encoding: UTF-8
OS name: "linux", version: "5.15.0-141-generic", arch: "amd64", family: "unix"
3.3. 安装node
[root@k8s-master ~]# node -v
v12.22.9
[root@k8s-master ~]# nodejs -v
v12.22.9
3.4.安装redis
创建K8S名称空间,将ruoyi服务放到同一个名称空间下:
[root@k8s-master ~/ruoyi-k8s]# kubectl create ns ruoyi-cloud[root@k8s-master ~/ruoyi-k8s]# cat redis.yaml
# 2. Redis 静态 PV(hostPath 类型,单节点测试用,数据存节点本地)
apiVersion: v1
kind: PersistentVolume
metadata:
name: redis-pv
labels:
app: redis
spec:
capacity:
storage: 1Gi # 存储大小,需与 PVC 一致
accessModes:
- ReadWriteOnce # 单节点读写权限
persistentVolumeReclaimPolicy: Retain # 数据保留策略(删除 PV 不删数据)
hostPath:
path: /data/redis # 节点本地存储路径(需提前创建或自动创建)
type: DirectoryOrCreate # 路径不存在时自动创建
---
# 3. Redis PVC(与 PV 绑定,用于持久化数据)
apiVersion: v1
kind: PersistentVolumeClaim
metadata:
name: redis-data-pvc
namespace: ruoyi-cloud # 指定命名空间
spec:
accessModes:
- ReadWriteOnce
resources:
requests:
storage: 1Gi # 与 PV 存储大小一致
selector:
matchLabels:
app: redis # 通过标签绑定上面的 PV
---
# 4. Redis Deployment(单节点模式)
apiVersion: apps/v1
kind: Deployment
metadata:
name: redis-server
namespace: ruoyi-cloud
labels:
app: redis-server
spec:
replicas: 1 # 单节点部署
selector:
matchLabels:
app: redis-server
template:
metadata:
labels:
app: redis-server
spec:
containers:
- name: redis
image: redis:7.4.5 # 轻量镜像,稳定版本
ports:
- containerPort: 6379 # Redis 默认端口
# 环境变量:配置密码(测试环境可直接写,生产建议用 Secret)
command: ["redis-server", "--requirepass", "$(REDIS_PASSWORD)"]
env:
- name: REDIS_PASSWORD
value: "redis123" # 自定义密码,需与应用配置一致
# 挂载持久化存储(关联 PVC)
volumeMounts:
- name: redis-data
mountPath: /data # Redis 数据默认存储路径
# 资源限制(根据服务器配置调整)
resources:
requests:
cpu: 200m
memory: 128Mi
limits:
cpu: 300m
memory: 256Mi
# 存活探针:检查 Redis 是否正常运行
livenessProbe:
exec:
command: ["redis-cli", "-a", "$(REDIS_PASSWORD)", "ping"] # 带密码检测
initialDelaySeconds: 5 # 启动后 5 秒开始检测
periodSeconds: 10 # 每 10 秒检测一次
# 就绪探针:确保 Redis 可用后再接收请求
readinessProbe:
exec:
command: ["redis-cli", "-a", "$(REDIS_PASSWORD)", "ping"]
initialDelaySeconds: 5
periodSeconds: 5
# 关联 PVC 存储
volumes:
- name: redis-data
persistentVolumeClaim:
claimName: redis-data-pvc # 对应上面的 PVC 名称
---
# 5. Redis Service(NodePort 类型,暴露到集群外)
apiVersion: v1
kind: Service
metadata:
name: redis-server-nodeport
namespace: ruoyi-cloud
labels:
app: redis-server
spec:
type: NodePort # 暴露到宿主机端口
ports:
- port: 6379 # Service 内部端口
targetPort: 6379 # 容器端口(与 Deployment 一致)
nodePort: 30379 # 宿主机端口(30000-32767 范围内,可自定义)
selector:
app: redis-server # 关联上面的 Redis Pod
验证redis正常启动
[root@k8s-master ~/ruoyi-k8s]# kubectl get -f redis.yaml
NAME                        CAPACITY   ACCESS MODES   RECLAIM POLICY   STATUS   CLAIM                        STORAGECLASS   VOLUMEATTRIBUTESCLASS   REASON   AGE
persistentvolume/redis-pv   1Gi        RWO            Retain           Bound    ruoyi-cloud/redis-data-pvc                  <unset>                          5m56s

NAME                                   STATUS   VOLUME     CAPACITY   ACCESS MODES   STORAGECLASS   VOLUMEATTRIBUTESCLASS   AGE
persistentvolumeclaim/redis-data-pvc   Bound    redis-pv   1Gi        RWO                           <unset>                 5m56s

NAME                           READY   UP-TO-DATE   AVAILABLE   AGE
deployment.apps/redis-server   1/1     1            1           5m56s

NAME                            TYPE       CLUSTER-IP      EXTERNAL-IP   PORT(S)          AGE
service/redis-server-nodeport   NodePort   10.200.77.107   <none>        6379:30379/TCP   5m56s
3.5 安装MySQL
[root@k8s-master ~/ruoyi-k8s]# cat mysql.yaml
# 2. MySQL 静态 PV(hostPath 类型)
apiVersion: v1
kind: PersistentVolume
metadata:
  name: mysql-pv
  labels:
    app: mysql
spec:
  capacity:
    storage: 10Gi
  accessModes:
    - ReadWriteOnce
  persistentVolumeReclaimPolicy: Retain
  hostPath:
    path: /data/mysql
    type: DirectoryOrCreate
---
# 3. MySQL PVC
apiVersion: v1
kind: PersistentVolumeClaim
metadata:
  name: mysql-data-pvc
  namespace: ruoyi-cloud
spec:
  accessModes:
    - ReadWriteOnce
  resources:
    requests:
      storage: 10Gi
  selector:
    matchLabels:
      app: mysql
---
# 4. MySQL 配置文件(仅保留必要参数,可选)
apiVersion: v1
kind: ConfigMap
metadata:
  name: mysql-config
  namespace: ruoyi-cloud
data:
  my.cnf: |
    [mysqld]
    character-set-server=utf8mb4
    collation-server=utf8mb4_unicode_ci
    max_connections=1000
---
# 5. MySQL Deployment(无自动初始化)
apiVersion: apps/v1
kind: Deployment
metadata:
  name: mysql-server
  namespace: ruoyi-cloud
  labels:
    app: mysql-server
spec:
  replicas: 1
  selector:
    matchLabels:
      app: mysql-server
  template:
    metadata:
      labels:
        app: mysql-server
    spec:
      containers:
        - name: mysql
          image: mysql:8.0.42
          ports:
            - containerPort: 3306
          env:
            - name: MYSQL_ROOT_PASSWORD
              value: "root123"  # 你的 root 密码(与手动执行时一致)
          volumeMounts:
            - name: mysql-data
              mountPath: /var/lib/mysql  # 仅保留数据持久化挂载
            - name: mysql-config
              mountPath: /etc/mysql/conf.d/
              readOnly: true
          resources:
            requests:
              cpu: 500m
              memory: 1Gi
            limits:
              cpu: 1000m
              memory: 2Gi
          livenessProbe:
            exec:
              command: ["mysqladmin", "ping", "-h", "localhost", "-u", "root", "-p$(MYSQL_ROOT_PASSWORD)"]
            initialDelaySeconds: 30
            periodSeconds: 10
          readinessProbe:
            exec:
              command: ["mysql", "-h", "localhost", "-u", "root", "-p$(MYSQL_ROOT_PASSWORD)", "-e", "SELECT 1"]
            initialDelaySeconds: 10
            periodSeconds: 5
      volumes:
        - name: mysql-data
          persistentVolumeClaim:
            claimName: mysql-data-pvc
        - name: mysql-config
          configMap:
            name: mysql-config
---
# 6. MySQL Service(NodePort,方便外部连接)
apiVersion: v1
kind: Service
metadata:
  name: mysql-server-nodeport
  namespace: ruoyi-cloud
spec:
  type: NodePort
  ports:
    - port: 3306
      targetPort: 3306
      nodePort: 30306
  selector:
    app: mysql-server
测试MySQL
[root@k8s-master ~/ruoyi-k8s]# kubectl get po -n ruoyi-cloud
NAME                            READY   STATUS    RESTARTS   AGE
mysql-server-6984967dbb-cz75k   1/1     Running   0          32m
然后创建ruyi所需要用到的库
[root@k8s-master ~/ruoyi-k8s]# kubectl -n ruoyi-cloud exec -it mysql-server-6984967dbb-cz75k -- bash
bash-5.1# mysql -uroot -proot123
mysql: [Warning] Using a password on the command line interface can be insecure.
Welcome to the MySQL monitor.  Commands end with ; or \g.
Your MySQL connection id is 654
Server version: 8.0.42 MySQL Community Server - GPL

Copyright (c) 2000, 2025, Oracle and/or its affiliates.

Oracle is a registered trademark of Oracle Corporation and/or its
affiliates. Other names may be trademarks of their respective
owners.

Type 'help;' or '\h' for help. Type '\c' to clear the current input statement.

创建ry-cloud库
mysql> CREATE DATABASE `ry-cloud` CHARSET utf8mb4;
创建ry-config库
mysql> CREATE DATABASE `ry-config` CHARSET utf8mb4;
验证是否存在
mysql> show databases;
+--------------------+
| Database           |
+--------------------+
| information_schema |
| mysql              |
| performance_schema |
| ry-cloud           |
| ry-config          |
| sys                |
+--------------------+
6 rows in set (0.00 sec)
将sql脚本导入到对应的库中
[root@k8s-master ~/ruoyi-k8s]#kubectl cp ~/RuoYi-Cloud/sql/quartz.sql -n ruoyi-cloud mysql-server-6984967dbb-cz75k:/tmp
[root@k8s-master ~/ruoyi-k8s]#kubectl cp ~/RuoYi-Cloud/sql/ry_20250523.sql -n ruoyi-cloud mysql-server-6984967dbb-cz75k:/tmp
[root@k8s-master ~/ruoyi-k8s]#kubectl cp ~/RuoYi-Cloud/sql/ry_config_20250224.sql -n ruoyi-cloud mysql-server-6984967dbb-cz75k:/tmp

然后进入MySQL的pod进行sql导入

mysql -uroot -proot123 ry-config </tmp/ry_config_20250224.sql
mysql -uroot -proot123 ry-cloud </tmp/ry_20250523.sql
3.6 安装nacos
编写资源清单
[root@k8s-master ~/ruoyi-k8s]# cat nacos.yaml
apiVersion: apps/v1
kind: Deployment
metadata:
  name: nacos-server
  namespace: ruoyi-cloud
  labels:
    app: nacos-server
spec:
  replicas: 1
  selector:
    matchLabels:
      app: nacos-server
  template:
    metadata:
      labels:
        app: nacos-server
    spec:
      containers:
        - name: nacos-server
          image: nacos/nacos-server:v2.5.1
          ports:
            - containerPort: 8848  # HTTP端口
            - containerPort: 9848  # gRPC客户端端口
          env:
            - name: MODE
              value: "standalone"  # 单节点模式
            - name: PREFER_HOST_MODE
              value: "hostname"    # K8s环境推荐
            - name: NACOS_AUTH_ENABLE
              value: "true"         # 开启认证
            # 32位以上随机字符串的Base64编码(解码后为40位)
            - name: NACOS_AUTH_TOKEN
              value: "bmFjb3NfYXV0aF90b2tlbl8yMDI1X1JBTkRPTUNPTVBMRVNTX1N0cmluZ180MEJpdA=="
            - name: NACOS_AUTH_IDENTITY_KEY
              value: "nacos"
            - name: NACOS_AUTH_IDENTITY_VALUE
              value: "nacos"
            # MySQL连接配置
            - name: SPRING_DATASOURCE_PLATFORM
              value: "mysql"
            - name: MYSQL_SERVICE_HOST
              value: "mysql-server-nodeport"  # 同命名空间MySQL Service名称
            - name: MYSQL_SERVICE_PORT
              value: "3306"
            - name: MYSQL_SERVICE_DB_NAME
              value: "ry-config"  # 需提前创建的数据库名
            - name: MYSQL_SERVICE_USER
              value: "root"
            - name: MYSQL_SERVICE_PASSWORD
              value: "root123"
            - name: MYSQL_SERVICE_DB_PARAM
              value: "characterEncoding=utf8&connectTimeout=1000&socketTimeout=3000&autoReconnect=true&useUnicode=true&useSSL=false&serverTimezone=Asia/Shanghai&allowPublicKeyRetrieval=true"
          resources:
            requests:
              memory: "2Gi"
              cpu: "1"
            limits:
              memory: "4Gi"
              cpu: "2"
---
apiVersion: v1
kind: Service
metadata:
  name: nacos-server-nodeport
  namespace: ruoyi-cloud
  labels:
    app: nacos-server
spec:
  type: NodePort
  ports:
    - name: http
      port: 8848
      targetPort: 8848
      nodePort: 30848  # 外部访问端口
    - name: grpc
      port: 9848
      targetPort: 9848
      nodePort: 31848  # gRPC客户端端口
  selector:
    app: nacos-server
验证nacos
[root@k8s-master ~/ruoyi-k8s]# kubectl get po,svc -n ruoyi-cloud
NAME                                READY   STATUS    RESTARTS   AGE
pod/mysql-server-6984967dbb-cz75k   1/1     Running   0          38m
pod/nacos-server-65c6c954dc-j29hp   1/1     Running   0          10m
pod/redis-server-7698494c94-6s4z9   1/1     Running   0          38m

NAME                            TYPE       CLUSTER-IP       EXTERNAL-IP   PORT(S)                         AGE
service/mysql-server-nodeport   NodePort   10.200.249.115   <none>        3306:30306/TCP                  38m
service/nacos-server-nodeport   NodePort   10.200.84.75     <none>        8848:30848/TCP,9848:31848/TCP   38m
service/redis-server-nodeport   NodePort   10.200.183.52    <none>        6379:30379/TCP                  38m
访问nacos服务,默认开启鉴权,用户名和密码设置为: nacos/nacos
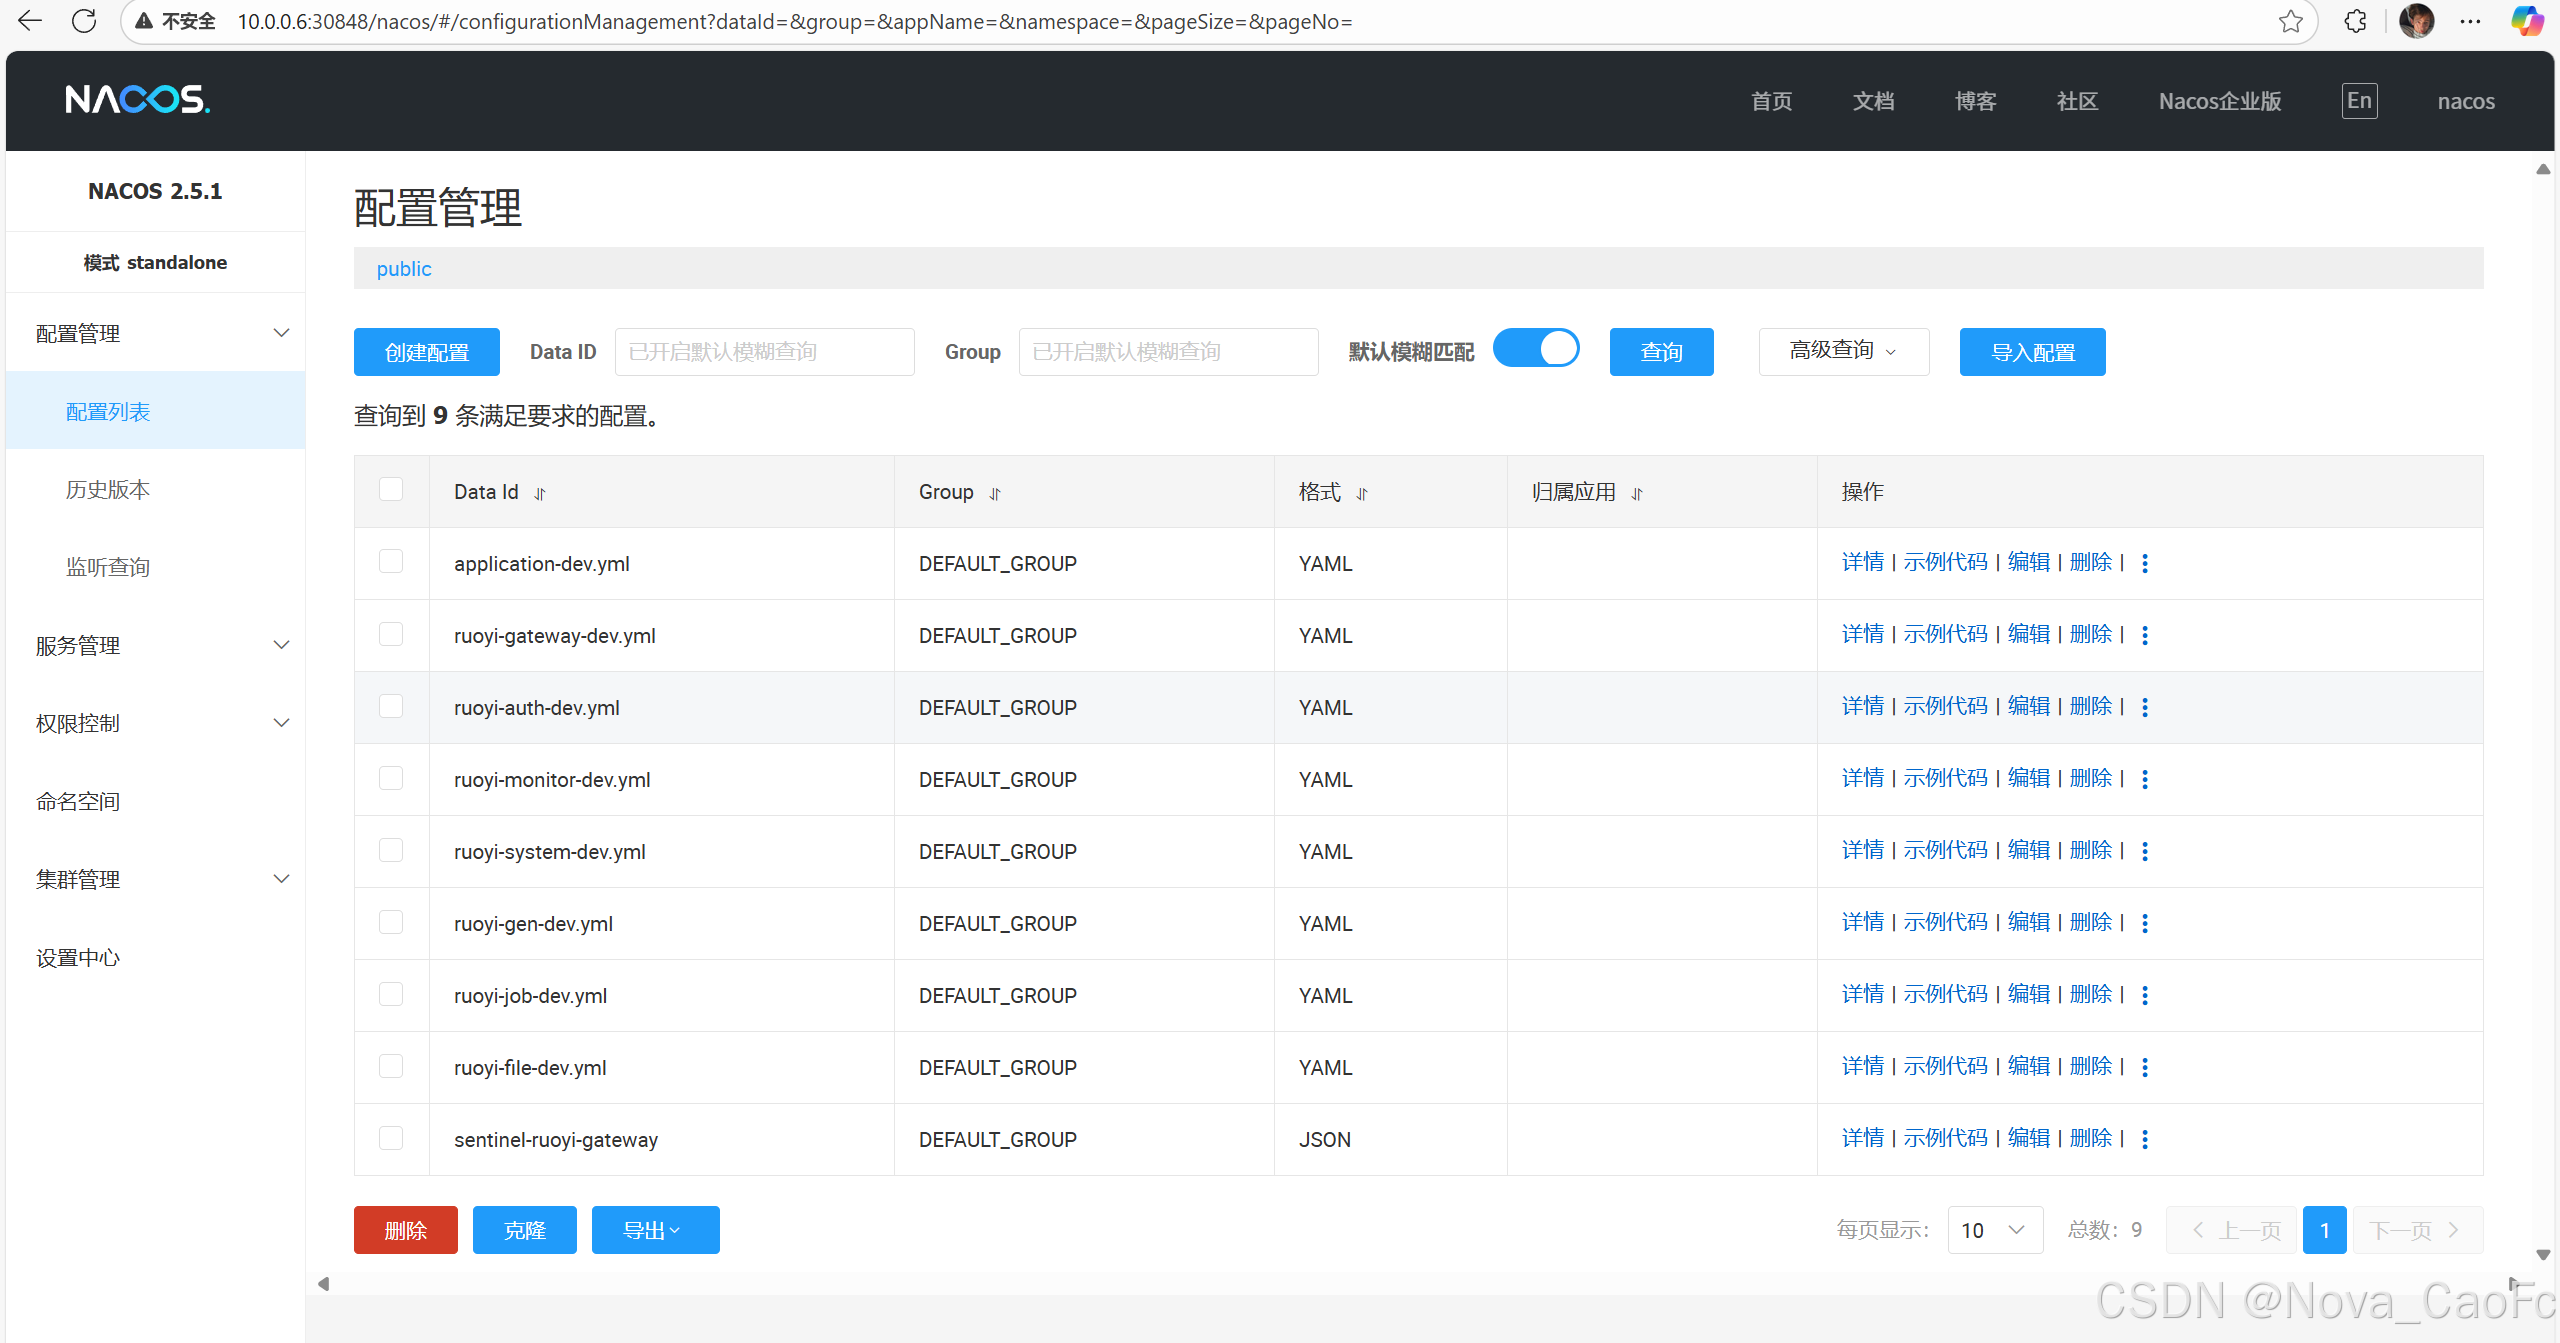
看到服务注册成功即可。
3.7 使用maven打包项目
[root@k8s-master ~/RuoYi-Cloud]# pwd
/root/RuoYi-Cloud
[root@k8s-master ~/RuoYi-Cloud]# mvn clean package -Dmaven.test.skip=true

[INFO] --- jar:3.4.1:jar (default-jar) @ ruoyi-common-sensitive ---
[INFO] Building jar: /root/RuoYi-Cloud/ruoyi-common/ruoyi-common-sensitive/target/ruoyi-common-sensitive-3.6.6.jar
[INFO] ------------------------------------------------------------------------
[INFO] Reactor Summary for ruoyi 3.6.6:
[INFO]
[INFO] ruoyi .............................................. SUCCESS [  2.379 s]
[INFO] ruoyi-common ....................................... SUCCESS [  0.002 s]
[INFO] ruoyi-common-core .................................. SUCCESS [ 21.979 s]
[INFO] ruoyi-api .......................................... SUCCESS [  0.003 s]
[INFO] ruoyi-api-system ................................... SUCCESS [  0.558 s]
[INFO] ruoyi-common-redis ................................. SUCCESS [  1.311 s]
[INFO] ruoyi-common-security .............................. SUCCESS [  0.469 s]
[INFO] ruoyi-auth ......................................... SUCCESS [  9.626 s]
[INFO] ruoyi-gateway ...................................... SUCCESS [  3.826 s]
[INFO] ruoyi-visual ....................................... SUCCESS [  0.003 s]
[INFO] ruoyi-visual-monitor ............................... SUCCESS [  1.551 s]
[INFO] ruoyi-common-datasource ............................ SUCCESS [  1.522 s]
[INFO] ruoyi-common-datascope ............................. SUCCESS [  0.126 s]
[INFO] ruoyi-common-log ................................... SUCCESS [  0.166 s]
[INFO] ruoyi-common-swagger ............................... SUCCESS [  0.273 s]
[INFO] ruoyi-modules ...................................... SUCCESS [  0.002 s]
[INFO] ruoyi-modules-system ............................... SUCCESS [  1.149 s]
[INFO] ruoyi-modules-gen .................................. SUCCESS [  0.834 s]
[INFO] ruoyi-modules-job .................................. SUCCESS [  0.918 s]
[INFO] ruoyi-modules-file ................................. SUCCESS [  2.527 s]
[INFO] ruoyi-common-seata ................................. SUCCESS [  5.010 s]
[INFO] ruoyi-common-sensitive ............................. SUCCESS [  0.124 s]
[INFO] ------------------------------------------------------------------------
[INFO] BUILD SUCCESS
[INFO] ------------------------------------------------------------------------
[INFO] Total time:  58.906 s
[INFO] Finished at: 2025-08-27T12:08:23+08:00
[INFO] ------------------------------------------------------------------------
[root@k8s-master ~/RuoYi-Cloud]#
八、使用K8S部署Ruoyi组件
1. 部署ruoyi-system服务
1.1.修改ruoyi-system的nacos配置
redis连接

MySQL连接

修改完成点击发布。
1.2. 编写Dockerfile启动
[root@k8s-master ~]# mkdir {system,monitor,auth,gateway}
编写谁的镜像就进入对应的目录中即可。
[root@k8s-master ~/system]# cat Dockerfile
# 基础镜像
FROM openjdk:8u265

# 维护者信息
LABEL maintainer="Nova_CaoFC"

# 设置工作目录
WORKDIR /app

# 创建日志目录并设置权限
RUN mkdir -p /var/log && chmod 777 /var/log

# 复制本地构建好的 jar 包到容器内
COPY ruoyi-modules-system.jar /app/ruoyi-system.jar

# 暴露应用端口
EXPOSE 9201

# 启动命令(整合你提供的参数,优化格式)
CMD ["java", \
  "-Dspring.profiles.active=dev", \
  "-Dspring.cloud.nacos.config.file-extension=yml", \
  "-Dspring.cloud.nacos.discovery.server-addr=10.0.0.6:30848", \
  "-Dspring.cloud.nacos.config.server-addr=10.0.0.6:30848", \
  "-Dspring.cloud.nacos.config.username=nacos", \
  "-Dspring.cloud.nacos.config.password=nacos", \
  "-Dspring.cloud.nacos.discovery.username=nacos", \
  "-Dspring.cloud.nacos.discovery.password=nacos", \
  "-jar", "/app/ruoyi-system.jar"]
然后构建
[root@k8s-master ~/system]# ll
total 608032
-rw-r--r-- 1 root root       951 Aug 27 12:25 Dockerfile
-rw-r--r-- 1 root root 522336768 Aug 19 14:09 openjdk.tar
-rw-r--r-- 1 root root 100273192 Aug 27 12:08 ruoyi-modules-system.jar
[root@k8s-master ~/system]# docker build -t ruoyi-system:v2 .
[+] Building 0.1s (9/9) FINISHED                                                                                                              docker:default
 => [internal] load build definition from Dockerfile                                                                                                    0.0s
 => => transferring dockerfile: 990B                                                                                                                    0.0s
 => [internal] load metadata for docker.io/library/openjdk:8u265                                                                                        0.0s
 => [internal] load .dockerignore                                                                                                                       0.0s
 => => transferring context: 2B                                                                                                                         0.0s
 => [1/4] FROM docker.io/library/openjdk:8u265                                                                                                          0.0s
 => [internal] load build context                                                                                                                       0.0s
 => => transferring context: 48B                                                                                                                        0.0s
 => CACHED [2/4] WORKDIR /app                                                                                                                           0.0s
 => CACHED [3/4] RUN mkdir -p /var/log && chmod 777 /var/log                                                                                            0.0s
 => CACHED [4/4] COPY ruoyi-modules-system.jar /app/ruoyi-system.jar                                                                                    0.0s
 => exporting to image                                                                                                                                  0.0s
 => => exporting layers                                                                                                                                 0.0s
 => => writing image sha256:0aef69361f0754cdf4a91abd40aa91a0bb99c5d46e7ae178a8f3ef116b41530a                                                            0.0s
 => => naming to docker.io/library/ruoyi-system:v1                                                                                                      0.0s
1.3. 使用K8S启动system
[root@k8s-master ~/ruoyi-k8s]# cat ruoyi-system.yaml
apiVersion: apps/v1
kind: Deployment
metadata:
  name: ruoyi-system
  namespace: ruoyi-cloud
  labels:
    app: ruoyi-system
spec:
  replicas: 1
  selector:
    matchLabels:
      app: ruoyi-system
  template:
    metadata:
      labels:
        app: ruoyi-system
    spec:
      nodeName: k8s-master   # 固定调度到 master 节点(可按需去掉)
      containers:
      - name: ruoyi-system
        image: ruoyi-system:v1
        imagePullPolicy: IfNotPresent
        ports:
        - containerPort: 9201
        resources:
          limits:
            cpu: "1"
            memory: "1Gi"
          requests:
            cpu: "500m"
            memory: "512Mi"
        env:
        - name: TZ
          value: "Asia/Shanghai"
        # 如果仍想挂载日志目录,可以保留。否则删除 volumeMounts/volumes
        volumeMounts:
        - name: log-volume
          mountPath: /var/log
      volumes:
      - name: log-volume
        emptyDir: {}

---
apiVersion: v1
kind: Service
metadata:
  name: ruoyi-system-service
  namespace: ruoyi-cloud
spec:
  selector:
    app: ruoyi-system
  ports:
  - port: 9201       # Service 暴露的端口
    targetPort: 9201 # Pod 内部容器监听的端口
  type: ClusterIP    # 内部访问,按需可改成 NodePort / LoadBalancer
查看状态
[root@k8s-master ~/ruoyi-k8s]# kubectl logs -f  -n ruoyi-cloud ruoyi-system-5d78f6fd8-8nhlj
12:47:10.001 [main] INFO  c.a.n.c.e.SearchableProperties - [sortPropertySourceDefaultOrder,197] - properties search order:PROPERTIES->JVM->ENV->DEFAULT_SETTING
12:47:10.287 [background-preinit] INFO  o.h.v.i.util.Version - [<clinit>,21] - HV000001: Hibernate Validator 6.2.5.Final
Spring Boot Version: 2.7.18
Spring Application Name: ruoyi-system
                            _                           _
                           (_)                         | |
 _ __  _   _   ___   _   _  _  ______  ___  _   _  ___ | |_   ___  _ __ ___
| '__|| | | | / _ \ | | | || ||______|/ __|| | | |/ __|| __| / _ \| '_ ` _ \
| |   | |_| || (_) || |_| || |        \__ \| |_| |\__ \| |_ |  __/| | | | | |
|_|    \__,_| \___/  \__, ||_|        |___/ \__, ||___/ \__| \___||_| |_| |_|
                      __/ |                  __/ |
                     |___/                  |___/
12:47:12.679 [main] INFO  c.a.n.p.a.s.c.ClientAuthPluginManager - [init,56] - [ClientAuthPluginManager] Load ClientAuthService com.alibaba.nacos.client.auth.impl.NacosClientAuthServiceImpl success.
12:47:12.679 [main] INFO  c.a.n.p.a.s.c.ClientAuthPluginManager - [init,56] - [ClientAuthPluginManager] Load ClientAuthService com.alibaba.nacos.client.auth.ram.RamClientAuthServiceImpl success.
12:47:15.008 [main] WARN  c.a.c.n.c.NacosPropertySourceBuilder - [loadNacosData,97] - Ignore the empty nacos configuration and get it based on dataId[ruoyi-system] & group[DEFAULT_GROUP]
12:47:15.018 [main] WARN  c.a.c.n.c.NacosPropertySourceBuilder - [loadNacosData,97] - Ignore the empty nacos configuration and get it based on dataId[ruoyi-system.yml] & group[DEFAULT_GROUP]
12:47:15.077 [main] INFO  c.r.s.RuoYiSystemApplication - [logStartupProfileInfo,638] - The following 1 profile is active: "dev"
12:47:23.490 [main] INFO  o.a.c.h.Http11NioProtocol - [log,168] - Initializing ProtocolHandler ["http-nio-9201"]
12:47:23.496 [main] INFO  o.a.c.c.StandardService - [log,168] - Starting service [Tomcat]
12:47:23.497 [main] INFO  o.a.c.c.StandardEngine - [log,168] - Starting Servlet engine: [Apache Tomcat/9.0.108]
12:47:23.585 [main] WARN  o.a.c.w.DirResourceSet - [log,168] - Disabled the global canonical file name cache to protect against CVE-2024-56337 when starting the WebResourceSet at [/tmp/tomcat-docbase.9201.1222418877152943862] which is part of the web application []
12:47:23.877 [main] INFO  o.a.c.c.C.[.[.[/] - [log,168] - Initializing Spring embedded WebApplicationContext
12:47:27.374 [main] INFO  c.a.d.p.DruidDataSource - [init,1002] - {dataSource-1,master} inited
12:47:27.376 [main] INFO  c.b.d.d.DynamicRoutingDataSource - [addDataSource,158] - dynamic-datasource - add a datasource named [master] success
12:47:27.376 [main] INFO  c.b.d.d.DynamicRoutingDataSource - [afterPropertiesSet,241] - dynamic-datasource initial loaded [1] datasource,primary datasource named [master]
12:47:37.802 [main] INFO  c.a.c.s.SentinelWebMvcConfigurer - [addInterceptors,52] - [Sentinel Starter] register SentinelWebInterceptor with urlPatterns: [/**].
12:47:44.976 [main] WARN  o.s.c.l.c.LoadBalancerCacheAutoConfiguration$LoadBalancerCaffeineWarnLogger - [logWarning,83] - Spring Cloud LoadBalancer is currently working with the default cache. While this cache implementation is useful for development and tests, it's recommended to use Caffeine cache in production.You can switch to using Caffeine cache, by adding it and org.springframework.cache.caffeine.CaffeineCacheManager to the classpath.
12:47:45.192 [main] INFO  o.a.c.h.Http11NioProtocol - [log,168] - Starting ProtocolHandler ["http-nio-9201"]
12:47:45.303 [main] INFO  c.a.n.p.a.s.c.ClientAuthPluginManager - [init,56] - [ClientAuthPluginManager] Load ClientAuthService com.alibaba.nacos.client.auth.impl.NacosClientAuthServiceImpl success.
12:47:45.303 [main] INFO  c.a.n.p.a.s.c.ClientAuthPluginManager - [init,56] - [ClientAuthPluginManager] Load ClientAuthService com.alibaba.nacos.client.auth.ram.RamClientAuthServiceImpl success.
12:47:45.607 [main] INFO  c.a.c.n.r.NacosServiceRegistry - [register,76] - nacos registry, DEFAULT_GROUP ruoyi-system 10.100.235.217:9201 register finished
12:47:45.690 [main] INFO  c.r.s.RuoYiSystemApplication - [logStarted,61] - Started RuoYiSystemApplication in 36.666 seconds (JVM running for 38.968)
12:47:45.778 [main] INFO  c.a.c.n.r.NacosContextRefresher - [registerNacosListener,141] - [Nacos Config] Listening config: dataId=ruoyi-system, group=DEFAULT_GROUP
12:47:45.779 [main] INFO  c.a.c.n.r.NacosContextRefresher - [registerNacosListener,141] - [Nacos Config] Listening config: dataId=ruoyi-system.yml, group=DEFAULT_GROUP
12:47:45.780 [main] INFO  c.a.c.n.r.NacosContextRefresher - [registerNacosListener,141] - [Nacos Config] Listening config: dataId=ruoyi-system-dev.yml, group=DEFAULT_GROUP
(♥◠‿◠)ノ゙  系统模块启动成功   ლ(´ڡ`ლ)゙
 .-------.       ____     __
 |  _ _   \      \   \   /  /
 | ( ' )  |       \  _. /  '
 |(_ o _) /        _( )_ .'
 | (_,_).' __  ___(_ o _)'
 |  |\ \  |  ||   |(_,_)'
 |  | \ `'   /|   `-'  /
 |  |  \    /  \      /
 ''-'   `'-'    `-..-'
没问题,然后查看nacos

2. 部署ruoyi-gateway服务
2.1 修改ruoyi-gatewaynacos配置

2.2 编写Dockerfile启动
[root@k8s-master ~]# cd gateway/
[root@k8s-master ~/gateway]# ll
total 0
[root@k8s-master ~/gateway]# cp -a /root/RuoYi-Cloud/ruoyi-gateway/target/ruoyi-gateway.jar .
[root@k8s-master ~/gateway]# ll
total 89788
-rw-r--r-- 1 root root 91940932 Aug 27 12:08 ruoyi-gateway.jar
[root@k8s-master ~/gateway]# cp -a ../system/Dockerfile .
[root@k8s-master ~/gateway]# ll
total 89792
-rw-r--r-- 1 root root      867 Aug 27 12:46 Dockerfile
-rw-r--r-- 1 root root 91940932 Aug 27 12:08 ruoyi-gateway.jar
[root@k8s-master ~/gateway]# vim Dockerfile
[root@k8s-master ~/gateway]# cat Dockerfile
# 基础镜像
FROM openjdk:8u265

# 维护者信息
LABEL maintainer="Nova_CaoFC"

# 设置工作目录
WORKDIR /app

# 创建日志目录并设置权限
RUN mkdir -p /var/log && chmod 777 /var/log

# 复制本地构建好的 jar 包到容器内
COPY ruoyi-gateway.jar /app/ruoyi-gateway.jar

# 暴露应用端口
EXPOSE 8080

# 启动命令(整合你提供的参数,优化格式)
CMD ["java", \
  "-Dspring.profiles.active=dev", \
  "-Dspring.cloud.nacos.config.file-extension=yml", \
  "-Dspring.cloud.nacos.discovery.server-addr=10.0.0.6:30848", \
  "-Dspring.cloud.nacos.config.server-addr=10.0.0.6:30848", \
  "-Dspring.cloud.nacos.config.username=nacos", \
  "-Dspring.cloud.nacos.config.password=nacos", \
  "-Dspring.cloud.nacos.discovery.username=nacos", \
  "-Dspring.cloud.nacos.discovery.password=nacos", \
  "-jar", "/app/ruoyi-gateway.jar"]
使用docker构建
[root@k8s-master ~/gateway]# docker build -t ruoyi-gateway:v1 .
[+] Building 1.0s (9/9) FINISHED                                                                                                              docker:default
 => [internal] load build definition from Dockerfile                                                                                                    0.0s
 => => transferring dockerfile: 901B                                                                                                                    0.0s
 => [internal] load metadata for docker.io/library/openjdk:8u265                                                                                        0.0s
 => [internal] load .dockerignore                                                                                                                       0.0s
 => => transferring context: 2B                                                                                                                         0.0s
 => [1/4] FROM docker.io/library/openjdk:8u265                                                                                                          0.0s
 => [internal] load build context                                                                                                                       0.4s
 => => transferring context: 91.96MB                                                                                                                    0.4s
 => CACHED [2/4] WORKDIR /app                                                                                                                           0.0s
 => CACHED [3/4] RUN mkdir -p /var/log && chmod 777 /var/log                                                                                            0.0s
 => [4/4] COPY ruoyi-gateway.jar /app/ruoyi-gateway.jar                                                                                                 0.4s
 => exporting to image                                                                                                                                  0.2s
 => => exporting layers                                                                                                                                 0.2s
 => => writing image sha256:f368593ec485bf1fb6771b3d319d607a6822fe1663ef069cffd2efd1b600aea7                                                            0.0s
 => => naming to docker.io/library/ruoyi-gateway:v1                                                                                                     0.0s
2.3 使用K8S启动gateway
[root@k8s-master ~/ruoyi-k8s]# cat ruoyi-gateway.yaml
apiVersion: apps/v1
kind: Deployment
metadata:
  name: ruoyi-gateway
  namespace: ruoyi-cloud
  labels:
    app: ruoyi-gateway
spec:
  replicas: 1
  selector:
    matchLabels:
      app: ruoyi-gateway
  template:
    metadata:
      labels:
        app: ruoyi-gateway
    spec:
      nodeName: k8s-master   # 固定调度到 master 节点(可按需去掉)
      containers:
      - name: ruoyi-gateway
        image: ruoyi-gateway:v1
        imagePullPolicy: IfNotPresent
        ports:
        - containerPort: 8080   # ⚠️ 改成和 Dockerfile 里 EXPOSE 一致
        resources:
          limits:
            cpu: "1"
            memory: "1Gi"
          requests:
            cpu: "500m"
            memory: "512Mi"
        env:
        - name: TZ
          value: "Asia/Shanghai"
        # 如果仍想挂载日志目录,可以保留。否则删除 volumeMounts/volumes
        volumeMounts:
        - name: log-volume
          mountPath: /var/log
      volumes:
      - name: log-volume
        emptyDir: {}

---
apiVersion: v1
kind: Service
metadata:
  name: ruoyi-gateway-service
  namespace: ruoyi-cloud
spec:
  selector:
    app: ruoyi-gateway
  ports:
  - port: 8080       # Service 暴露的端口
    targetPort: 8080 # Pod 内部容器监听的端口
  type: ClusterIP    # 内部访问,按需可改成 NodePort / LoadBalancer
查看日志
[root@k8s-master ~/ruoyi-k8s]# kubectl -n ruoyi-cloud logs -f ruoyi-gateway-6c4cf8f86-6kpf5
12:54:55.006 [main] INFO  c.a.n.c.e.SearchableProperties - [sortPropertySourceDefaultOrder,197] - properties search order:PROPERTIES->JVM->ENV->DEFAULT_SETTING
12:54:55.285 [background-preinit] INFO  o.h.v.i.util.Version - [<clinit>,21] - HV000001: Hibernate Validator 6.2.5.Final
Spring Boot Version: 2.7.18
Spring Application Name: ruoyi-gateway
                            _                        _
                           (_)                      | |
 _ __  _   _   ___   _   _  _  ______   __ _   __ _ | |_   ___ __      __  __ _  _   _
| '__|| | | | / _ \ | | | || ||______| / _` | / _` || __| / _ \\ \ /\ / / / _` || | | |
| |   | |_| || (_) || |_| || |        | (_| || (_| || |_ |  __/ \ V  V / | (_| || |_| |
|_|    \__,_| \___/  \__, ||_|         \__, | \__,_| \__| \___|  \_/\_/   \__,_| \__, |
                      __/ |             __/ |                                     __/ |
                     |___/             |___/                                     |___/
12:54:57.783 [main] INFO  c.a.n.p.a.s.c.ClientAuthPluginManager - [init,56] - [ClientAuthPluginManager] Load ClientAuthService com.alibaba.nacos.client.auth.impl.NacosClientAuthServiceImpl success.
12:54:57.783 [main] INFO  c.a.n.p.a.s.c.ClientAuthPluginManager - [init,56] - [ClientAuthPluginManager] Load ClientAuthService com.alibaba.nacos.client.auth.ram.RamClientAuthServiceImpl success.
12:55:00.190 [main] WARN  c.a.c.n.c.NacosPropertySourceBuilder - [loadNacosData,97] - Ignore the empty nacos configuration and get it based on dataId[ruoyi-gateway] & group[DEFAULT_GROUP]
12:55:00.198 [main] WARN  c.a.c.n.c.NacosPropertySourceBuilder - [loadNacosData,97] - Ignore the empty nacos configuration and get it based on dataId[ruoyi-gateway.yml] & group[DEFAULT_GROUP]
12:55:00.234 [main] INFO  c.r.g.RuoYiGatewayApplication - [logStartupProfileInfo,638] - The following 1 profile is active: "dev"
12:55:12.295 [main] INFO  c.a.c.s.g.s.SentinelSCGAutoConfiguration - [sentinelGatewayFilter,144] - [Sentinel SpringCloudGateway] register SentinelGatewayFilter with order: -2147483648
12:55:17.288 [main] INFO  c.a.c.s.g.s.SentinelSCGAutoConfiguration - [sentinelGatewayBlockExceptionHandler,134] - [Sentinel SpringCloudGateway] register SentinelGatewayBlockExceptionHandler
INFO: Sentinel log output type is: file
INFO: Sentinel log charset is: utf-8
INFO: Sentinel log base directory is: /root/logs/csp/
INFO: Sentinel log name use pid is: false
INFO: Sentinel log level is: INFO
12:55:18.987 [main] WARN  o.s.c.l.c.LoadBalancerCacheAutoConfiguration$LoadBalancerCaffeineWarnLogger - [logWarning,83] - Spring Cloud LoadBalancer is currently working with the default cache. While this cache implementation is useful for development and tests, it's recommended to use Caffeine cache in production.You can switch to using Caffeine cache, by adding it and org.springframework.cache.caffeine.CaffeineCacheManager to the classpath.
12:55:19.197 [main] INFO  c.a.n.p.a.s.c.ClientAuthPluginManager - [init,56] - [ClientAuthPluginManager] Load ClientAuthService com.alibaba.nacos.client.auth.impl.NacosClientAuthServiceImpl success.
12:55:19.197 [main] INFO  c.a.n.p.a.s.c.ClientAuthPluginManager - [init,56] - [ClientAuthPluginManager] Load ClientAuthService com.alibaba.nacos.client.auth.ram.RamClientAuthServiceImpl success.
12:55:19.782 [main] INFO  c.a.c.s.d.c.SentinelConverter - [convert,79] - converter can not convert rules because source is empty
12:55:20.192 [main] INFO  c.a.n.p.a.s.c.ClientAuthPluginManager - [init,56] - [ClientAuthPluginManager] Load ClientAuthService com.alibaba.nacos.client.auth.impl.NacosClientAuthServiceImpl success.
12:55:20.193 [main] INFO  c.a.n.p.a.s.c.ClientAuthPluginManager - [init,56] - [ClientAuthPluginManager] Load ClientAuthService com.alibaba.nacos.client.auth.ram.RamClientAuthServiceImpl success.
12:55:20.498 [main] INFO  c.a.c.n.r.NacosServiceRegistry - [register,76] - nacos registry, DEFAULT_GROUP ruoyi-gateway 10.100.235.218:8080 register finished
12:55:21.389 [main] INFO  c.a.c.n.d.NacosDiscoveryHeartBeatPublisher - [start,66] - Start nacos heartBeat task scheduler.
12:55:21.595 [main] INFO  c.r.g.RuoYiGatewayApplication - [logStarted,61] - Started RuoYiGatewayApplication in 27.797 seconds (JVM running for 30.031)
12:55:21.688 [main] INFO  c.a.c.n.r.NacosContextRefresher - [registerNacosListener,141] - [Nacos Config] Listening config: dataId=ruoyi-gateway, group=DEFAULT_GROUP
12:55:21.689 [main] INFO  c.a.c.n.r.NacosContextRefresher - [registerNacosListener,141] - [Nacos Config] Listening config: dataId=ruoyi-gateway.yml, group=DEFAULT_GROUP
12:55:21.691 [main] INFO  c.a.c.n.r.NacosContextRefresher - [registerNacosListener,141] - [Nacos Config] Listening config: dataId=ruoyi-gateway-dev.yml, group=DEFAULT_GROUP
(♥◠‿◠)ノ゙  若依网关启动成功   ლ(´ڡ`ლ)゙
 .-------.       ____     __
 |  _ _   \      \   \   /  /
 | ( ' )  |       \  _. /  '
 |(_ o _) /        _( )_ .'
 | (_,_).' __  ___(_ o _)'
 |  |\ \  |  ||   |(_,_)'
 |  | \ `'   /|   `-'  /
 |  |  \    /  \      /
 ''-'   `'-'    `-..-'
3. 部署ruoyi-auth服务
3.1 修改ruoyi-auth的nacos配置

3.2 编写Dockerfile启动
[root@k8s-master ~/auth]# cat Dockerfile
# 基础镜像
FROM openjdk:8u265

# 维护者信息
LABEL maintainer="Nova_CaoFC"

# 设置工作目录
WORKDIR /app

# 创建日志目录并设置权限
RUN mkdir -p /var/log && chmod 777 /var/log

# 复制本地构建好的 jar 包到容器内
COPY ruoyi-auth.jar /app/ruoyi-auth.jar

# 暴露应用端口
EXPOSE 9200

# 启动命令(整合你提供的参数,优化格式)
CMD ["java", \
  "-Dspring.profiles.active=dev", \
  "-Dspring.cloud.nacos.config.file-extension=yml", \
  "-Dspring.cloud.nacos.discovery.server-addr=10.0.0.6:30848", \
  "-Dspring.cloud.nacos.config.server-addr=10.0.0.6:30848", \
  "-Dspring.cloud.nacos.config.username=nacos", \
  "-Dspring.cloud.nacos.config.password=nacos", \
  "-Dspring.cloud.nacos.discovery.username=nacos", \
  "-Dspring.cloud.nacos.discovery.password=nacos", \
  "-jar", "/app/ruoyi-auth.jar"]
[root@k8s-master ~/auth]# docker build -t ruoyi-auth:v1 .
[+] Building 1.0s (9/9) FINISHED                                                                                                              docker:default
 => [internal] load build definition from Dockerfile                                                                                                    0.0s
 => => transferring dockerfile: 892B                                                                                                                    0.0s
 => [internal] load metadata for docker.io/library/openjdk:8u265                                                                                        0.0s
 => [internal] load .dockerignore                                                                                                                       0.0s
 => => transferring context: 2B                                                                                                                         0.0s
 => [1/4] FROM docker.io/library/openjdk:8u265                                                                                                          0.0s
 => [internal] load build context                                                                                                                       0.4s
 => => transferring context: 87.05MB                                                                                                                    0.4s
 => CACHED [2/4] WORKDIR /app                                                                                                                           0.0s
 => CACHED [3/4] RUN mkdir -p /var/log && chmod 777 /var/log                                                                                            0.0s
 => [4/4] COPY ruoyi-auth.jar /app/ruoyi-auth.jar                                                                                                       0.3s
 => exporting to image                                                                                                                                  0.2s
 => => exporting layers                                                                                                                                 0.1s
 => => writing image sha256:de4b664bf81e32394e04daa855cef0adaf6f5aca7e21f8f35fdd9541733739e2                                                            0.0s
 => => naming to docker.io/library/ruoyi-auth:v1                                                                                                        0.0s
3.3 使用K8S启动auth
[root@k8s-master ~/ruoyi-k8s]# cat ruoyi-auth.yaml
apiVersion: apps/v1
kind: Deployment
metadata:
  name: ruoyi-auth
  namespace: ruoyi-cloud
  labels:
    app: ruoyi-auth
spec:
  replicas: 1
  selector:
    matchLabels:
      app: ruoyi-auth
  template:
    metadata:
      labels:
        app: ruoyi-auth
    spec:
      nodeName: k8s-master   # 固定调度到 master 节点(可按需去掉)
      containers:
      - name: ruoyi-auth
        image: ruoyi-auth:v1
        imagePullPolicy: IfNotPresent
        ports:
        - containerPort: 9200   # ⚠️ 改成和 Dockerfile 里 EXPOSE 一致
        resources:
          limits:
            cpu: "1"
            memory: "1Gi"
          requests:
            cpu: "500m"
            memory: "512Mi"
        env:
        - name: TZ
          value: "Asia/Shanghai"
        # 如果仍想挂载日志目录,可以保留。否则删除 volumeMounts/volumes
        volumeMounts:
        - name: log-volume
          mountPath: /var/log
      volumes:
      - name: log-volume
        emptyDir: {}

---
apiVersion: v1
kind: Service
metadata:
  name: ruoyi-auth-service
  namespace: ruoyi-cloud
spec:
  selector:
    app: ruoyi-auth
  ports:
  - port: 9200       # Service 暴露的端口
    targetPort: 9200 # Pod 内部容器监听的端口
  type: ClusterIP    # 内部访问,按需可改成 NodePort / LoadBalancer
查看日志
[root@k8s-master ~/ruoyi-k8s]# kubectl -n ruoyi-cloud  logs -f ruoyi-auth-65d9bcb86c-jp6g5
13:00:04.791 [main] INFO  c.a.n.c.e.SearchableProperties - [sortPropertySourceDefaultOrder,197] - properties search order:PROPERTIES->JVM->ENV->DEFAULT_SETTING
13:00:05.081 [background-preinit] INFO  o.h.v.i.util.Version - [<clinit>,21] - HV000001: Hibernate Validator 6.2.5.Final
Spring Boot Version: 2.7.18
Spring Application Name: ruoyi-auth
                            _                        _    _
                           (_)                      | |  | |
 _ __  _   _   ___   _   _  _  ______   __ _  _   _ | |_ | |__
| '__|| | | | / _ \ | | | || ||______| / _` || | | || __|| '_ \
| |   | |_| || (_) || |_| || |        | (_| || |_| || |_ | | | |
|_|    \__,_| \___/  \__, ||_|         \__,_| \__,_| \__||_| |_|
                      __/ |
                     |___/
13:00:07.614 [main] INFO  c.a.n.p.a.s.c.ClientAuthPluginManager - [init,56] - [ClientAuthPluginManager] Load ClientAuthService com.alibaba.nacos.client.auth.impl.NacosClientAuthServiceImpl success.
13:00:07.615 [main] INFO  c.a.n.p.a.s.c.ClientAuthPluginManager - [init,56] - [ClientAuthPluginManager] Load ClientAuthService com.alibaba.nacos.client.auth.ram.RamClientAuthServiceImpl success.
13:00:10.290 [main] WARN  c.a.c.n.c.NacosPropertySourceBuilder - [loadNacosData,97] - Ignore the empty nacos configuration and get it based on dataId[ruoyi-auth] & group[DEFAULT_GROUP]
13:00:10.301 [main] WARN  c.a.c.n.c.NacosPropertySourceBuilder - [loadNacosData,97] - Ignore the empty nacos configuration and get it based on dataId[ruoyi-auth.yml] & group[DEFAULT_GROUP]
13:00:10.337 [main] INFO  c.r.a.RuoYiAuthApplication - [logStartupProfileInfo,638] - The following 1 profile is active: "dev"
13:00:15.777 [main] INFO  o.a.c.h.Http11NioProtocol - [log,168] - Initializing ProtocolHandler ["http-nio-9200"]
13:00:15.781 [main] INFO  o.a.c.c.StandardService - [log,168] - Starting service [Tomcat]
13:00:15.782 [main] INFO  o.a.c.c.StandardEngine - [log,168] - Starting Servlet engine: [Apache Tomcat/9.0.108]
13:00:15.812 [main] WARN  o.a.c.w.DirResourceSet - [log,168] - Disabled the global canonical file name cache to protect against CVE-2024-56337 when starting the WebResourceSet at [/tmp/tomcat-docbase.9200.983698844609416763] which is part of the web application []
13:00:16.003 [main] INFO  o.a.c.c.C.[.[.[/] - [log,168] - Initializing Spring embedded WebApplicationContext
13:00:21.087 [main] INFO  c.a.c.s.SentinelWebMvcConfigurer - [addInterceptors,52] - [Sentinel Starter] register SentinelWebInterceptor with urlPatterns: [/**].
13:00:24.183 [main] WARN  o.s.c.l.c.LoadBalancerCacheAutoConfiguration$LoadBalancerCaffeineWarnLogger - [logWarning,83] - Spring Cloud LoadBalancer is currently working with the default cache. While this cache implementation is useful for development and tests, it's recommended to use Caffeine cache in production.You can switch to using Caffeine cache, by adding it and org.springframework.cache.caffeine.CaffeineCacheManager to the classpath.
13:00:24.475 [main] INFO  o.a.c.h.Http11NioProtocol - [log,168] - Starting ProtocolHandler ["http-nio-9200"]
13:00:24.584 [main] INFO  c.a.n.p.a.s.c.ClientAuthPluginManager - [init,56] - [ClientAuthPluginManager] Load ClientAuthService com.alibaba.nacos.client.auth.impl.NacosClientAuthServiceImpl success.
13:00:24.585 [main] INFO  c.a.n.p.a.s.c.ClientAuthPluginManager - [init,56] - [ClientAuthPluginManager] Load ClientAuthService com.alibaba.nacos.client.auth.ram.RamClientAuthServiceImpl success.
13:00:24.890 [main] INFO  c.a.c.n.r.NacosServiceRegistry - [register,76] - nacos registry, DEFAULT_GROUP ruoyi-auth 10.100.235.219:9200 register finished
13:00:24.980 [main] INFO  c.r.a.RuoYiAuthApplication - [logStarted,61] - Started RuoYiAuthApplication in 21.467 seconds (JVM running for 23.667)
13:00:25.179 [main] INFO  c.a.c.n.r.NacosContextRefresher - [registerNacosListener,141] - [Nacos Config] Listening config: dataId=ruoyi-auth.yml, group=DEFAULT_GROUP
13:00:25.183 [main] INFO  c.a.c.n.r.NacosContextRefresher - [registerNacosListener,141] - [Nacos Config] Listening config: dataId=ruoyi-auth-dev.yml, group=DEFAULT_GROUP
13:00:25.185 [main] INFO  c.a.c.n.r.NacosContextRefresher - [registerNacosListener,141] - [Nacos Config] Listening config: dataId=ruoyi-auth, group=DEFAULT_GROUP
(♥◠‿◠)ノ゙  认证授权中心启动成功   ლ(´ڡ`ლ)゙
 .-------.       ____     __
 |  _ _   \      \   \   /  /
 | ( ' )  |       \  _. /  '
 |(_ o _) /        _( )_ .'
 | (_,_).' __  ___(_ o _)'
 |  |\ \  |  ||   |(_,_)'
 |  | \ `'   /|   `-'  /
 |  |  \    /  \      /
 ''-'   `'-'    `-..-'
4.查看nacos注册情况

九、部署nginx展示前端
修改vue.config.js
[root@k8s-master ~/RuoYi-Cloud/ruoyi-ui]# grep -A5  'target' vue.config.js
        target: `http://ruoyi-gateway-service:8080`,
        changeOrigin: true,
        pathRewrite: {
          ['^' + process.env.VUE_APP_BASE_API]: ''
        }
      }
然后打包就跟上面的第五步的前端部署一样的了。
部署nginx
[root@k8s-master ~/ruoyi-k8s]# cat nginx.yaml
apiVersion: v1
kind: ConfigMap
metadata:
  name: nginx-ui-conf
  namespace: ruoyi-cloud
data:
  default.conf: |
    server {
        listen 80;
        server_name localhost;

        location / {
            root /usr/share/nginx/html;
            index index.html;
            try_files $uri $uri/ /index.html;
        }

        location /prod-api/ {
            proxy_pass http://ruoyi-gateway-service:8080/;
            proxy_set_header Host $host;
            proxy_set_header X-Real-IP $remote_addr;
            proxy_set_header X-Forwarded-For $proxy_add_x_forwarded_for;
        }
    }
---
apiVersion: apps/v1
kind: Deployment
metadata:
  name: nginx-deployment
  namespace: ruoyi-cloud
spec:
  replicas: 1
  selector:
    matchLabels:
      app: nginx
  template:
    metadata:
      labels:
        app: nginx
    spec:
      nodeName: k8s-master
      containers:
      - name: nginx
        image: nginx:1.29.0
        imagePullPolicy: IfNotPresent
        ports:
        - containerPort: 80
        volumeMounts:
        - name: nginx-html
          mountPath: /usr/share/nginx/html
        - name: nginx-ui-conf
          mountPath: /etc/nginx/conf.d/default.conf
          subPath: default.conf
      volumes:
      - name: nginx-html
        hostPath:
          path: /root/dist
          type: Directory
      - name: nginx-ui-conf
        configMap:
          name: nginx-ui-conf
---
apiVersion: v1
kind: Service
metadata:
  name: nginx-service
  namespace: ruoyi-cloud
spec:
  selector:
    app: nginx
  ports:
  - port: 80
    targetPort: 80
    nodePort: 30088
  type: NodePort
访问系统
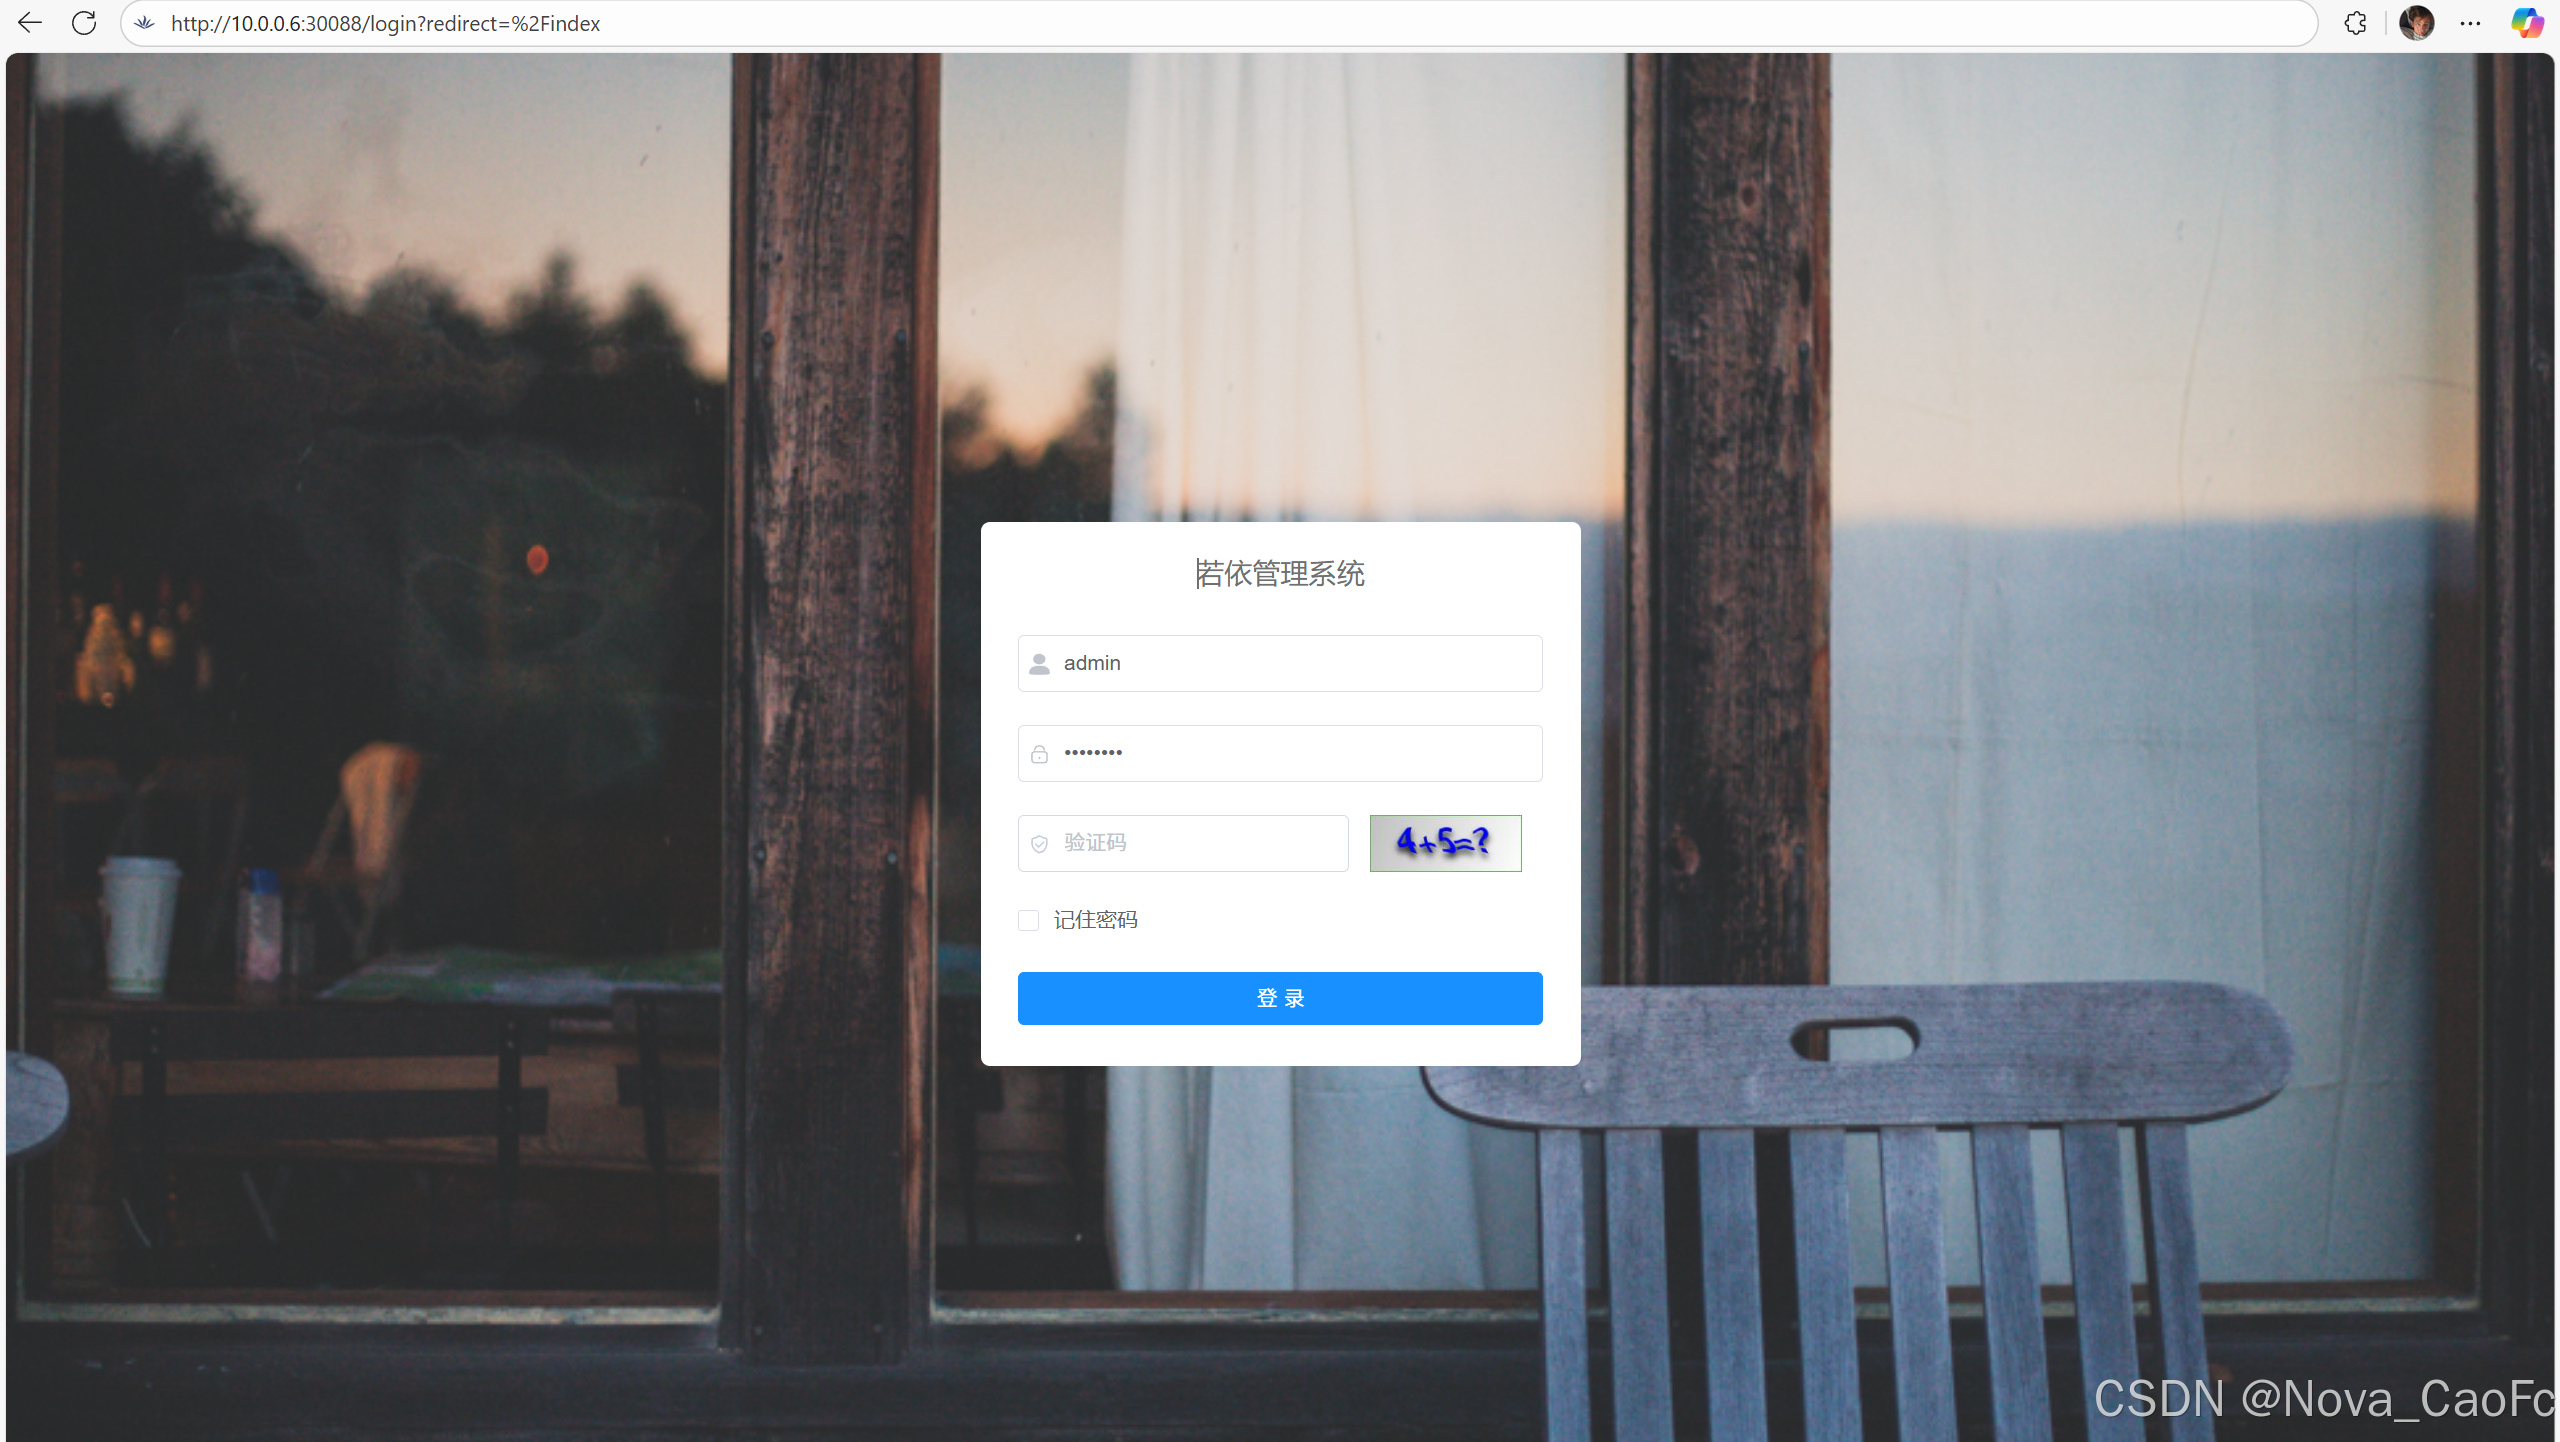
十、最后
针对于K8S的持久卷的使用这里只是简单的测试,并没有使用nfs,ceph生产级别的PV和PVC,而且本实验增加harbor仓库,将Docker构建的镜像都推送到仓库中去,这样效果更好一点,不然就只能像我一样使用nodeName选择主机名的方式固定调度,或者save镜像然后同步到各个节点,最后,最后,最后,祝部署顺利!