今天继续批量创建常用的基础元素:楼板。这次以简单的轮廓为矩形的楼板为例。让我们来看一看如何让Revit自动干活:
from typing import List
import math
# drvt_pybind 支持多会话、多文档,先从简单的单会话、单文档开始
# MyContext是在Python中用户自定义的单会话、单文档的上下文管理类
from packs.core import MyContext, m2feet, feet2m, isNone

# 导入驱动 Revit 的核心模块
from drvt_pybind.Autodesk import Revit
from drvt_pybind.Autodesk.Revit import DB

# 批量创建标高(没错,就是从“Python+DRVT 从外部调用 Revit:批量创建标高”示例中搬过来稍作扩展)
def createLevels(ctx: MyContext, levels: List[DB.Level]) -> None:
    """
    本示例移值自 Revit 2025.3 SDK 中的相关示例
    """

    session = ctx.session
    doc = ctx.doc

    try:
        # 涉及到修改操作的,需要锁定并用事务包装
        ctx.lockAndStartTransaction("创建标高")
        floorPlanTypeId = DB.FilteredElementCollector.ctor(ctx.session, ctx.doc).OfClass(ctx.session.typeof(DB.ViewFamilyType)).FirstElementId()
        if isNone(floorPlanTypeId):
            raise AssertionError("尝试获取ViewFamilyType失败")
        for i in range(0,8):
            l = 9 + i * 3
            level = DB.Level.Create(session, doc, m2feet(l))
            name = f"测试标高 {l}"
            # 更新标高的名称
            level.setName(name)
            levels.append(level)
            # 创建与标高对应的 ViewPlan,这样 楼层平面 视图会出现在项目管理器中
            levelId = level.getId()
            vp = DB.ViewPlan.Create(session, doc, floorPlanTypeId, levelId)
            if vp is not None:
                vp.setName(name)

        # 提交事务并解锁,若没有错误则修改操作将会生效
        ctx.commitTransactionAndUnlock()
    except Exception as e:
        print(f"【异常】{e}")
        # 回滚事务并解锁
        ctx.rollbackTransactionAndUnlock()

# 遍历文档中已有的标高然后再批量创建一些,返回按Elevation从低到高的List[DB.Level]
def getLevels(ctx : MyContext) -> List[DB.Level]:
    tmp : List[DB.Level] = []
    levelList = DB.FilteredElementCollector.ctor(ctx.session, ctx.doc).OfClass(ctx.session.typeof(DB.Level)).ToElements()
    for i in range(levelList.getCount()):
        l = DB.asLevel(levelList.getItem(i))
        if isNone(l):
            continue
        tmp.append(l)
    ret = sorted(tmp, key=lambda x:x.getElevation())
    createLevels(ctx, ret)
    return ret

# 遍历FloorType,返回List[DB.FloorType]
def getFloorTypes(ctx : MyContext) -> List[DB.FloorType]:
    floorTypeList : List[DB.FloorType] = []
    listWt = DB.FilteredElementCollector.ctor(ctx.session, ctx.doc).OfClass(ctx.session.typeof(DB.FloorType)).ToElements()
    for i in range(listWt.getCount()):
        wt = DB.asFloorType(listWt.getItem(i))
        if isNone(wt):
            continue
        floorTypeList.append(wt)
    return floorTypeList

# 示例创建板
def FloorCreation(ctx: MyContext) -> None:
    """
    本示例展示如何使用Python+DRVT,在外部让Revit批量创建墙
    """
    if ctx.doc is not None:
        ctx.closeDoc(True)

    template = "建筑样板.rte"
    fileName = "FloorCreation.rvt"
    err = ctx.createAndActiveDoc(template, fileName)
    if err != 0:
        raise AssertionError(f"创建项目文档失败: 错误码 {err}")

    session = ctx.session
    doc = ctx.doc

    # 取所有标高,缺省是两个
    levels = getLevels(ctx)

    try:
        # 取所有FloorType
        floorTypeList = getFloorTypes(ctx)

        # 涉及到修改操作的,需要锁定并用事务包装
        ctx.lockAndStartTransaction("批量创建板")

        for i in range(len(levels)):
            locLev = levels[i]
            ele = locLev.getElevation()
            # 选择一个FloorType
            floorType = floorTypeList[i % len(floorTypeList)]
            # 定义板的轮廓线
            a = m2feet(5)
            b = m2feet(3)
            p0 = DB.XYZ.ctor(session, 0, 0, ele)
            p1 = DB.XYZ.ctor(session, a, 0, ele)
            p2 = DB.XYZ.ctor(session, a, b, ele)
            p3 = DB.XYZ.ctor(session, 0, b, ele)
            profileCurves = DB.ListCurve.ctor(session)
            profileCurves.Add(DB.Line.CreateBound(session, p0, p1))
            profileCurves.Add(DB.Line.CreateBound(session, p1, p2))
            profileCurves.Add(DB.Line.CreateBound(session, p2, p3))
            profileCurves.Add(DB.Line.CreateBound(session, p3, p0))
            profileLoop = DB.CurveLoop.Create(session, profileCurves)
            listCurveLoop = DB.ListCurveLoop.ctor(session)
            listCurveLoop.Add(profileLoop)

            # 创建板
            floor = DB.Floor.Create(session, doc, listCurveLoop, floorType.getId(), locLev.getId())
            # 取“结构”参数
            p = floor.getParameter(DB.BuiltInParameter.FLOOR_PARAM_IS_STRUCTURAL)
            # 更新其值为“1”(等价于:True)
            p.Set(1)
            print(f"在 {locLev.getName()} 创建了 {floorType.getName()} 楼板(ID:{floor.getId().getIntegerValue()})")

        # 提交事务并解锁,若没有错误则修改操作将会生效
        ctx.commitTransactionAndUnlock()
    except Exception as e:
        print(f"【异常】{e}")
        # 回滚事务并解锁
        ctx.rollbackTransactionAndUnlock()

    # 保存文档并关闭
    ctx.closeDoc(True)


# 下面这段代码,看过“创建新项目”示例的会很熟悉,就是照搬过来的
# 创建新的上下文(可以按需创建多个,意味着能直接管理多个 Revit 会话)
ctx = MyContext("在这里指定会话名称")
# 初始化会话(启动 Revit 进程实例)
ctx.initSession()

# 调用FloorCreation
FloorCreation(ctx)


# 结束会话(Revit 进程实例将退出)
ctx.dispose()
又一个完整的自动化脚本,上面的代码做了什么?
1、创建Revit会话,启动Revit进程(可见、可交互,与手工启动的无任何差异)
2、批量创建楼板
3、结束会话,退出Revit进程
其中“2、批量创建楼板”做了以下工作:
1)以“建筑样板.rte”为样板,创建项目 “FloorCreation.rvt” 并作为当前活动文档(可见、可交互)
2)获取该文档中所有标高(缺省仅2个),并批量创建多个,按Elevation排序
3)获取该文档中所有FloorType
4)在每一个标高上
a)按次序选择一FloorType
b)在当前标高的高度上创建一个长5米、宽3米的矩形轮廓
c)基于a)选择的FloorType + b)中创建的轮廓在当前标高上创建一个楼板
d)更新楼板对象的“结构”参数值为True(选中楼板在其“属性”中可见“结构”参数打勾)
保存项目文件并关闭
运行结果(三维视图):
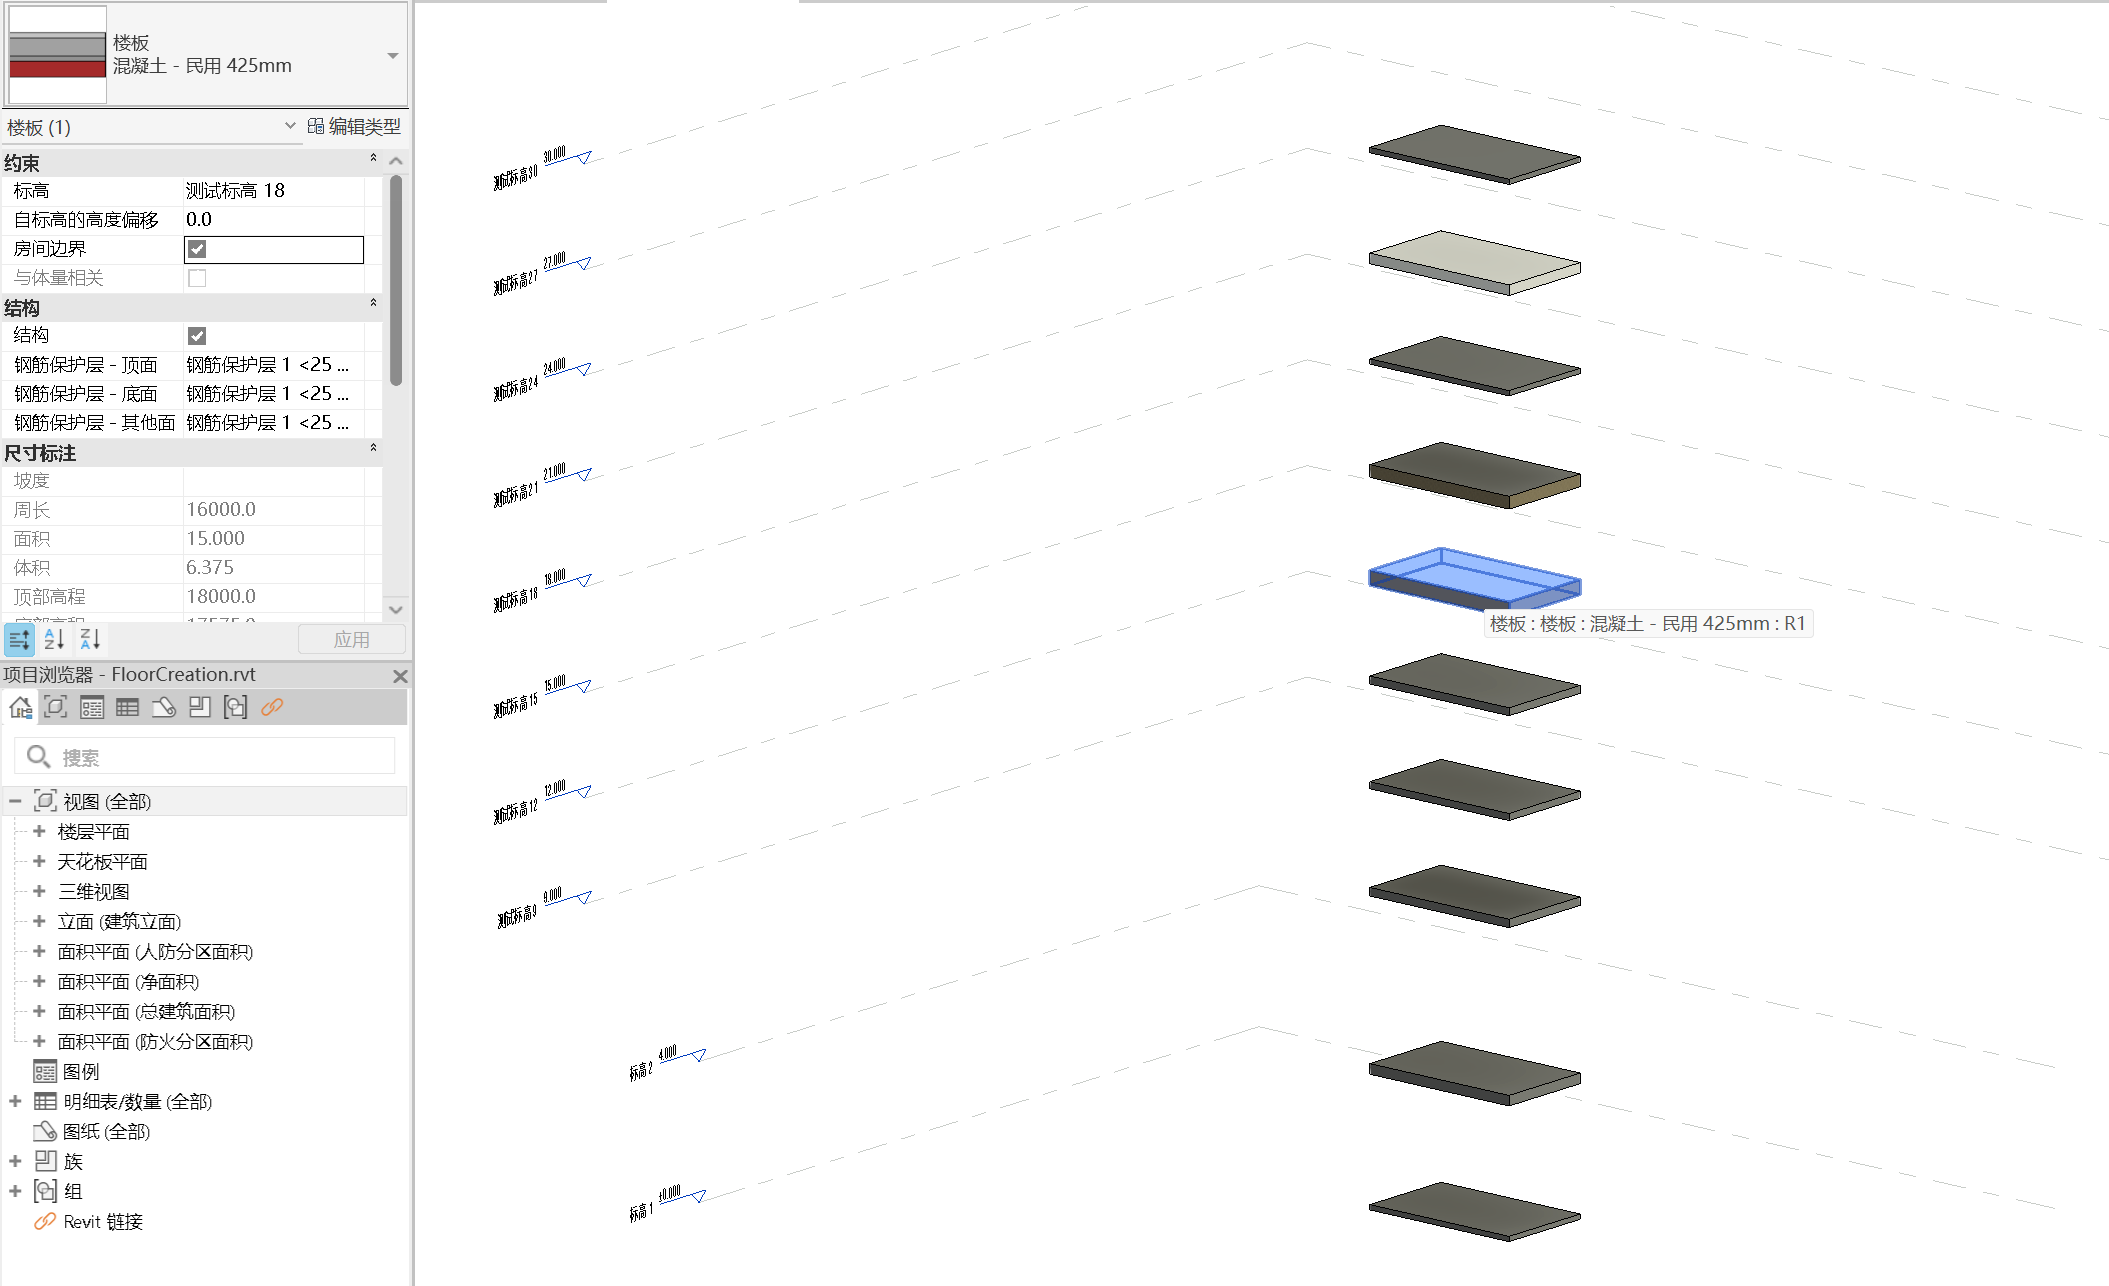
三维
控制台输出:
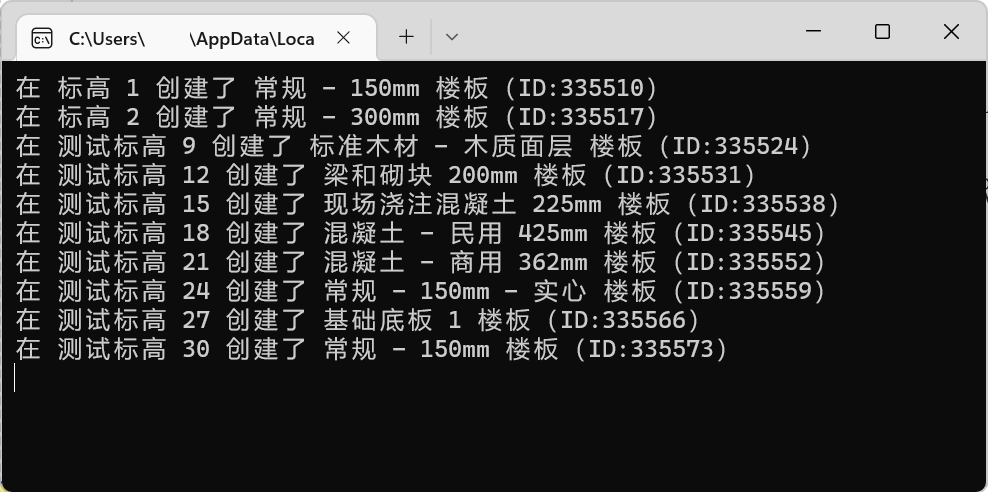
依旧是全自动完成,启动Revit => 创建项目 => 批量创建 => 保存项目文档 => 结束Revit 全程无需手工操作。Python+DRVT,轻松跨越了应用边界与技术壁垒,实现对Revit插件核心能力的高效驾驭。
随着展示出来的能力越来越多,并且保持一贯简洁的同时又能专注于业务逻辑+双向访问。那么,对于充分挖掘Revit的价值、构建自动化生产流水线、将Revit深度集成到自己的系统……会不会有新的想法?创意有没有闪现?
相关文章
Python+DRVT 从外部调用 Revit:从外部启动 Revit-CSDN博客
Python+DRVT 从外部调用 Revit:打开项目文件-CSDN博客
Python+DRVT 从外部调用 Revit:获取项目信息-CSDN博客
Python+DRVT 从外部调用 Revit:更新项目信息-CSDN博客
Python+DRVT 从外部调用 Revit:第一个完整示例-CSDN博客
Python+DRVT 从外部调用 Revit:创建新项目-CSDN博客
Python+DRVT 从外部调用 Revit:创建族文档-CSDN博客
Python+DRVT 从外部调用 Revit:批量创建轴网-CSDN博客
Python+DRVT 从外部调用 Revit:批量创建标高-CSDN博客
Python+DRVT 从外部调用 Revit:创建风管系统加劲肋-CSDN博客
Python+DRVT 从外部调用 Revit:创建剖面-CSDN博客
Python+DRVT 从外部调用 Revit:创建桁架族-CSDN博客
Python+DRVT 从外部调用 Revit:批量创建墙-CSDN博客
Python+DRVT 从外部调用 Revit:批量创建门-CSDN博客
Python+DRVT 从外部调用 Revit:批量创建门和窗-CSDN博客
Python+DRVT 从外部调用 Revit:批量创建梁-CSDN博客
Python+DRVT 从外部调用 Revit:批量创建梁(2)-CSDN博客
#SystemIntegration #Revit #RevitAPI #Python #Automation #DesignAutomation #BIM #Interop #AEC #DigitalTwin #Workflow