文章目录
为什么要免密
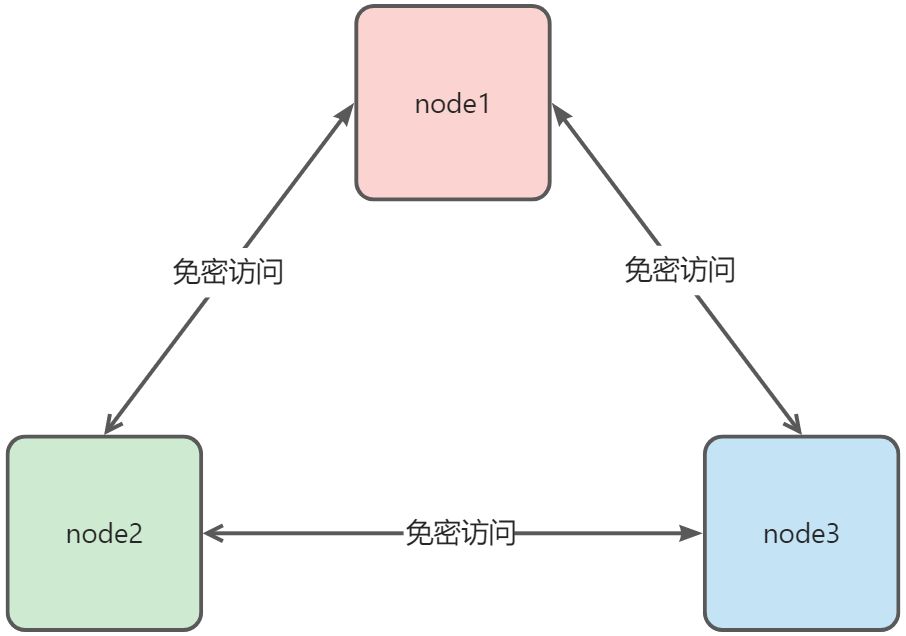
现在的linux作为服务器通常都以集群的形式存在,当某一台想访问另一台服务器的时候, 如果不能免密就每次都要输入密码, 非常麻烦
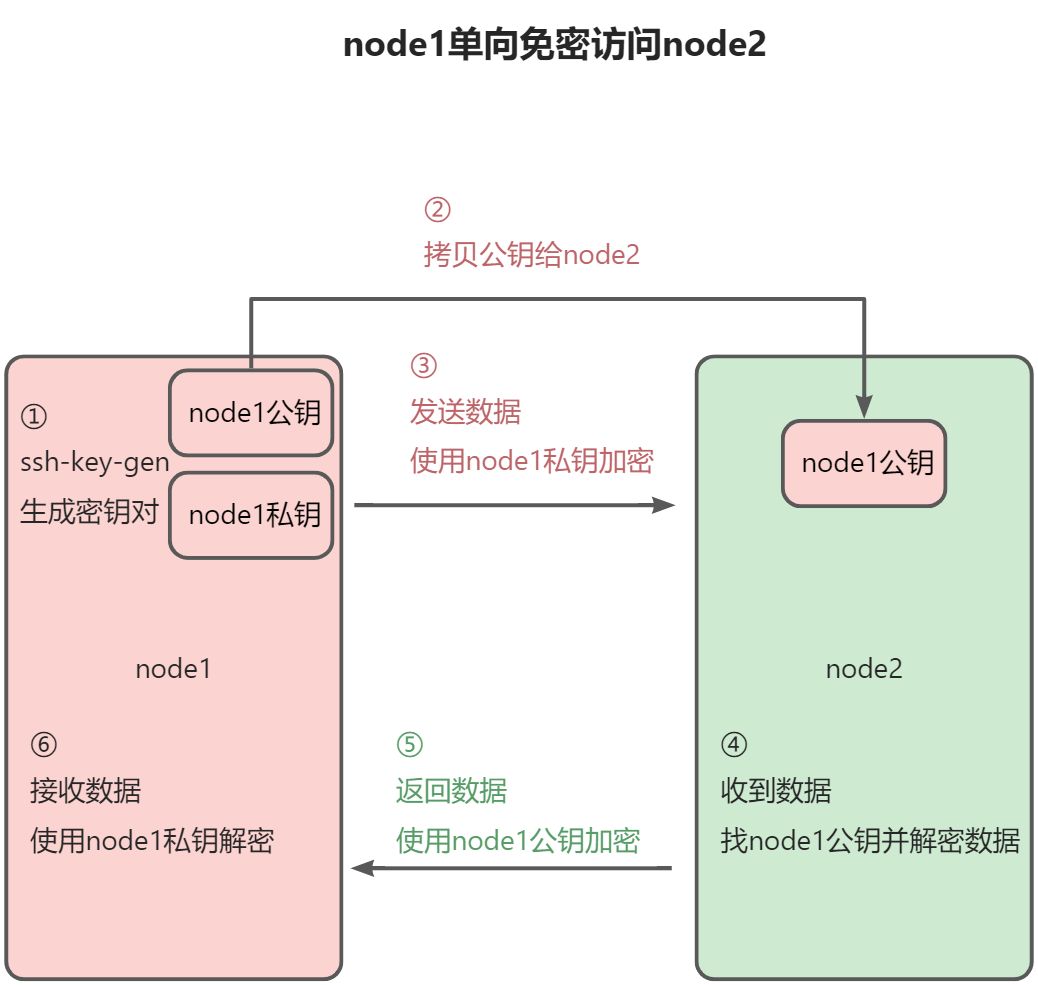
SSH单向免密过程原理
- 在node1上使用命令生成ssh密钥对,一个公钥(别人使用),一个是私钥(自己使用),类似谍战片中使用的密码本,通信双方要各持有一本,不然无法加密和解密信息
- 拷贝node1公钥到node2的.ssh目录下,类似于拿一个密码本给通信的另一方
- 此时node1访问node2时,数据会使用私钥进行加密后再发送
- node2接收到node1的数据后,找到node1的公钥并解密数据
- node2返回数据给node1时,会用node1的公钥加密后再发送
- node1接收到返回数据后,用私钥解密数据
SSH双向免密访问
在上图的基础上把步骤①和②在node2的机器上再执行一次,这样就实现了两个机器相互免密访问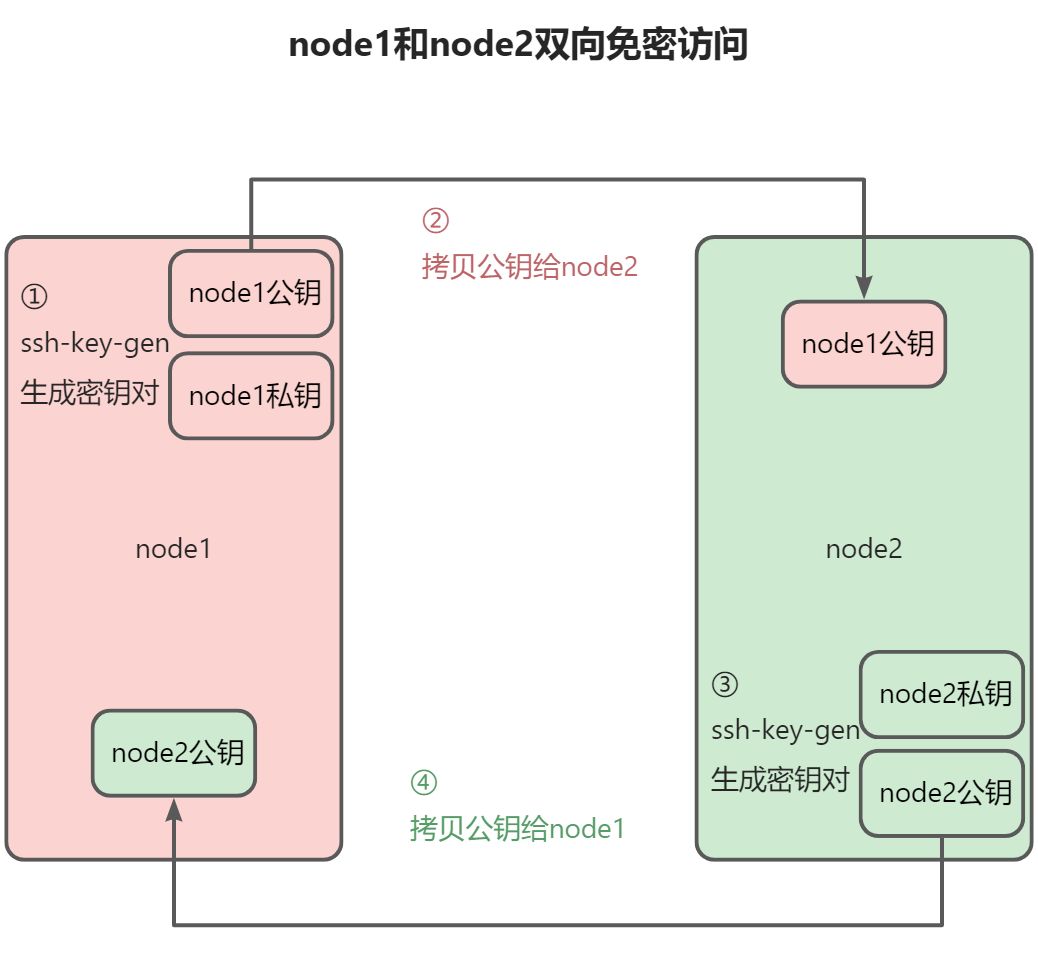
代码实现
# 免输入生成密钥对
[root@node1 ~] ssh-keygen -t rsa -P '' -f ~/.ssh/id_rsa

Generating public/private rsa key pair.
Your identification has been saved in /root/.ssh/id_rsa.
Your public key has been saved in /root/.ssh/id_rsa.pub.
The key fingerprint is:
SHA256:sKNCpX38EMmqUAXxvW3eBInQTqPzpGwkb96WfHWPfzk root@node1
The key randomart image is:
+---[RSA 2048]----+
|  ooo.           |
|   o ++o .       |
|  . o+B.o        |
| ..++oo* .       |
|. o=o=B S .      |
| o .*o.* o. .    |
|  o+.o .o... o  .|
|   .. = .   . .E.|
|     . .     ....|
+----[SHA256]-----+


# 拷贝node1公钥到node2
[root@node1 ~] ssh-copy-id node2

/usr/bin/ssh-copy-id: INFO: Source of key(s) to be installed: "/root/.ssh/id_rsa.pub"
/usr/bin/ssh-copy-id: INFO: attempting to log in with the new key(s), to filter out any that are already installed
/usr/bin/ssh-copy-id: INFO: 1 key(s) remain to be installed -- if you are prompted now it is to install the new keys
root@node2 password:

Number of key(s) added: 1

Now try logging into the machine, with:   "ssh 'node2'"
and check to make sure that only the key(s) you wanted were added.
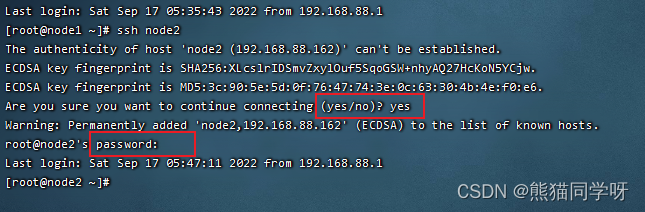
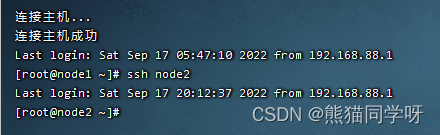
输入ssh node2 访问node2进行测试
解决免密后第一次访问确认连接提示
# vim /etc/ssh/ssh_config 把# StrictHostKeyChecking ask前面注释去掉改成
StrictHostKeyChecking no


# 或者直接输入命令
sed -i /Checking/a'StrictHostKeyChecking no' /etc/ssh/ssh_config
双向免密自动脚本
#! /bin/bash
# 设置用户和密码
user="root"
password="root"
timeout=2

# 获取待遍历的集群ip列表
ips=$(cat /etc/hosts |grep "192" | cut -d " " -f 1)

# 获取本地ip
yum install ifconifg -y
local_host=`ifconfig | awk '/broadcast/{print}' | awk -F ' ' '{print $2}'`

# 安装远程登录交互工具
yum install expect -y

# 给集群添加机器后重新设置互相免密,需要要同级目录提供一个new_hosts.txt文件
add_host(){

    add_ips=`cat ./new_hosts.txt | cut -d " " -f 1`
    for add_ip in $add_ips
    do
        grep $add_ip /etc/hosts
        if [[ $? == 0 ]];then
            echo ${add_ip}地址已存在
        else
            sed -n "/${add_ip}/p" ./new_hosts.txt >> /etc/hosts
            echo 添加${add_ip}成功
        fi
    done
    ips=$(cat /etc/hosts |grep "192" | cut -d " " -f 1)
    echo $ips
}

# 自动生成密钥对并拷贝到主节点
auto_keygen(){
expect <<-EOF
    set timeout ${timeout}
    spawn ssh ${user}@$1
    expect {
        "yes/no" { send "yes\r" }
        "password:" { send "${password}\r"}
    }
    expect "password" {send "${password}\r"}
    expect "]#" {send "rm -rf ~/.ssh\r"}
    expect "]#" {send "ssh-keygen -t rsa -P '' -f ~/.ssh/id_rsa\r"}
    expect "]#" {send "sed -i /StrictHostKeyChecking/a'StrictHostKeyChecking no' /etc/ssh/ssh_config\r"}
    expect "]#" {send "ssh-copy-id ${local_host}\r"}
    expect "yes/no" {send "yes\r" }
    expect "password" {send "${password}\r";exp_continue }
EOF
}

# 拷贝host文件给其它主机
copy_host(){
expect <<-EOF
    set timeout ${timeout}
    spawn scp -r /etc/hosts ${user}@$1:/etc
    expect {
        "yes/no" { send "yes\r" }
        "password:" { send "${password}\r";exp_continue}
    }
EOF
}

# 拷贝公钥给其它主机
copy_key(){
expect <<-EOF
    set timeout ${timeout}
    spawn scp -r /root/.ssh/authorized_keys ${user}@$1:/root/.ssh
    expect {
        "yes/no" { send "yes\r" }
        "password:" { send "${password}\r";exp_continue}
    }
EOF
}

loop_auto_keygen(){
    for ip in $@
    do
        echo "========生成$ip的密钥========"
        auto_keygen $ip
    done
}

loop_copy_hosts(){
    for ip in $@
    do
        echo "========拷贝$ip的hosts========"
        copy_host $ip
    done
}

loop_copy_key(){
    for ip in $@
    do
        echo "========拷贝$ip的密钥========"
        copy_key $ip
    done
}

# add_host
loop_auto_keygen $ips
loop_copy_hosts $ips
loop_copy_key $ips
new_hosts.txt
192.168.88.163 node3 node3.itcast.cn
192.168.88.164 node4 node4.itcast.cn
本文含有隐藏内容,请 开通VIP 后查看