1 创建虚拟环境
conda create -n yolov11 python=3.9
conda activate yolov11
2 安装ultralytics
默认是有cuda的情况下
# Install all packages together using conda
conda install pytorch torchvision
conda 还不能直接安装ultralytics,需要通过pip进行安装
pip install ultralytics
但是可能会因为网络问题报错,根据官网提示可以使用下面的方式:
pip install git+https://github.com/ultralytics/ultralytics.git@main
当然也可以试多几次,或者使用下面的命令添加尝试参数:
pip install --resume-retries 5 ultralytics
安装好后基本上差不多了,可以直接在终端上运行:yolo
(yolov11) xxx@xxx:your path to/yolov11$ yolo
WARNING ⚠️ Ultralytics settings reset to default values. This may be due to a possible problem with your settings or a recent ultralytics package update.
View Ultralytics Settings with 'yolo settings' or at '/home/a/.config/Ultralytics/settings.json'
Update Settings with 'yolo settings key=value', i.e. 'yolo settings runs_dir=path/to/dir'. For help see https://docs.ultralytics.com/quickstart/#ultralytics-settings.

    Arguments received: ['yolo']. Ultralytics 'yolo' commands use the following syntax:

        yolo TASK MODE ARGS

        Where   TASK (optional) is one of ['obb', 'pose', 'detect', 'segment', 'classify']
                MODE (required) is one of ['predict', 'export', 'track', 'benchmark', 'train', 'val']
                ARGS (optional) are any number of custom 'arg=value' pairs like 'imgsz=320' that override defaults.
                    See all ARGS at https://docs.ultralytics.com/usage/cfg or with 'yolo cfg'

    1. Train a detection model for 10 epochs with an initial learning_rate of 0.01
        yolo train data=coco8.yaml model=yolo11n.pt epochs=10 lr0=0.01

    2. Predict a YouTube video using a pretrained segmentation model at image size 320:
        yolo predict model=yolo11n-seg.pt source='https://youtu.be/LNwODJXcvt4' imgsz=320

    3. Val a pretrained detection model at batch-size 1 and image size 640:
        yolo val model=yolo11n.pt data=coco8.yaml batch=1 imgsz=640

    4. Export a YOLO11n classification model to ONNX format at image size 224 by 128 (no TASK required)
        yolo export model=yolo11n-cls.pt format=onnx imgsz=224,128

    5. Ultralytics solutions usage
        yolo solutions count or in ['crop', 'blur', 'workout', 'heatmap', 'isegment', 'visioneye', 'speed', 'queue', 'analytics', 'inference', 'trackzone'] source="path/to/video.mp4"

    6. Run special commands:
        yolo help
        yolo checks
        yolo version
        yolo settings
        yolo copy-cfg
        yolo cfg
        yolo solutions help

    Docs: https://docs.ultralytics.com
    Solutions: https://docs.ultralytics.com/solutions/
    Community: https://community.ultralytics.com
    GitHub: https://github.com/ultralytics/ultralytics
也就是可以直接使用Ultralytics 命令行界面CLI,它提供了一种直接使用Ultralytics YOLO 模型的方法,无需Python 环境。CLI 支持直接从终端运行各种任务,使用 yolo 命令,无需定制或编写Python 代码。(怎么听都觉得不是很对,因为已经安装了python啊,可能是因为不需要先使用python进入python环境吧)
3 验证环境
(1)验证预测环境
既然是直接用Ultralytics 命令行界面CLI,那就直接使用命令进行预测,这里使用的是定向边框对象检测:OBB,我们预测一下:
yolo obb predict model=yolo11n-obb.pt source='https://ultralytics.com/images/boats.jpg'
直接在终端输入这个命令,接着就会自动下载预训练模型以及图片素材:
(yolov11) xxx@xxx:path to/yolov11$ yolo obb predict model=yolo11n-obb.pt source='https://ultralytics.com/images/boats.jpg'
Downloading https://github.com/ultralytics/assets/releases/download/v8.3.0/yolo11n-obb.pt to 'yolo11n-obb.pt'...
100%|████████████████████████████████████████████████████████████████████████████████| 5.53M/5.53M [09:52<00:00, 9.78kB/s]
Ultralytics 8.3.155 🚀 Python-3.9.23 torch-2.5.1 CUDA:0 (NVIDIA GeForce RTX 4090, 23993MiB)
YOLO11n-obb summary (fused): 109 layers, 2,656,648 parameters, 0 gradients, 6.6 GFLOPs

Downloading https://ultralytics.com/images/boats.jpg to 'boats.jpg'...
WARNING ⚠️ Download failure, retrying 1/3 https://ultralytics.com/images/boats.jpg...
################################################################################################################### 100.0%################################################################################################################### 100.0%curl: (28) Failed to connect to github.com port 443 after 133813 ms: 连接超时     #
Warning: Problem : timeout. Will retry in 1 seconds. 3 retries left.
################################################################################################################### 100.0%################################################################################################################### 100.0%################################################################################################################### 100.0%
image 1/1 /media/a/data4t/DL/yolov11/boats.jpg: 576x1024 None66.3ms
Speed: 10.3ms preprocess, 66.3ms inference, 189.6ms postprocess per image at shape (1, 3, 576, 1024)
Results saved to runs/obb/predict
💡 Learn more at https://docs.ultralytics.com/modes/predict
所需要的预训练模型以及测试图像素材将会下载在当前目录,并进行预测后的结果保存在当前目录的:runs/obb/predict中,查看一下结果:

原图

结果图
看样子方便很多,连源码都没有调一个,直接就有结果了。
(2) 验证训练环境
使用dota8的数据进行预训练:
yolo obb train data=dota8.yaml model=yolo11n-obb.pt epochs=5 imgsz=640 device=0,1 batch=128
至于参数,可以使用yolo cfg进行查看。
输入上面的训练命令后,会先下载所需要的模型和数据库,这里因为偷懒,就用官方提供的数据好了。所需要的数据将会下载到datasets中。训练的过程将会保存到runs/obb/train/中,


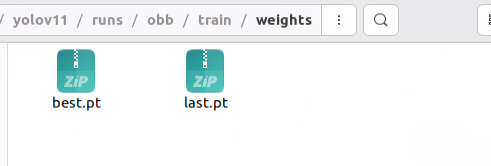
目录中包含了训练的中间过程,各种曲线以及每个批次对应的初始结果等,训练的结果将保存在runs/obb/train/weights中,保存了acc最好以及最后一个轮次的结果。
总体看起来,跟早期版本使用源码进行训练预测的结果一样,看来方便很多了。当然训练的过程中也可以使用工具去查看中间过程,这里就不展示了。
总结
ultralytics其实是一个大平台,方便了很多想用yolo的同学,但是有点不好的是,作为一个开发者,没有源码的加持,总感觉不得劲,看不到源码的中间过程,并没有很踏实。
本文已经完成了yolo新版本的环境搭建,至于后续的转换以及其他步骤,就不阐述了。