Apache Dubbo经常作为一个RPC框架来使用,这篇文章主要介绍使用Dubbo配合注册中心来发布和调用服务。
Apache Dubbo和Spring Boot、JDK的版本对应关系。
| Dubbo 分支 | 最新版本 | JDK | Spring Boot | 组件版本 | 详细说明 |
|---|---|---|---|---|---|
| 3.3.x (当前文档) | 3.3.0 | 8, 17, 21 | 2.x、3.x | 详情 | - 版本变更记录 - 生产可用(推荐,长期维护)! 最新Triple协议升级,内置Metrics、Tracing、GraalVM支持等 |
| 3.2.x | 3.2.10 | 8, 17 | 2.x、3.x | 详情 | - 版本变更记录 - 生产可用(长期维护)! |
| 3.1.x | 3.1.11 | 8, 17 | 2.x、3.x | 详情 | - 版本变更记录 - 仅修复安全漏洞! |
| 3.0.x | 3.0.15 | 8 | 2.x | 详情 | - 版本变更记录 - 停止维护! |
| 2.7.x | 2.7.23 | 8 | 2.x | 详情 | - 了解如何升级到Dubbo3 - 停止维护! |
博主使用的Spring Boot版本是2.3.4.RELEASE、jdk版本是1.8.0_461,所以采用dubbo的2.7.23版本(因为3.0.x版本不兼容)。
<dependencyManagement>
    <dependencies>
        <dependency>
            <groupId>org.apache.dubbo</groupId>
            <artifactId>dubbo-bom</artifactId>
            <version>2.7.23</version>
            <type>pom</type>
            <scope>import</scope>
        </dependency>
    </dependencies>
</dependencyManagement>
一、创建服务接口
文章只是为了简单介绍一下使用Dubbo来发布和调用服务(RPC接口),所以把所有接口都存放在一个dubbo-api的项目上,服务提供者和服务消费者只需要依赖这个项目即可。
1、创建项目
在Intellij IDEA中创建一个Maven项目,项目名为dubbo-api
2、添加依赖
添加lombok的依赖和Maven的jar包插件。
<?xml version="1.0" encoding="UTF-8"?>
<project xmlns="http://maven.apache.org/POM/4.0.0" xmlns:xsi="http://www.w3.org/2001/XMLSchema-instance"
         xsi:schemaLocation="http://maven.apache.org/POM/4.0.0 https://maven.apache.org/xsd/maven-4.0.0.xsd">
    <modelVersion>4.0.0</modelVersion>

    <version>20250906</version>
    <groupId>cn.edu.sgu.www</groupId>
    <artifactId>dubbo-api</artifactId>

    <properties>
        <java.version>1.8</java.version>
    </properties>

    <dependencies>
        <dependency>
            <groupId>org.projectlombok</groupId>
            <artifactId>lombok</artifactId>
            <version>1.18.22</version>
            <optional>true</optional>
        </dependency>
    </dependencies>

    <build>
        <plugins>
            <plugin>
                <groupId>org.apache.maven.plugins</groupId>
                <artifactId>maven-jar-plugin</artifactId>
                <version>3.2.0</version>
            </plugin>
        </plugins>
    </build>
</project>
3、创建接口
在项目的src/main/java包下创建多级包cn.edu.sgu.www.dubbo.provider
- 在provider子包下创建entity子包
- 在provider子包下创建service子包
User.java
在entity包下创建一个类User.java。在User类上使用lombok的@Data注解,实现序列化接口,指定序列化版本号。
package cn.edu.sgu.www.dubbo.provider.entity;

import lombok.Data;

import java.io.Serializable;

/**
 * @author 沐雨橙风ιε
 * @version 1.0
 */
@Data
public class User implements Serializable {
    private static final long serialVersionUID = 18L;

    private String id;

    /**
     * 姓名
     */
    private String name;

    /**
     * 身高
     */
    private Integer height;

    /**
     * 体重
     */
    private Integer weight;
}
UserService.java
在service包下创建user子包,在user包下创建UserService接口,定义两个方法。
package cn.edu.sgu.www.dubbo.provider.service.user;

import cn.edu.sgu.www.dubbo.provider.entity.User;

import java.util.List;

/**
 * @author 沐雨橙风ιε
 * @version 1.0
 */
public interface UserService {

    void save(User user);

    List<String> selectAll();
}
HelloService.java
在service包下创建hello子包,在hello包下创建HelloService接口,定义一个greet()方法。
package cn.edu.sgu.www.dubbo.provider.service.hello;
/**
* @author 沐雨橙风ιε
* @version 1.0
*/
public interface HelloService {
void greet();
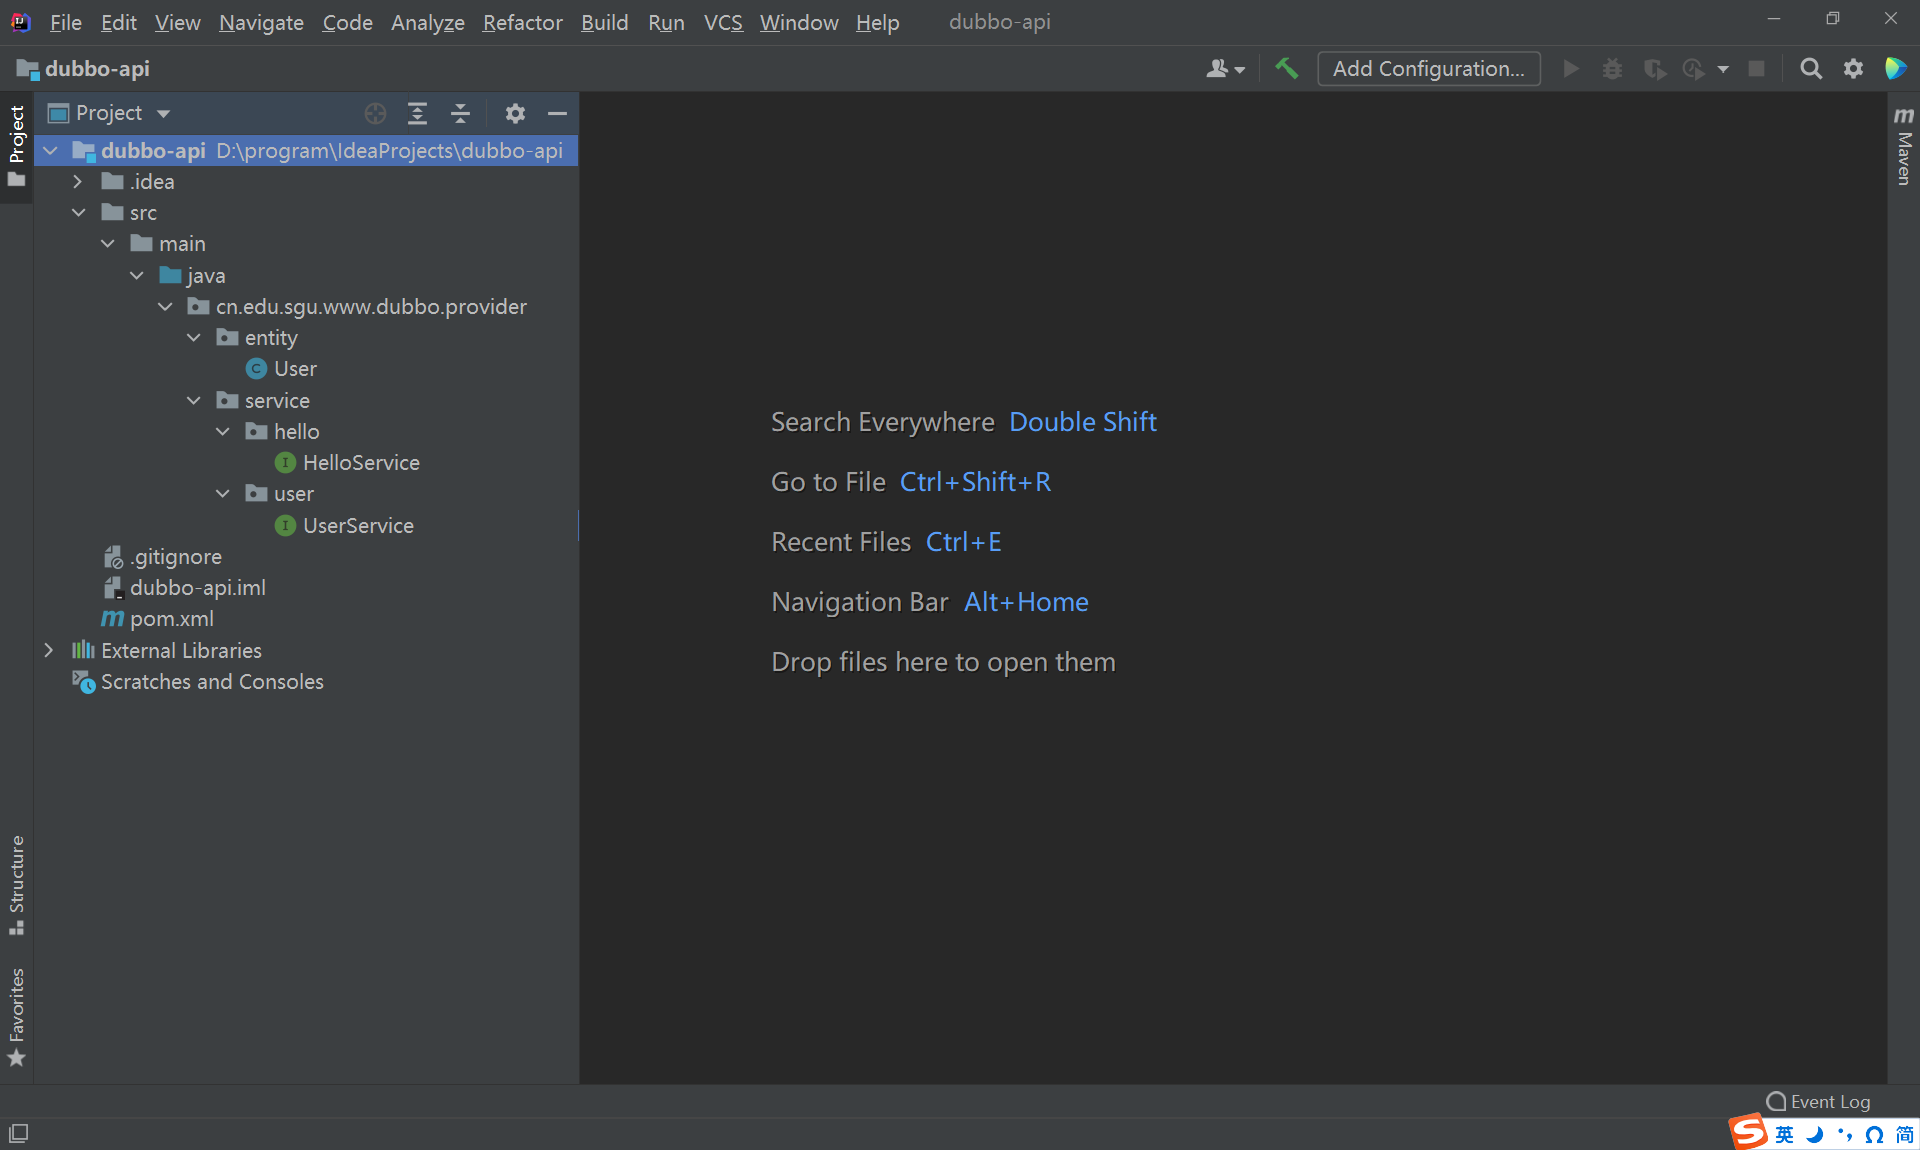
}4、项目结构预览
完成上面三个步骤之后,项目的目录结构如下。
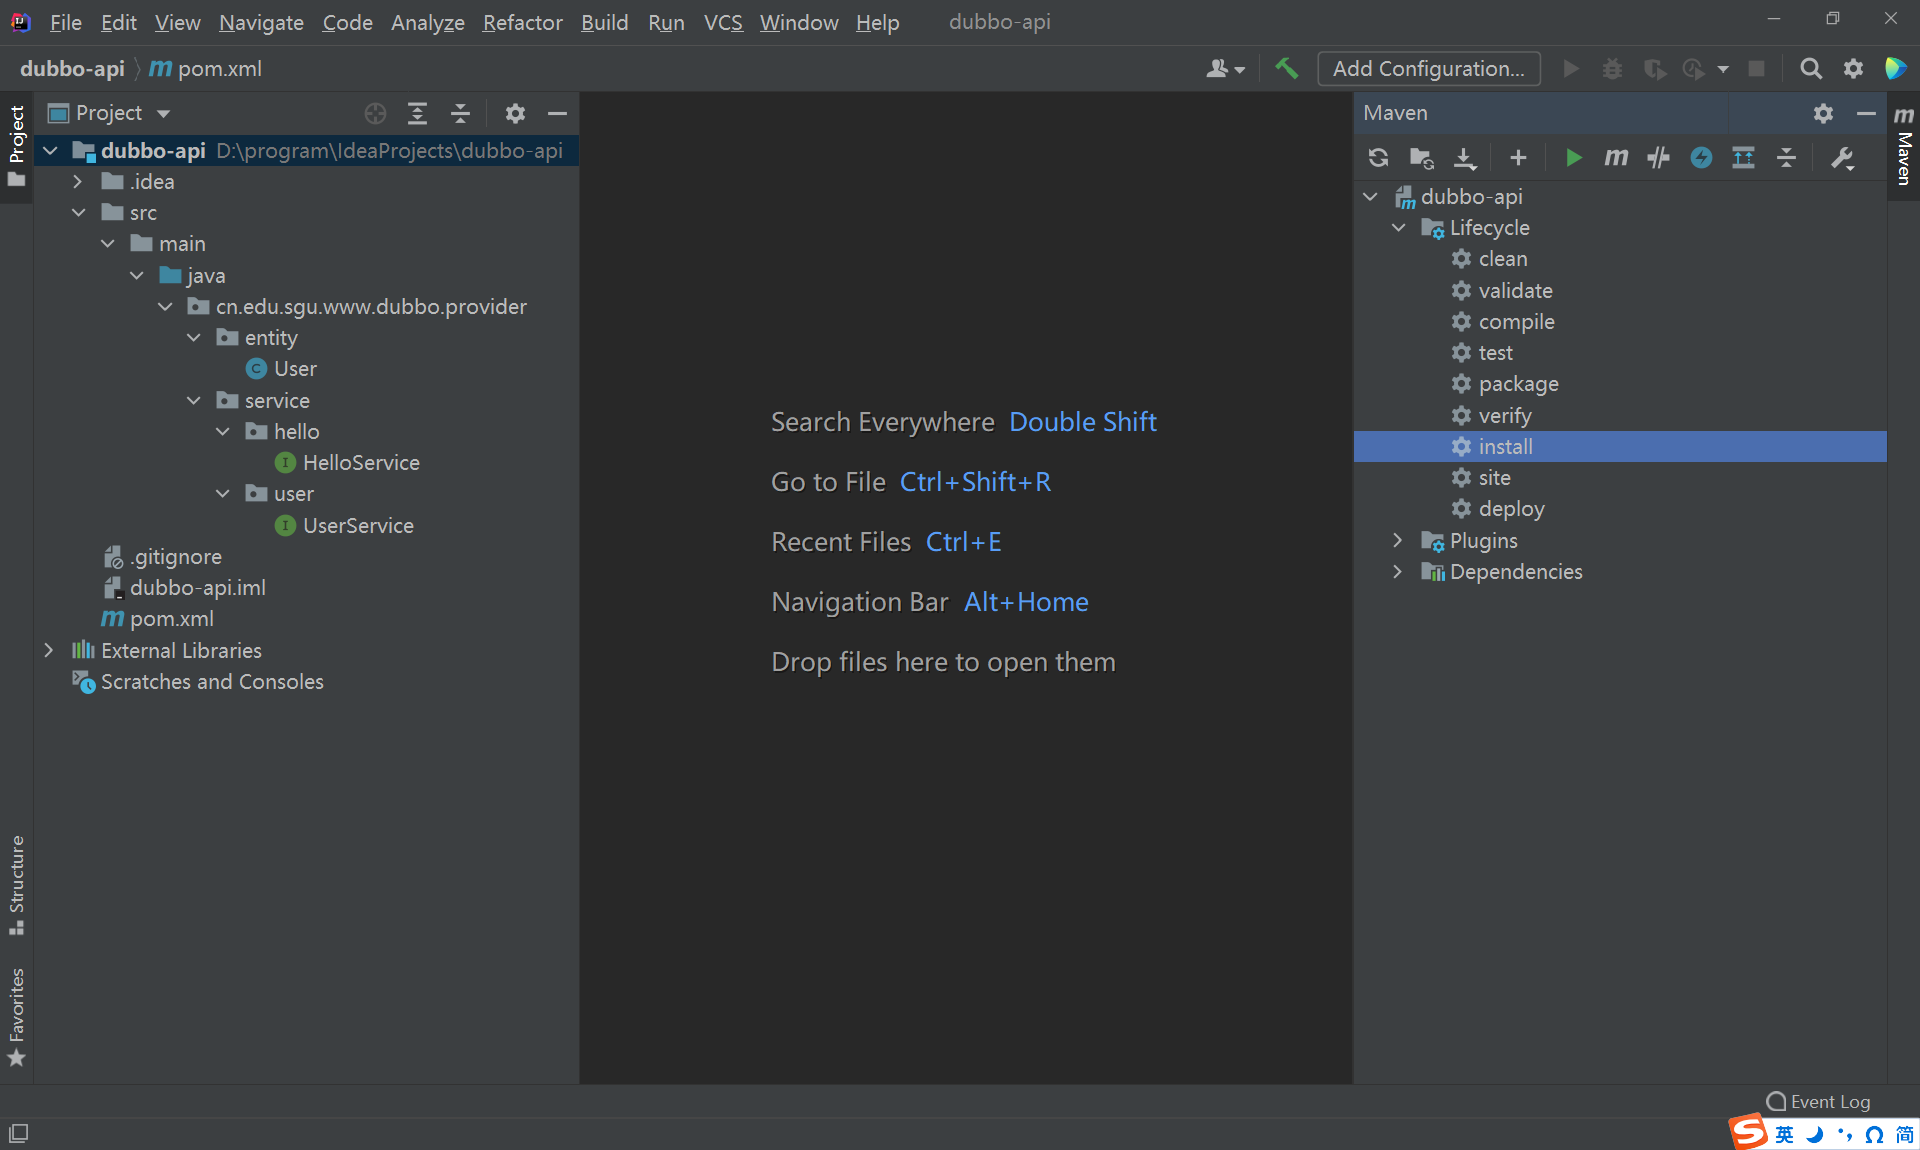
5、安装项目到本地仓库
在当前项目目录下执行Maven命令mvn install或直接通过Maven插件安装本项目到本地仓库。
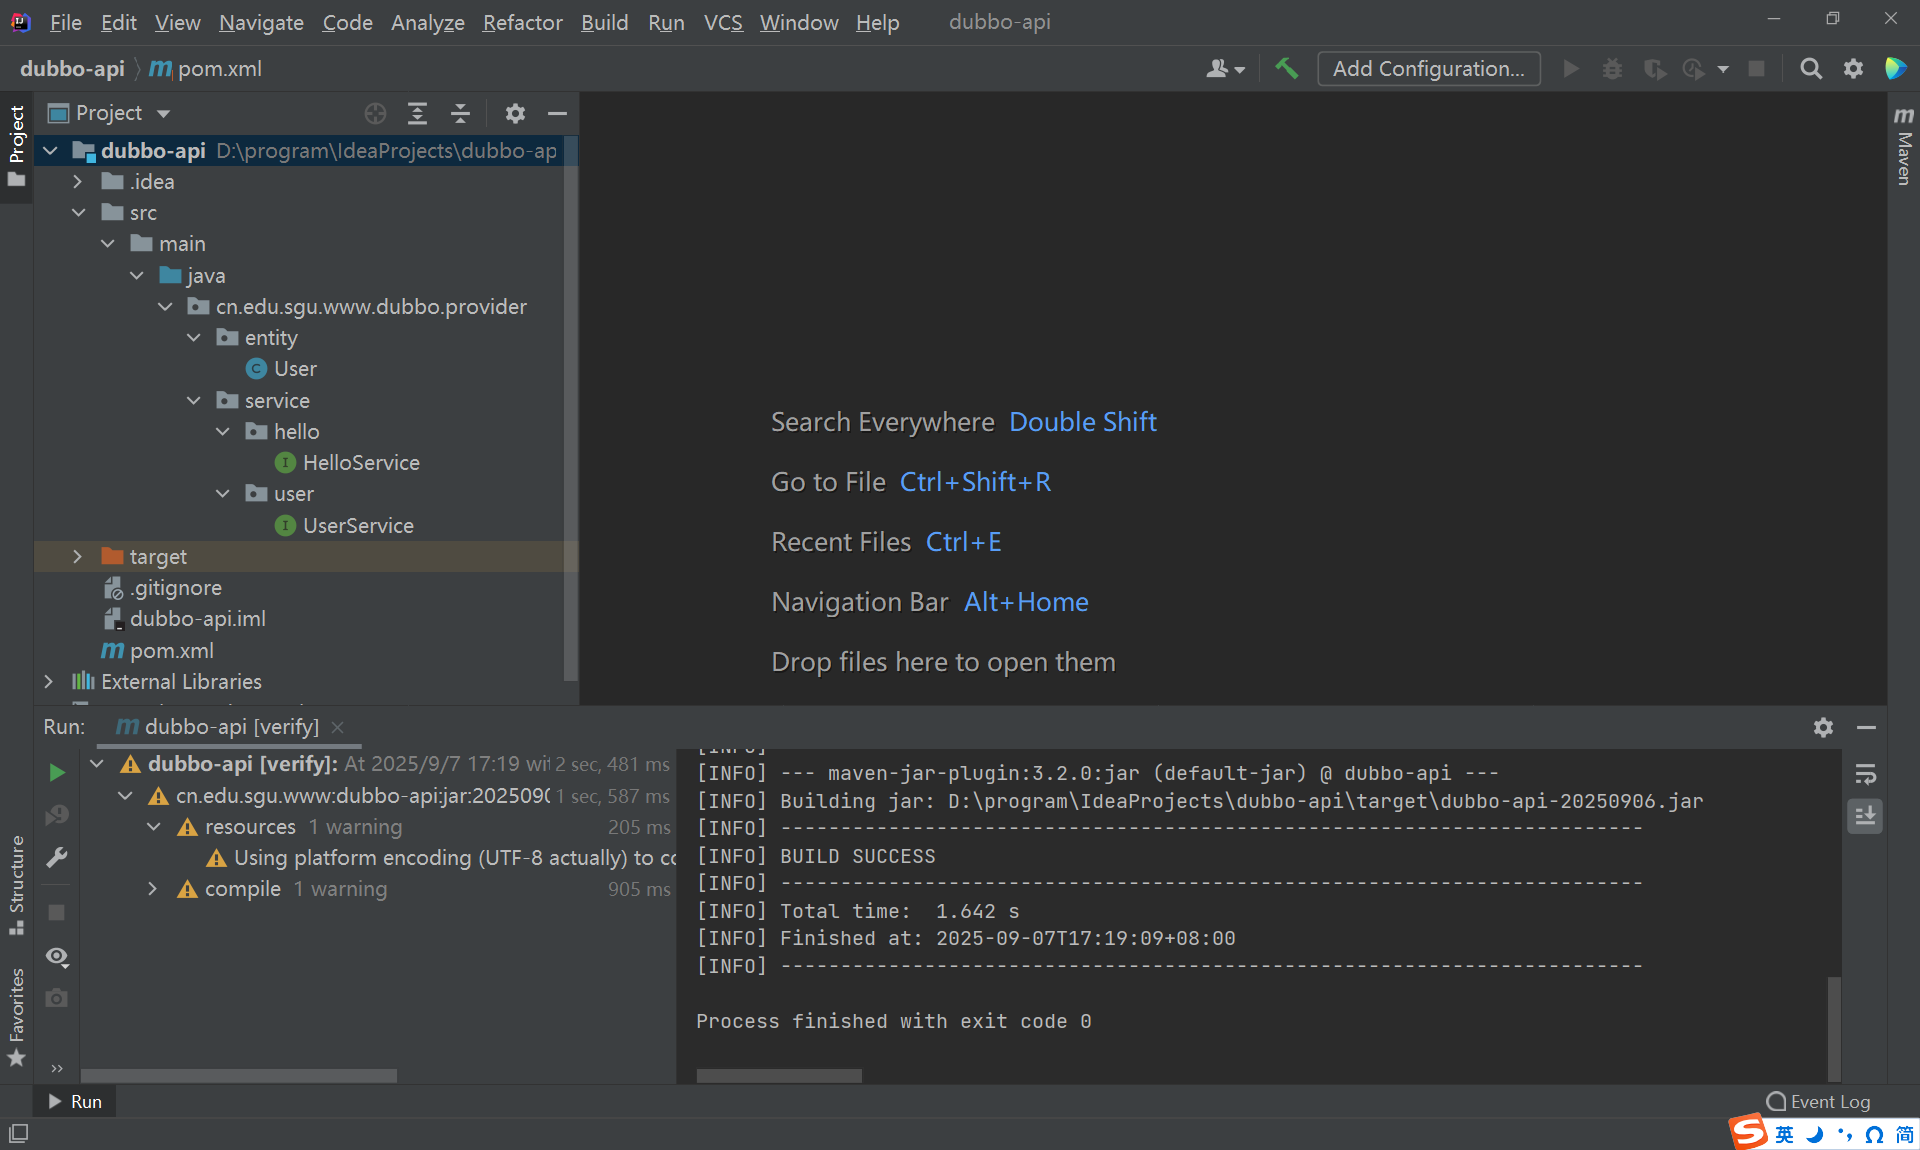
成功安装到Maven本地仓库:
二、创建服务提供者
1、创建项目
在Intellij IDEA中创建一个Spring Boot项目,项目名为dubbo-provider
2、添加依赖
添加Apache Dubbo的Spring Boot启动器依赖,这个启动器包含了所有使用Dubbo需要的依赖。
因为还需要通过注册中心暴露服务信息,所以额外引入Dubbo整合nacos的依赖。
<?xml version="1.0" encoding="UTF-8"?>
<project xmlns="http://maven.apache.org/POM/4.0.0" xmlns:xsi="http://www.w3.org/2001/XMLSchema-instance"
         xsi:schemaLocation="http://maven.apache.org/POM/4.0.0 https://maven.apache.org/xsd/maven-4.0.0.xsd">
    <modelVersion>4.0.0</modelVersion>

    <parent>
        <groupId>org.springframework.boot</groupId>
        <artifactId>spring-boot-starter-parent</artifactId>
        <version>2.3.4.RELEASE</version>
    </parent>

    <version>20250907</version>
    <artifactId>dubbo-provider</artifactId>
    <description>Apache Dubbo服务提供者项目</description>

    <properties>
        <java.version>1.8</java.version>
        <dubbo.version>2.7.23</dubbo.version>
        <dubbo-registry.version>3.2.10</dubbo-registry.version>
    </properties>

    <dependencyManagement>
        <dependencies>
            <dependency>
                <groupId>org.apache.dubbo</groupId>
                <artifactId>dubbo-bom</artifactId>
                <version>${dubbo.version}</version>
                <type>pom</type>
                <scope>import</scope>
            </dependency>
        </dependencies>
    </dependencyManagement>

    <dependencies>
        <dependency>
            <groupId>org.springframework.boot</groupId>
            <artifactId>spring-boot-starter-web</artifactId>
        </dependency>

        <dependency>
            <version>20250906</version>
            <groupId>cn.edu.sgu.www</groupId>
            <artifactId>dubbo-api</artifactId>
        </dependency>

        <dependency>
            <groupId>org.apache.dubbo</groupId>
            <artifactId>dubbo-spring-boot-starter</artifactId>
        </dependency>

        <dependency>
            <groupId>org.apache.dubbo</groupId>
            <artifactId>dubbo-nacos-spring-boot-starter</artifactId>
            <version>${dubbo-registry.version}</version>
        </dependency>
    </dependencies>

    <build>
        <plugins>
            <plugin>
                <groupId>org.springframework.boot</groupId>
                <artifactId>spring-boot-maven-plugin</artifactId>
                <version>2.3.4.RELEASE</version>
            </plugin>
        </plugins>
    </build>
</project>
3、实现接口
在项目src/main/java包下创建cn.edu.sgu.www.dubbo.provider子包,在provider子包下创建service子包。
UserServiceImpl.java
在service包下创建user子包。
在user包下创建UserServiceImpl,实现UserService接口,重写两个方法。
package cn.edu.sgu.www.dubbo.provider.service.user;

import cn.edu.sgu.www.dubbo.provider.entity.User;

import java.util.ArrayList;
import java.util.List;

/**
 * @author 沐雨橙风ιε
 * @version 1.0
 */
public class UserServiceImpl implements UserService {

    @Override
    public void save(User user) {
        System.out.println("save: " + user);
    }

    @Override
    public List<String> selectAll() {
        List<String> list = new ArrayList<>();

        list.add("沐雨橙风");
        list.add("一叶之秋");
        list.add("苏沐秋");

        return list;
    }

}
HelloServiceImpl.java
在service包下创建hello子包。
在user包下创建HelloServiceImpl,实现HelloService接口,重写两个方法。
package cn.edu.sgu.www.dubbo.provider.service.hello;
/**
* @author 沐雨橙风ιε
* @version 1.0
*/
public class HelloServiceImpl implements HelloService {
@Override
public void greet() {
System.out.println("Hello,沐雨橙风ιε");
}
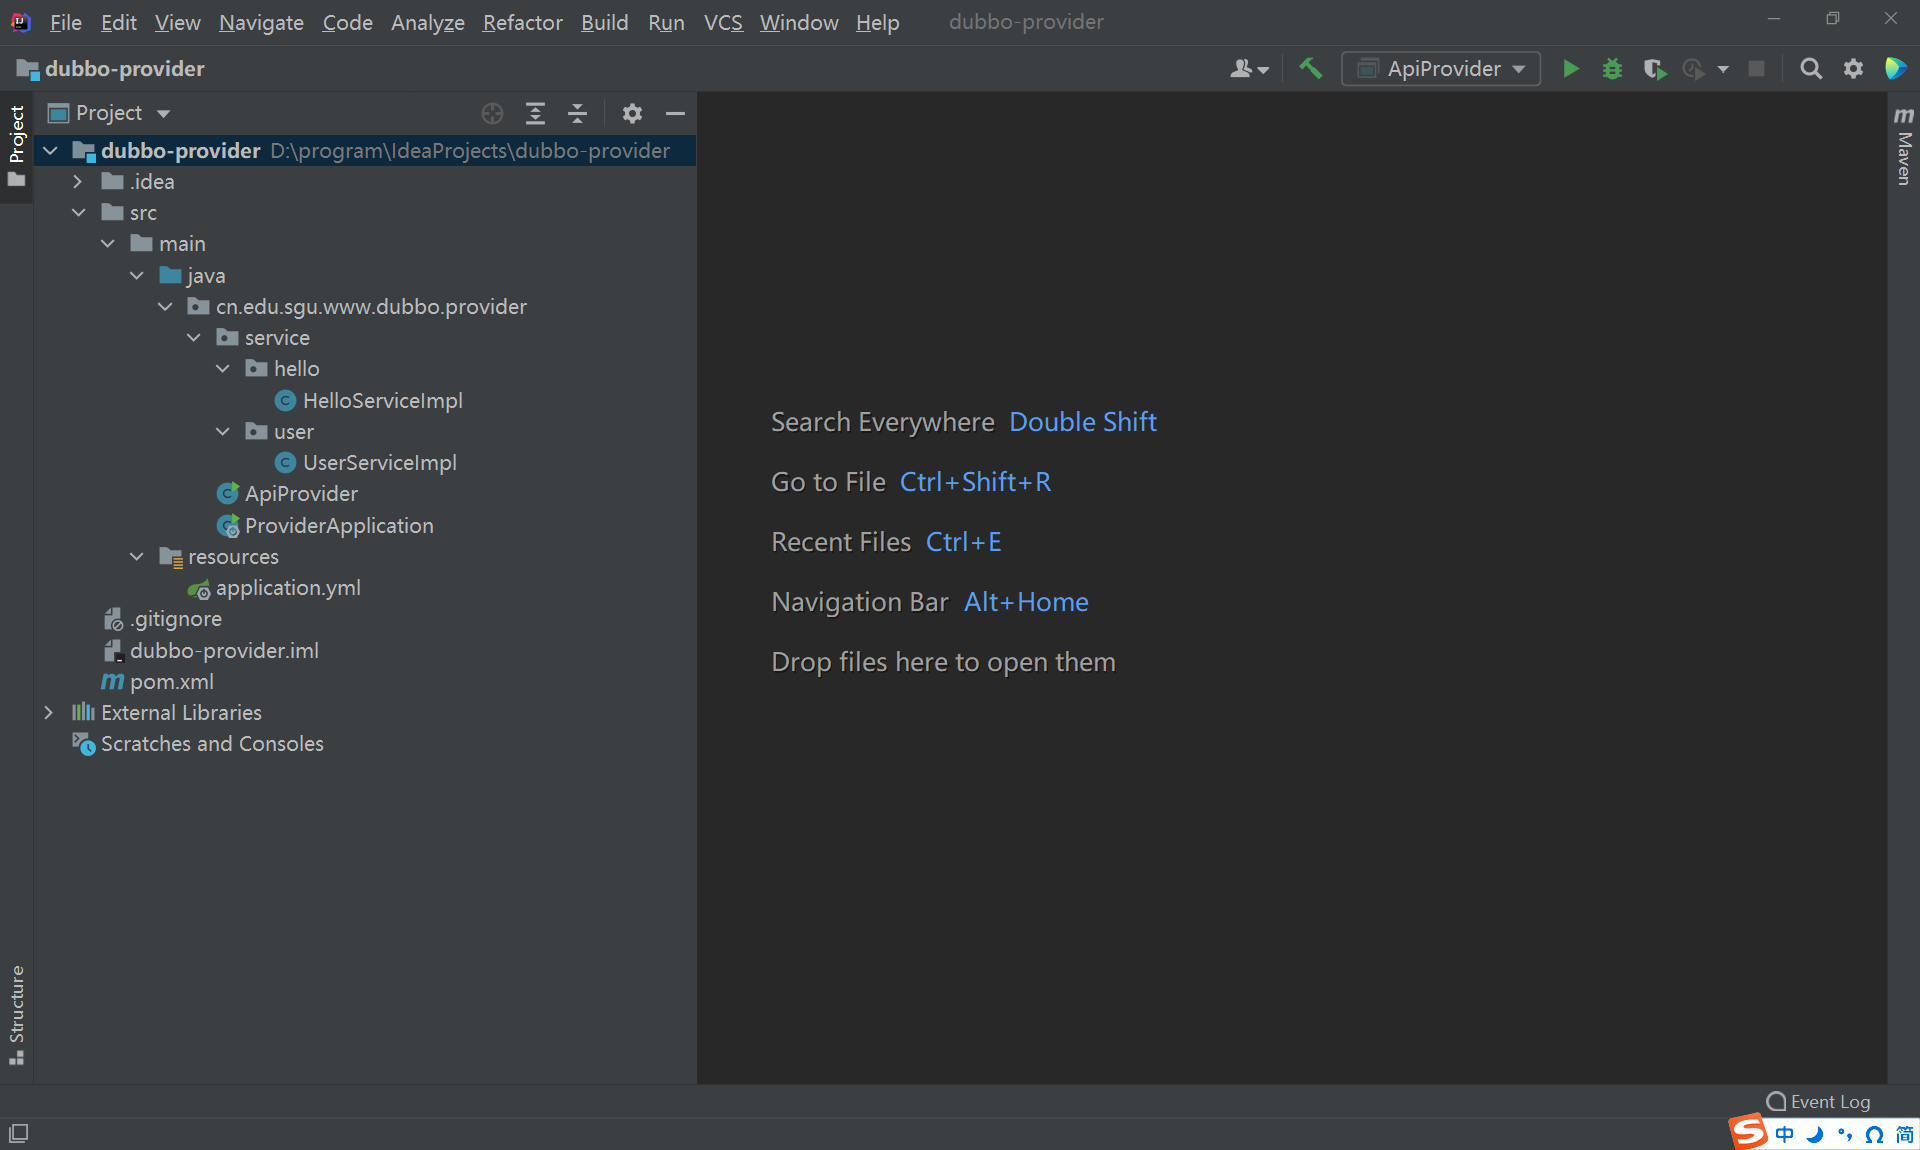
}完成以上步骤的项目目录结构如下:
- 启动类类名删除了Dubbo前缀
- 配置类后缀由.properties修改为了.yml
4、发布服务
使用API发布服务
使用Dubbo原生API发布服务:在provider包下创建ApiProvider.java
package cn.edu.sgu.www.dubbo.provider;
import cn.edu.sgu.www.dubbo.provider.service.hello.HelloService;
import cn.edu.sgu.www.dubbo.provider.service.hello.HelloServiceImpl;
import cn.edu.sgu.www.dubbo.provider.service.user.UserService;
import cn.edu.sgu.www.dubbo.provider.service.user.UserServiceImpl;
import org.apache.dubbo.config.ApplicationConfig;
import org.apache.dubbo.config.ProtocolConfig;
import org.apache.dubbo.config.RegistryConfig;
import org.apache.dubbo.config.ServiceConfig;
import java.io.IOException;
/**
* @author 沐雨橙风ιε
* @version 1.0
*/
public class ApiProvider {
public static void main(String[] args) throws IOException {
// 当前应用配置
ApplicationConfig application = new ApplicationConfig();
application.setName("dubbo-provider");
// 连接注册中心配置
RegistryConfig registry = new RegistryConfig();
registry.setAddress("nacos://localhost:8848");
// 服务提供者协议配置
ProtocolConfig protocol = new ProtocolConfig();
protocol.setName("dubbo");
protocol.setPort(20880);
protocol.setThreads(200);
// 服务提供者暴露服务配置
ServiceConfig<HelloService> helloServiceServiceConfig = new ServiceConfig<>();
helloServiceServiceConfig.setApplication(application);
helloServiceServiceConfig.setRegistry(registry); // 多个注册中心可以用setRegistries()
helloServiceServiceConfig.setProtocol(protocol); // 多个协议可以用setProtocols()
helloServiceServiceConfig.setInterface(HelloService.class);
helloServiceServiceConfig.setRef(new HelloServiceImpl());
helloServiceServiceConfig.setVersion("20250906");
// 暴露及注册服务
helloServiceServiceConfig.export();
ServiceConfig<UserService> userServiceServiceConfig = new ServiceConfig<>();
userServiceServiceConfig.setApplication(application);
userServiceServiceConfig.setRegistry(registry); // 多个注册中心可以用setRegistries()
userServiceServiceConfig.setProtocol(protocol); // 多个协议可以用setProtocols()
userServiceServiceConfig.setInterface(UserService.class);
userServiceServiceConfig.setRef(new UserServiceImpl());
userServiceServiceConfig.setVersion("20250906");
// 暴露及注册服务
userServiceServiceConfig.export();
System.out.println("dubbo-provider is running.");
System.in.read();
}
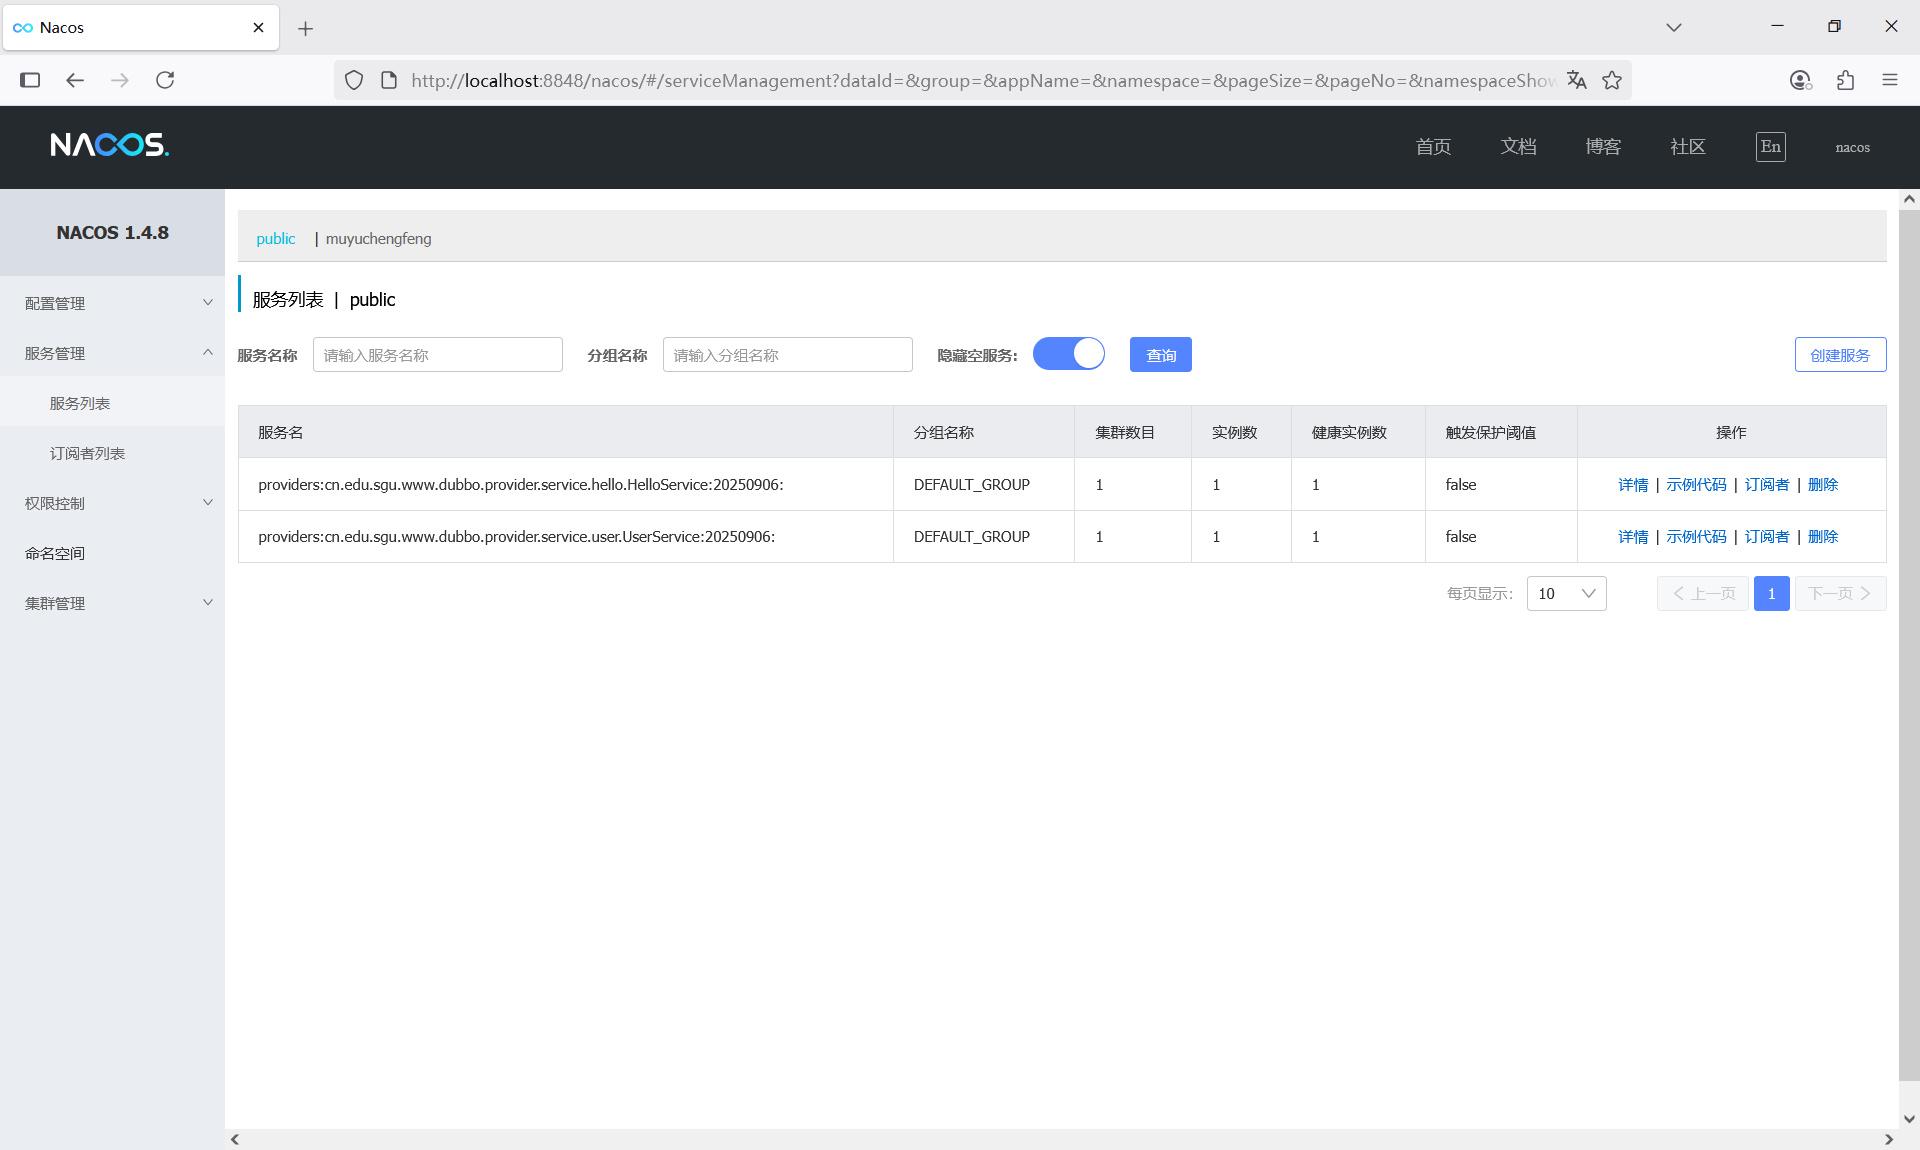
}启动nacos服务器、运行ApiProvider,访问nacos的控制台。
可以看到在默认命名空间中多了两个配置文件。

同时,Dubbo往nacos中注册了两个接口级服务。
使用Spring发布服务
基于XML文件
Dubbo支持通过xml配置文件的方式,结合Spring框架来发布服务。
dubbo-provider.xml
在classpath下创建一个xml配置文件,文件名为dubbo-provider.xml
<?xml version="1.0" encoding="UTF-8"?>
<beans xmlns="http://www.springframework.org/schema/beans"
       xmlns:xsi="http://www.w3.org/2001/XMLSchema-instance"
       xmlns:dubbo="http://dubbo.apache.org/schema/dubbo"
       xsi:schemaLocation="http://www.springframework.org/schema/beans
       http://www.springframework.org/schema/beans/spring-beans-4.3.xsd
       http://dubbo.apache.org/schema/dubbo
       http://dubbo.apache.org/schema/dubbo/dubbo.xsd">

    <!-- 提供方应用信息,用于计算依赖关系 -->
    <dubbo:application name="dubbo-provider"  />

    <!-- 用dubbo协议在20880端口暴露服务 -->
    <dubbo:protocol name="dubbo" port="20880" />

    <!-- 使用nacos注册中心暴露服务地址 -->
    <dubbo:registry address="nacos://localhost:8848" />

    <!-- 声明需要暴露的服务接口 -->
    <dubbo:service interface="cn.edu.sgu.www.dubbo.provider.service.user.UserService" ref="userService" />
    <dubbo:service interface="cn.edu.sgu.www.dubbo.provider.service.hello.HelloService" ref="helloService" />

    <!-- 和本地bean一样实现服务 -->
    <bean id="userService" class="cn.edu.sgu.www.dubbo.provider.service.user.UserServiceImpl" />
    <bean id="helloService" class="cn.edu.sgu.www.dubbo.provider.service.hello.HelloServiceImpl" />
</beans>
SpringProvider.java
在provider包下创建SpringProvider类,通过xml配置文件创建并启动Spring容器。
package cn.edu.sgu.www.dubbo.provider;

import org.springframework.context.support.ClassPathXmlApplicationContext;

import java.io.IOException;

/**
 * @author 沐雨橙风ιε
 * @version 1.0
 */
public class SpringProvider {

    public static void main(String[] args) throws IOException {
        ClassPathXmlApplicationContext applicationContext = new ClassPathXmlApplicationContext("dubbo-provider.xml");

        applicationContext.start();

        System.out.println("dubbo-provider is running.");
        System.in.read();
    }

}
停止之前运行的ApiProvider,并删除其创建的nacos配置文件。
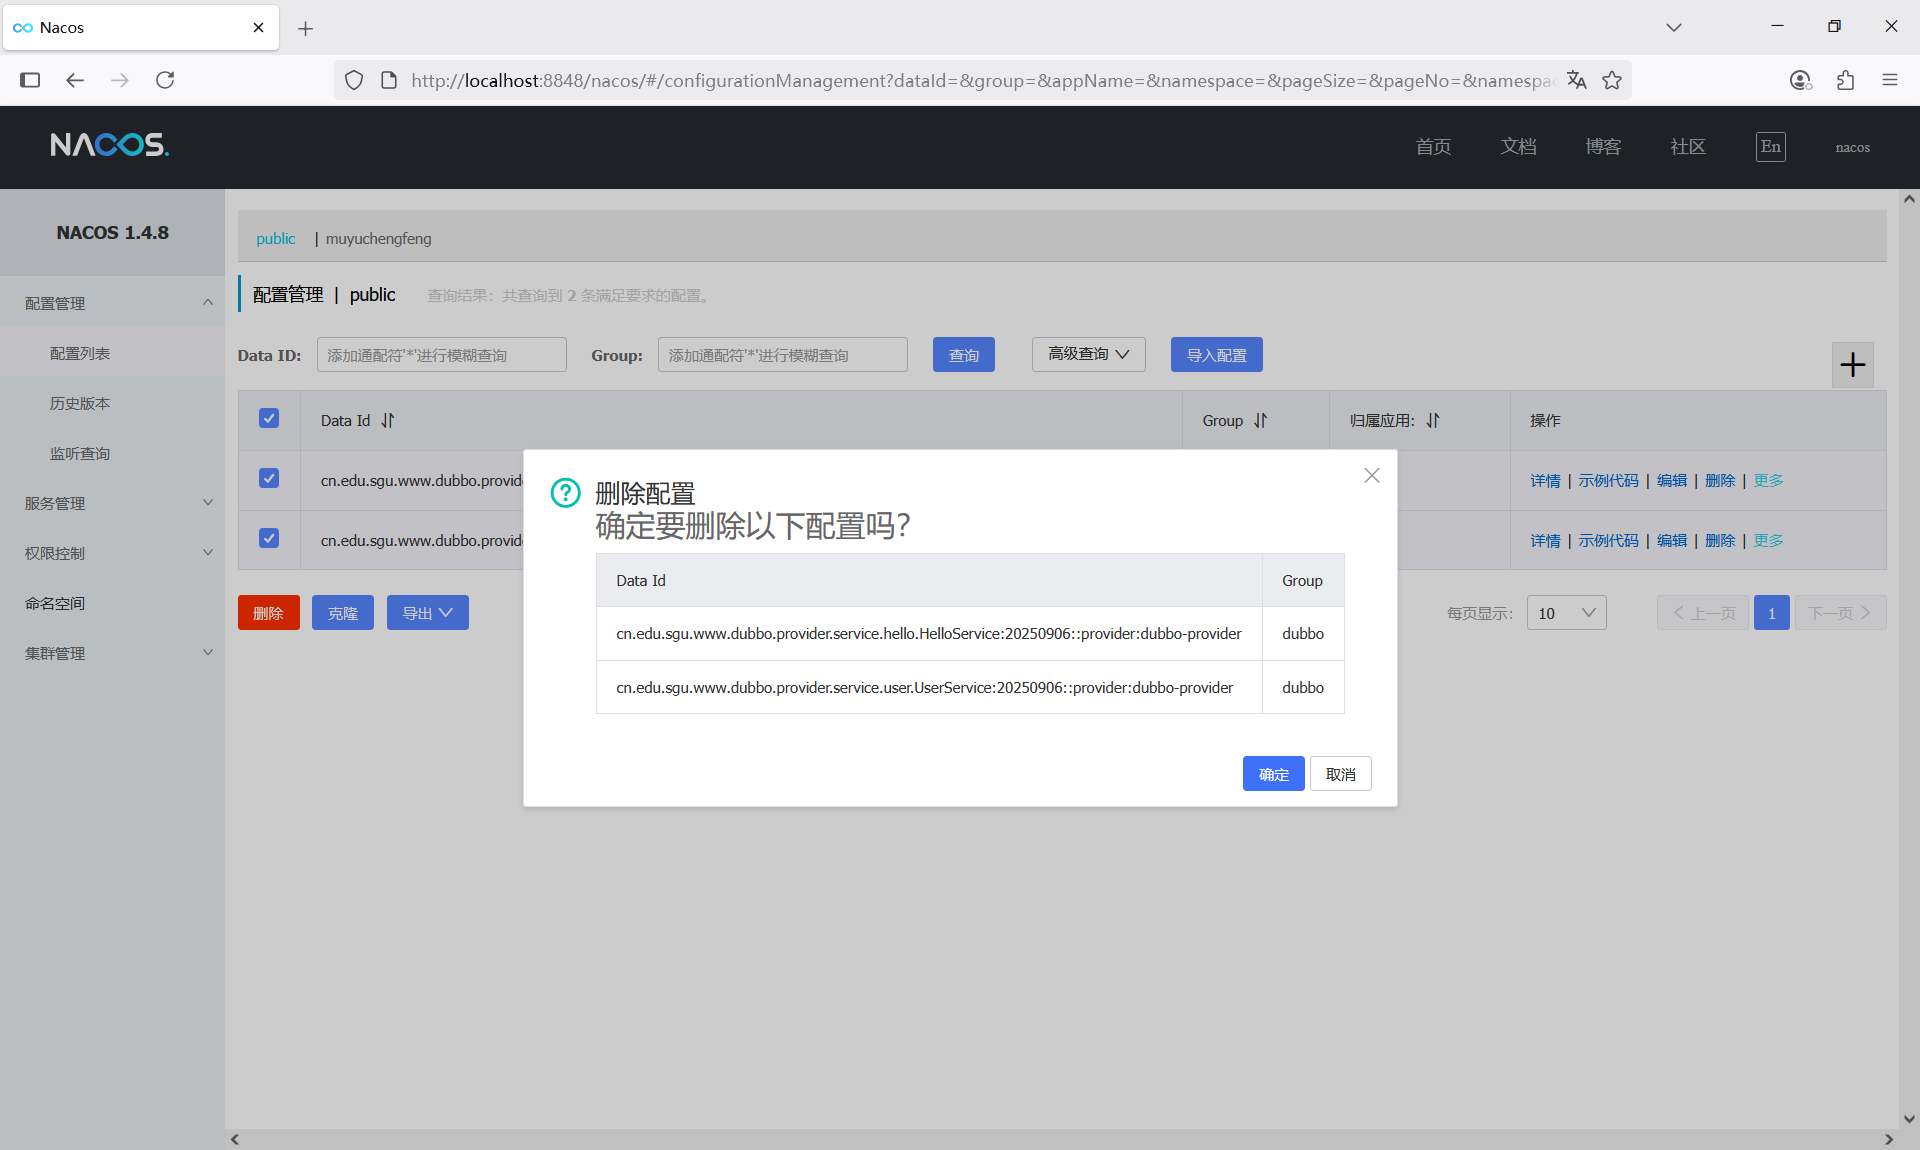
启动SpringProvider,发现又创建了这两个配置文件
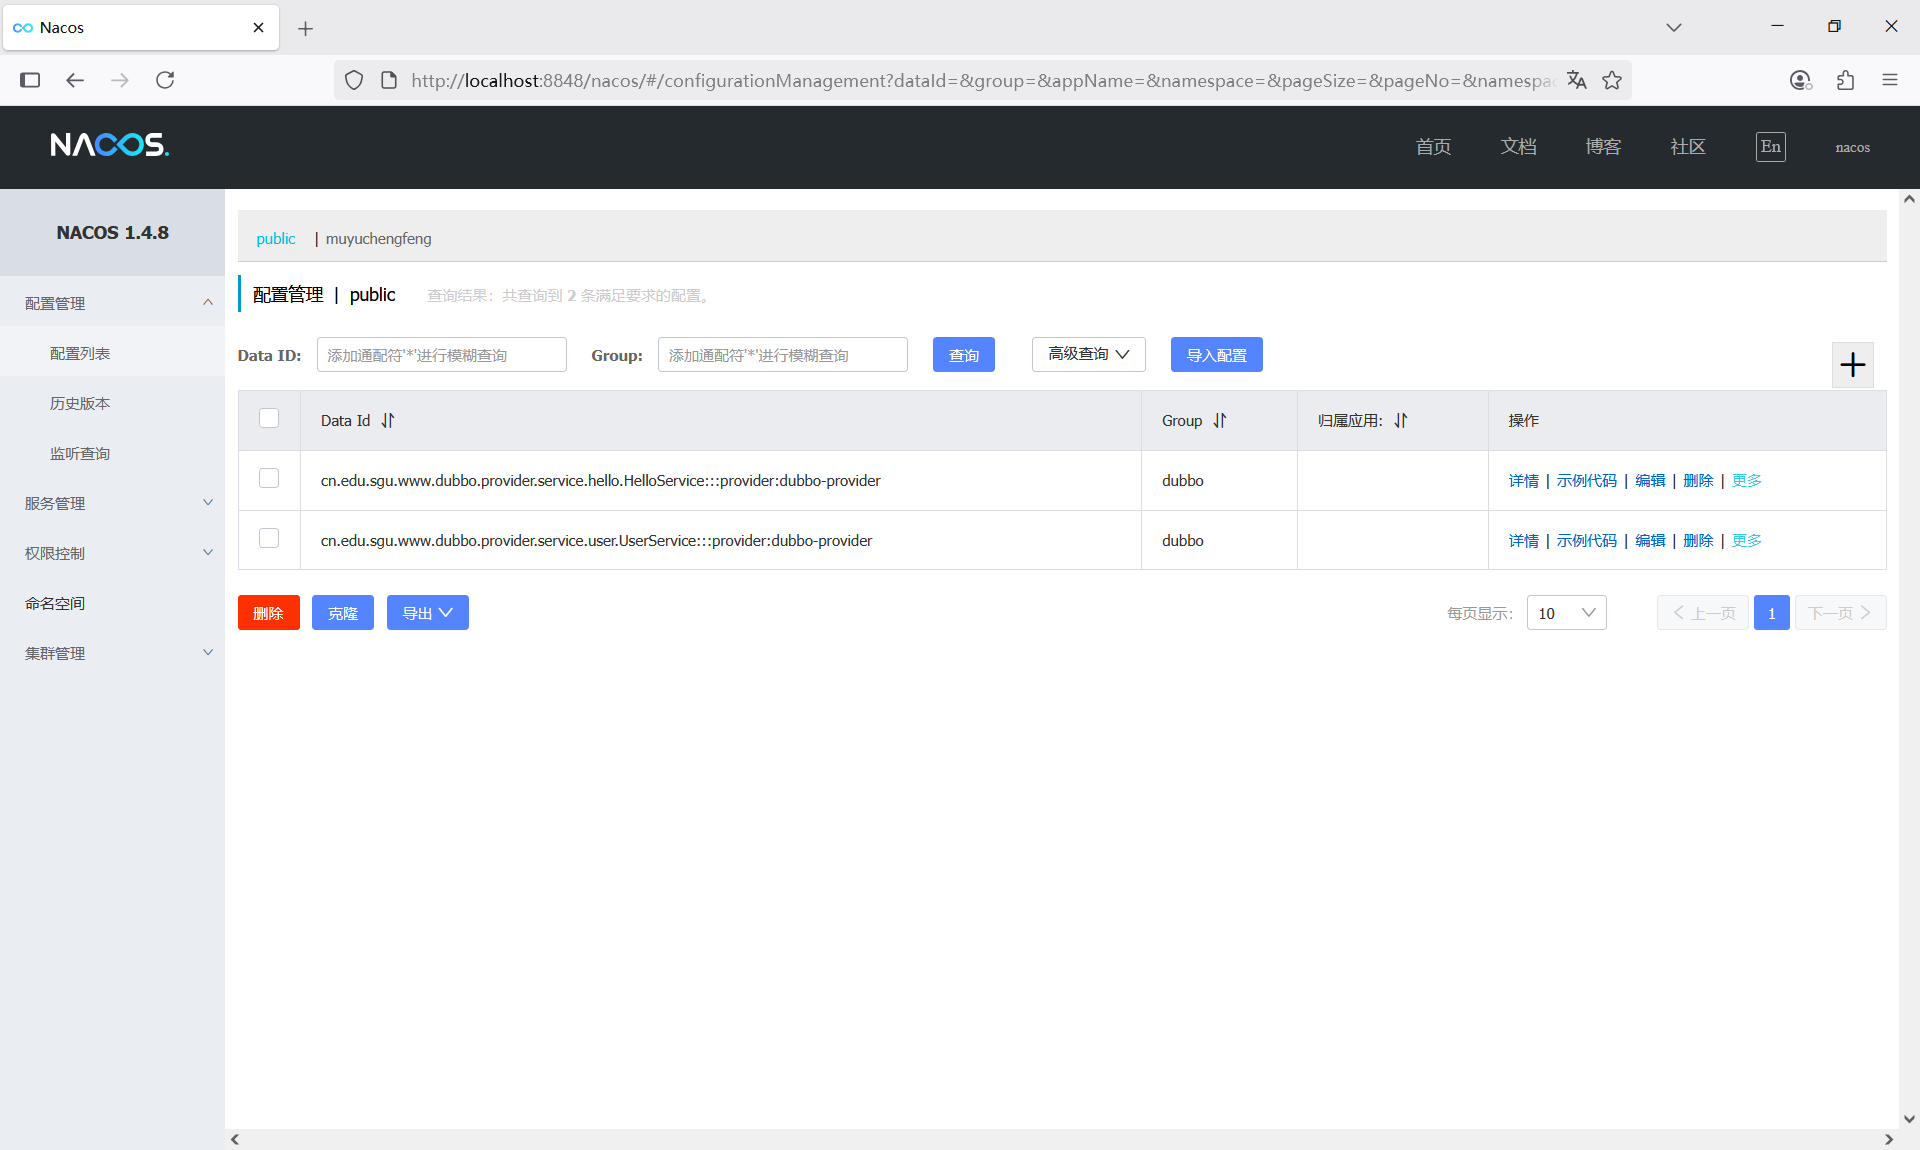
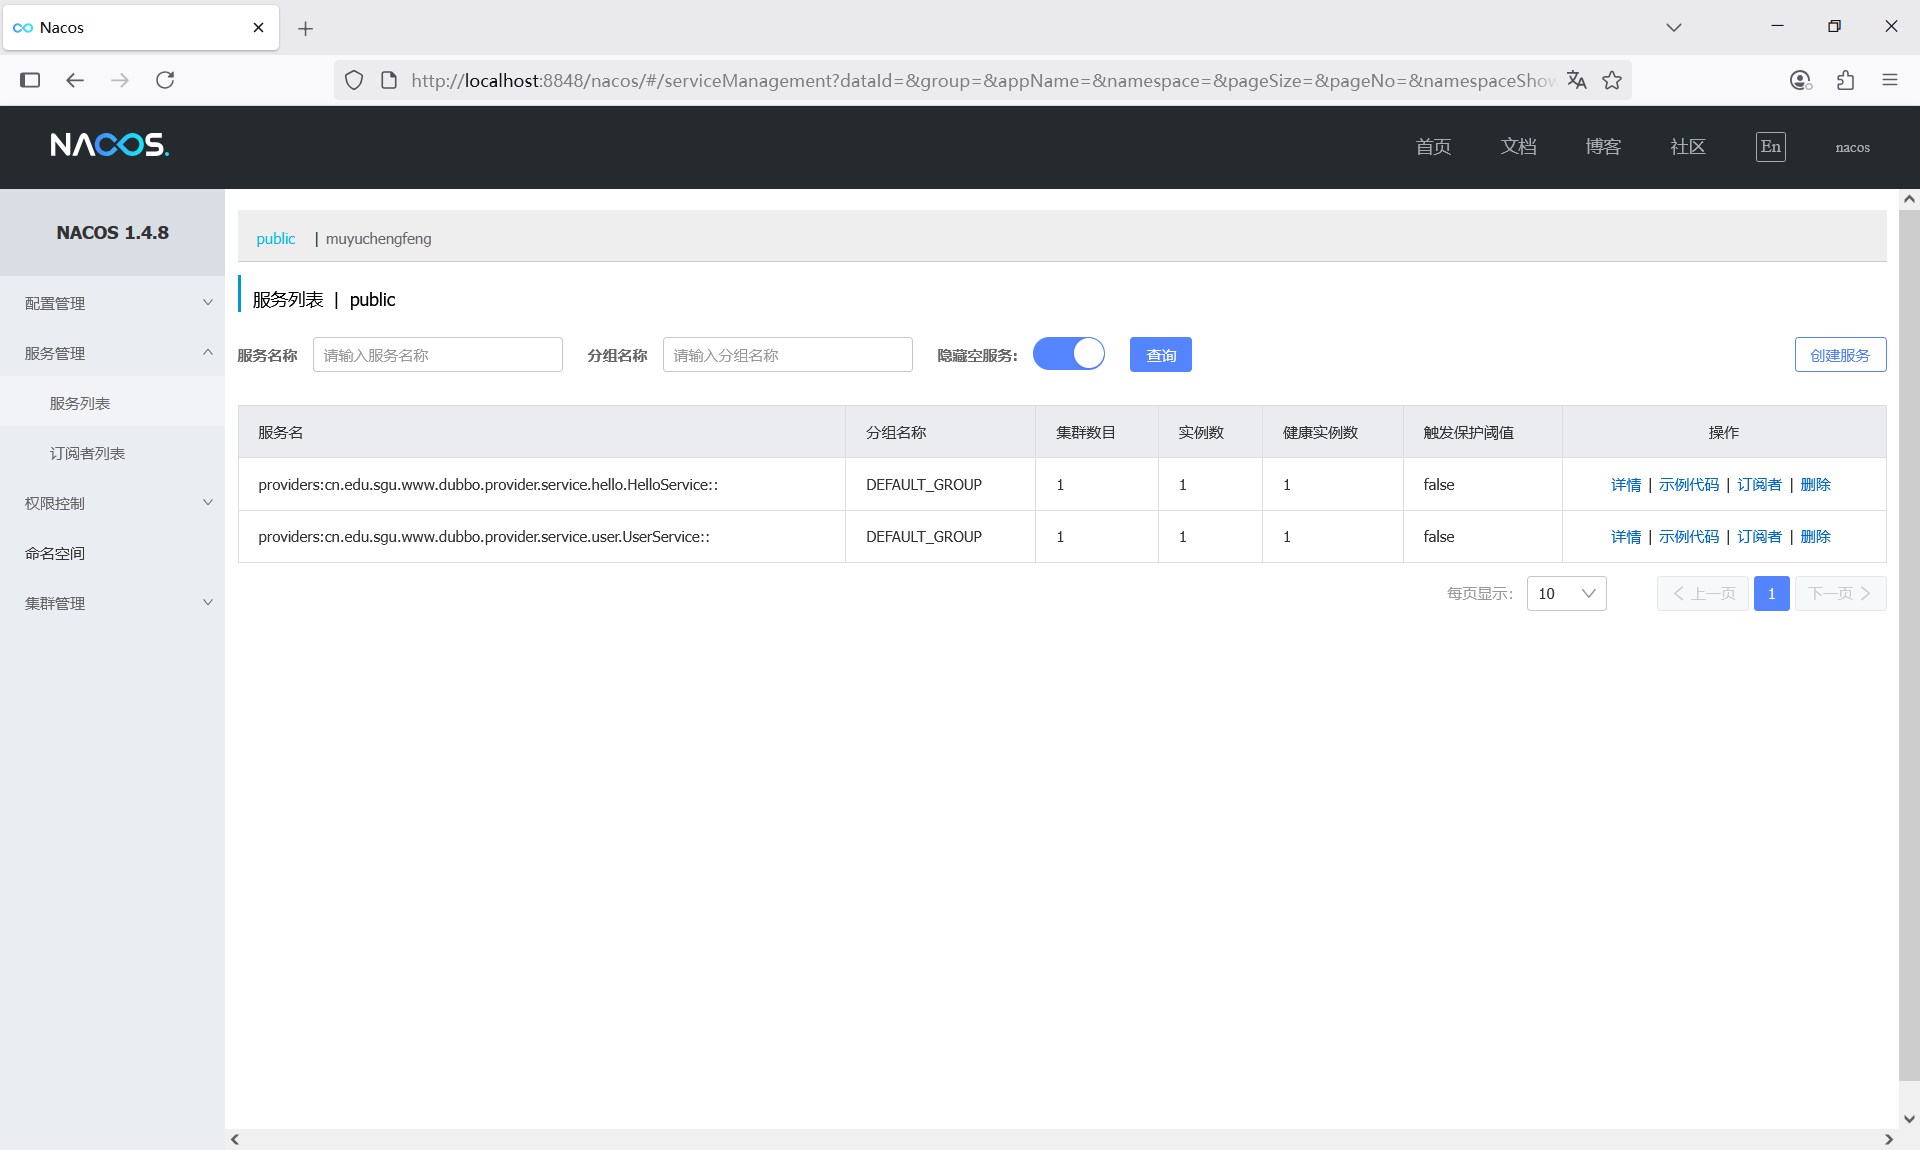
并且这两个服务也注册到了nacos
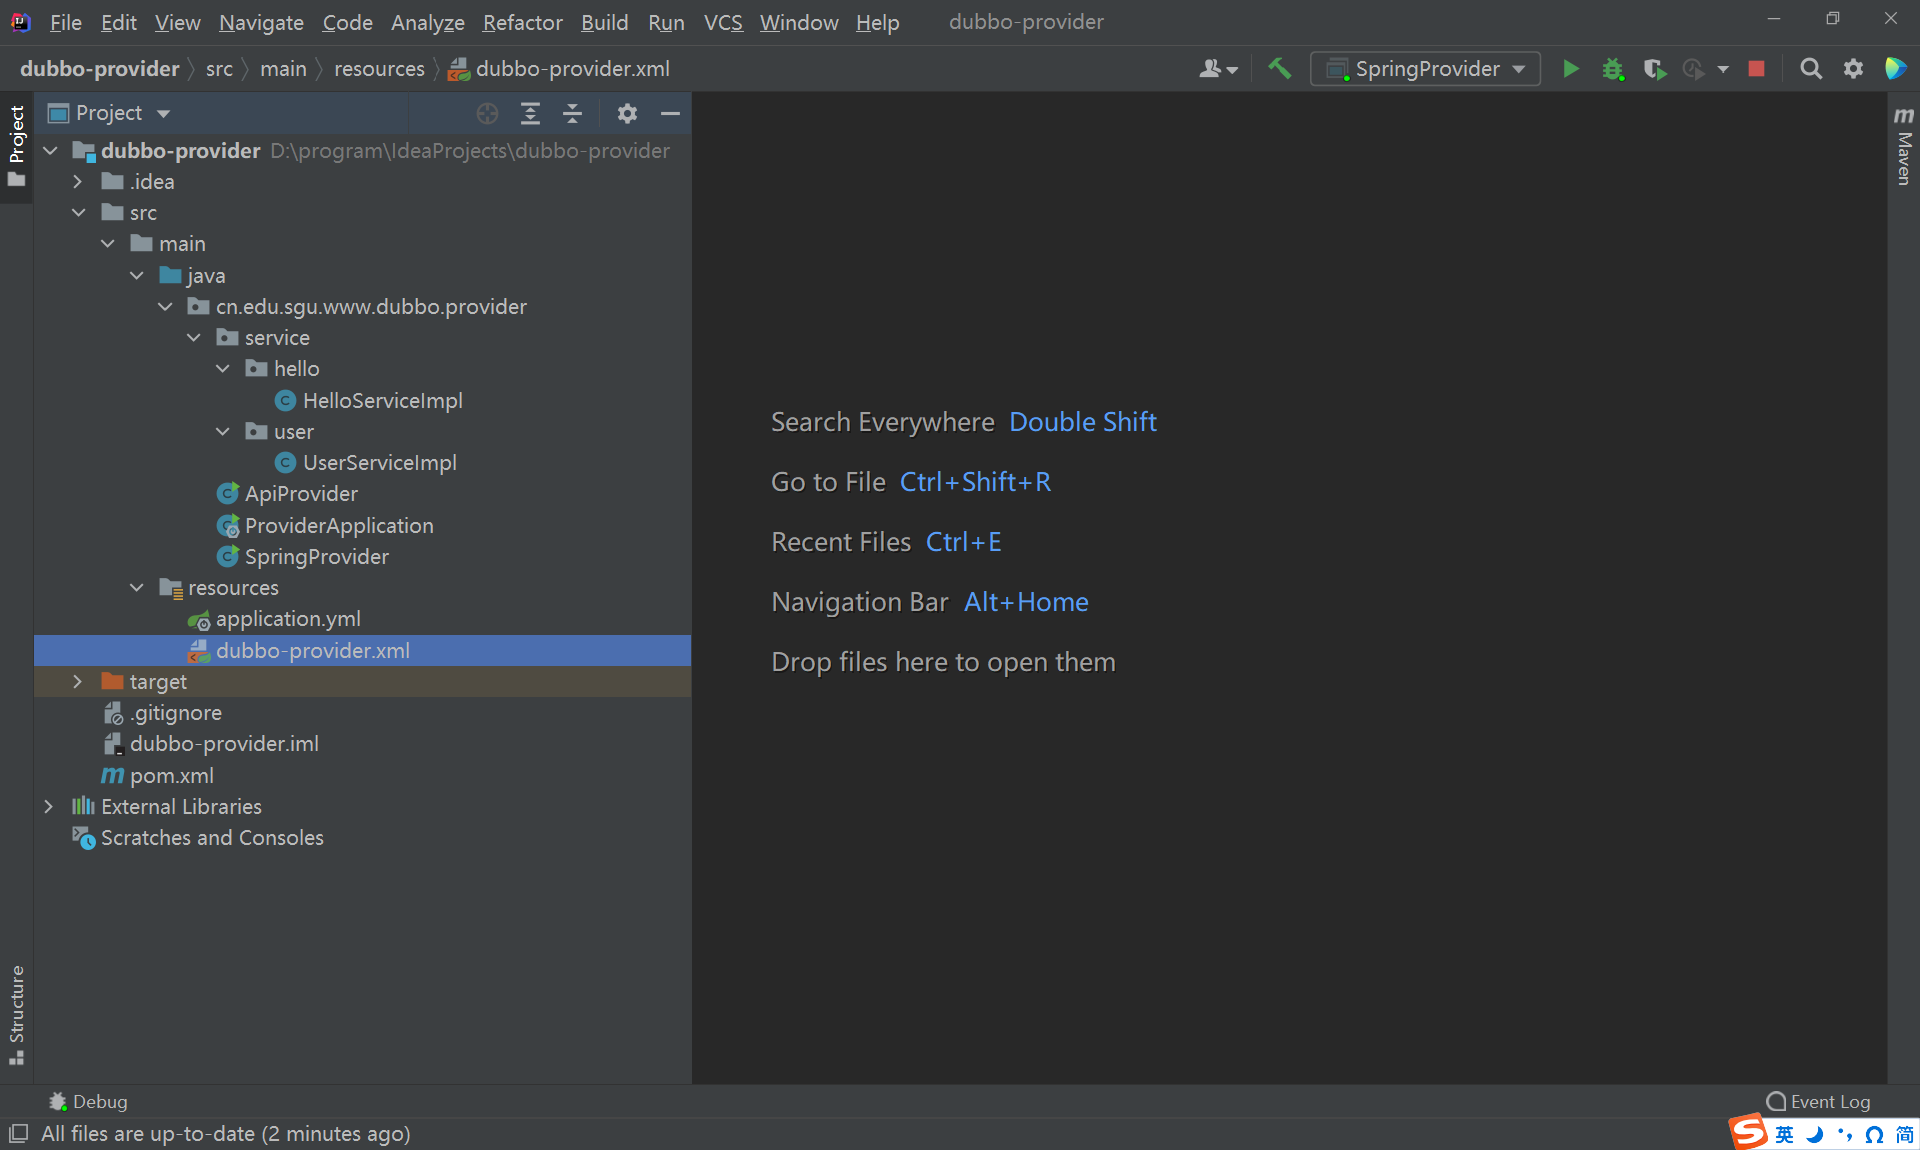
完成以上步骤的项目目录结构如下:
基于注解
除了基于xml配置文件的方式以外,Spring还支持使用注解的方式发布(暴露)服务。
dubbo-provider.properties
在classpath下创建一个properties配置文件,文件名为dubbo-provider.properties
dubbo.application.name=dubbo-provider
dubbo.registry.address=nacos://localhost:8848
dubbo.protocol.name=dubbo
dubbo.protocol.port=20880
ProviderConfig.java
在HelloServiceImpl和UserServiceImpl两个类上使用@DubboService注解,将这两个类定义为Dubbo服务。
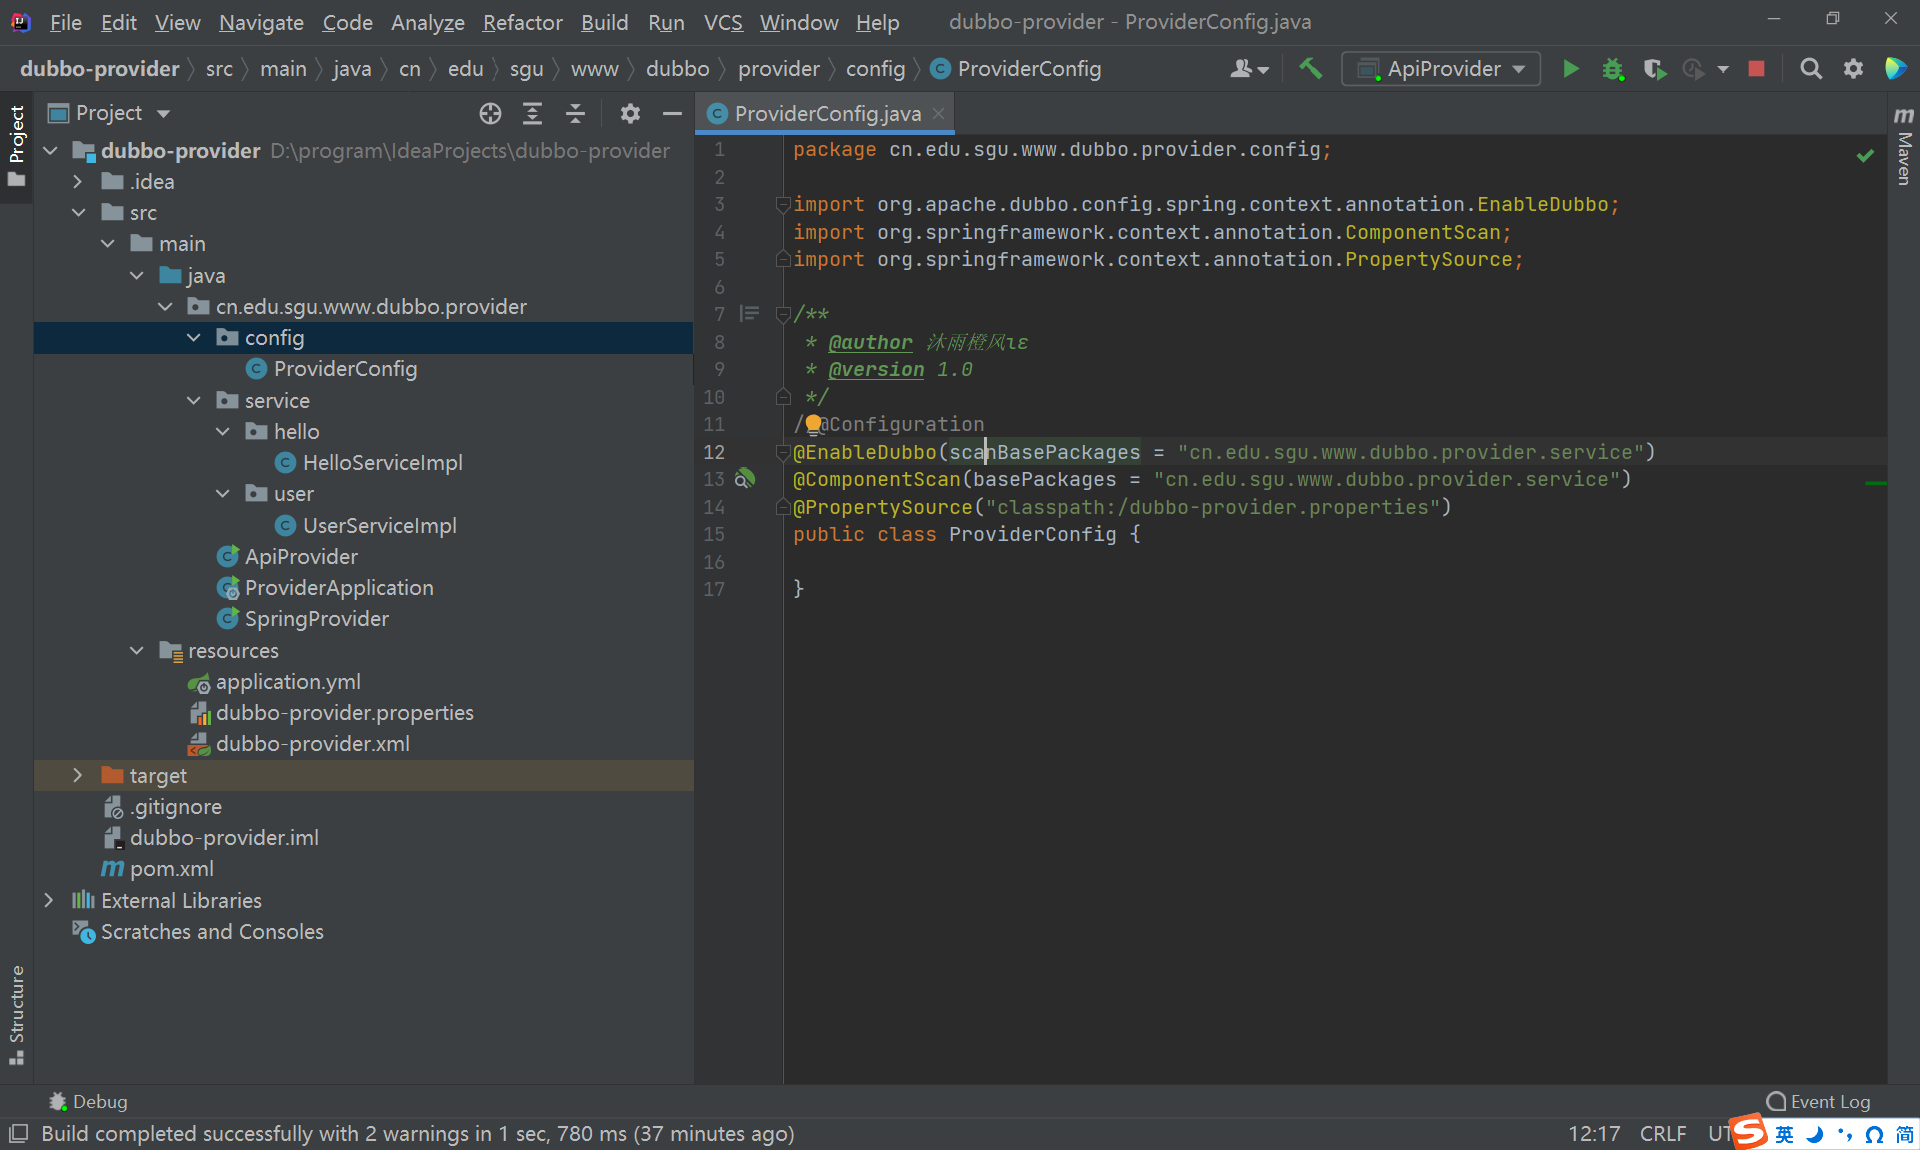
在provider包下创建config子包,在config包下创建一个配置类ProviderConfig。
- 在配置类上使用@EnableDubbo注解,指定扫描service包下的Dubbo服务。
- 在配置类上使用@PropertySource注解,加载classpath下的配置文件dubbo-provider.properties。
package cn.edu.sgu.www.dubbo.provider.config;

import org.apache.dubbo.config.spring.context.annotation.EnableDubbo;
import org.springframework.context.annotation.ComponentScan;
import org.springframework.context.annotation.Configuration;
import org.springframework.context.annotation.PropertySource;

/**
 * @author 沐雨橙风ιε
 * @version 1.0
 */
@Configuration
@EnableDubbo(scanBasePackages = "cn.edu.sgu.www.dubbo.provider.service")
@ComponentScan(basePackages = "cn.edu.sgu.www.dubbo.provider.service")
@PropertySource("classpath:/dubbo-provider.properties")
public class ProviderConfig {

}
SpringProvider.java
通过配置文件创建并启动Spring容器。
package cn.edu.sgu.www.dubbo.provider;

import cn.edu.sgu.www.dubbo.provider.config.ProviderConfig;
import org.springframework.context.annotation.AnnotationConfigApplicationContext;

import java.io.IOException;

/**
 * @author 沐雨橙风ιε
 * @version 1.0
 */
public class SpringProvider {

    public static void main(String[] args) throws IOException {
        AnnotationConfigApplicationContext applicationContext = new AnnotationConfigApplicationContext(ProviderConfig.class);

        applicationContext.start();

        System.out.println("dubbo-provider is running.");
        System.in.read();
    }

}
停止运行中的SpringProvider,并删除其创建的nacos配置文件。
再次运行SpringProvider,发现配置文件被重新创建,并且服务也注册到了nacos。
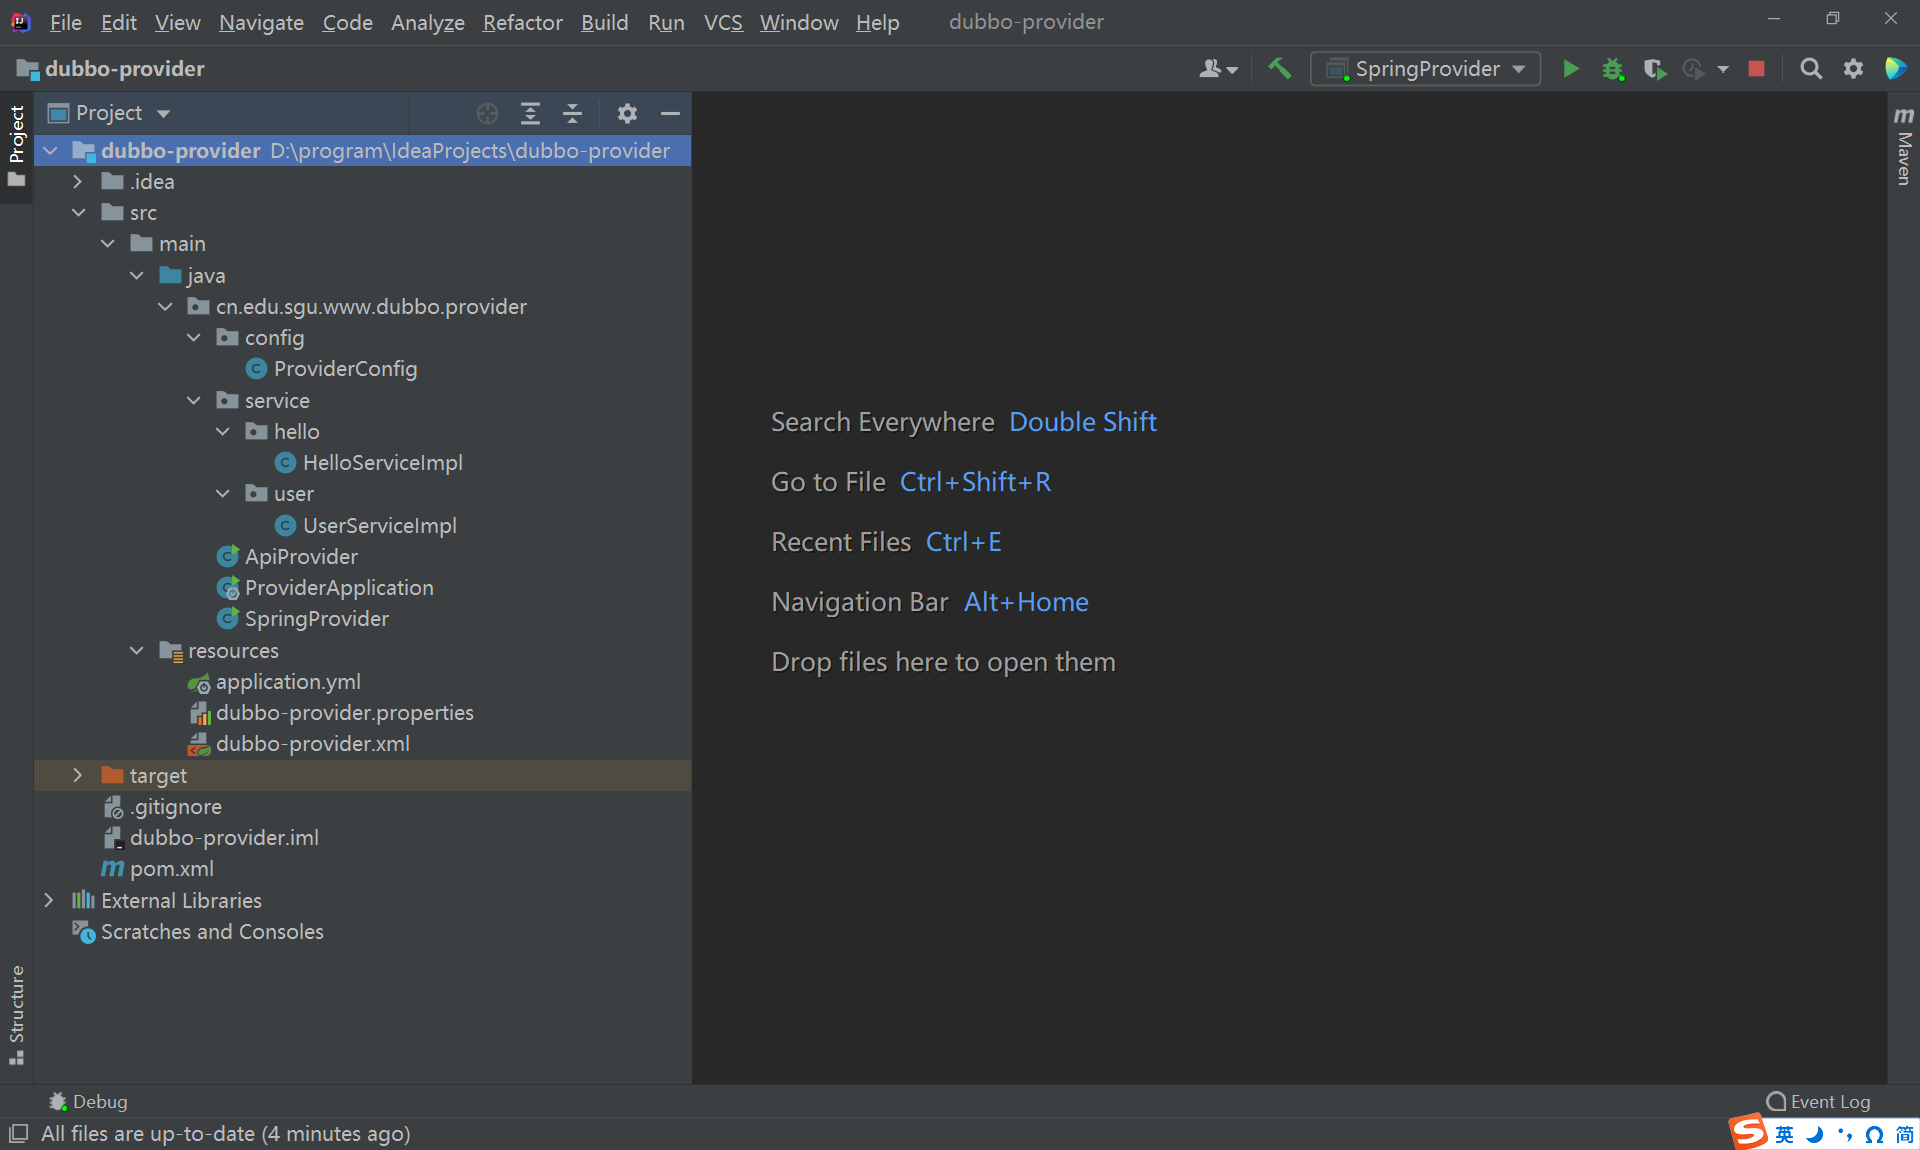
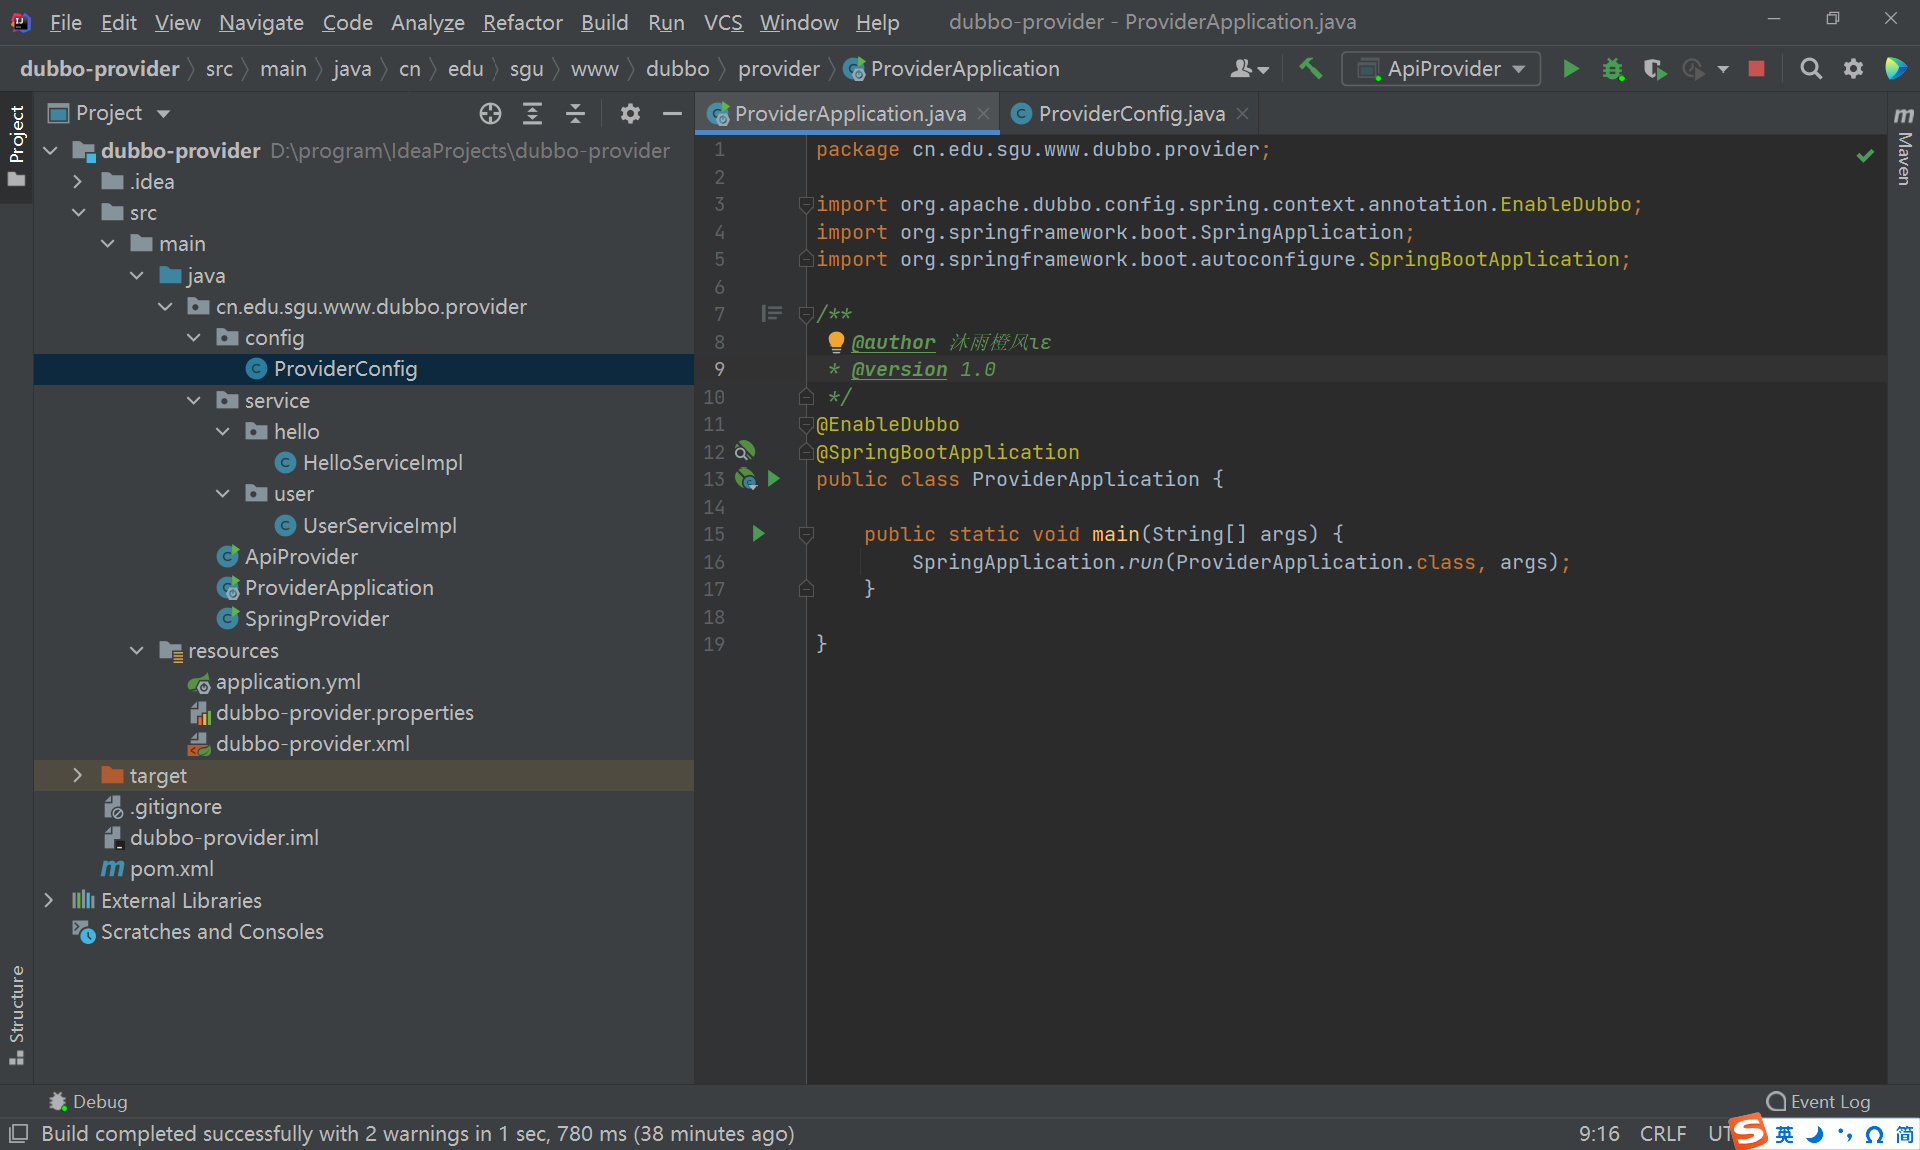
完成以上步骤的项目目录结构如下:
三、创建服务消费者
1、创建项目
在Intellij IDEA中创建一个Spring Boot项目,项目名为dubbo-consumer
2、添加依赖
<?xml version="1.0" encoding="UTF-8"?>
<project xmlns="http://maven.apache.org/POM/4.0.0" xmlns:xsi="http://www.w3.org/2001/XMLSchema-instance"
         xsi:schemaLocation="http://maven.apache.org/POM/4.0.0 https://maven.apache.org/xsd/maven-4.0.0.xsd">
    <modelVersion>4.0.0</modelVersion>

    <parent>
        <groupId>org.springframework.boot</groupId>
        <artifactId>spring-boot-starter-parent</artifactId>
        <version>2.3.4.RELEASE</version>
    </parent>

    <version>20250907</version>
    <artifactId>dubbo-consumer</artifactId>
    <description>Apache Dubbo服务消费者项目</description>

    <properties>
        <java.version>1.8</java.version>
        <dubbo.version>2.7.23</dubbo.version>
        <dubbo-registry.version>3.2.10</dubbo-registry.version>
    </properties>

    <dependencyManagement>
        <dependencies>
            <dependency>
                <groupId>org.apache.dubbo</groupId>
                <artifactId>dubbo-bom</artifactId>
                <version>${dubbo.version}</version>
                <type>pom</type>
                <scope>import</scope>
            </dependency>
        </dependencies>
    </dependencyManagement>

    <dependencies>
        <dependency>
            <groupId>org.springframework.boot</groupId>
            <artifactId>spring-boot-starter-web</artifactId>
        </dependency>

        <dependency>
            <version>20250906</version>
            <groupId>cn.edu.sgu.www</groupId>
            <artifactId>dubbo-api</artifactId>
        </dependency>

        <dependency>
            <groupId>org.apache.dubbo</groupId>
            <artifactId>dubbo-spring-boot-starter</artifactId>
        </dependency>

        <dependency>
            <groupId>org.apache.dubbo</groupId>
            <artifactId>dubbo-nacos-spring-boot-starter</artifactId>
            <version>${dubbo-registry.version}</version>
        </dependency>
<!--        <dependency>-->
<!--            <groupId>org.apache.dubbo</groupId>-->
<!--            <artifactId>dubbo-zookeeper-spring-boot-starter</artifactId>-->
<!--            <version>${dubbo-registry.version}</version>-->
<!--        </dependency>-->
    </dependencies>

    <build>
        <plugins>
            <plugin>
                <groupId>org.springframework.boot</groupId>
                <artifactId>spring-boot-maven-plugin</artifactId>
                <version>2.3.4.RELEASE</version>
            </plugin>
        </plugins>
    </build>
</project>
3、调用服务
使用API调用服务
使用Dubbo原生API调用服务:在consumer包下创建ApiConsumer.java
package cn.edu.sgu.www.dubbo.consumer;
import cn.edu.sgu.www.dubbo.provider.service.hello.HelloService;
import cn.edu.sgu.www.dubbo.provider.service.user.UserService;
import org.apache.dubbo.config.ApplicationConfig;
import org.apache.dubbo.config.ReferenceConfig;
import org.apache.dubbo.config.RegistryConfig;
import java.util.List;
/**
* @author 沐雨橙风ιε
* @version 1.0
*/
public class ApiConsumer {
public static void main(String[] args) {
// 当前应用配置
ApplicationConfig application = new ApplicationConfig();
application.setName("dubbo-consumer");
// 连接注册中心配置
RegistryConfig registry = new RegistryConfig();
registry.setAddress("nacos://localhost:8848");
/*
* 1、引用HelloService远程服务
*/
ReferenceConfig<HelloService> helloServiceReferenceConfig = new ReferenceConfig<>();
helloServiceReferenceConfig.setApplication(application);
helloServiceReferenceConfig.setRegistry(registry); // 多个注册中心可以用setRegistries()
helloServiceReferenceConfig.setInterface(HelloService.class);
helloServiceReferenceConfig.setVersion("20250906");
// 和本地bean一样使用HelloService
HelloService helloService = helloServiceReferenceConfig.get();
helloService.greet();
/*
* 2、引用UserService远程服务
*/
ReferenceConfig<UserService> userServiceReferenceConfig = new ReferenceConfig<>();
userServiceReferenceConfig.setApplication(application);
userServiceReferenceConfig.setRegistry(registry); // 多个注册中心可以用setRegistries()
userServiceReferenceConfig.setInterface(UserService.class);
userServiceReferenceConfig.setVersion("20250906");
// 和本地bean一样使用UserServiceService
UserService userService = userServiceReferenceConfig.get();
List<String> list = userService.selectAll();
System.out.println(list);
}
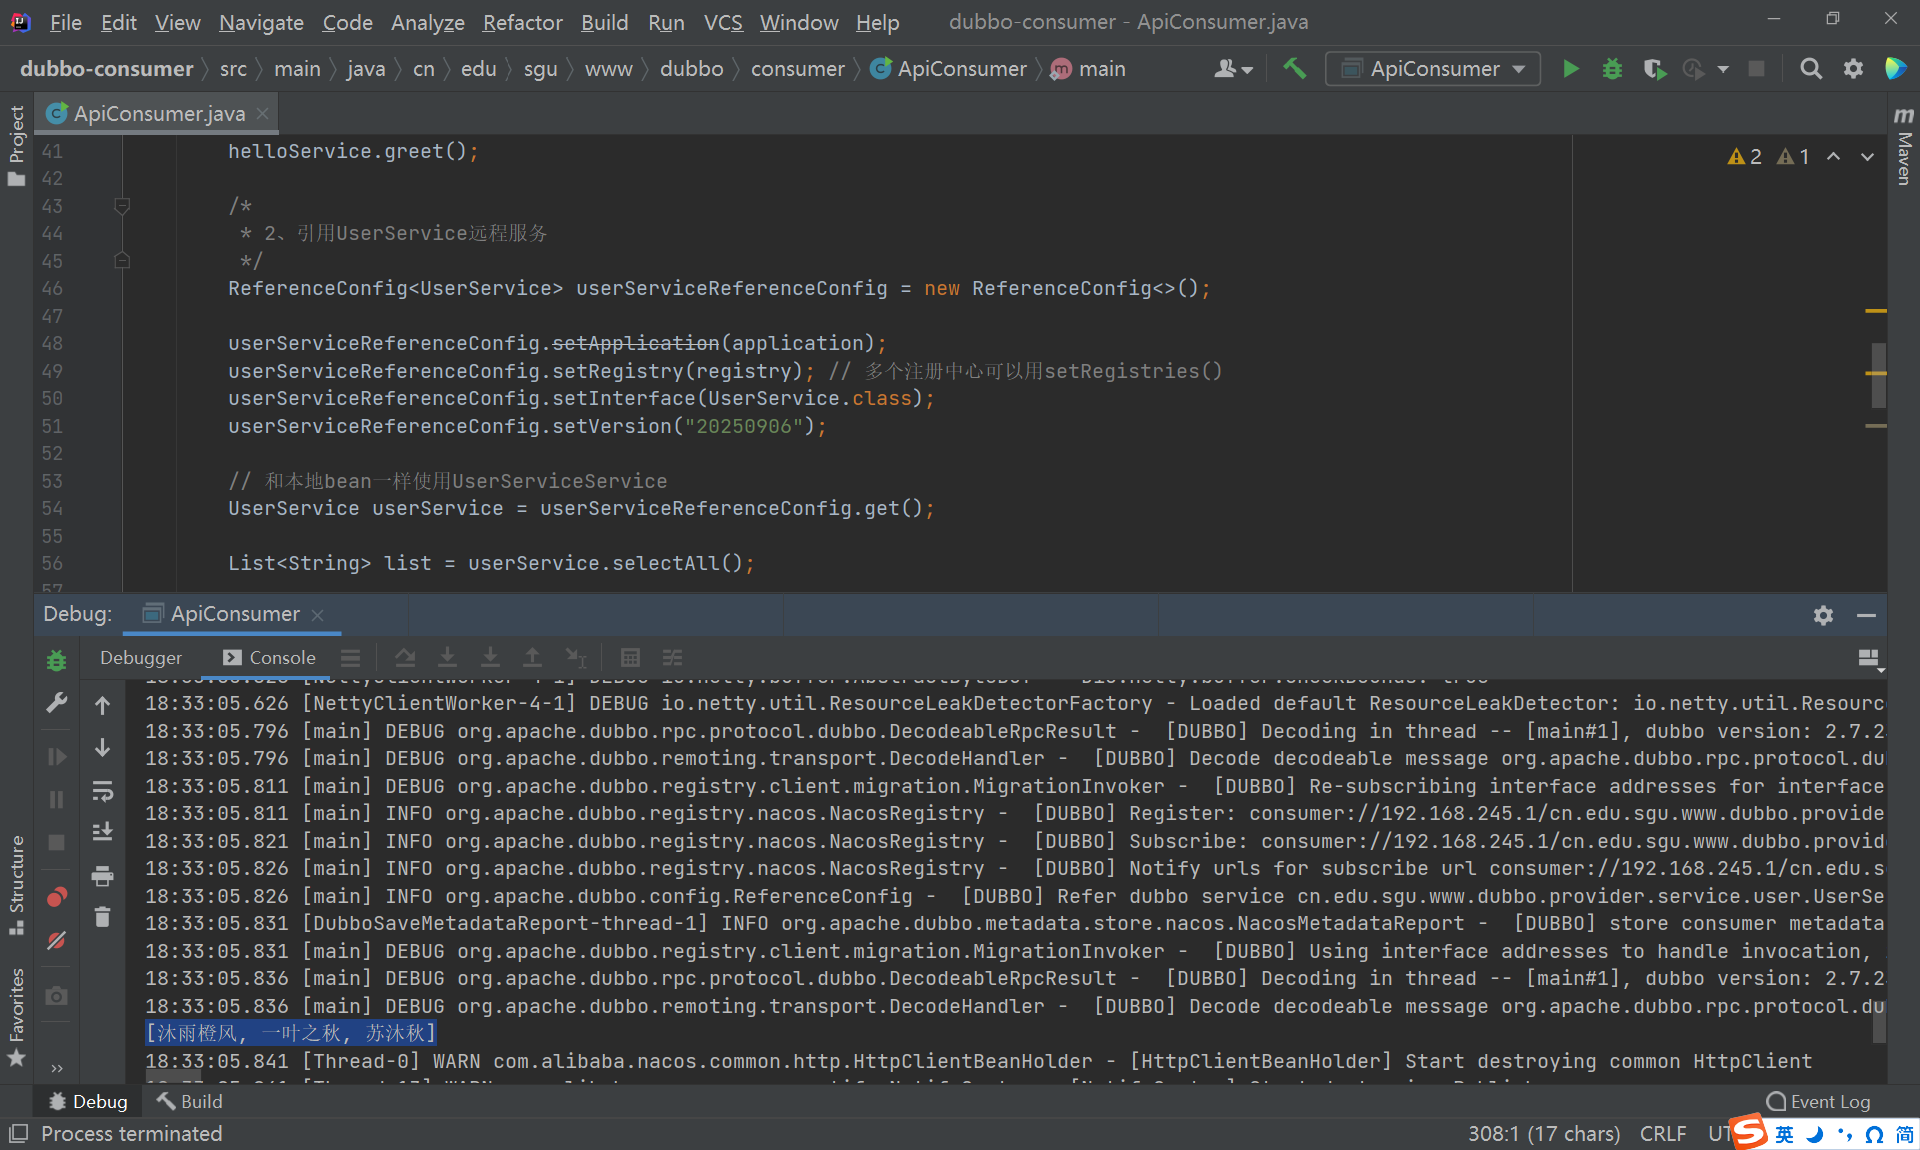
}启动服务提供者的ApiProvider,然后启动当前项目的ApiConsumer
可以看到控制台打印出来了调用UserService接口的selectAll()方法返回的结果。
使用Spring调用服务
基于XML文件
dubbo-consumer.xml
在classpath下创建一个xml配置文件,文件名为dubbo-consumer.xml
<?xml version="1.0" encoding="UTF-8"?>
<beans xmlns="http://www.springframework.org/schema/beans"
       xmlns:xsi="http://www.w3.org/2001/XMLSchema-instance"
       xmlns:dubbo="http://dubbo.apache.org/schema/dubbo"
       xsi:schemaLocation="http://www.springframework.org/schema/beans
       http://www.springframework.org/schema/beans/spring-beans-4.3.xsd
       http://dubbo.apache.org/schema/dubbo
       http://dubbo.apache.org/schema/dubbo/dubbo.xsd">

    <!-- 消费方应用名,用于计算依赖关系,不是匹配条件,不要与提供方一样 -->
    <dubbo:application name="dubbo-consumer"  />

    <!-- 使用nacos注册中心暴露发现服务地址 -->
    <dubbo:registry address="nacos://localhost:8848" />

    <!-- 生成远程服务代理,可以和本地bean一样使用demoService -->
    <dubbo:reference id="userService" interface="cn.edu.sgu.www.dubbo.provider.service.user.UserService" />
    <dubbo:reference id="helloService" interface="cn.edu.sgu.www.dubbo.provider.service.hello.HelloService" />
</beans>
SpringConsumer.java
在sonsumer包下创建SpringConsumer类,通过xml配置文件创建并启动Spring容器。
通过Spring容器获取Dubbo引用的Dubbo服务的Bean对象,调用Bean对象的方法。
package cn.edu.sgu.www.dubbo.consumer;

import cn.edu.sgu.www.dubbo.provider.service.hello.HelloService;
import cn.edu.sgu.www.dubbo.provider.service.user.UserService;
import org.springframework.context.support.ClassPathXmlApplicationContext;

import java.util.List;

/**
 * @author 沐雨橙风ιε
 * @version 1.0
 */
public class SpringConsumer {

    public static void main(String[] args) {
        ClassPathXmlApplicationContext applicationContext = new ClassPathXmlApplicationContext("dubbo-consumer.xml");

        applicationContext.start();

        // HelloService
        HelloService helloService = applicationContext.getBean(HelloService.class);

        helloService.greet();

        // UserService
        UserService userService = applicationContext.getBean(UserService.class);

        List<String> list = userService.selectAll();

        System.out.println(list);
    }

}
基于注解
dubbo-consumer.properties
在classpath下创建一个properties配置文件,文件名为dubbo-provider.properties
dubbo.application.name=dubbo-consumer
dubbo.registry.address=nacos://localhost:8848
HelloController.java
在consumer包下创建controller包,在controller包下创建HelloController类。
通过@DubboReference注解引入Dubbo暴露的接口级服务HelloService
package cn.edu.sgu.www.dubbo.consumer.controller;

import cn.edu.sgu.www.dubbo.provider.service.hello.HelloService;
import org.apache.dubbo.config.annotation.DubboReference;
import org.springframework.web.bind.annotation.GetMapping;
import org.springframework.web.bind.annotation.RequestMapping;
import org.springframework.web.bind.annotation.RestController;

/**
 * @author 沐雨橙风ιε
 * @version 1.0
 */
@RestController
@RequestMapping(path = "/hello", produces = "application/json;charset=utf-8")
public class HelloController {

    @DubboReference
    private HelloService helloService;

    @GetMapping("/greet")
    public void greet() {
        helloService.greet();
    }

}
UserController.java
在controller包下创建UserController类。
通过@DubboReference注解引入Dubbo暴露的接口级服务UserService
package cn.edu.sgu.www.dubbo.consumer.controller;
import cn.edu.sgu.www.dubbo.provider.service.user.UserService;
import org.apache.dubbo.config.annotation.DubboReference;
import org.springframework.web.bind.annotation.GetMapping;
import org.springframework.web.bind.annotation.RequestMapping;
import org.springframework.web.bind.annotation.RestController;
import java.util.List;
/**
* @author 沐雨橙风ιε
* @version 1.0
*/
@RestController
@RequestMapping(path = "/user", produces = "application/json;charset=utf-8")
public class UserController {
@DubboReference
private UserService userService;
@GetMapping("/selectAll")
public List<String> selectAll() {
return userService.selectAll();
}
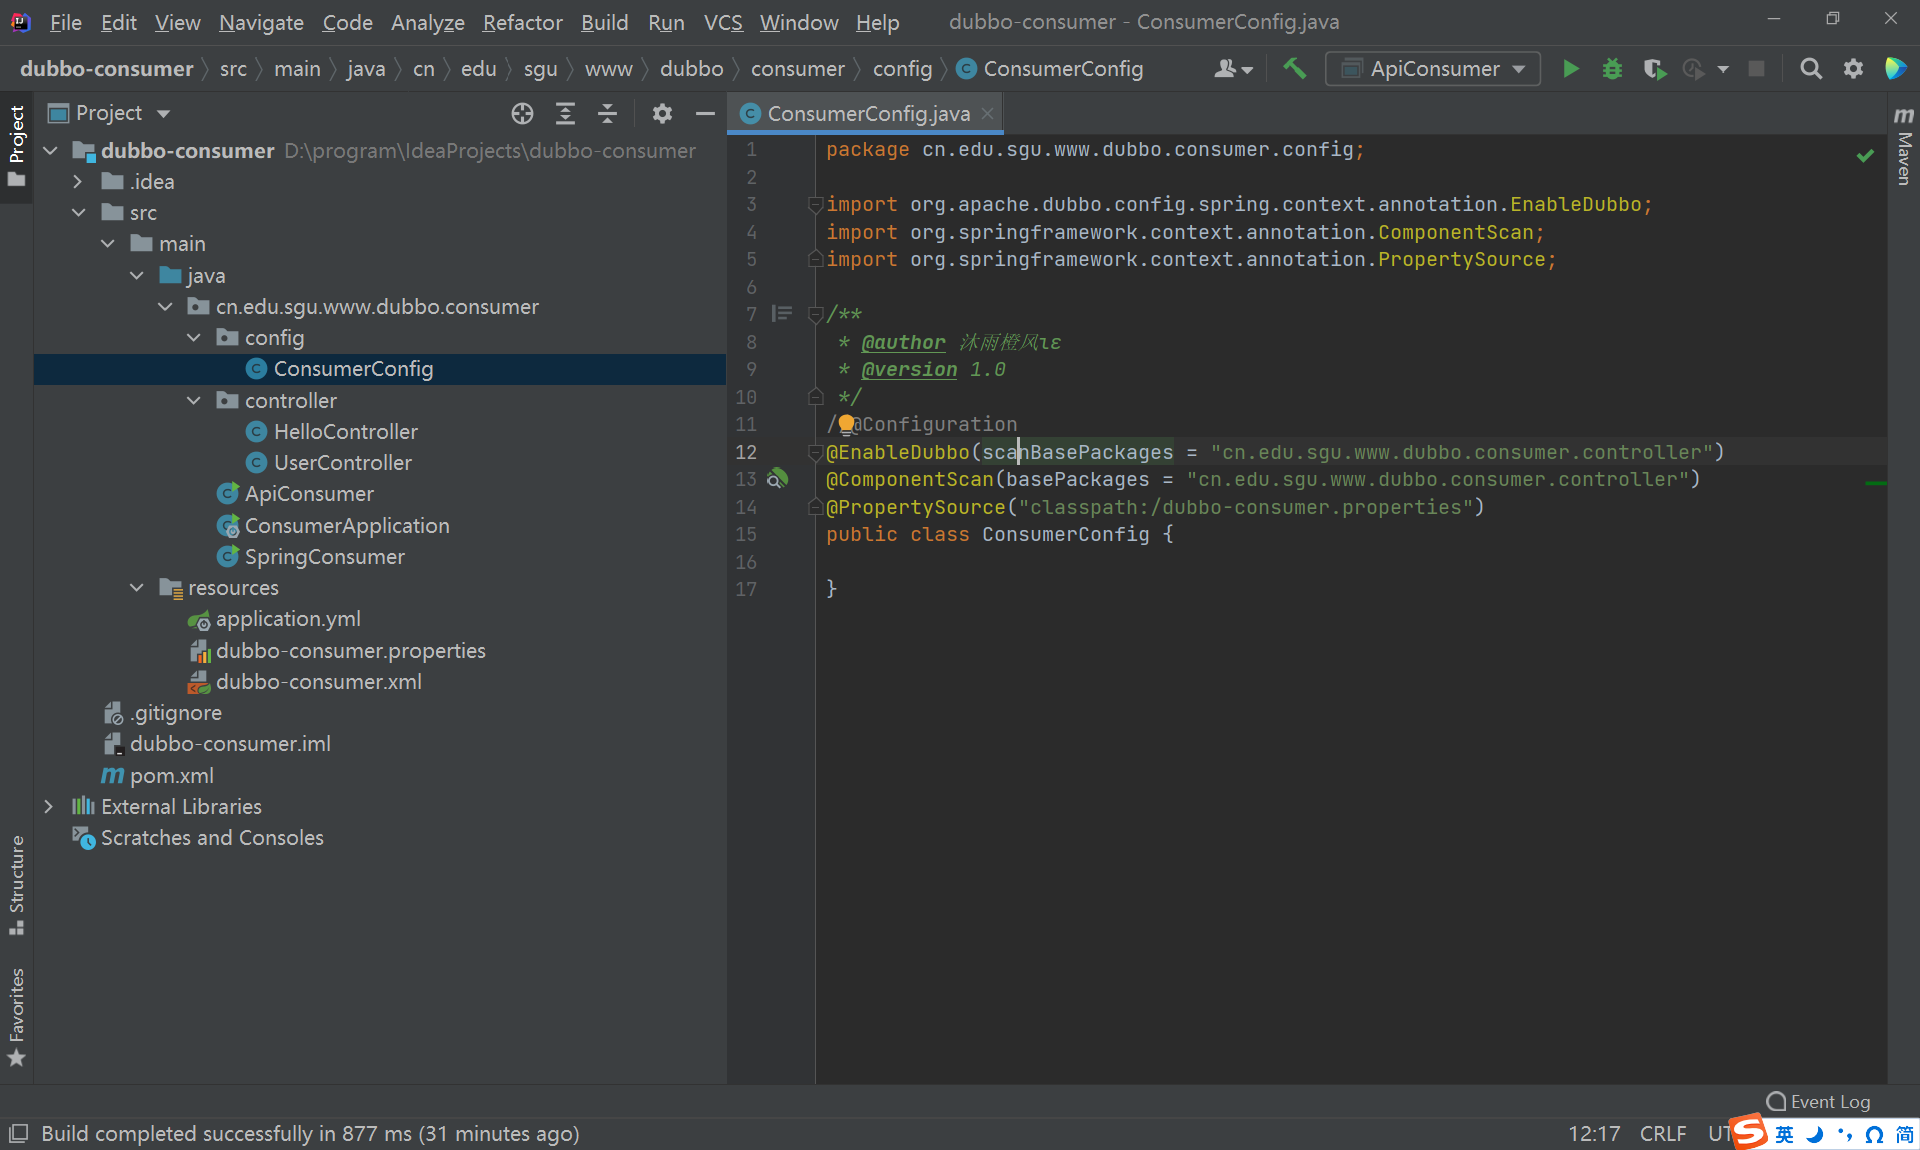
}ConsumerConfig.java
在consumer包下创建config子包,在config包下创建一个配置类ConsumerConfig。
- 在配置类上使用@EnableDubbo注解,指定扫描service包下引用Dubbo服务的类。
- 在配置类上使用@PropertySource注解,加载classpath下的配置文件dubbo-consumer.properties。
package cn.edu.sgu.www.dubbo.consumer.config;

import org.apache.dubbo.config.spring.context.annotation.EnableDubbo;
import org.springframework.context.annotation.ComponentScan;
import org.springframework.context.annotation.Configuration;
import org.springframework.context.annotation.PropertySource;

/**
 * @author 沐雨橙风ιε
 * @version 1.0
 */
@Configuration
@EnableDubbo(scanBasePackages = "cn.edu.sgu.www.dubbo.consumer.controller")
@ComponentScan(basePackages = "cn.edu.sgu.www.dubbo.consumer.controller")
@PropertySource("classpath:/dubbo-consumer.properties")
public class ConsumerConfig {

}
SpringConsumer.java
通过配置文件创建并启动Spring容器,通过容器获取引用Dubbo服务的控制器Bean对象。
package cn.edu.sgu.www.dubbo.consumer;

import cn.edu.sgu.www.dubbo.consumer.config.ConsumerConfig;
import cn.edu.sgu.www.dubbo.consumer.controller.HelloController;
import cn.edu.sgu.www.dubbo.consumer.controller.UserController;
import org.springframework.context.annotation.AnnotationConfigApplicationContext;

import java.util.List;

/**
 * @author 沐雨橙风ιε
 * @version 1.0
 */
public class SpringConsumer {

    public static void main(String[] args) {
        AnnotationConfigApplicationContext applicationContext = new AnnotationConfigApplicationContext(ConsumerConfig.class);

        applicationContext.start();

        HelloController helloController = applicationContext.getBean(HelloController.class);

        helloController.greet();

        UserController userController = applicationContext.getBean(UserController.class);

        List<String> list = userController.selectAll();

        System.out.println(list);
    }

}
四、Dubbo生产级应用
Java应用的开发几乎离不开Spring Boot,结合Spring Boot使用Dubbo框架简单许多。
只需要在启动类上使用@EnableDubbo注解即可,前面用到的配置类已经不需要了。
dubbo-provider
注释掉ProviderConfig配置类的@Configuration注解,Spring Boot会自动处理@DubboService注解标注的类,将其暴露为Dubbo服务。
在启动类ProviderApplication上使用@EnableDubbo注解(因为项目没有其他配置类了)
application.yml
在配置文件中配置dubbo
dubbo:
  scan:
    base-packages: cn.edu.sgu.www.dubbo.provider.service
  application:
    name: dubbo-provider
    logger: slf4j
    qos-port: 22221
    qos-enable: true
  protocol:
    name: dubbo
    port: 20880
  registry:
    address: nacos://localhost:8848  # 使用Nnacos注册中心
    parameters:
      group: dubbo

server:
  port: 8090

spring:
  application:
    name: dubbo-provider
dubbo-consumer
注释掉ConsumerConfig配置类的@Configuration注解。
在启动类ConsumerApplication上使用@EnableDubbo注解

application.yml
在配置文件中配置dubbo
dubbo:
  application:
    name: dubbo-consumer
    logger: slf4j
    qos-port: 22222
    qos-enable: true
  protocol:
    name: tri
    port: 50051
  registry:
    address: nacos://localhost:8848?group=dubbo

server:
  port: 8091
最后,依次启动服务提供者dubbo-provider、服务消费者dubbo-consumer,访问两个控制器的接口。
好了,文章就分享到这里了,看完不要忘了点赞+收藏哦~
文章代码已经上传到Gitee,可按需获取:
dubbo-api![]() https://gitee.com/muyu-chengfeng/dubbo-api.gitApache Dubbo服务提供者项目
https://gitee.com/muyu-chengfeng/dubbo-api.gitApache Dubbo服务提供者项目![]() https://gitee.com/muyu-chengfeng/dubbo-provider.gitApache Dubbo服务消费者项目
https://gitee.com/muyu-chengfeng/dubbo-provider.gitApache Dubbo服务消费者项目![]() https://gitee.com/muyu-chengfeng/dubbo-consumer.git
https://gitee.com/muyu-chengfeng/dubbo-consumer.git